Thank you rosuckmedia and mrl
There are a few phases and each phase can be completed in a few different ways depending on requirements for quality,
degree of realism and the amount of time you would like to spend with it.
Here is my workflow/phases.
1 Base blanket simulation.There are 2 ways of doing that:
a. In iClone
b. Elsewhere (Blender or other)
I used "b", but will describe both.
a. Simulate in iClone* Simulate with Physics (Avatars must have all related collision shapes enabled and tweaked).
* Bake simulation and make it static:
* Bake baked simulation. The problem is, that baked simulation in iClone is still a simulation. It does not deform mesh statically.
That is you cannot export and apply morphs to it. To make it static you may exported it as Alembic, import into Blender, export as OBJ and import back to iClone.
You would now have a totally static mesh.
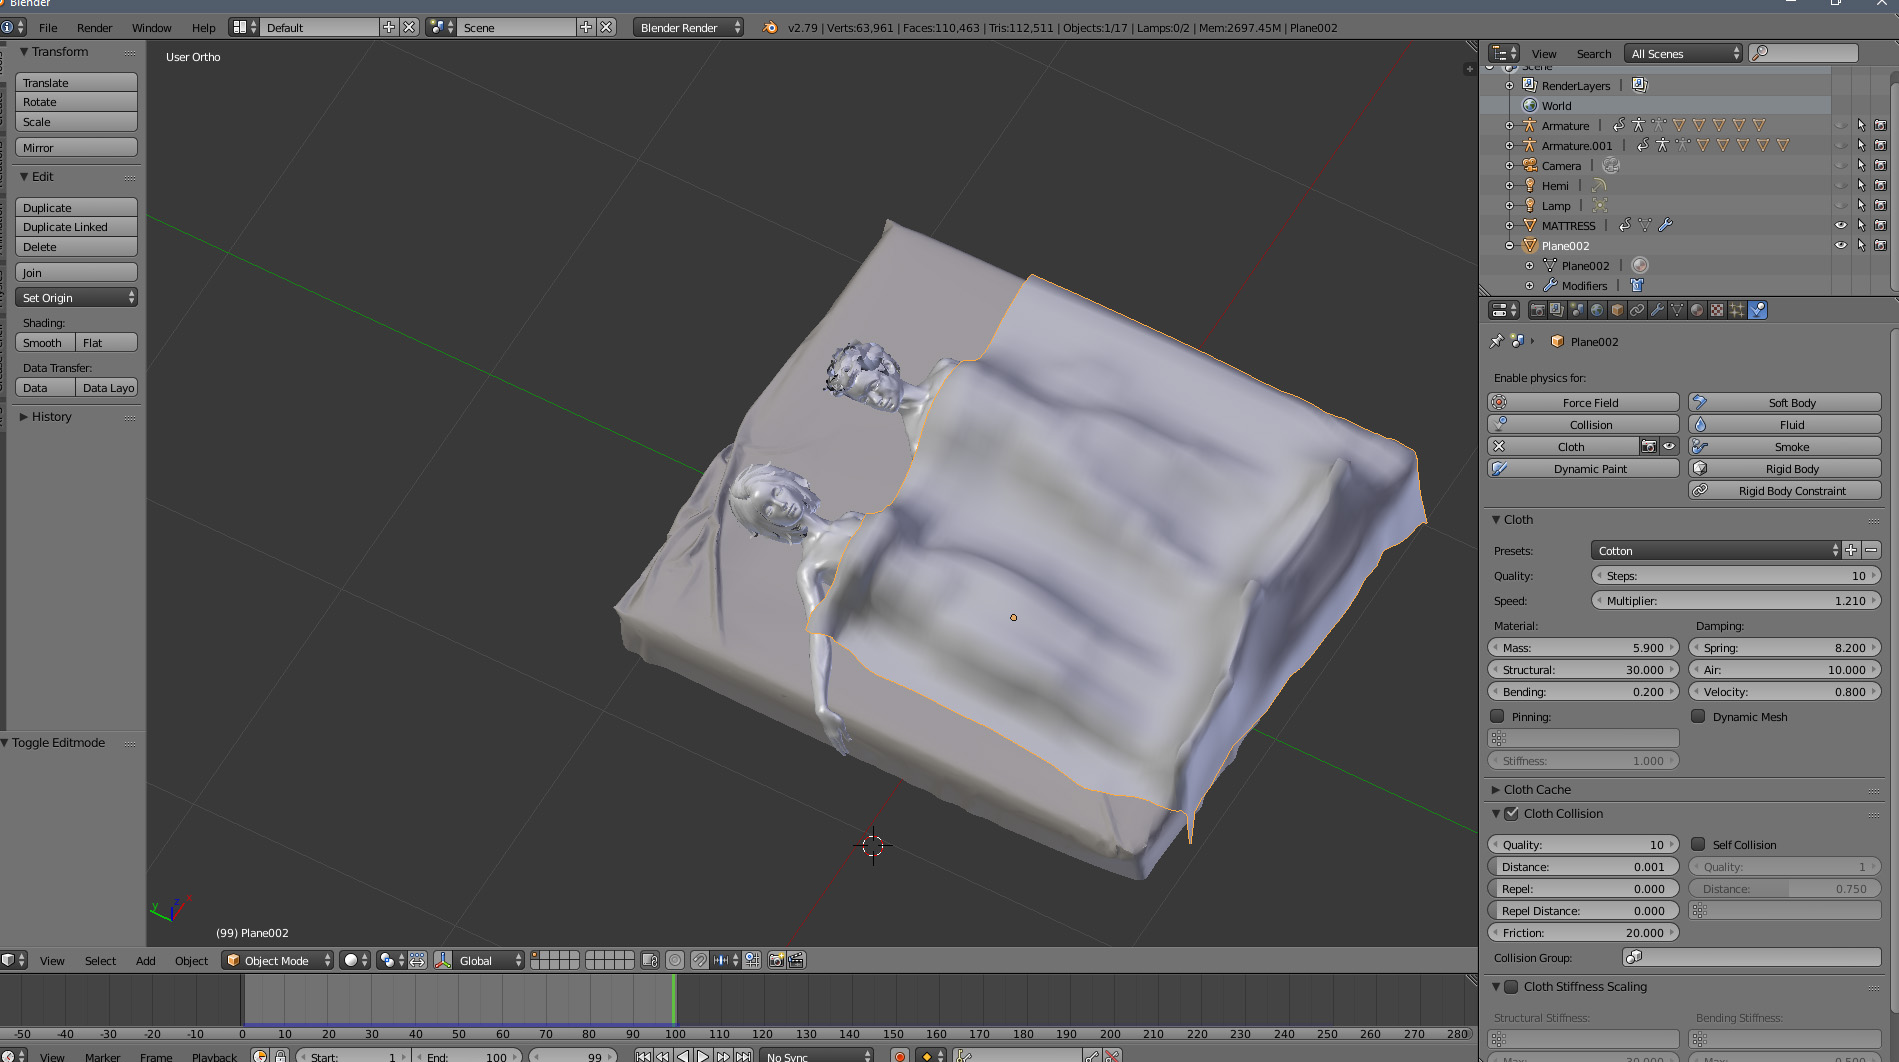
b. Simulate in Blender. This is what I used for this project.
* I exported posed avatars, a bed and high resolution mesh plane to FBX out of iClone.
* Imported all to Blender.
* In physics tab I enabled "Collision" for bed and avatars body and "Cloth" go the plane.
"Outer" setting in "Collision" controls how close simulated mesh should be to the objects beneath.
("Cloth" setting you need to play with to understand it well. There are many tutorial on YouTube.)
* Played animation, stopped it at some point when blanket is settled and exported blanket to FBX and then brought to iClone.

The advantage of Blender simulation is, that you do not need to play with collision shapes.
Once collision is enabled for avatars, they become a "Self-Mesh" type, which bare in more accurate cloth simulation.
In iClone "Self-Mesh" type does not interact with cloth.
And the reason for that, is way too many calculation required, which in turn is not suitable with real-time engine.
2. Breath morphsI needed to make each avatar to breath and make blanket to follow.
It might have been a lot easier if Morph Creator would not reset the posed characters to the root (resetting current Transform and Rotation to 0,0,0).
Otherwise I settled with the following routine:
* Created breath morphs for each avatar from T-pose.
This could be done before posing avatars for a bed, or setting a T-pose somewhere on the timeline,
making morphs and then deleting a T-pose key). See this tut for breathing:
https://youtu.be/wURKXuRGZOU* Exported posed avatars and simulated blanket to FBX from iClone and then to Blender.
* Both Avatars have breath morphs in Shape Keys section at this point (along with all those face morphs).
* Slide Breath shape keys to the value of 1.000 for both avatars and create 2 morphs for a blanket so that they raise the mesh above chest/stomach for both avatars.
See this tut on how to make multiple morphs for object at once: (arbitrary use relevant parts of it).
Note: Before exporting anything FBX out of Blender make sure to reset the root/origin to 0,0,0. CTRL+A and then "Location" and CTRL+A and then "Rotation and Scale".
Can't stress enough that 90% of misalignment and weird scaling of objects in iClone occur because of this rule was not followed.
3. Animating breath.Now that you have both avatars and blanket morphs for breathing, you may animate it.
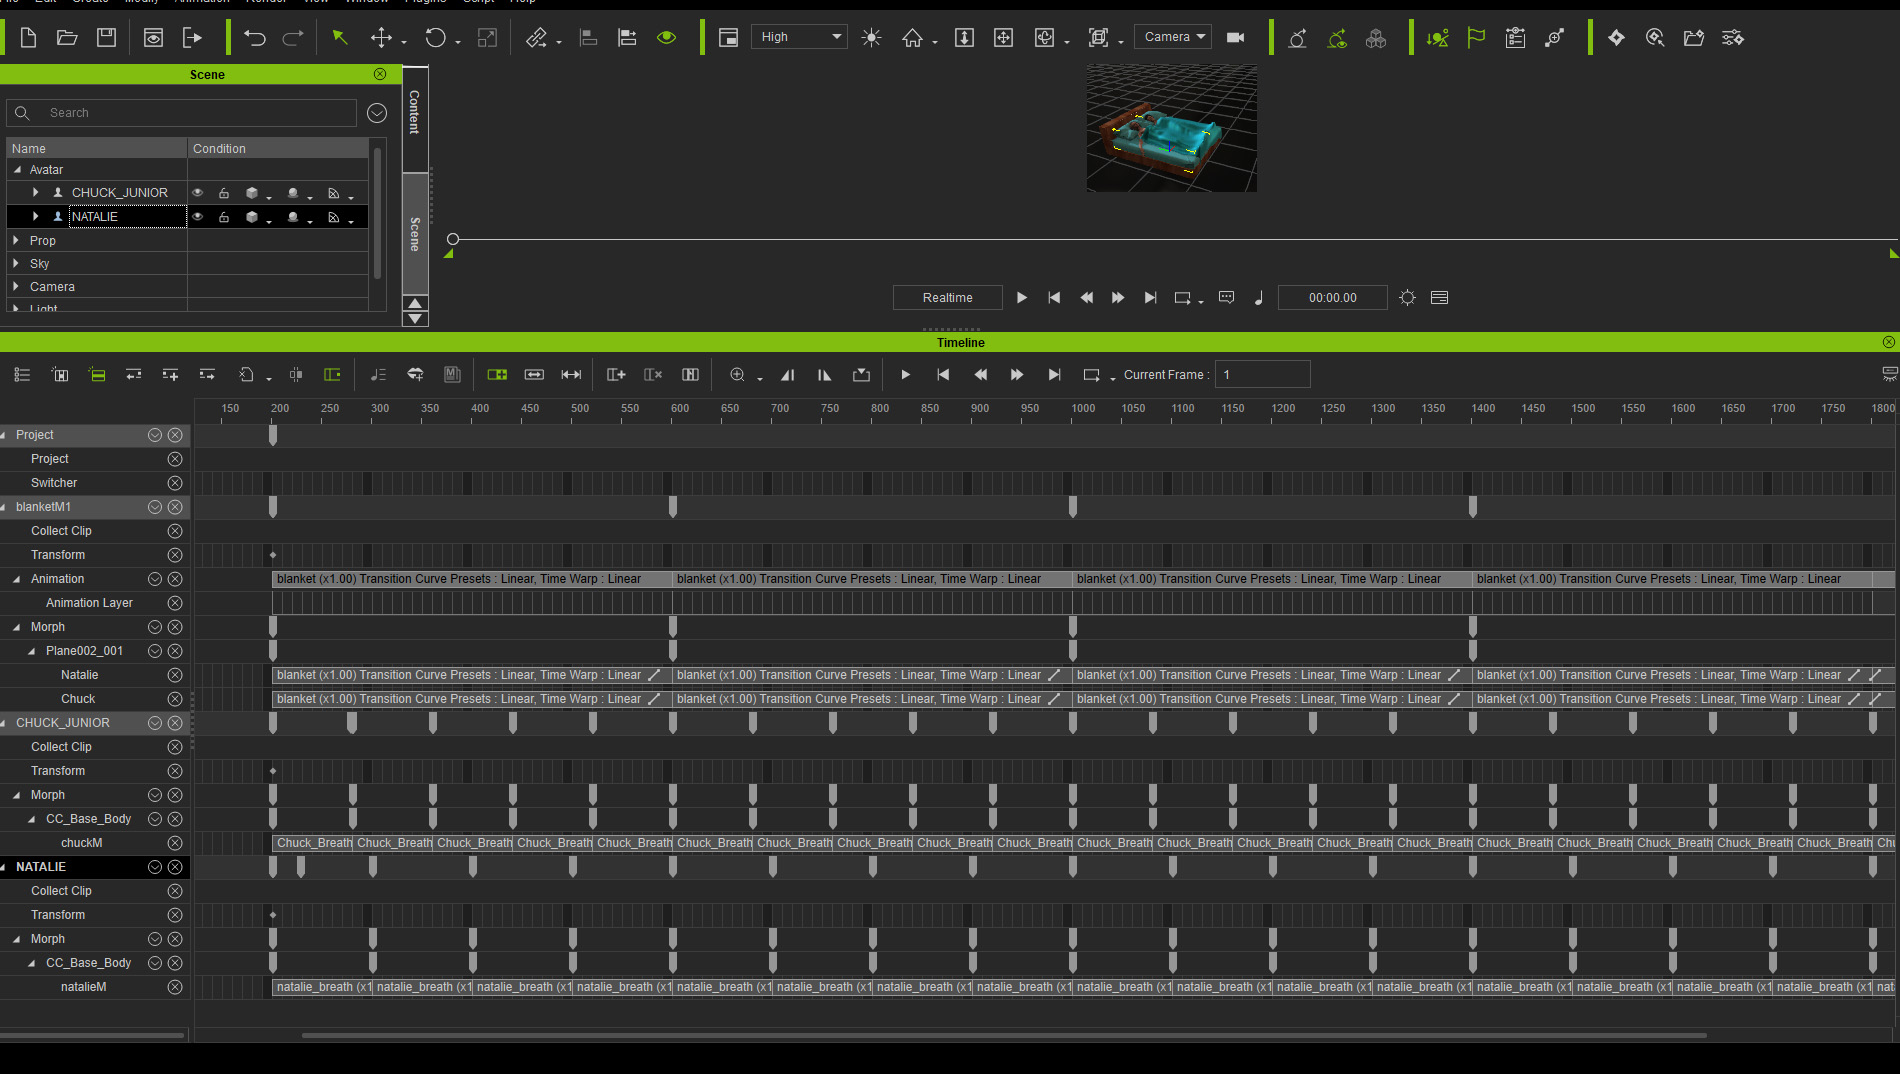
If unlike me, you use a synced breathing for avatars, then create one cycle for each avatar and a blanket, save them as Motion Plus, reapply and replicate clips along the timeline.
If you decide that avatars should be breathing with different intervals (like me), then the blanket should have clip made when 2 avatars exhale is matched at some point on the timeline.
This is what I mean:

Note: You may use clip extend (instead of copy/paste replication as I did). It is faster but not precise.
There is bug somewhere, which adds 1 frame with clip extend and that would eventually cause de-synchronization between avatars/blanket morphs.
4. Animating characters.This is hardest part of all. Because it would involve enabling soft cloth for the blanket again so that characters can fool around and blanket would follow.
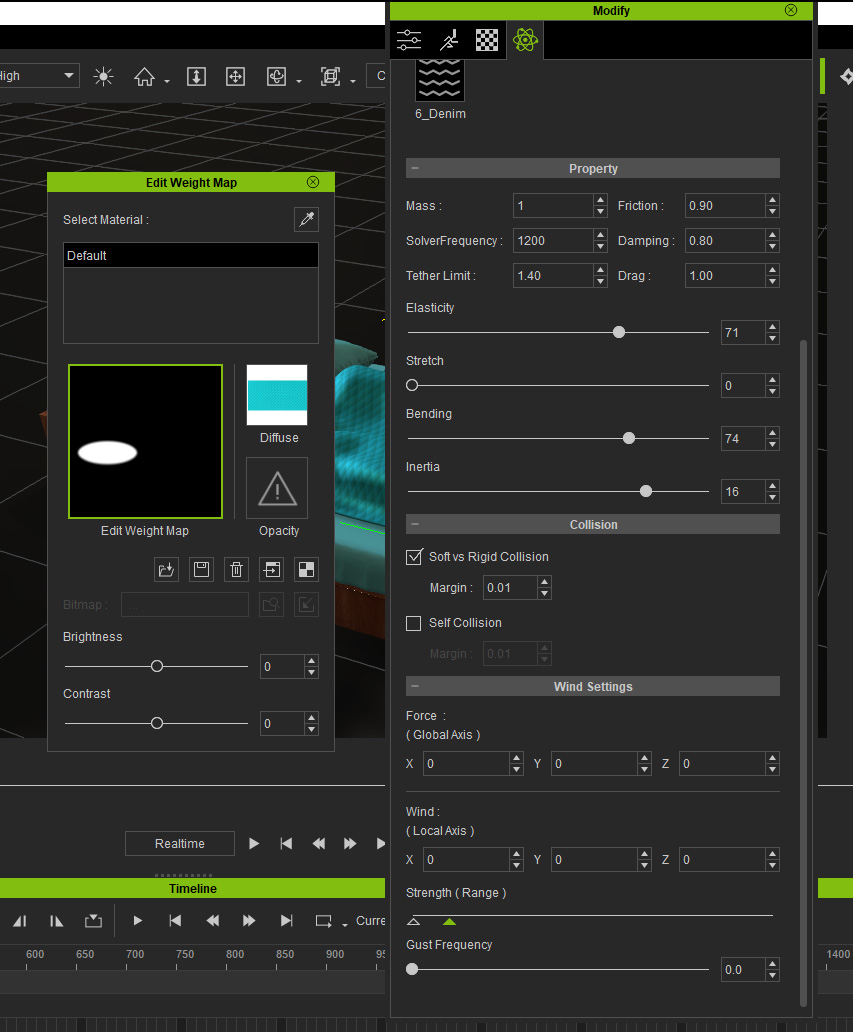
So for this example I picked a minimal interaction and only enabled "active" cloth interaction of the blanket portion between the character where I needed it.
Here is my blanket settings and a weight map for it:

Regardless how well you tweaked collision shapes and how well you crafted physics settings a poke through might still occur.
Do not bother to fix them all.
Once you are done with final animation, bake the soft cloth blanket (in ByFrame mode of course) and disable physics for it.
Now you may switch to Realtime mode, move timeline scrabber and inspect all "poke" inconsistencies.
At this point either use Edit Motion Layer for characters and tweak bones fixing pokes, or you may simply hide avatars mesh with Alpha map.
As the matter of fact you may hide ALL body mesh under the blanket if the there is no intention to reveal it at some point.
Hope you find useful tips in this review and can apply them to your project.