|
Author
|
Message
|
|
planetstardragon
|
planetstardragon
Posted 9 Years Ago
|
|
Group: Forum Members
Last Active: 4 Months Ago
Posts: 11.5K,
Visits: 46.0K
|
there are several ways to do it - 1 - prop 2 - prop with soft cloth 3 - prop with springs 4 - simple texture map 5 - texture map with bump / displacement 6 - model with beard, 7 - model with beard and displacement / normal map 8 - model with beard, displacement map and rigged with bones for spring effect. 9 - mocha tracking in a video editor. 10 - get a friend with a beard and green screen him into your scene - i know someone who could pull off that clown look for the right price lol
☯🐉 "To define Tao is to defile it" - Lao Tzu
|
|
|
|
|
michael7
|
michael7
Posted 9 Years Ago
|
|
Group: Forum Members
Last Active: Last Year
Posts: 420,
Visits: 1.2K
|
I wonder if I can turn the beard into a soft cloth. Anyone know? Maybe I can turn it into a soft cloth and pin it to various places of the face.
|
|
|
|
|
michael7
|
michael7
Posted 9 Years Ago
|
|
Group: Forum Members
Last Active: Last Year
Posts: 420,
Visits: 1.2K
|
Well the displacement map didn't work for what I needed to happen. Two things happened with it in iclone, it separated the diffuse map from the body slightly making it look like the character had a skin peel, but as for the beard the mesh isn't fine enough to handle fine looking face stubble coming from it so it ended up looking like the character had a bad skin problem. I went back into Daz to see what would happen there and it's not as bad but it still looks like a bad skin condition instead of whiskers so this method is in the trash. I also realized ( took me long enough ) that I would never be able to do what I want to do with this anyway. I don't know if any of you are familiar with the Garibaldi hair plug in in Daz but it lets you make almost any kind of hair and they act like real world hairs that catch the light and alter in appearance with the light, plus they conform to the movements of the skin, so if you suck in a characters cheeks the hairs move with it. I hope/ I wish iclone picks up a feature like this in the future but it is more memory intensive. So initially, since the hair won't come into iclone I thought I'd turn the hair into objects, which Garibaldi lets you do. I didn't stop to think though that in the case of the beard it would be a static object. If I could pose the character with different mouth expressions and make the hair turn into objects conformed to each one, I might be able to then take those into the timeline and place them at the various characters mouth expressions but alas it only turns the hair into an object from the initial paint and not from a body morph. Turning the hair into an object works just fine for head hair, but not for whiskers that have to follow skin movements. So I'm left with just having the whiskers painted on the skin. Which is too bad because it really added a lot of depth to the character the way I had it. Really, this goes back to hoping one of the two companies will make it so that face animations can be imported back into Daz. Here is a screen shot of the character I mentioned and you can see the whiskers I am talking about. 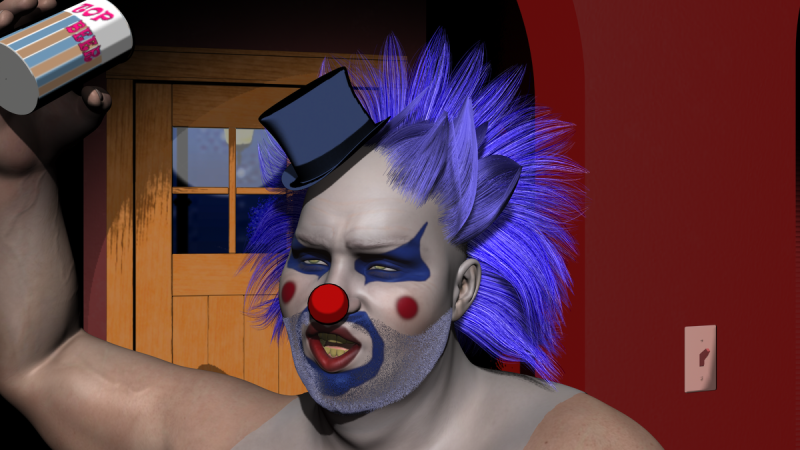
|
|
|
|
|
Rampa
|
|
|
Group: Forum Members
Last Active: Last Week
Posts: 8.2K,
Visits: 62.6K
|
Load this grayscale texture into the displacement channel for the head of a CC. scroll down to the tessalation section. Set the "grayscale base value" to zero, the "tessalation level" to 10, and the "multiplier to about 2. 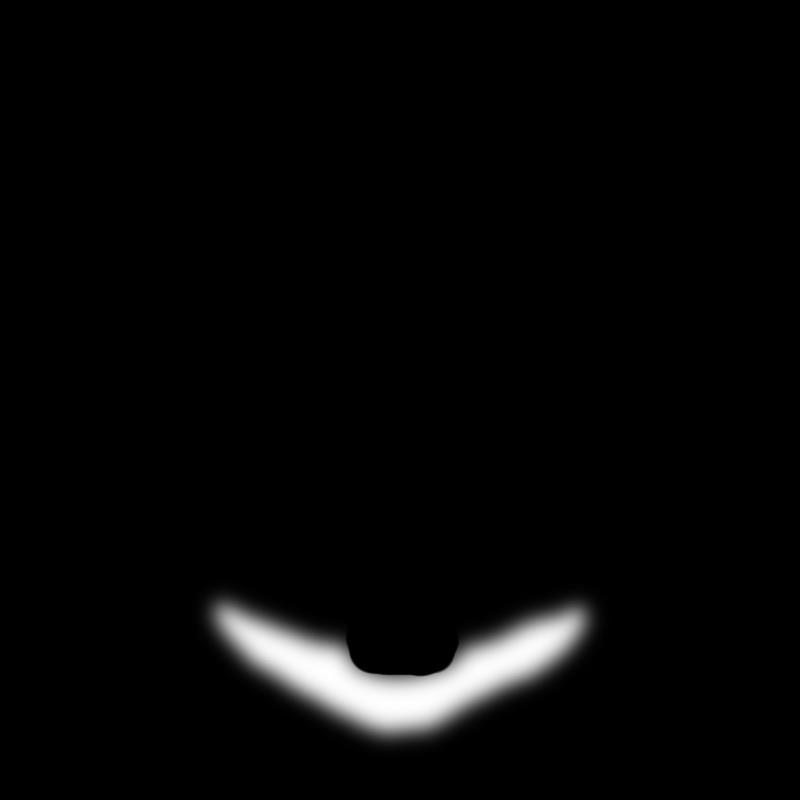
|
|
|
|
|
Snarp Farkle
|
Snarp Farkle
Posted 9 Years Ago
|
|
Group: Forum Members
Last Active: Last Year
Posts: 770,
Visits: 3.6K
|
rampa (6/11/2016)
I think you best off using a displacement map. There is the downside that it is stretching the UV's, but some clever texturing might take care of that pretty well. Here's a quick example. I would then need to add some new texturing to the existing face texture. 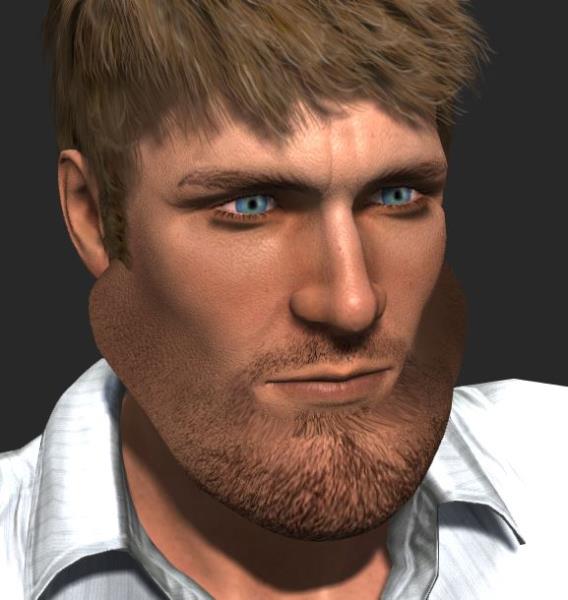 I'm confused rampa, you did this with a displacement map? I started a thread about a month ago on facial hair issues, see ( HERE) and my conclusion in that thread was to attempt a displacement map but this isn't what I imagined at all, something like this would have real potential!
Dell XPS 8900, Intel(R) Core(TM) i7-6700 CPU @ 3.40GHz, 3408 Mhz, 4 Core(s), 8 Logical Processor(s), 16 GB RAM, - 4 GB GeForce GTX 745, NVIDIA compatible.
Acer Aspire V Nitro Laptop, 2.5GHz Intel Core i5-7300HQ processor with 6MB cache, 256GB solid state drive, 16GB Ram, 4 GB NVIDIA GeForce GTX 1050 Ti graphics.
|
|
|
|
|
michael7
|
michael7
Posted 9 Years Ago
|
|
Group: Forum Members
Last Active: Last Year
Posts: 420,
Visits: 1.2K
|
Thanks rampa. :) This is the method I am going to use. It's just beard stubble so this will be the easiest method. Just want to learn the rest for future use to.
|
|
|
|
|
Rampa
|
|
|
Group: Forum Members
Last Active: Last Week
Posts: 8.2K,
Visits: 62.6K
|
I think you best off using a displacement map. There is the downside that it is stretching the UV's, but some clever texturing might take care of that pretty well. Here's a quick example. I would then need to add some new texturing to the existing face texture.
|
|
|
|
|
michael7
|
michael7
Posted 9 Years Ago
|
|
Group: Forum Members
Last Active: Last Year
Posts: 420,
Visits: 1.2K
|
Sw00000p I can appreciate what you are suggesting, I really do. But that would involve me building the character right from the beginning and at the moment I just don't have the time for that. The Daz character/s has a bone hierarchy and Daz allows you to change all of that and alter the mesh as well, so I could probably fix some things but that would be for the future as it would probably involve a couple of weeks learning ( I assume ). Thanks for the advice. :)
|
|
|
|
|
michael7
|
michael7
Posted 9 Years Ago
|
|
Group: Forum Members
Last Active: Last Year
Posts: 420,
Visits: 1.2K
|
Cricky I have my character in 3DX and I am in the expressions editor menu. The only reference to jaw in the sliders menu on the right hand side is Genesis2MaleCtrlJaw Side to Side. When I drop the jaw wide open the slider that moves is the HeadPhmMouthOpenWide. I assume that is just a face morph? There are no other jaw sliders. I see the scene tree on the left and I see the lower jaw bone in there but selecting that doesn't do anything. When I go to convert to non standard and I select the lower jaw there are options I can map it to. The default seems to be map to jaw. I can change it to map to face, is this what I should be doing? I tried doing that before and tried parenting a sphere to the lower jaw in iclone but the sphere doesn't move when I run a viseme animation, or open the mouth in any other way. I also tried maping the jaw to the extend bone instead of the face in 3Dx and went back into iclone and that didn't work either. I haven't tried the weight mapping yet. But where do I start first in 3DX? I want to thank you for all your help and I understand people have busy schedules. If this is to complex to get into can you refer me to a source where I can read about it?
Thanks again,
Mike.
|
|
|
|
|
michael7
|
michael7
Posted 9 Years Ago
|
|
Group: Forum Members
Last Active: Last Year
Posts: 420,
Visits: 1.2K
|
Thanks animagic. I'm pretty impressed with iclone overall so far. I wasn't so much so when I first saw some of the renders that are used to promote the product in some videos but I am now.
|
|
|
|