|
Fionn (RL)
|
Fionn (RL)
Posted 3 Years Ago
|
|
Group: Administrators
Last Active: 2 Years Ago
Posts: 87,
Visits: 614
|
Thanks for the many feedbacks and suggestions from our users. We think now’s a good time to elaborate on this easy workflow for the community: please follow the steps below to import your Daz3D characters into CC4 without losing data. Step 1. Before exporting characters from Daz3D1-1 Please copy the Reallusion folder to C:\Users\Public\Documents\My DAZ 3D Library\data\DAZ 3D\Genesis 8\Male\Morphs, because we need this morph data in Daz3D when we convert the facial keys. 1-2 To open Daz Studio, drag " Genesis8_Male_RL_FaceKey.duf" to the character that you want to export. It will create a facekey in DAZ, and then you can export FBX to Character Creator 4 (CC4) or 3DXchange.
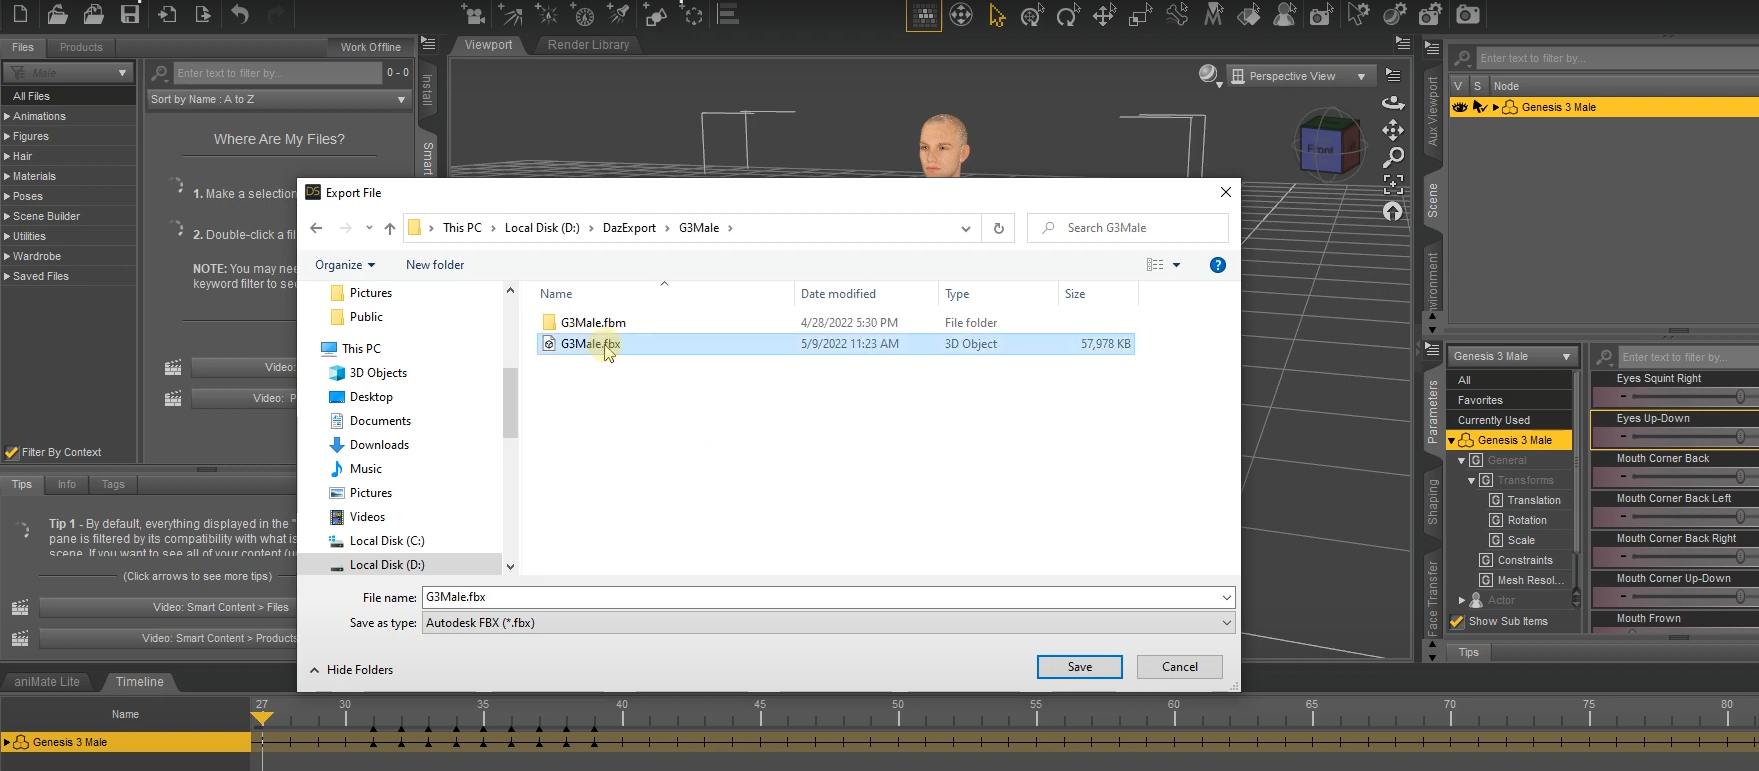
Step 2. Export characters from Daz3D2-1We take the model 'Genesis 3 Male’ as an example. Before you export this model from Daz Studio, make sure you tick the Show Sub Items checkbox at the right panel.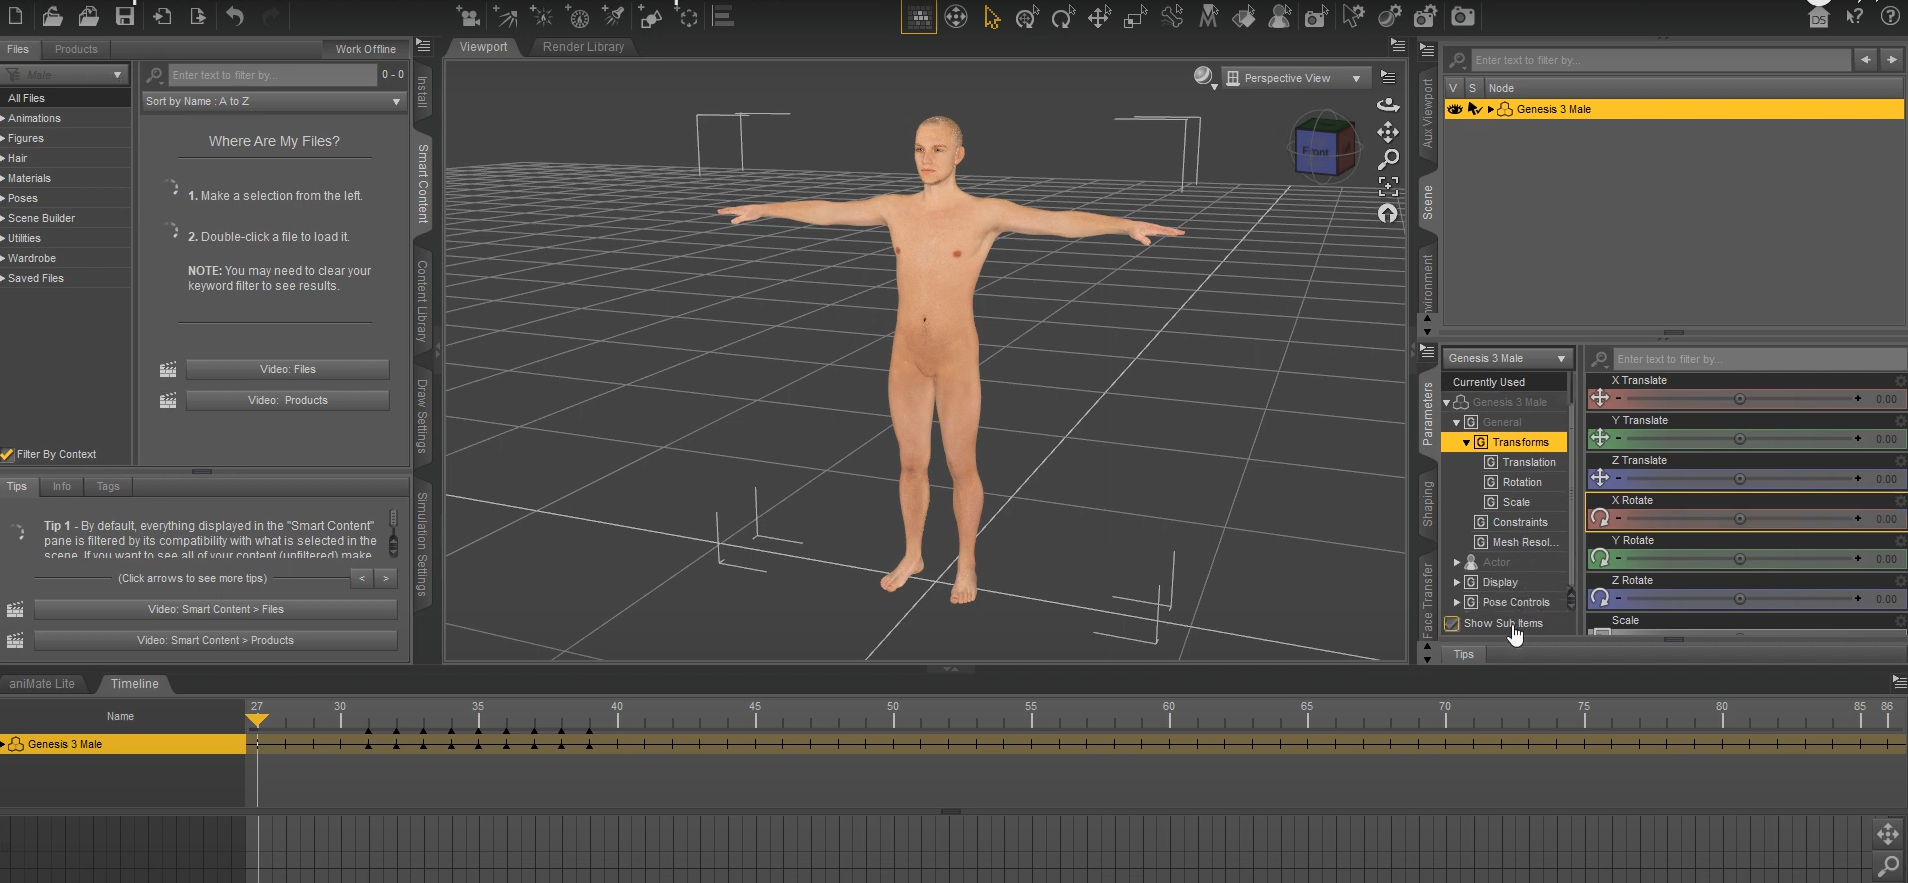 2-2 Go to the toolbar, click File > Export > DazExport, find the ‘G3Male’ folder and save this model as an FBX file. 2-2 Go to the toolbar, click File > Export > DazExport, find the ‘G3Male’ folder and save this model as an FBX file.
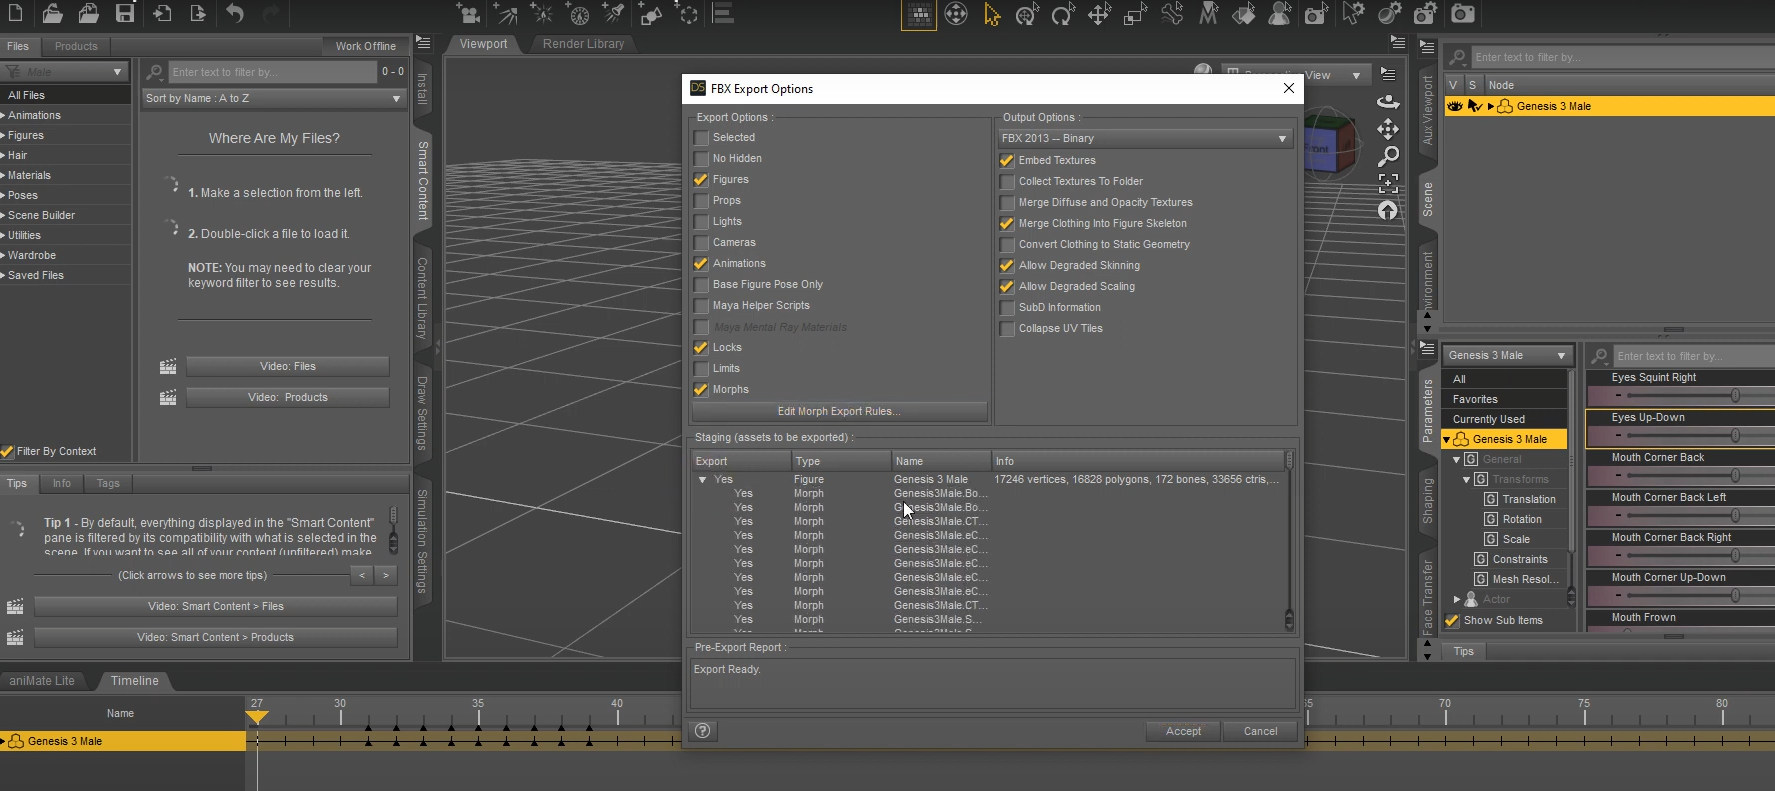
2-3 After saving the FBX file, choose the desired content on the FBX Export Options window, then click the Edit Morph Export Rules…button.
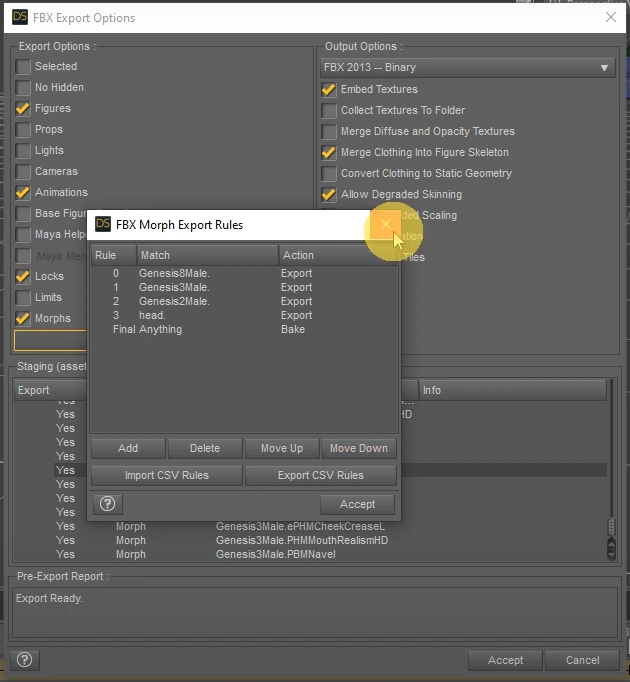
2-4 Once the Rule, Match, Action export rules are confirmed, click the Accept button.
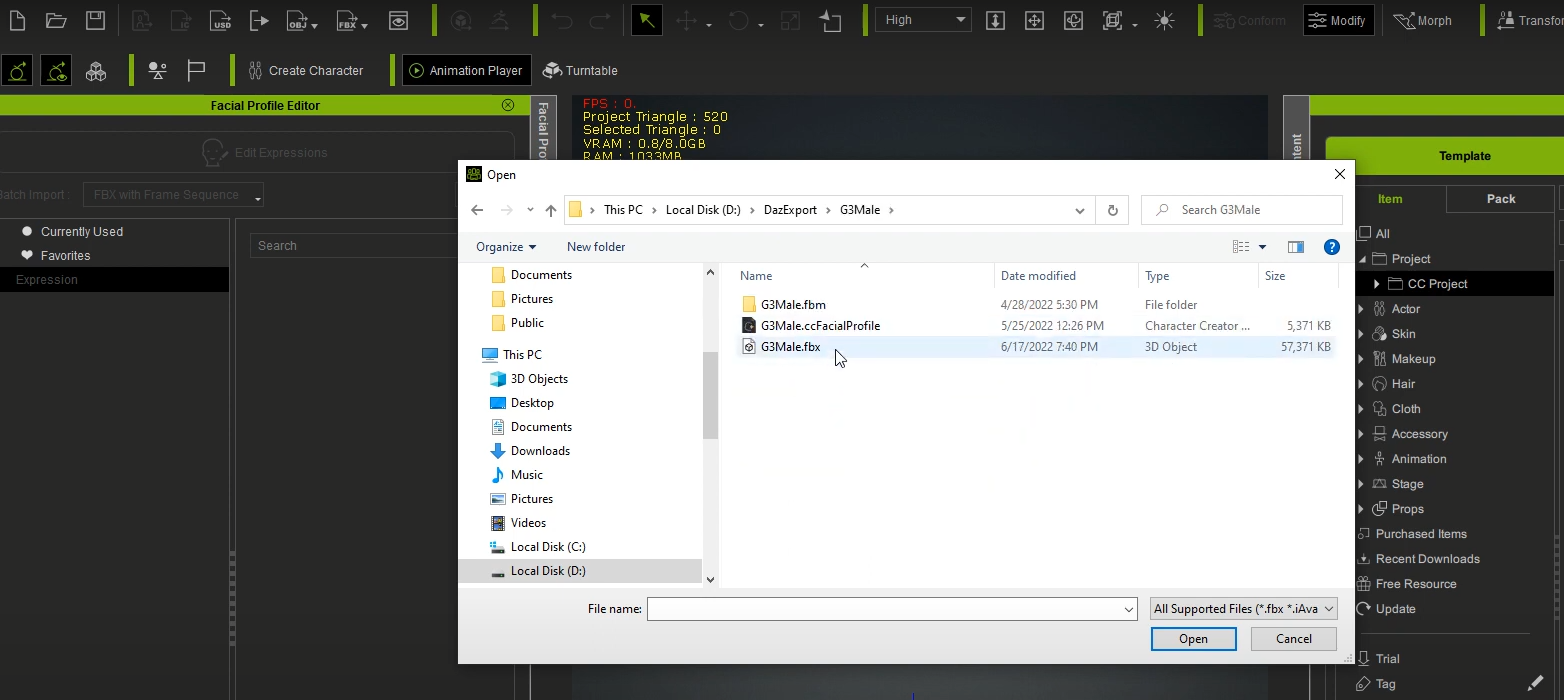
Step 3. Import characters to Character Creator 43-1 Open Character Creator 4 and go to the toolbar, click File > Import > DazExport, find the file “G3Male.fbx” and click Open.
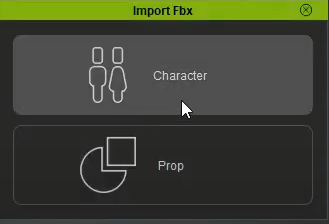
3-2 Since this model is not a prop, choose Character.
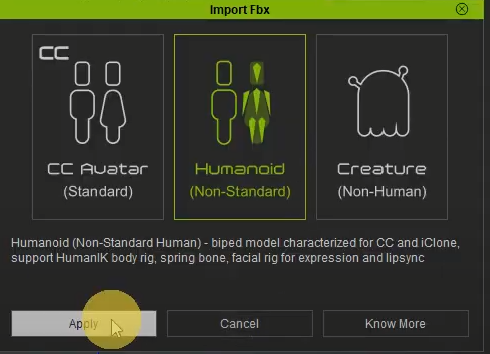
As it’s not a CC Avatar created in Character Creator, choose the Humanoid option for Non-Standard character.
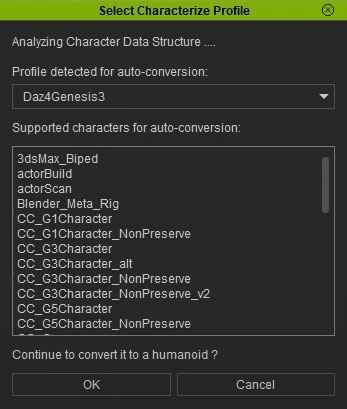
3-3 As CC4 supports various character types from the industry, ranging from Maya, 3ds Max, Blender to Daz3D, CC4 will automatically detect this Daz model and convert it to Humanoid.
https://www.reallusion.com/character-creator/animate-any-character.html#feature-nav-Humanoid
Step 4. Using Daz3D Facial keys in Character Creator 44-1 After successfully importing the Daz model into CC4, go to Local Disk( C: ) > Program Files > Reallusion > Character Creator 4 > Program > Assets 
4-2 Continue the path, Assets > ExternalFiles > DazResource > FacialProfile >Genesis3_Male, and find the “Genesis3_Male.ccFacialProfile” file.
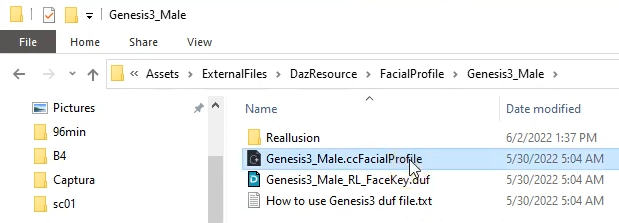
Directly drag this file to your character in the viewport.
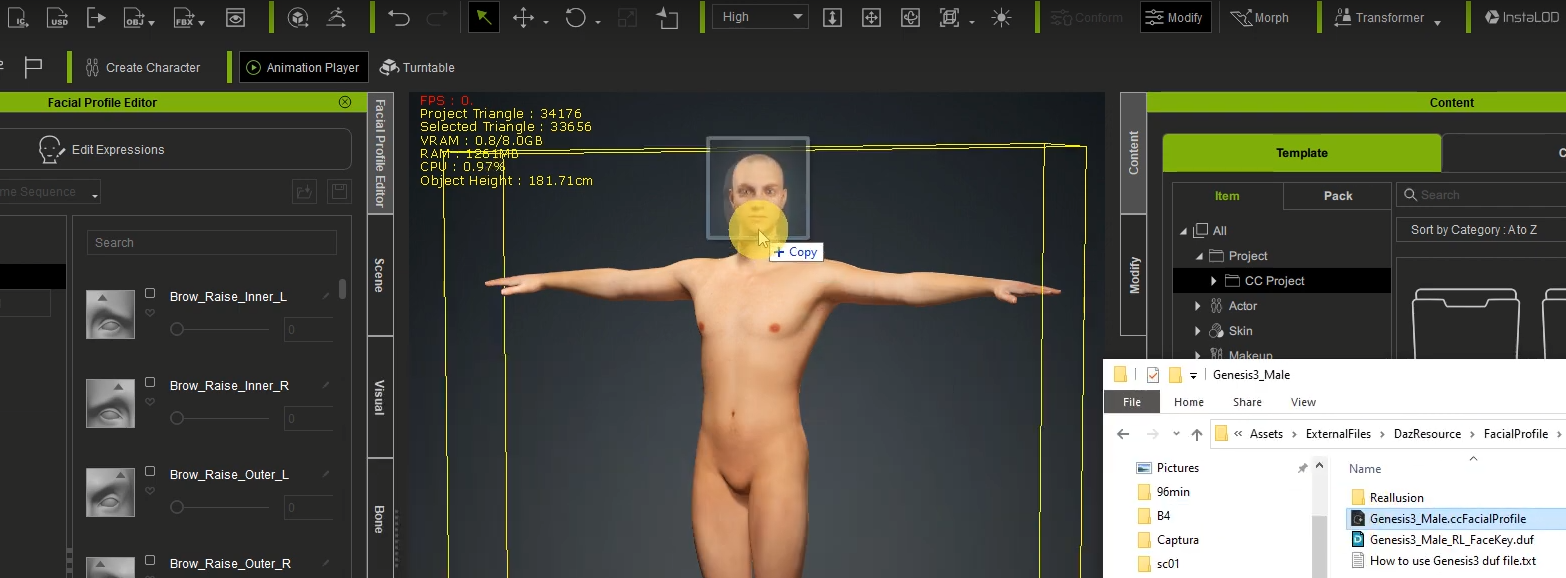
A popup window will show the Facial Profile you can apply to this Daz character; click Apply.
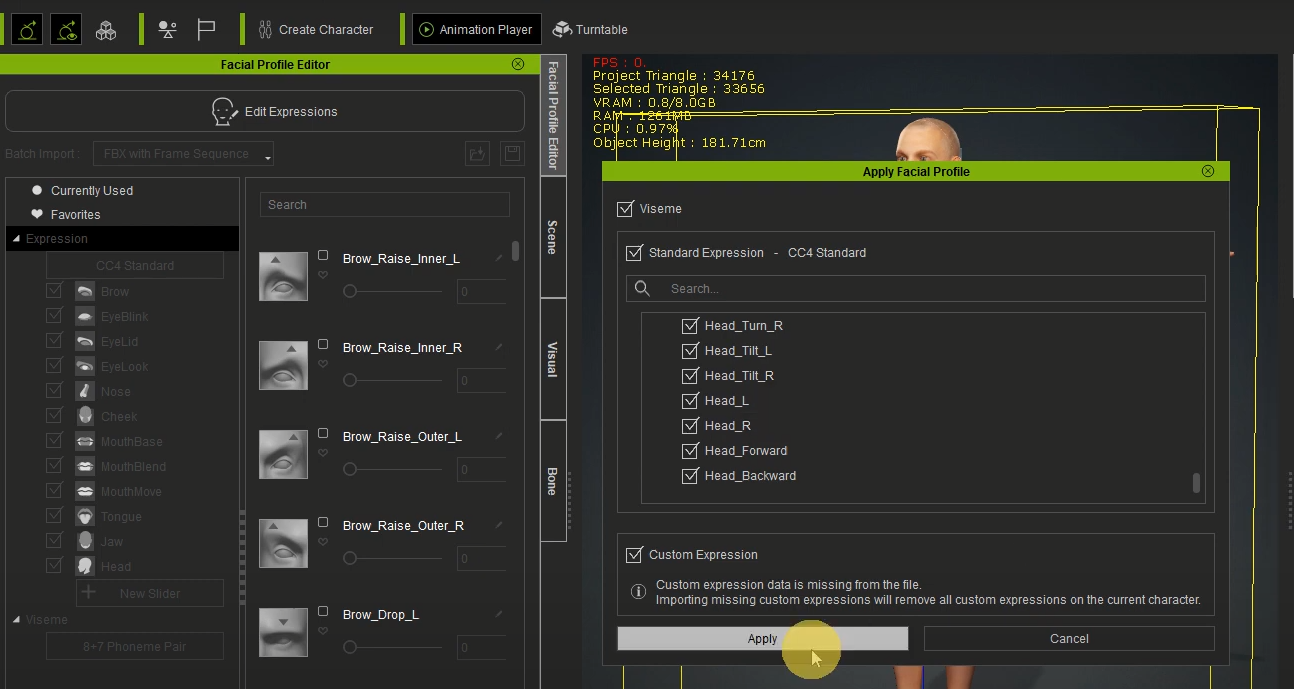
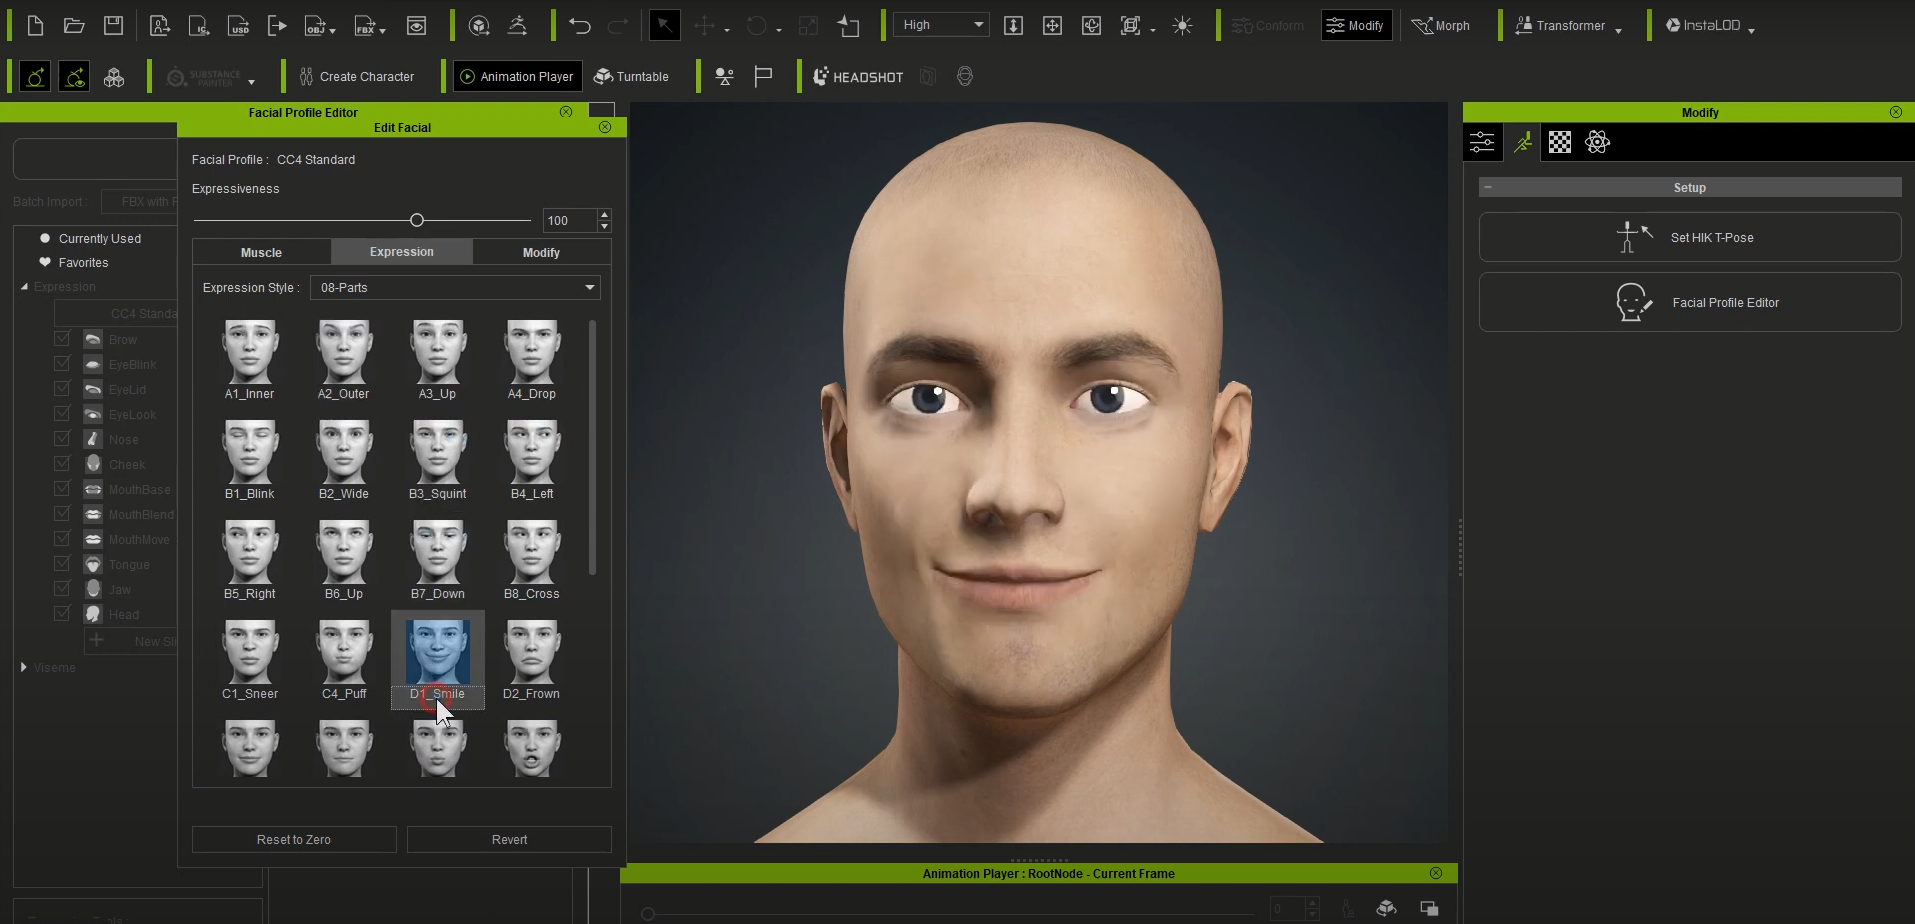
4-3 Click Edit Expressions in the Facial Profile Editor panel on the left side, then you can easily customise this model’s facial expressions with the Standard (60+ blendshapes) or Extended Expression Profile (140+ blendshapes) in CC4.
 4-4 After successfully importing your Daz character in CC4, you can use the Facial Expression Template to demo its expression data by clicking Edit Facial in the Modify panel. 4-4 After successfully importing your Daz character in CC4, you can use the Facial Expression Template to demo its expression data by clicking Edit Facial in the Modify panel.
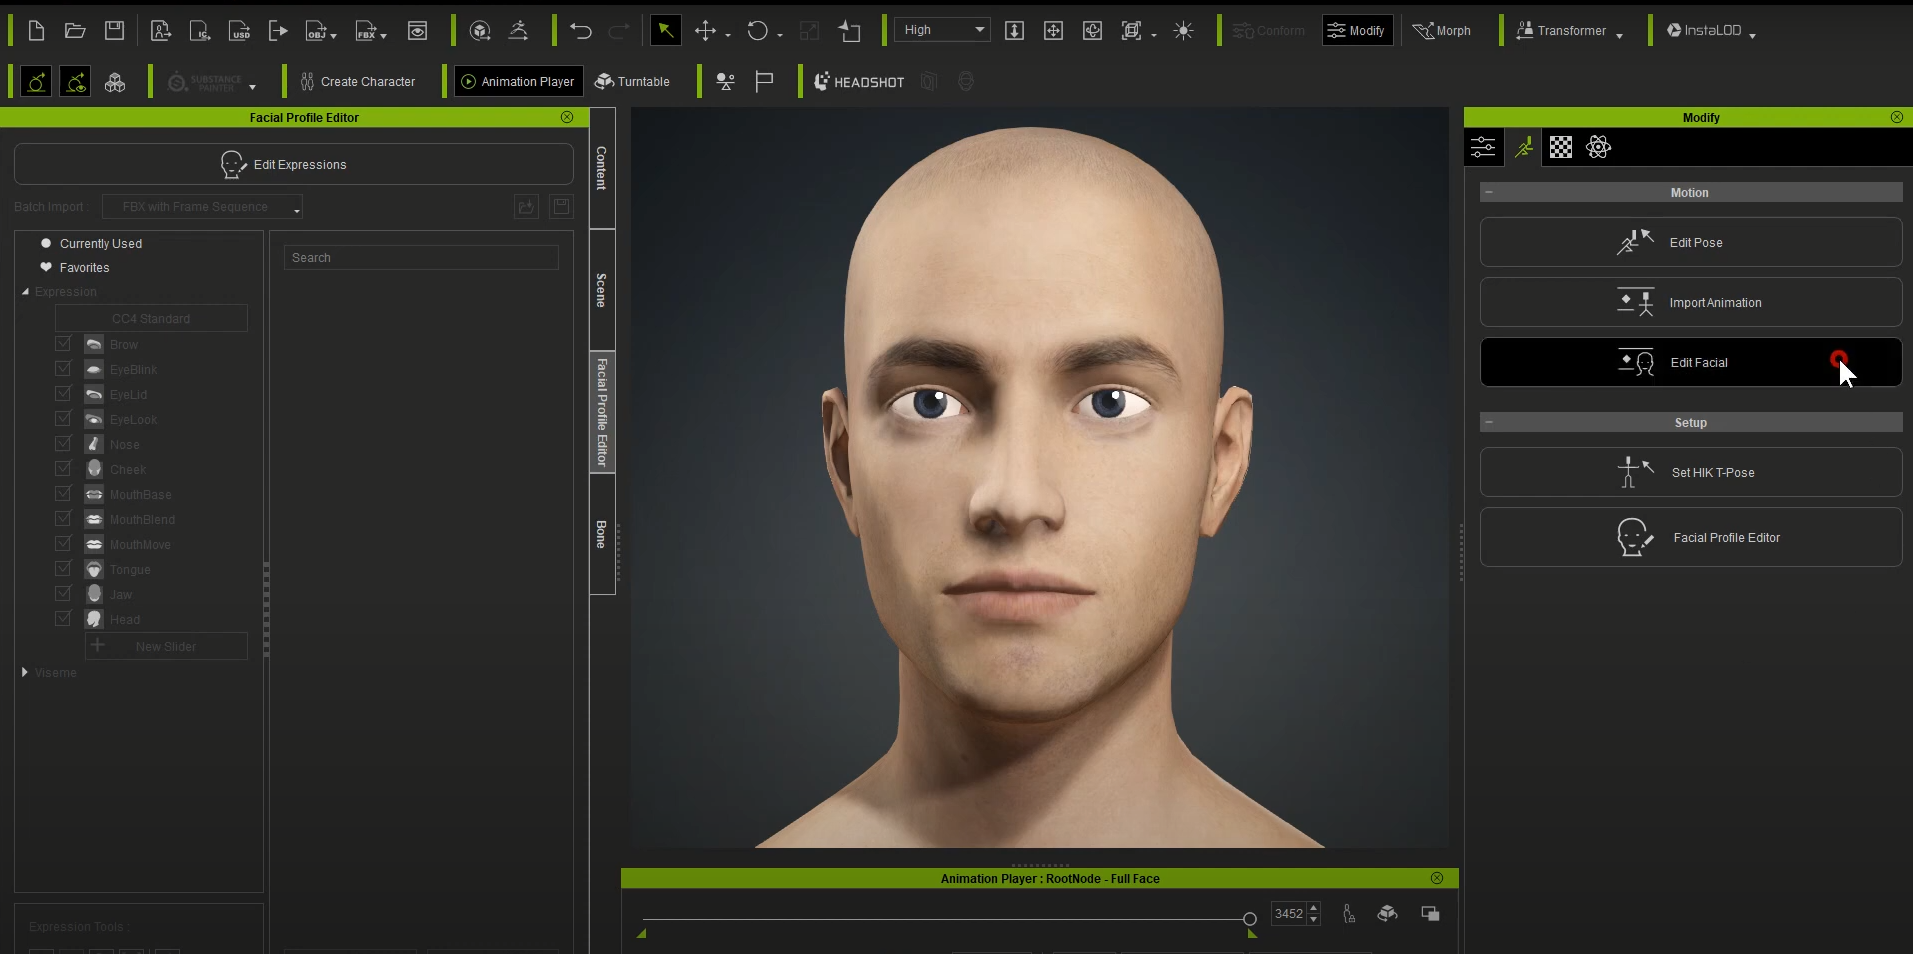
Directly drag the desired facial profiles onto your character in the viewport and see the result.
4-5 In addition, you can apply Facial Motion (Facial Rig) to the Daz characters for further calibration.

Learn more about custom facial expressions in CC4.
https://www.reallusion.com/character-creator/facial-expression.html
|