|
Miranda (RL)
|
Miranda (RL)
Posted 6 Years Ago
|
|
Group: Administrators
Last Active: 3 Years Ago
Posts: 1.8K,
Visits: 11.2K
|
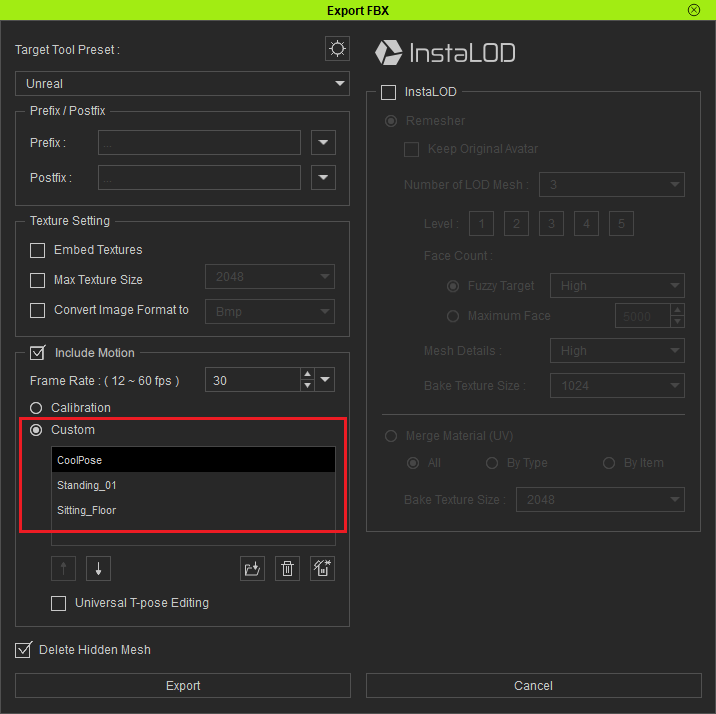
March 15th update: the Beta 2.0 plugin is released. Please find the process HERE. Introduction
The process of bringing an animated CC character into the Unreal Engine can be tedious. This is exacerbated by the inordinate amount of time it would take to manually assign every material property, adjust texture settings, modify animation properties, model configuration, along with other complicated manual tasks. In response, we are providing this plugin to trim your production time by automating the aforementioned idiosyncrasies. Process Overview- Export a FBX character from Character Creator 3
- Download and install the Auto-Settings Plugin
- Import the FBX file into the Unreal Engine
- Export motions for the character from CC3
- Initialize the plugin and setup the character
- If you need additional expressions or motions, you'll have to export them from Character Creator.
- Export another FBX including as much motion as you want.
- Use the following configuration for the Unreal Engine import settings.
- Pay attention to the following parameters:
- Deactivate Import Mesh.
- Set the Skeleton to use the one from the previously imported CC character.
- Select Animated Time for the Animation Length.
- Enable Use Default Sample Rate.
Step 5 - Initialize the plugin and setup the character
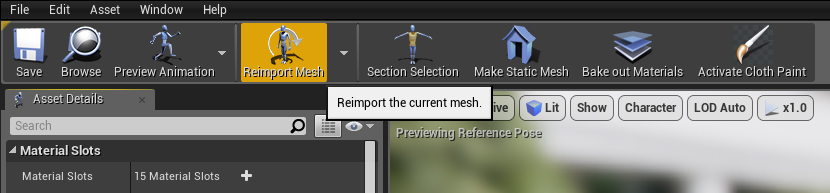
- You can fix the disappearance of morph data by opening up the Content Browser, selecting the skeleton mesh, and click on the Reimport the current mesh button.

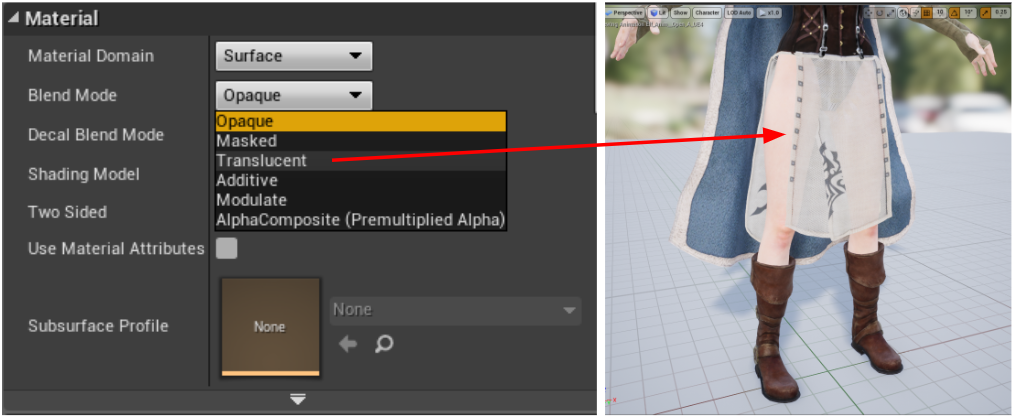
- Currently there is not way to intelligibly assign the Blend Mode: Masked or Translucent. Therefore we recommend setting everything besides the eyelashes to Masked and only use Translucent for semi-transparent surfaces.
See this tutorial for more details: https://youtu.be/ZSBrR8L2lsA?t=565
Plugin & Tutorial
To download the Auto-Settings Plugin, and learn more details from step-by-step training videos, please visit >> Important Considerations- There is only full support for Character Creator 3 G1 and G3 characters with FBX being the primary format of exchange.
- Characters and motions should all be exported from Character Creator. Be aware that characters processed directly from iClone or 3DXchange may need some manual re-assignments for motion re-targeting.
- Please process only one character at a time (including LOD), otherwise you may experience unexpected results. For example, exporting multiple characters can lead to conflicts with identical texture names.
- Make sure to organize different characters into separate folders in Unreal Engine, otherwise there could be conflicts between the various assets with identical names.
- Avoid using reserved key words that are crucial for the plugin's proper operation. These include the following: diffuse - ao - normal - metallic - roughness - glow - specular - transparency - hair - eyelash - ga_skin_body - skin - loop - LOD0~N - displacement - pbr - tra - opacity.
- You can fix the disappearance of morph data by opening up the Content Browser, selecting the skeleton mesh, and click on the Reimport the current mesh button.
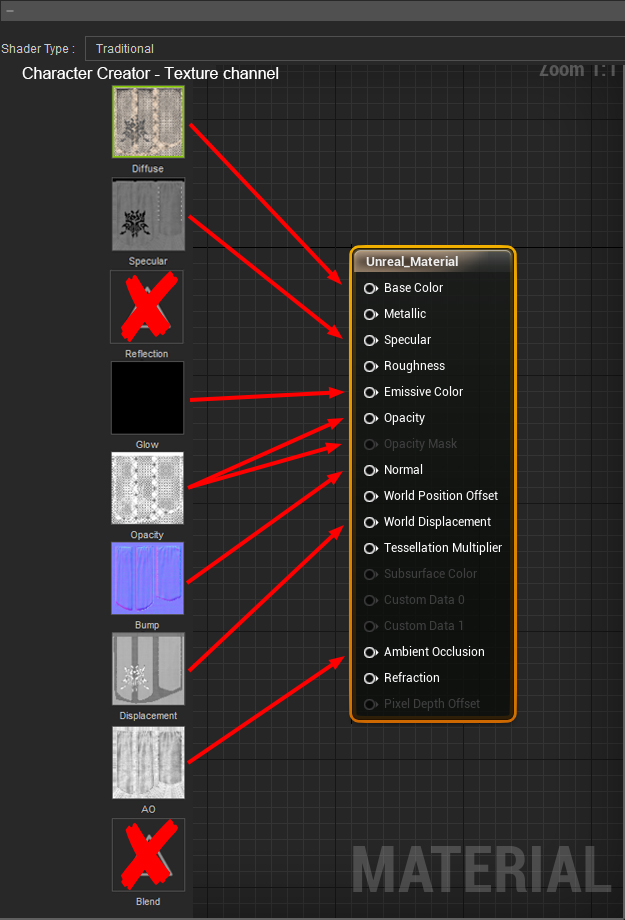
- Unreal Engine's PBR shader does not support CC's blend channel.
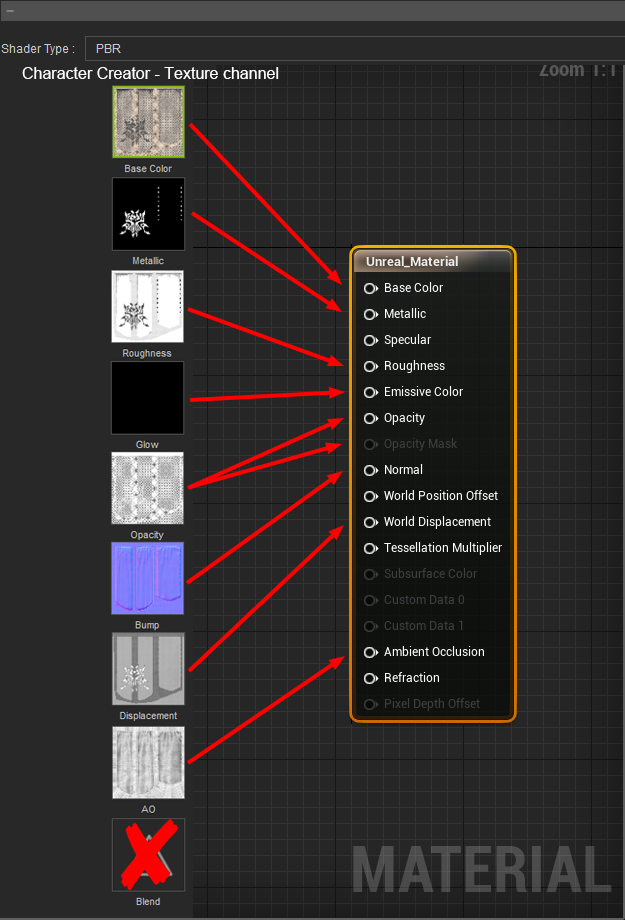
- Unreal Engine's traditional shader does not support CC's blend and reflection channel.
|