|
Author
|
Message
|
|
jonathan.v.nielsen
|
jonathan.v.nielsen
Posted 4 Years Ago
|
|
Group: Forum Members
Last Active: 4 Years Ago
Posts: 1,
Visits: 33
|
Dear Victor I just downloaded your plugin yesterday, and it instantly relieved me of 1½ years of trying to fix eye and skin shaders with PBR. Wow. I can't tell you how much time I spent on that, it actually feels a little ridiculous. Switching to Christensen-Burley with your shaders helped even more. I looked far and wide and couldn't find it. Is there any way to donate a small amount / buy the plugin? Sorry if this is the wrong place to mention this. Best regards Jonathan This is a very quick and dirty screenshot that shows how powerful CC3 and this plugin is. 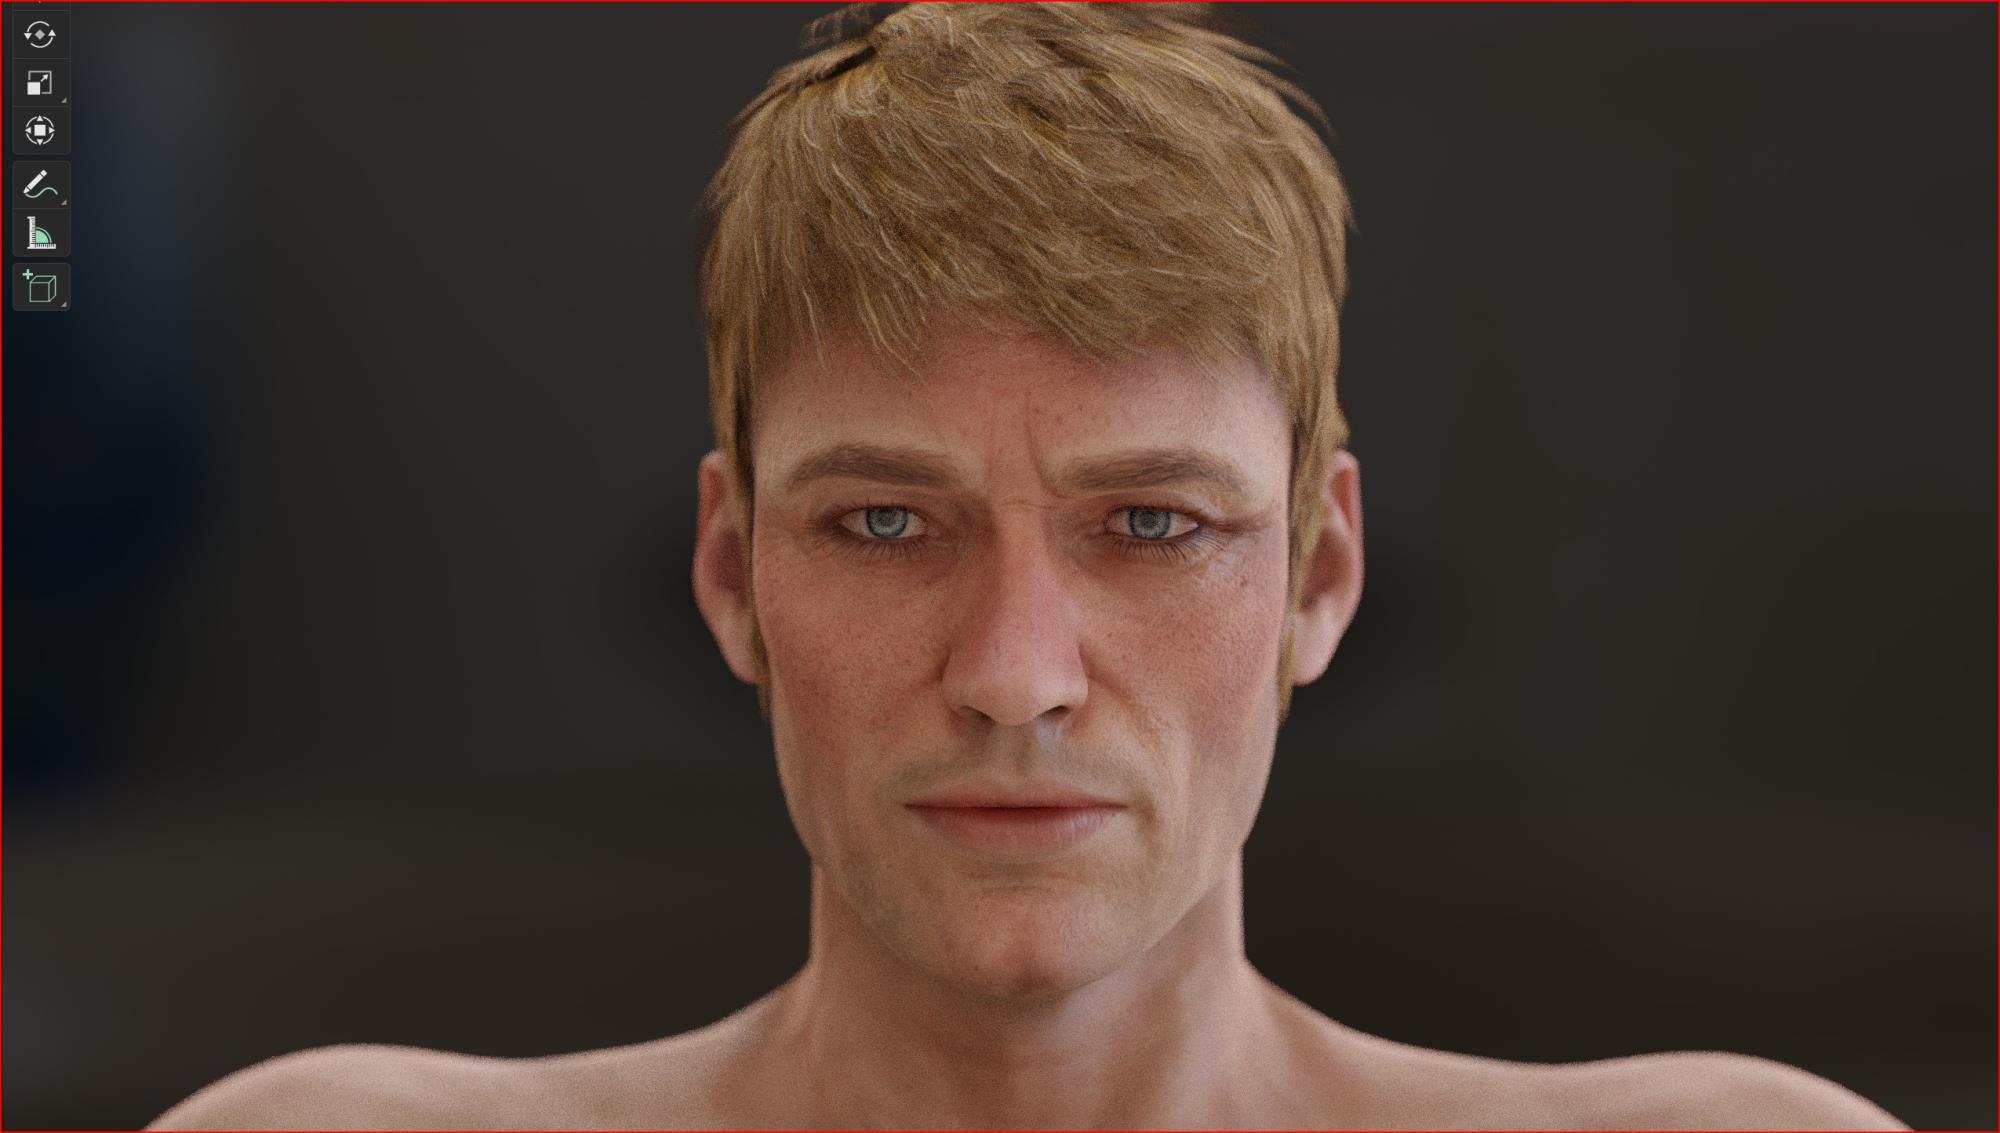
|
|
|
|
|
leandromeire
|
leandromeire
Posted 4 Years Ago
|
|
Group: Forum Members
Last Active: 3 Years Ago
Posts: 46,
Visits: 188
|
Victor.Soupday (3/3/2022)
In this case, there is actually an error in the skin shader micro-roughness calculation, causing a seam in the roughness between the head and body materials. Working on a fix now.
Ok, Victor. Waiting for the update. Thanks!
|
|
|
|
|
leandromeire
|
leandromeire
Posted 4 Years Ago
|
|
Group: Forum Members
Last Active: 3 Years Ago
Posts: 46,
Visits: 188
|
Colonel_Klink (3/3/2022)
Hi. Adjust the roughness setting on the body material. That effect appears usually when the roughness of the head and body don't match. You can see in your screenshot that the head has a glossiness to it whereas the body doesn't. leandromeire (3/3/2022)
Hi. I exported character Sandra to Blender, as I exported the Default character, but this time, the UV seams are noticeble. Why?  I´ll try it. Thanks Colonel_Klink
|
|
|
|
|
Victor.Soupday
|
Victor.Soupday
Posted 4 Years Ago
|
|
Group: Forum Members
Last Active: 2 Months Ago
Posts: 569,
Visits: 9.0K
|
In this case, there is actually an error in the skin shader micro-roughness calculation, causing a seam in the roughness between the head and body materials. Working on a fix now.
|
|
|
|
|
Colonel_Klink
|
Colonel_Klink
Posted 4 Years Ago
|
|
Group: Forum Members
Last Active: 11 hours ago
Posts: 1.1K,
Visits: 7.7K
|
Hi. Adjust the roughness setting on the body material. That effect appears usually when the roughness of the head and body don't match. You can see in your screenshot that the head has a glossiness to it whereas the body doesn't. leandromeire (3/3/2022)
Hi. I exported character Sandra to Blender, as I exported the Default character, but this time, the UV seams are noticeble. Why?
* * * * * * * * * * * * * * * * * *
See all my content in one place

Facebook Page: CWK3D Game and Film Content
Cancer Survivor - Retired Teacher - Geriatric Icloner still learning
Hardware: ZX80; Operating System- ZX80 Basic; CPU - ZX80 @ 3.25 MHz; Memory - 1KB; Hard Drive - N/A; Storage - Cassette; Monitor: Any old CRT TV
|
|
|
|
|
BigSkyMG
|
BigSkyMG
Posted 4 Years Ago
|
|
Group: Forum Members
Last Active: Last Year
Posts: 7,
Visits: 32
|
The shirtless character I posted earlier on this page has those same seams, so I'm curious how to get rid of those as well :) I also just wanted to check back in to see if anyone has any ideas for how to get rid of the intense pink that's always around all of my characters' eyes when I render in Cycles (the problem doesn't happen with Evee). I've tried changing the subsurface color, subsurface radius, and subsurface scale, but the color around the eyes is always super noticeable with every character I try in Cycles. Here is another example:  Thank you!
|
|
|
|
|
leandromeire
|
leandromeire
Posted 4 Years Ago
|
|
Group: Forum Members
Last Active: 3 Years Ago
Posts: 46,
Visits: 188
|
Hi. I exported character Sandra to Blender, as I exported the Default character, but this time, the UV seams are noticeble. Why?
|
|
|
|
|
AutoDidact
|
AutoDidact
Posted 4 Years Ago
|
|
Group: Forum Members
Last Active: 4 Months Ago
Posts: 2.1K,
Visits: 13.6K
|
If you are sharing Blender scene files for use on other computers you need to "pack all into .blend" Your .blend files may dramatically increase in size depending on what external files the project is using.
|
|
|
|
|
Victor.Soupday
|
Victor.Soupday
Posted 4 Years Ago
|
|
Group: Forum Members
Last Active: 2 Months Ago
Posts: 569,
Visits: 9.0K
|
There is no default rule for relative or absolute paths in Blender, it will decide based on the location of the Blend file and the textures.
If they were relative paths in their own folders you wouldn't be having any problems so I'm guessing you have absolute paths.
Do you have access to the original Blend files (in their original paths) before they go into drop box? i.e. so you can set the blend files to relative paths and pack the images.
(You can set paths to relative with the file menu: File > External Data > Make Paths Relative,
and then you can pack the images into the blend files with: File > External Data > Pack Resources.)
Or are you stuck with what you have got in drop box?
|
|
|
|
|
macklawrencefilms
|
macklawrencefilms
Posted 4 Years Ago
|
|
Group: Forum Members
Last Active: 2 Years Ago
Posts: 2,
Visits: 115
|
Thanks for getting back to me!
Does each blend file come with it's own folder with it's own textures? all blend files are unpacked in a folder per shot. So (Shot 1) Folder And then There are folders in that with the textures.
Or is just one big glob of blend files and textures?
Are the image paths in the blend files absolute full paths or relative paths? (Can you give some examples of the image paths?) This is set as relative paths i believe. whatever is default with blender.
(It could be possible to reconstruct the original file path structure, so paths in the blend files are correct.)
So i should set to absolute or relative? this is done in the script editor tab?
|
|
|
|