|
Grace (RL)
|
Grace (RL)
Posted 8 Years Ago
|
|
Group: Administrators
Last Active: Last Week
Posts: 497,
Visits: 5.1K
|
iClone v7.1 (7.1.1116.1) released on Nov. 16th, 2017
v7.1 is the largest annual update for iClone 7. The redesigned DOF (Depth of Field) gives significant improvements over camera realism, while the default Transition type has changed from linear to curve. Additionally, the Timeline systems have been greatly enhanced with highly expected features which are well integrated with the new Curve Editor Plug-in for synchronous operation.
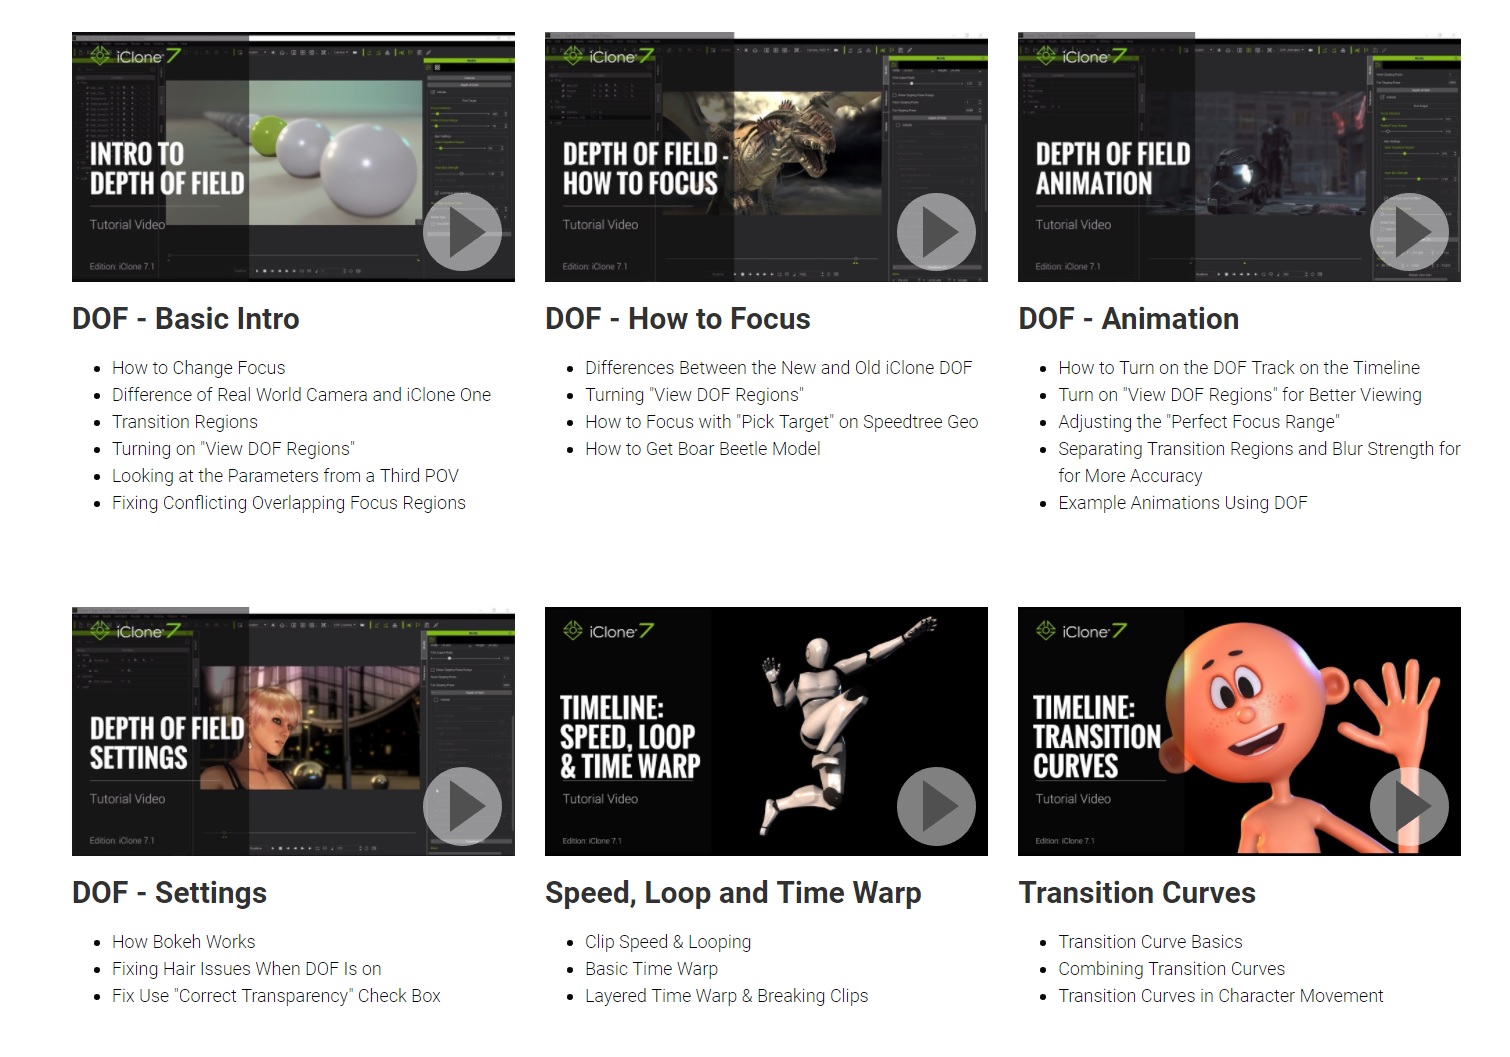
Get started with these new features from Tutorials.
Smooth Transitions
Added:
- iClone 7.1 provides the Default Key Tangent settings (under Preference) which can be set at any time. More
- There are 6 different Tangent settings. By default, the curve type is set to Auto (Auto is a type of optimization where the selected lowest and highest value keys are slowed and everything in between become linear.)
- Default Key Tangents can only be used on Curve Clips and Transform Keys.
- In order to make older projects backwards compatible, one must first apply Convert Data on the Curve before editing.
- The Transition curve options have increased from 6 to 16 also accessible via the context menu. More
- Each Type can be previewed in the viewport simply by selecting it in the floating window, making it more intuitive and convenient.
- Rotation now can be larger than 360. More
- Continuously rotating prop can be done by setting Transform keys with the Rotate Tool or with the Rotate X/Y/Z fields on the Modify panel.
Fundamental Timeline Upgrades
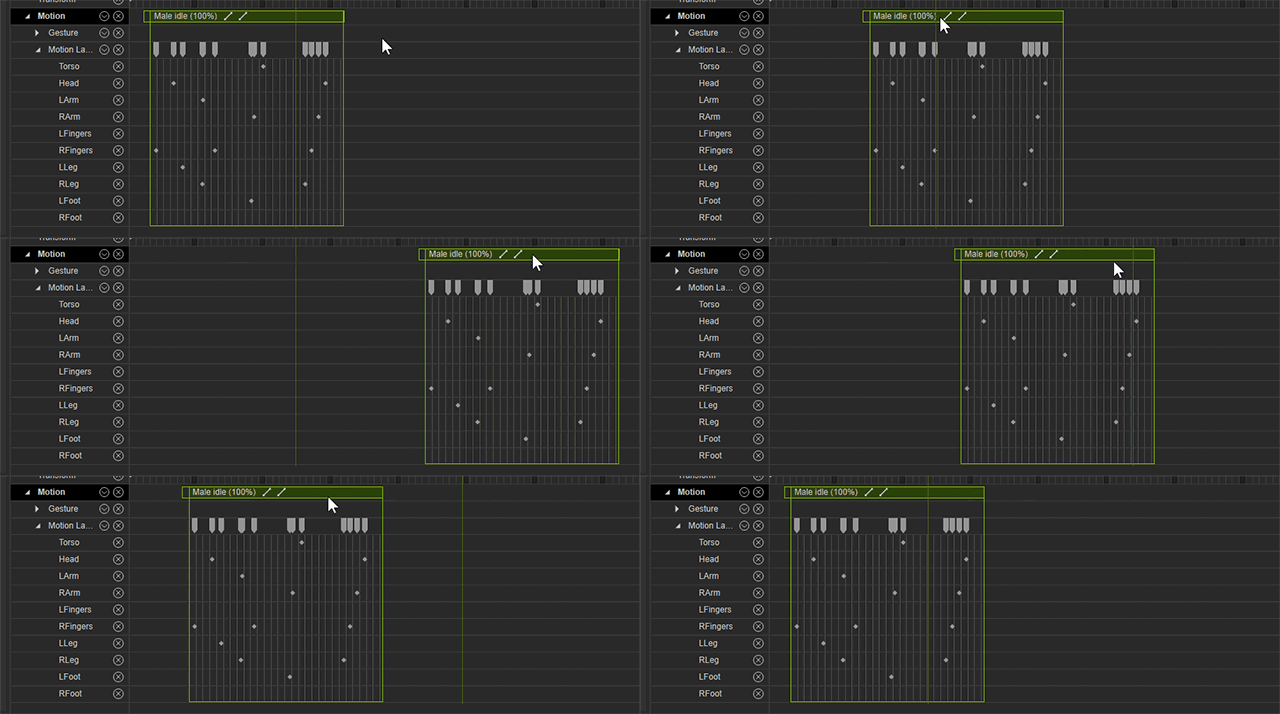
Enhanced:- Motion Clip is now a unit encasing Gestures and Motion Layer keys. More
Previously
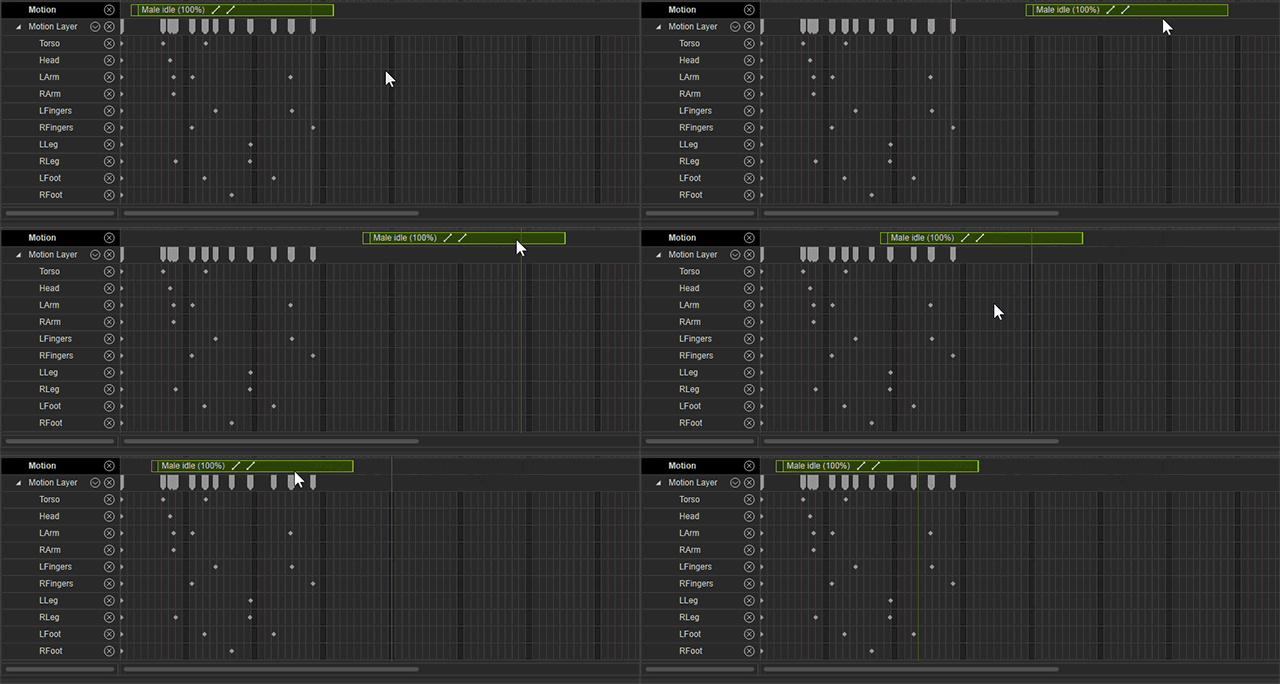
iClone 7.1

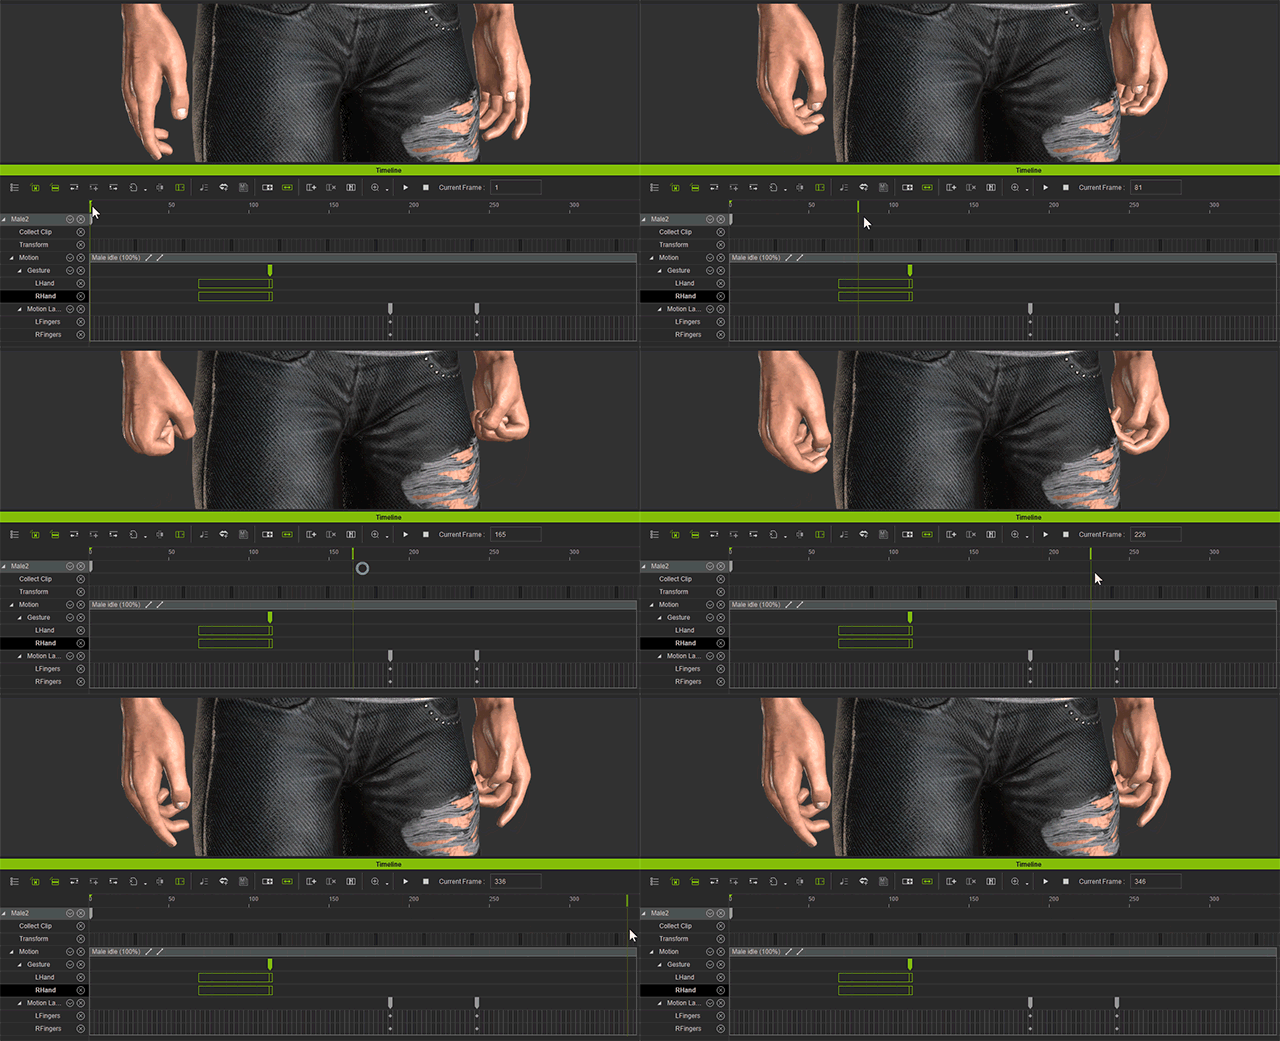
- Gestures: More
- Gestures reside in a different Motion Layer, therefore, can not be applied to the Motion Clip.
- Gestures only replaces the Motion Clip's Gesture layer, other Motion Layer keys will only superimpose onto the performance of the Gesture Clip.
- When Sample or Flatten is activated, the Gesture data will combine into corresponding tracks of the Motion Clip Layer Keys
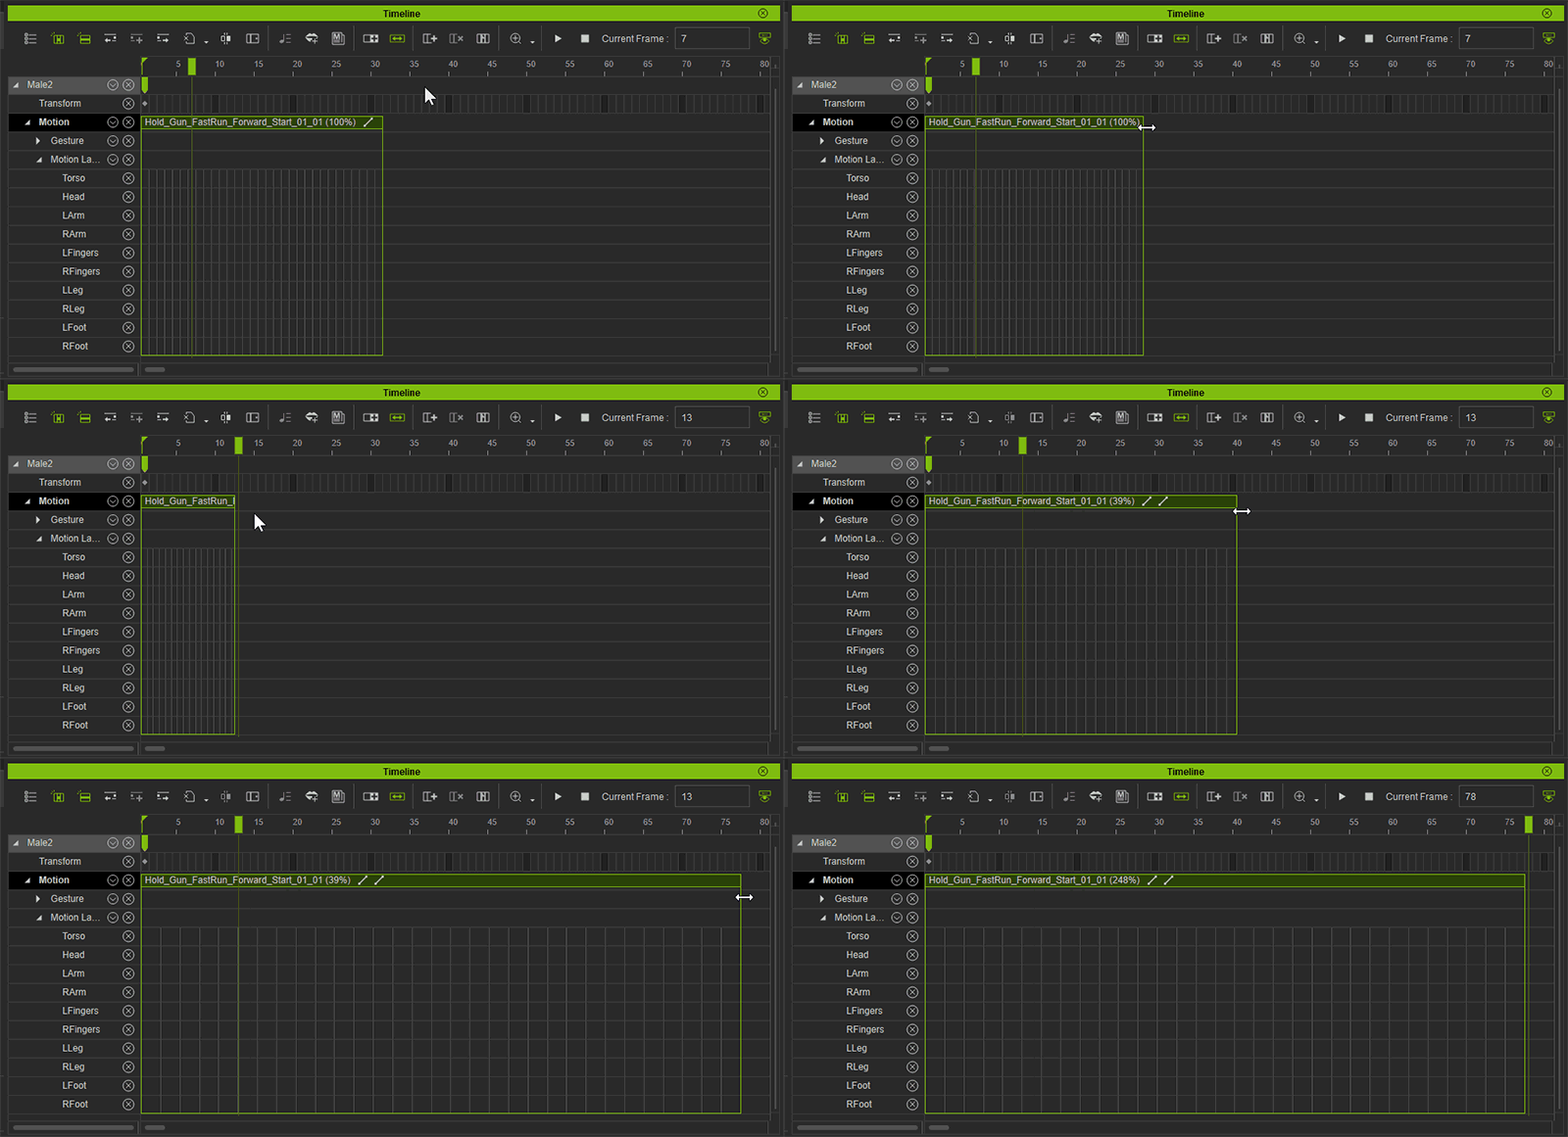
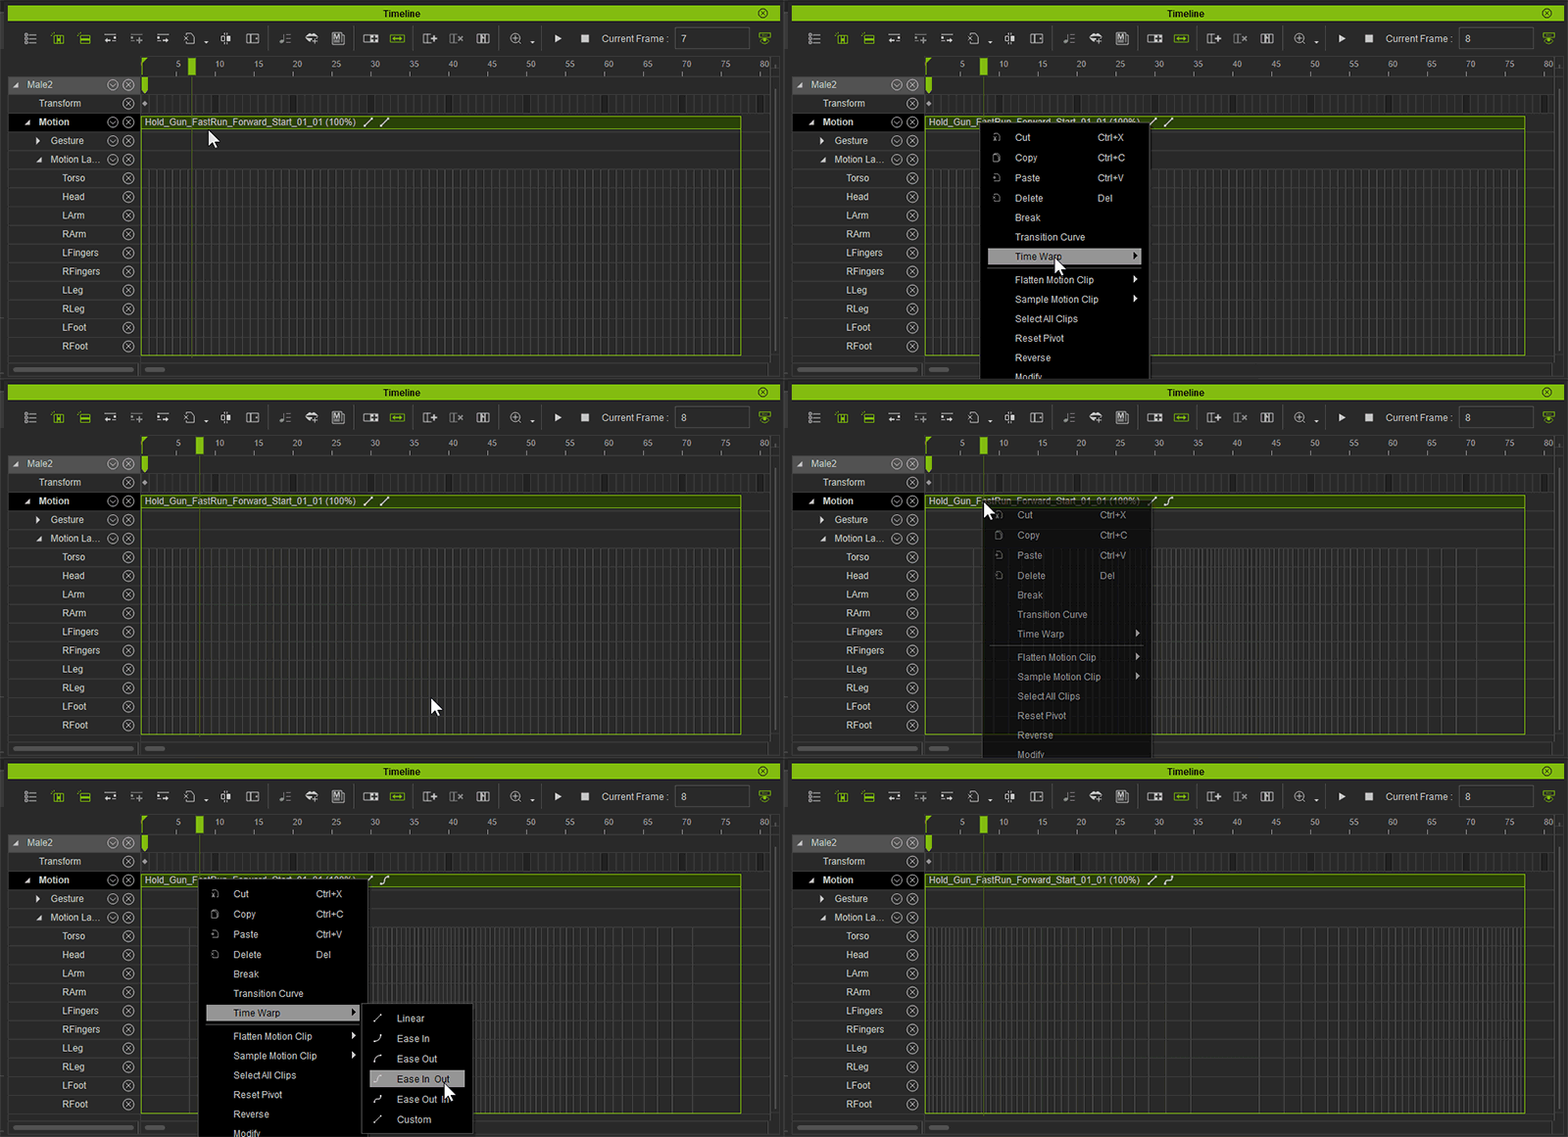
- Speed/Time Warp: More
- Pushing and pulling on the edges of the Clip will change the speed of the motion from fast to slow.
- The grid of the Clip will narrow or expand accordingly to provide a visual cue for the changes in the speed.
- The speed of the Clip will now be displayed behind the name of the Clip.
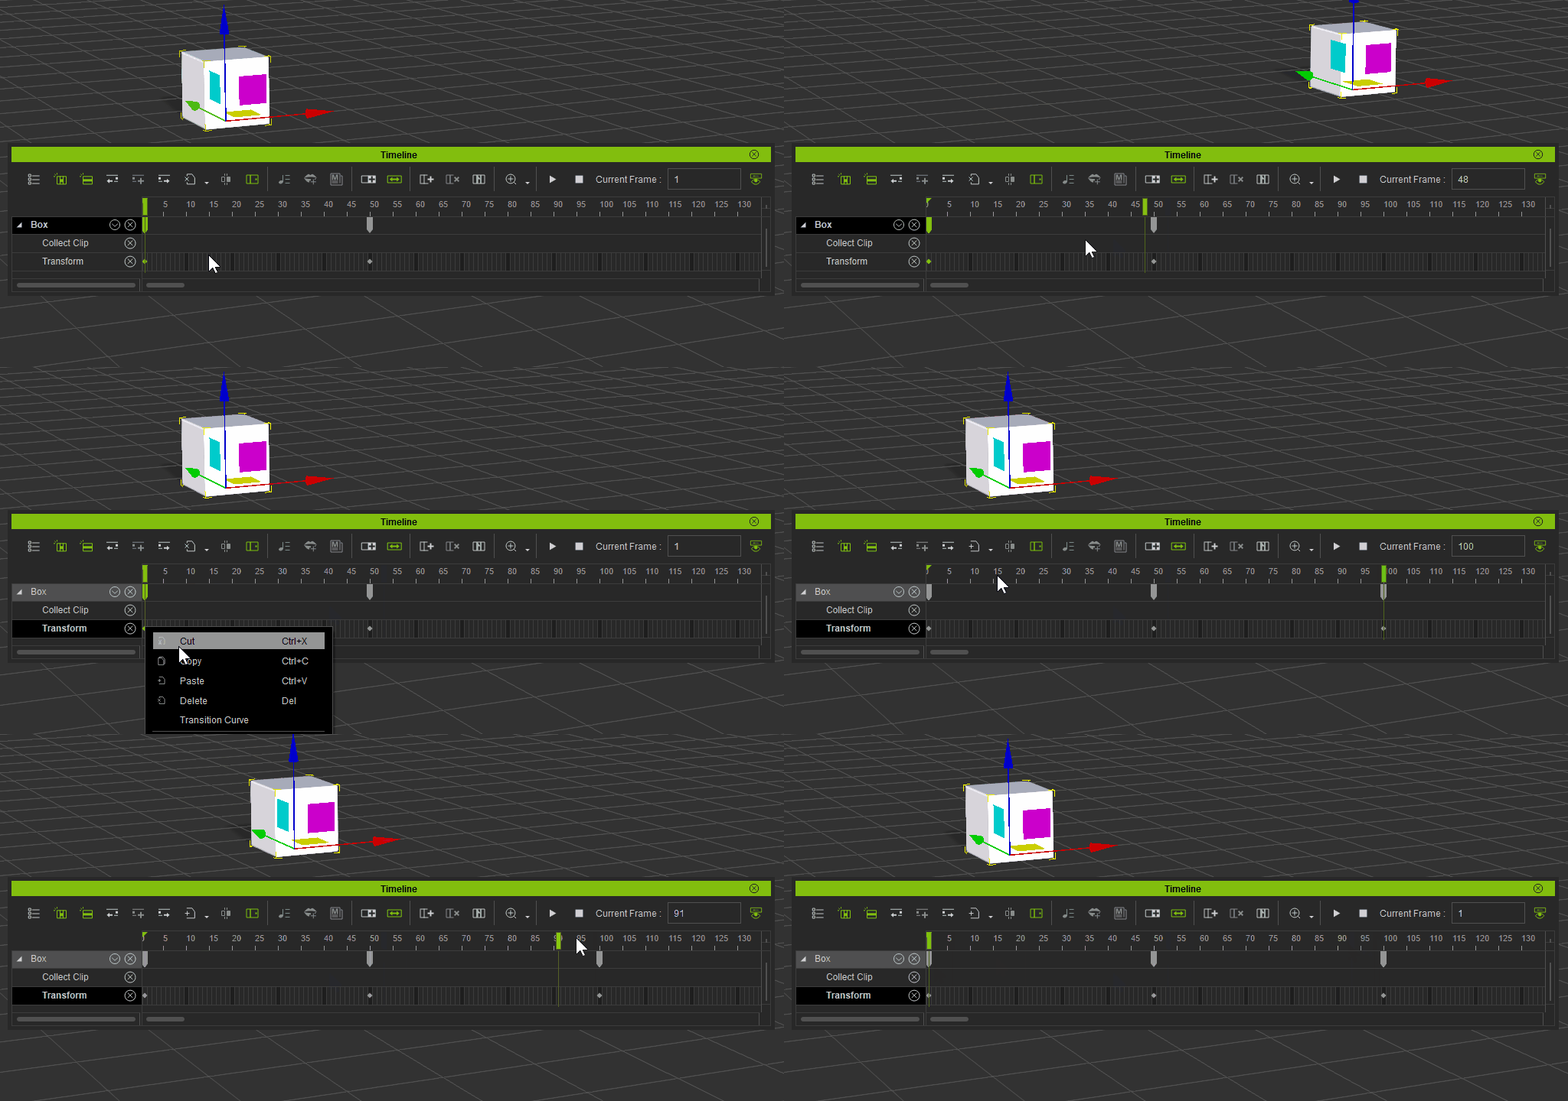
- Copy/Cut and Paste can be applied to any clip of the same asset or other clips of same asset types. More
- This also applies to clip transform and layer keys.
- Symmetrical paste is allowed and can be executed with Ctrl+v or via the context menu's Paste Symmetrical.
Added:- Motion clips provide the Sample and Flatten function in order to allow editing of the contents of the motion clip or merge the layer keys with the motion clip. More
- Merge Clips: More
- Merge Clips can be used to join disparate clips of the same track.
- Usage: pick two adjoining clips and perform Merge Clips via the context menu (right mouse click).
- Auto Extend feature has been added to the timeline toolbar. More
- When Auto Extend is enabled, a new animation key will join a clip to its left.
- When Auto Extend is disabled, a new animation key becomes an independent motion clip.
- Hollow and Solid Keys: More
- Hollow keys represent partially keyed frames (not all axes of the element has a key).
- On the other hand, Solid keys represent keys where all axes have been keyed.
- Create Transition Clip: More
- Accessible via the right mouse button context menu, the Create Transition Clip function can be used to convert clip transition region into a new clip segment.
Enhanced Motion Editing- FK Motion Control for editing all available character bones, and be able to work perfectly with the intuitive Human IK editing More
- Mirror Copy for copying one side of the character’s poses to the opposite side, save the efforts on walk or run loop editing. More
- Reach Target has a new Reach Effector. More
- The Reach Effector can be applied on any bone in order to create a lite IK effector.
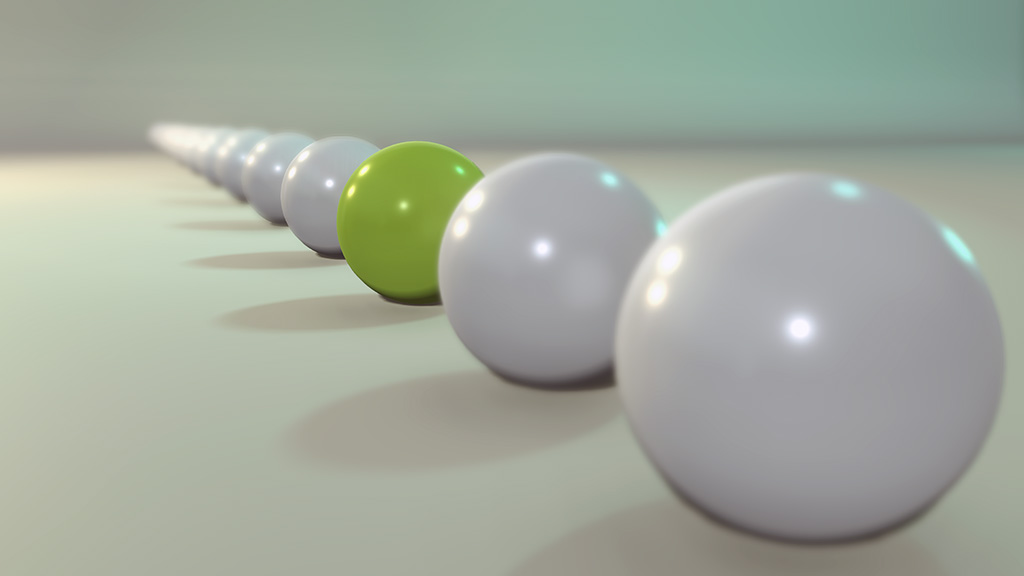
DOF ImprovementsEnhanced:
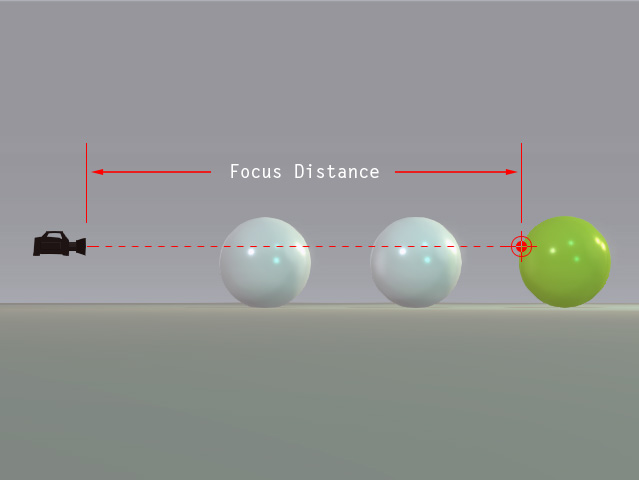
- Focus Distance is now based on the picked target's point on mesh. (before it's based on pivot) More
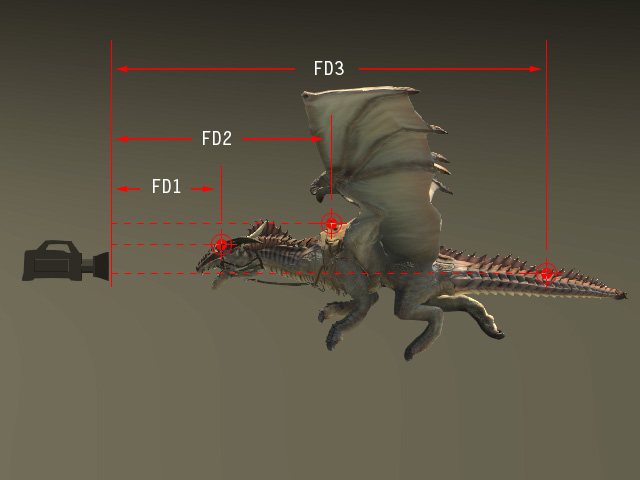
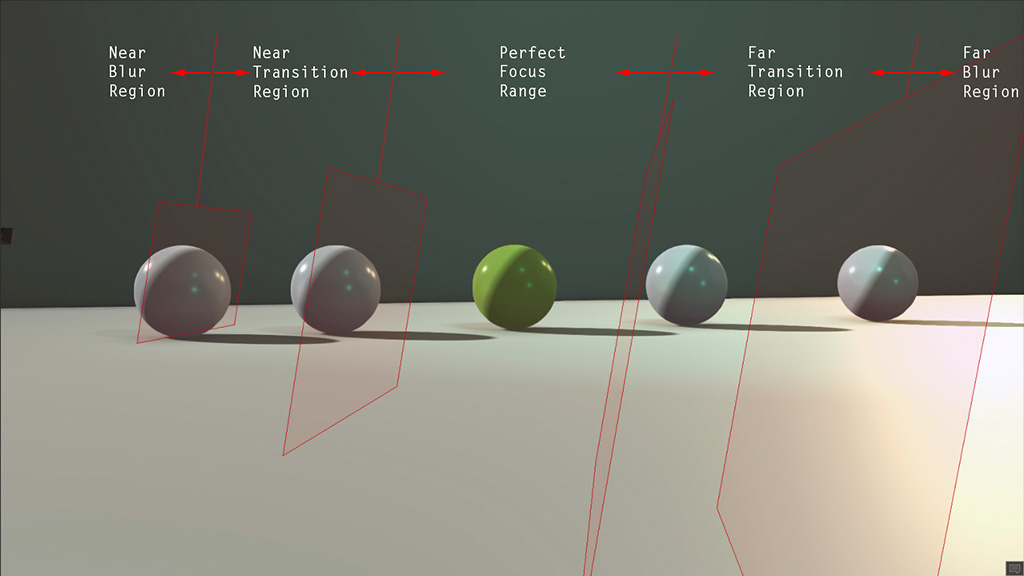
Added:- Focus Range can be used to grow out from the point of the Focus Distance to cover the area of clarity. More
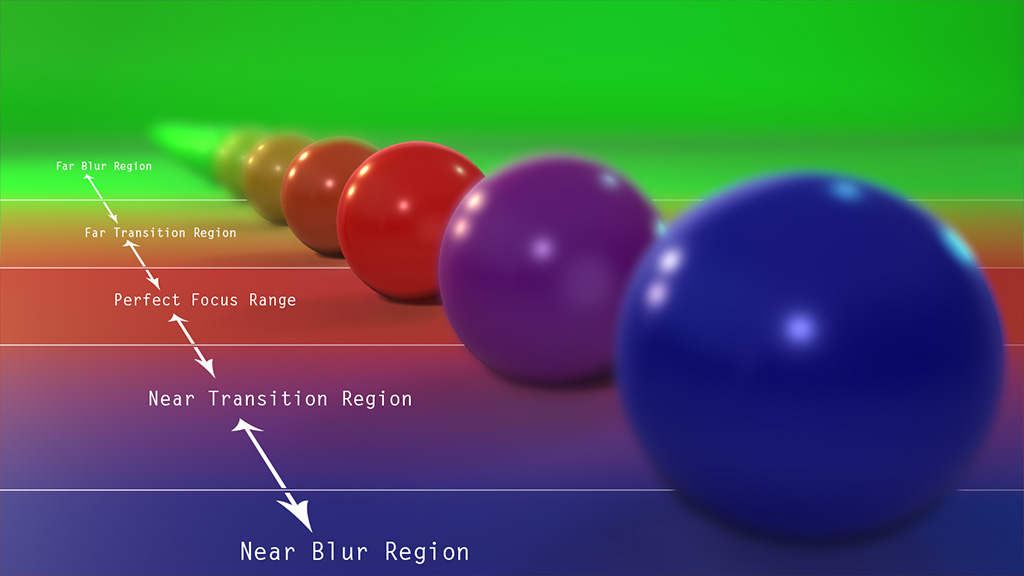
- Near and Far Transition Region: More
- Near Transition Region determines the Near Blur and Focus Range boundary to control the gradience of blurriness between the two regions.
- Far Transition Region determines the Far Blur and Focus Range boundary to control the gradience of blurriness between the two regions.
- Near and Far Blur Strength: More
- Near Blur Strength can be used to adjust the degree of blurriness for the near blur boundary.
- Far Blur Strength can be used to adjust the degree of blurriness for the far blur boundary.
- Lock Near and Far Effect can be toggled on to control the Near and Far parameters simultaneously.
- Create DOF animation by setting DOF keys in different time frame.
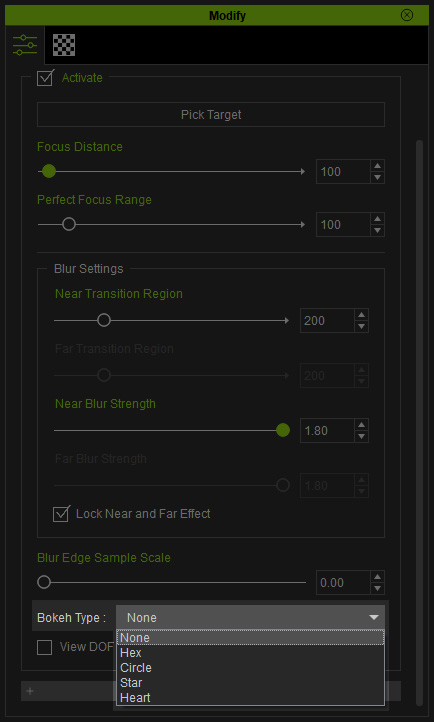
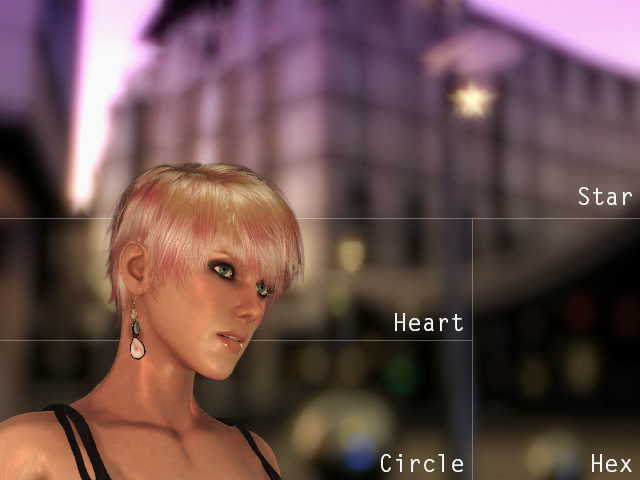
- New Bokeh effects, include: Hex, Circle, Star and Heart. More
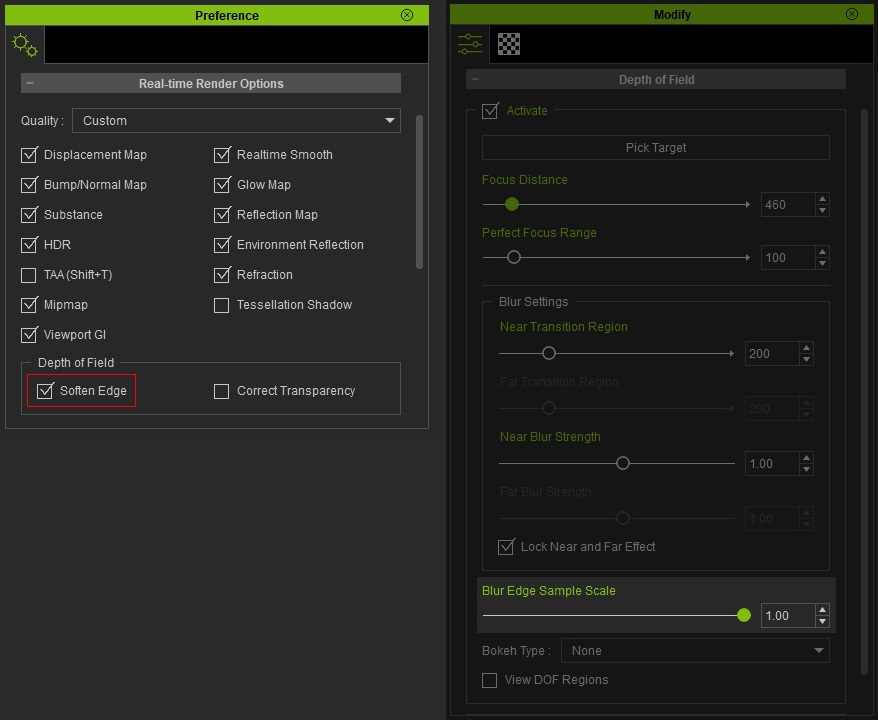
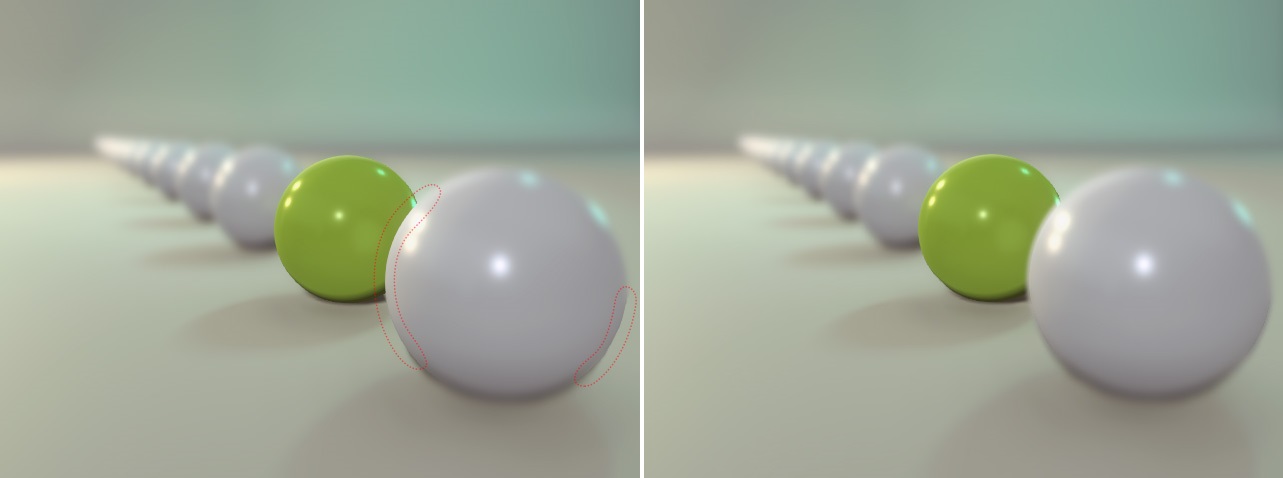
- Blur Edge Samples Scale can be used to soften the jaggedness in the junction between the regions of blurriness and sharpness of an object. More
Click to zoom in for details
- New DOF Regions can be used to display and diagnose the DOF ranges. More
Fixed:
- Flickering caused by the slow down when DOF is enabled during video and image export.
- Exported video and image discrepancies between different viewport sizes due to variations between monitor resolutions.
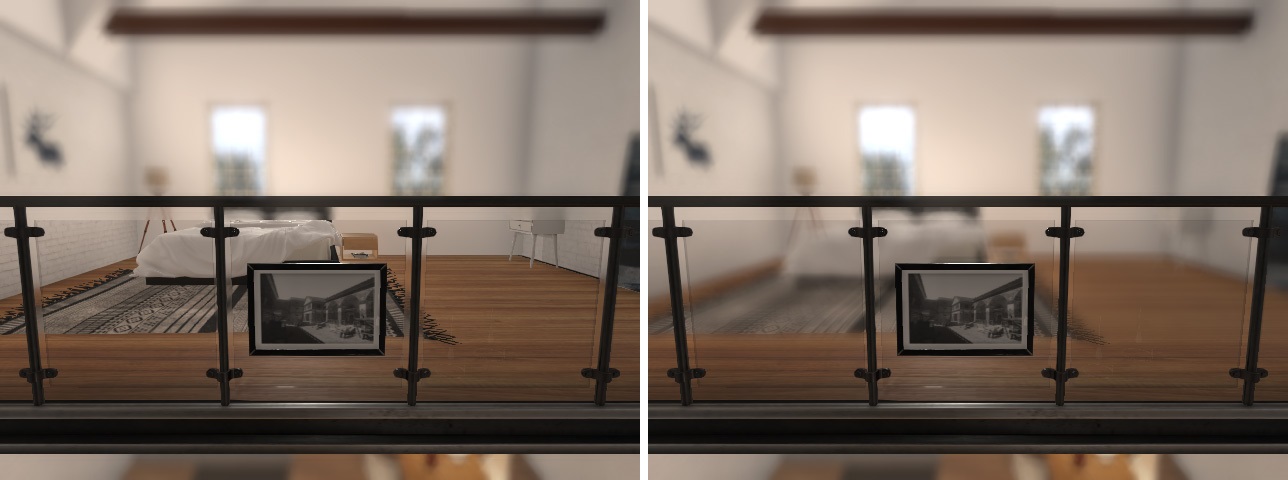
- Blurriness on objects behind other semi-transparent objects for exported videos and images. More
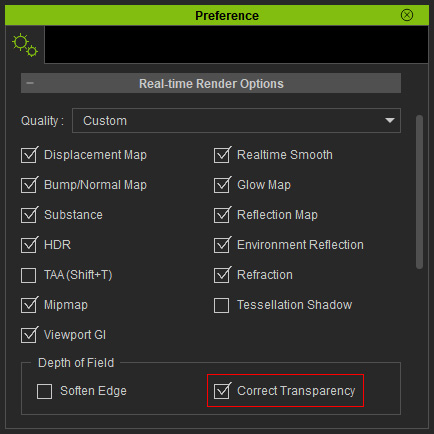
Click to zoom in for details
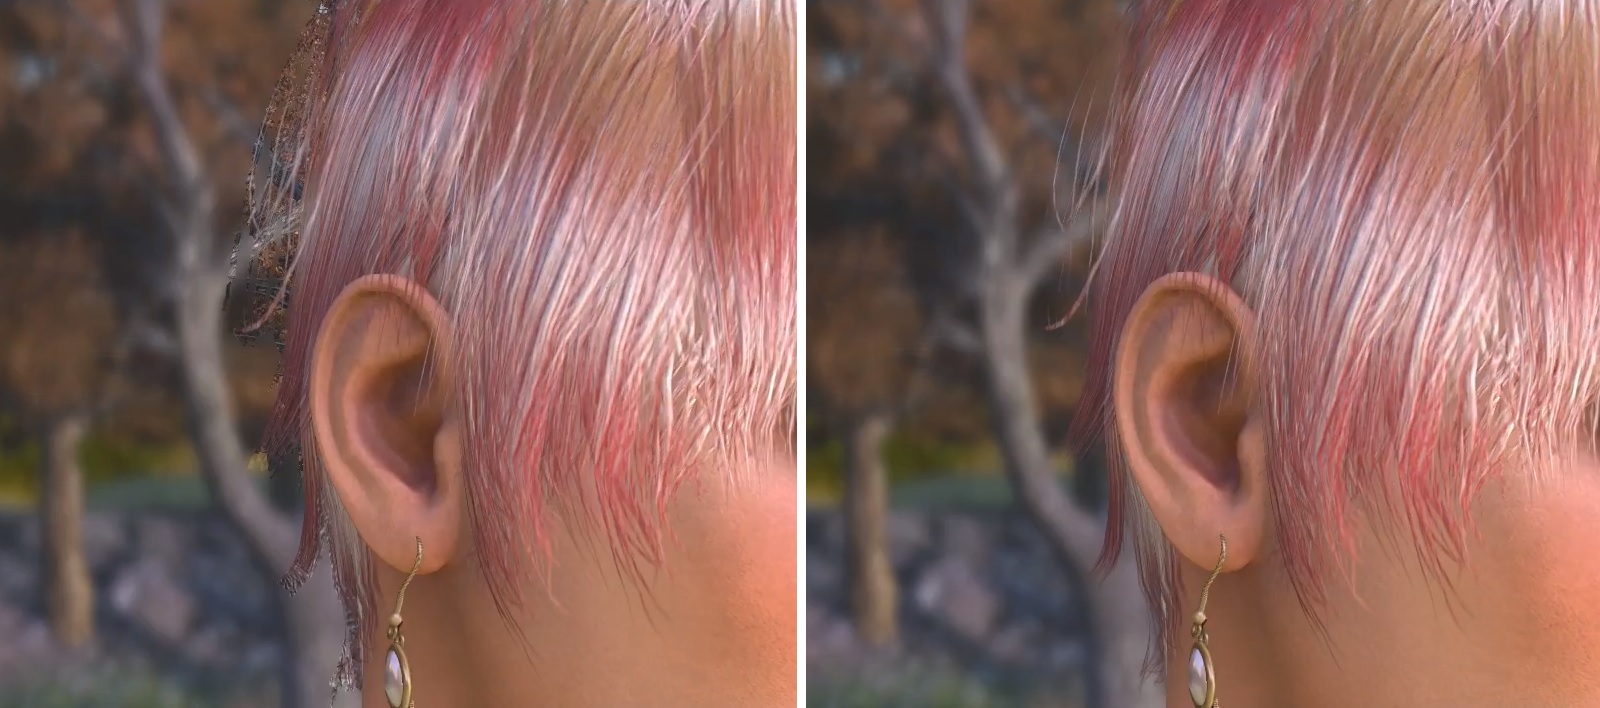
Other Updates
Added:
- Local Transform Section: Select multiple objects to show the Local Transformation group in the Modify panel.(via Modify Panel > Edit > Local Transform) Here one can directly input the offset values for each individual selection (Does not support characters).
- CC Characters can now be scaled via Modify > Edit > Avatar > Body Scale. More
- Reach Key can now be baked into the current pose. More
- Align to Actor Orientation: (via Menu > Animation > Motion Setting Options > Align to Actor Orientation) More
- Once enabled, the Gizmo will align with the orientation of the character's root.
- Otherwise applied motions will also derive its direction from the orientation of the character.
- New Content:
- A DOF Demo project can be accessed from Content > Project > Project Template > 7.DOF > DOF Demo
- A Dummy male character for motion preview
Fixed:- Drag and drop sound files into iClone timeline now works properly. Feedback Tracker
- Glow textures for billboards now emit light normally. Feedback Tracker
- .iMtl files can now be properly applied to the character. Feedback Tracker
- The camera can now be repositioned properly even when it is linked and Sub-Node > Align Position is applied. Feedback Tracker
- Keys can now be properly applied to Extend Bones (activated via Modify > Edit Motion Layer > Extend Bone). Feedback Tracker
- Extend Bone for G6 characters can now be properly keyed. Feedback Tracker
- Motion Plus saved with Collect Clip can now properly preserve animation data for the eyes. Feedback Tracker
- The blink morph will no longer create mesh penetration with CC characters export in FBX format.
|