I was working on a DAZ hair past weekend and figured I'd share my workflow routine. It might be the same, or different from yours. But I hope you find it useful.
You would most likely have a different hair to convert, which in turn might require slightly different approach at certain workflow steps.
So please share your experience in case you have some additional tips, or if you find a way to facilitate a certain routine in a workflow.
Sorry folks - no video - just a plain text and screenshots (I hate my voice and accent :) )
Prerequisites1. You need to have a DAZ studio software with Decimator. Decimator is a little bit on the expensive side, but it is a great tool for reducing poly count.
You can do decimation in Blender (or other mesh editing software). But it is rather time consuming (specifically for the hair) and it is not covered in this workflow.
2. You have to be proficient with importing/exporting models in and out of CC 2.0. Export in advance a base female avatar from CC for the workflow steps in Blender.
3. Some knowledge / experience working with Blender would require (at least be familiar with mesh editing via basic transform tools).
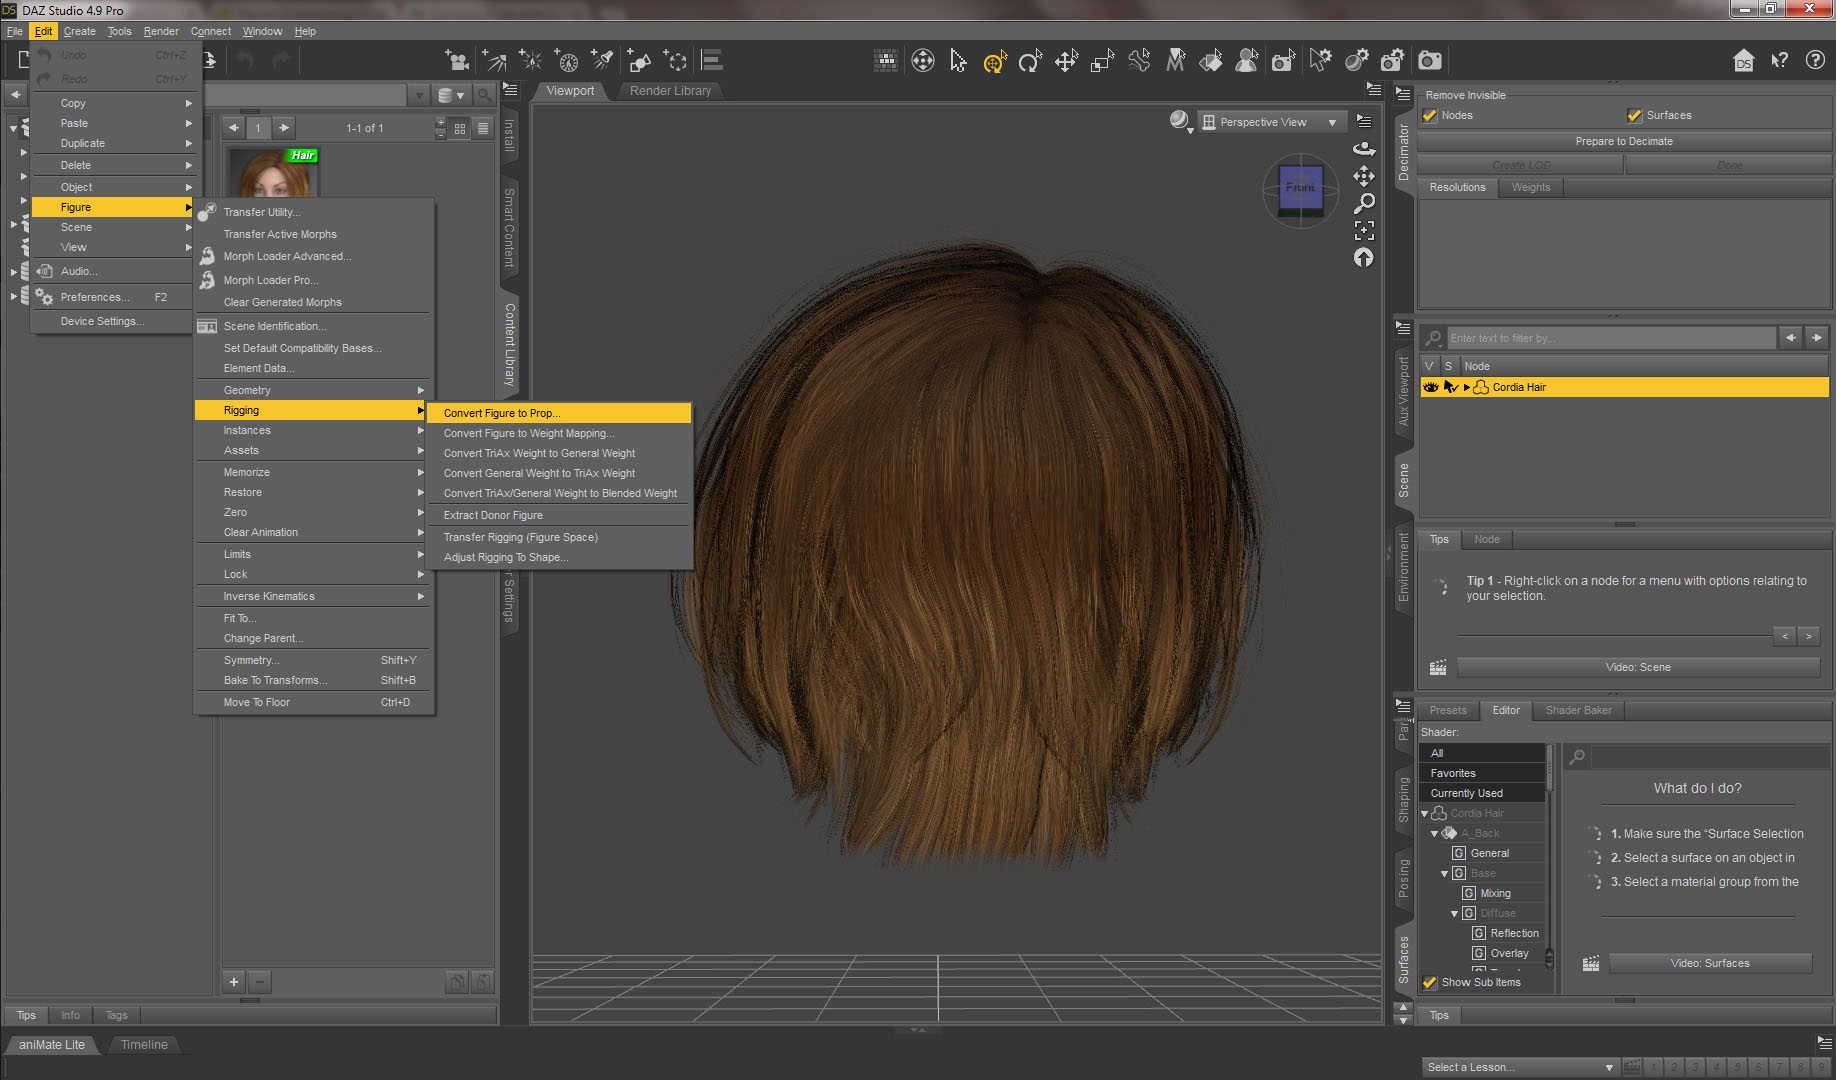
Workflow1. Bring a DAZ hair to the stage (there is no need to have an avatar on a stage in DAZ for that) and convert it to a Prop.
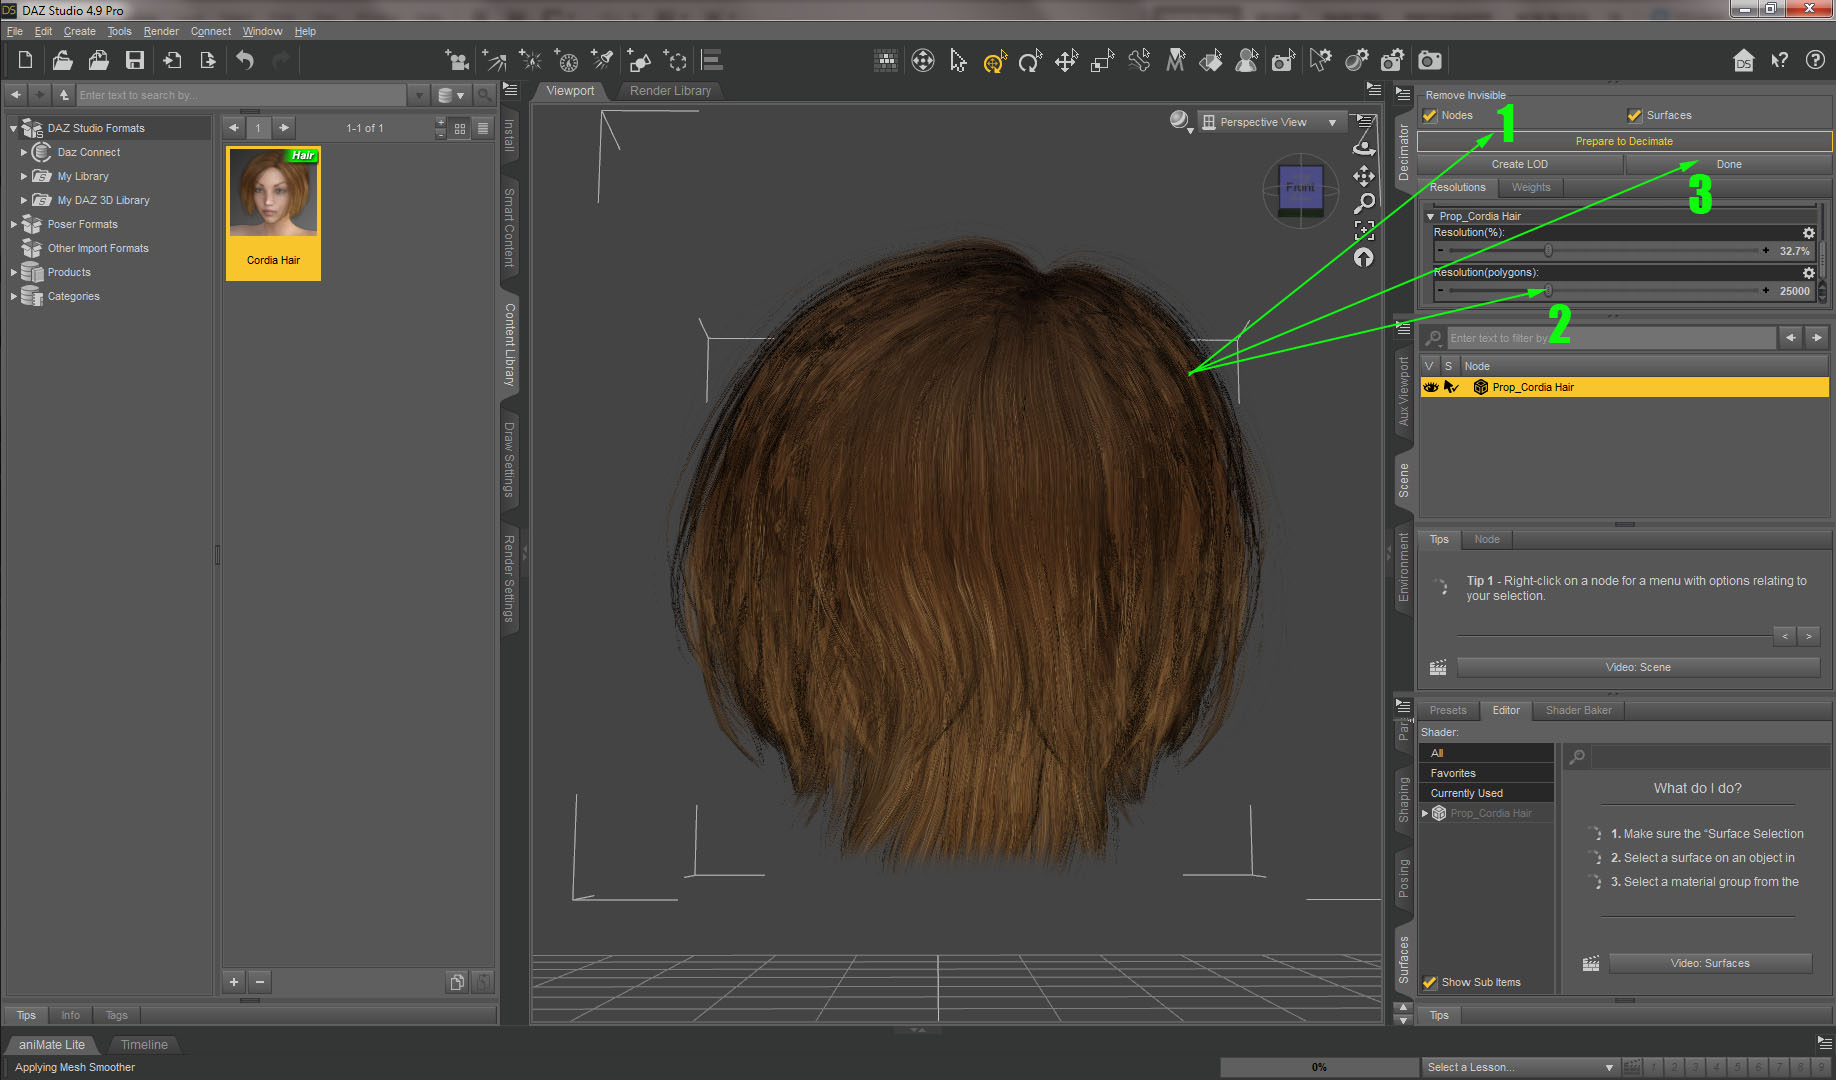
2. Decimate it. Click Prepare to Decimate, then use slider to set a poly count (or percentage), and click Done.
I have selected 25000 for Cordia Hair (you may go lower if you wish). But do not go too low. The hair would look bulky and ugly.
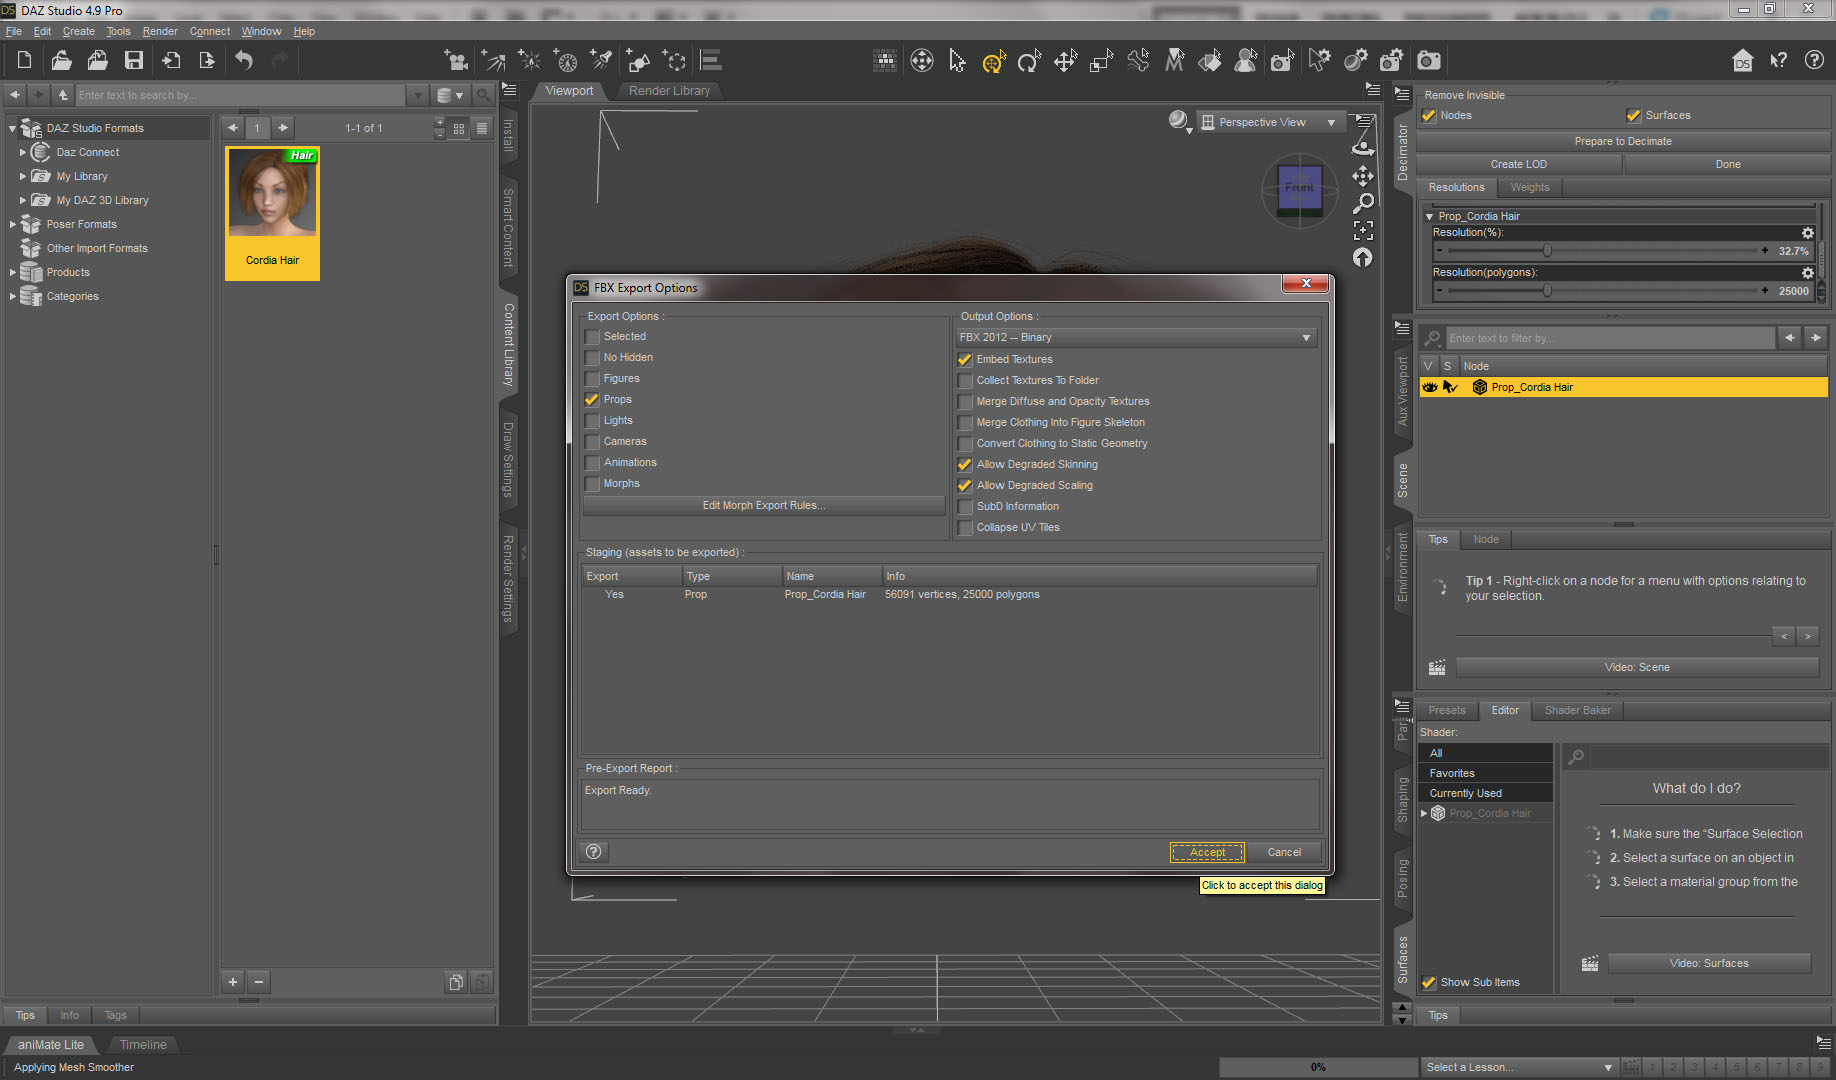
3. Export hair to FBX. From File menu select Export, choose .fbx and specify a name and location to save it to.
4. Open Blender fresh. Import a base CC 2.0 model and then hair you just exported from DAZ. Hair should match the model by X.
But it most likely be off by Y and Z. In my case Z was almost perfect but Y was way off.
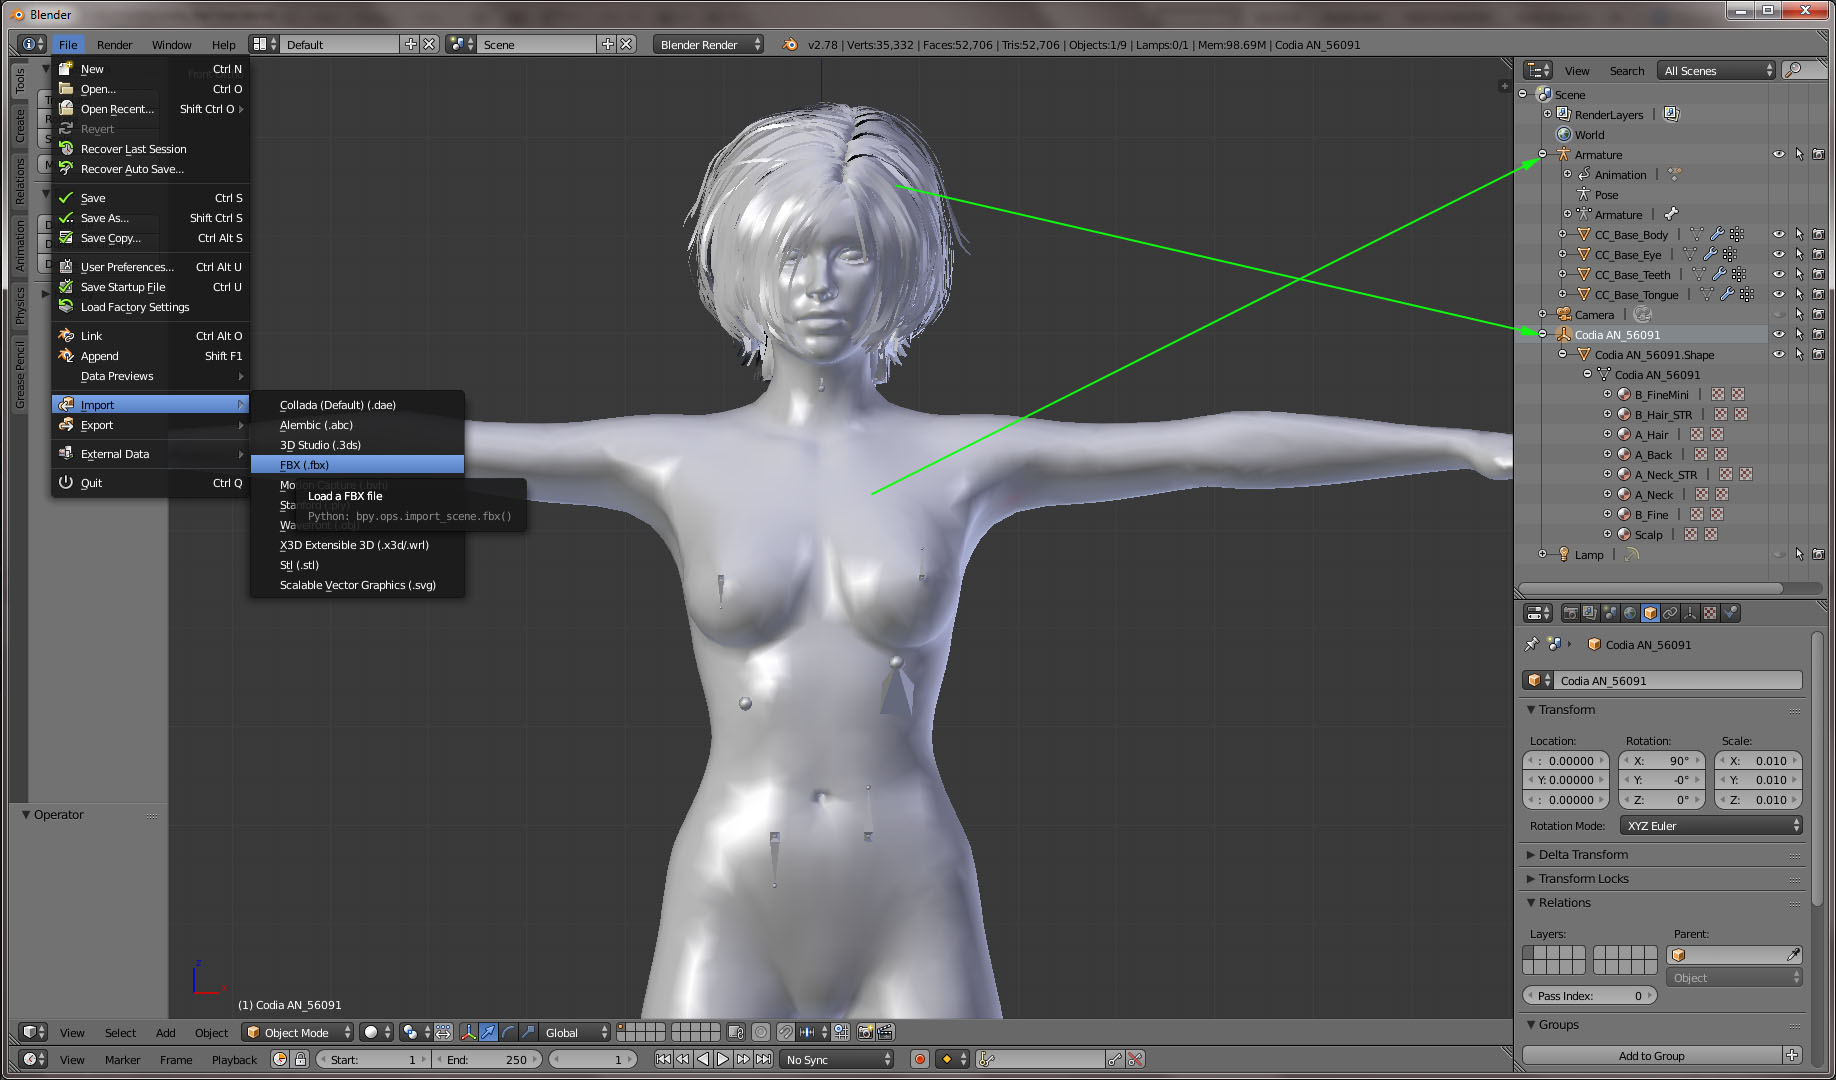
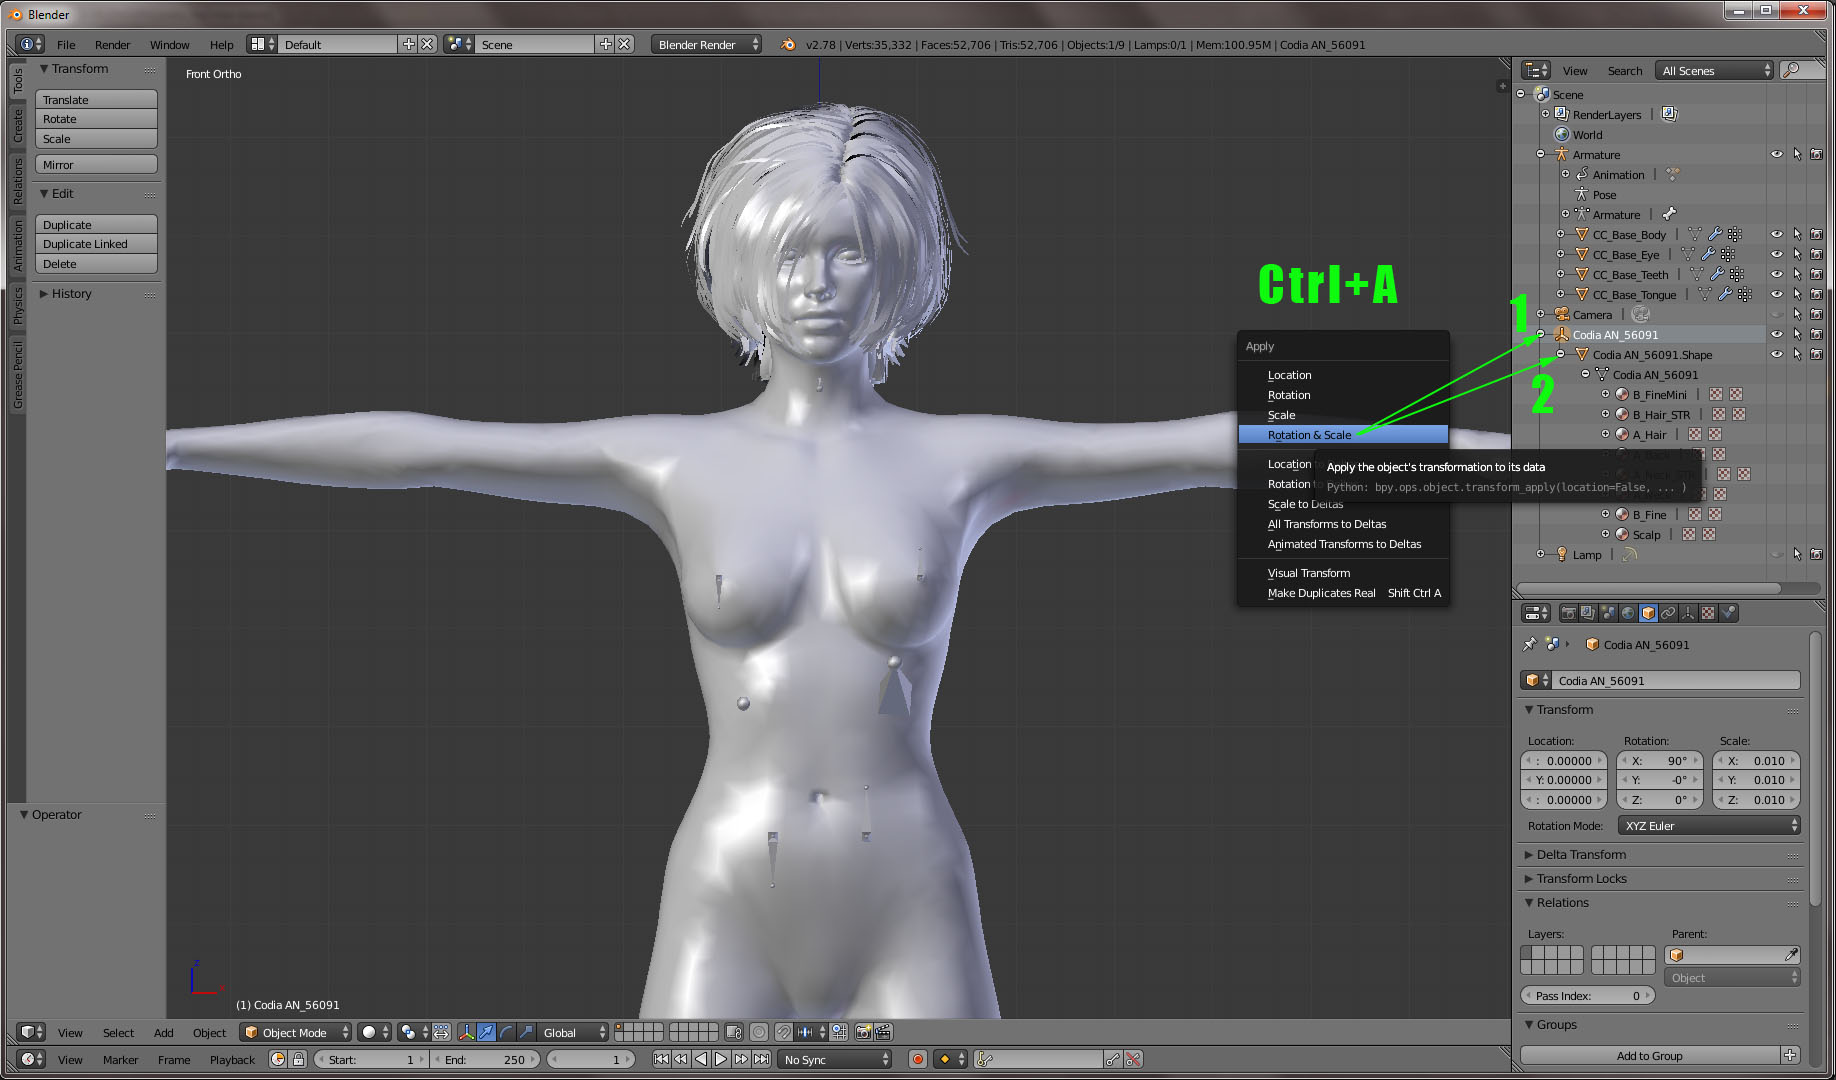
5. Get rid of a Hair Root (Empty) object. Before you do that, you need to reset Rotation and Scale in the correct order.
First select a Root object, hit Ctrl+A and choose Rotation and Scale. This would zero out rotation and scale data, but transfer initial values to the child node - which is a hair mesh.
Next select a hair mesh object and do the same - Ctrl+A and choose Rotation and Scale.
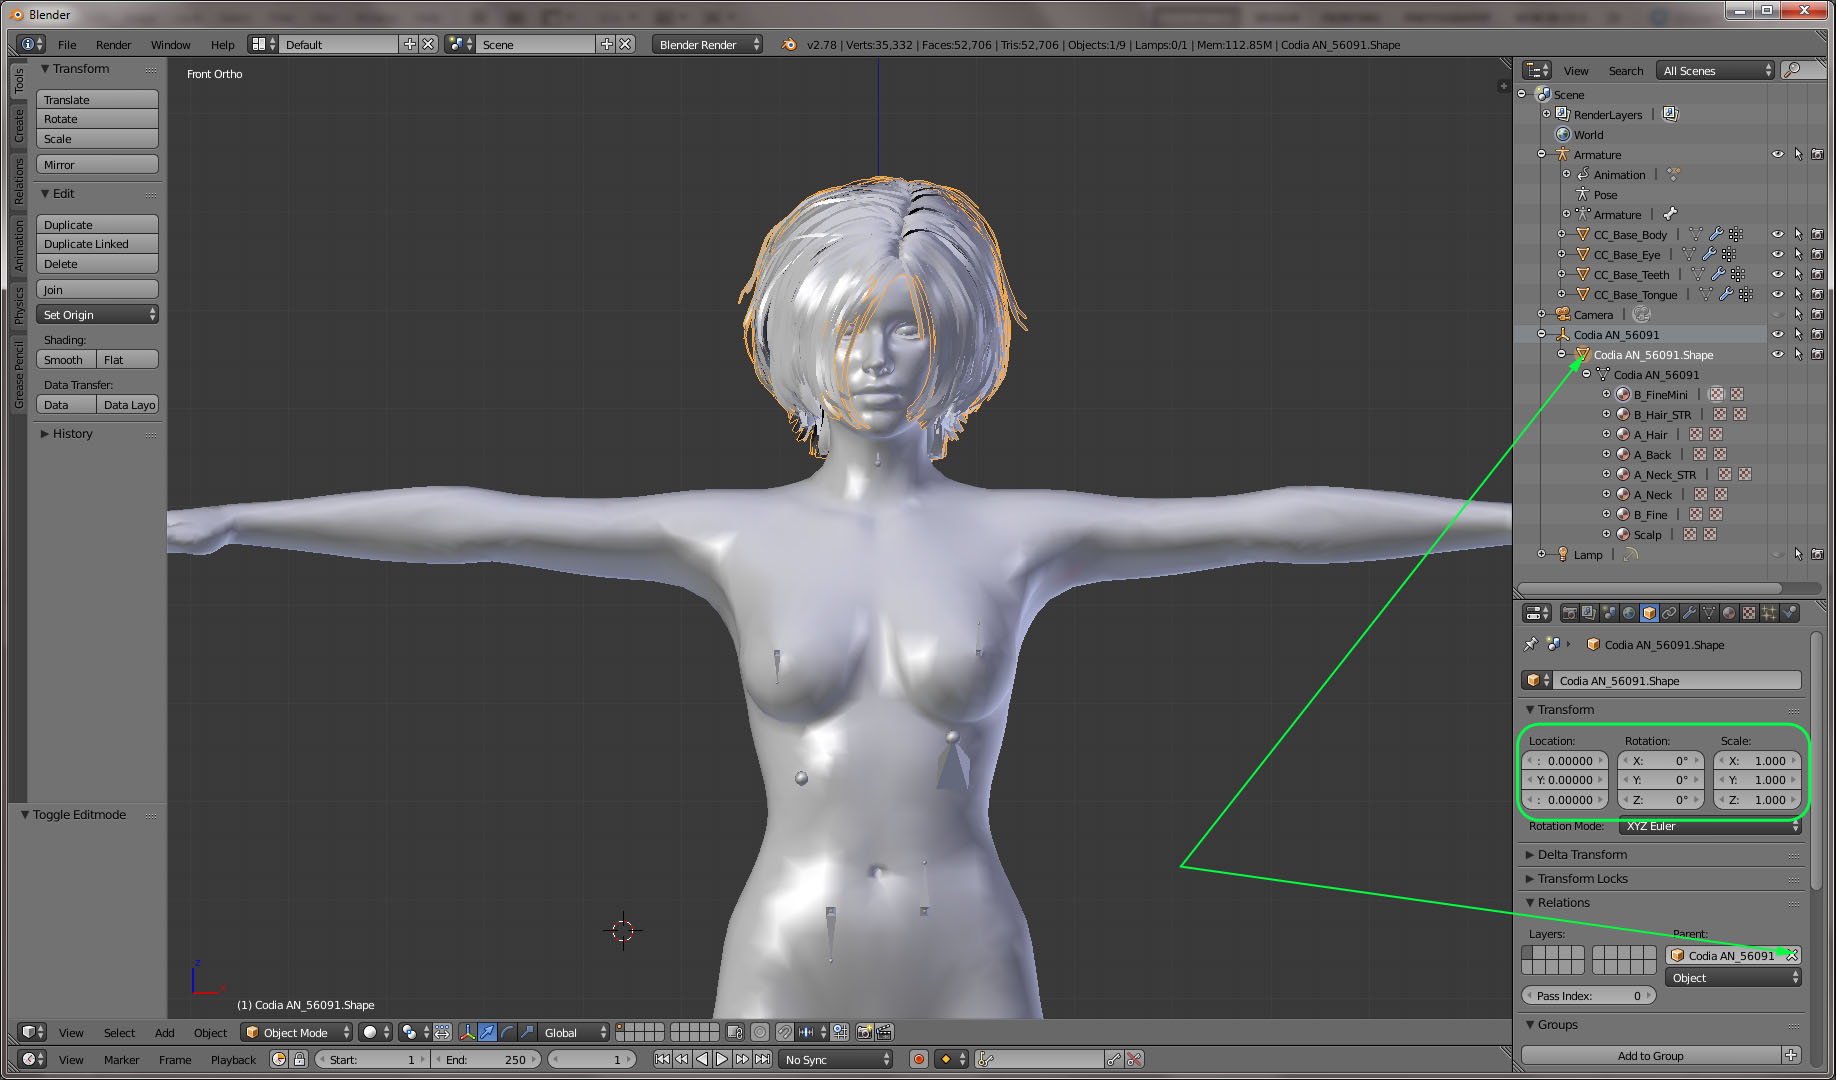
6. Now lets detach a hair from the parent.
Select a hair mesh object, make sure rotation and location values are 0 and scale is 1, and then detach from parent by clicking an X in the parent bound window.
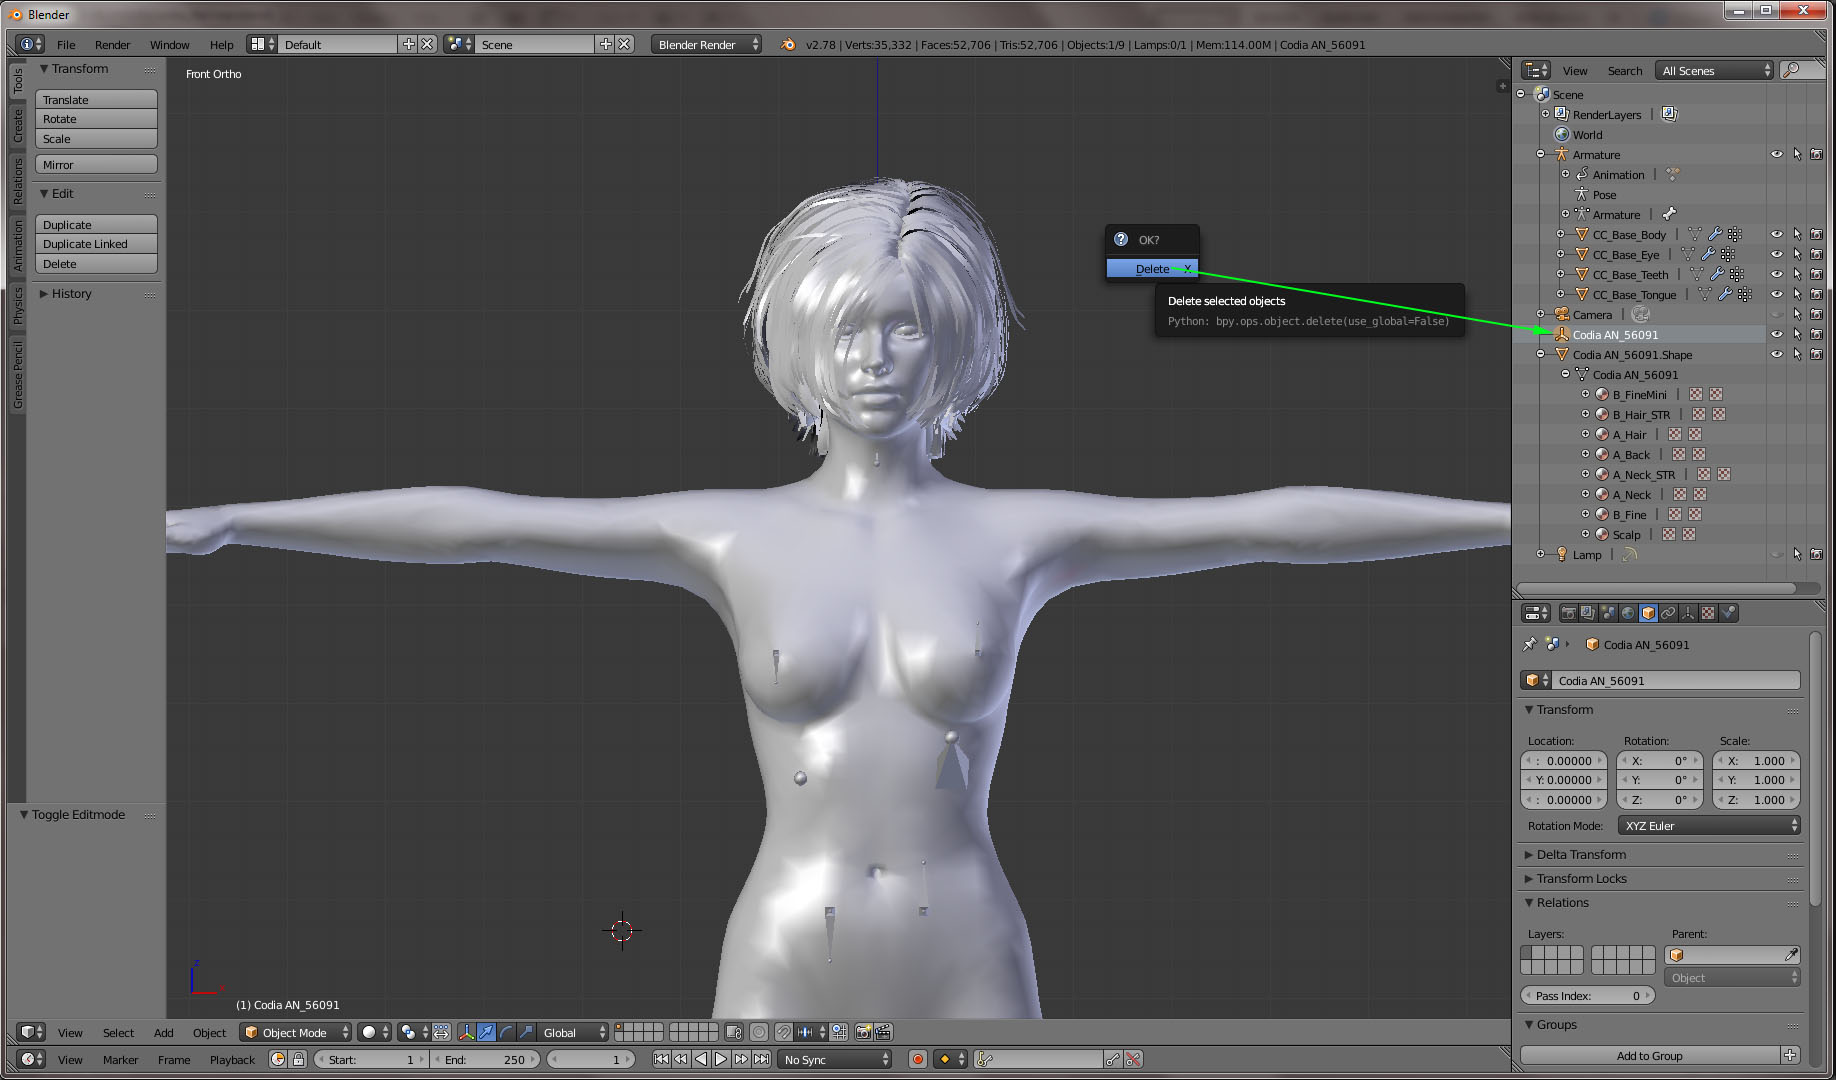
7. Finally delete orphan Empty object
8. Now lets work with materials and textures. You might have more, or less count of materials assigned to different hair strands.
The goal is to reduce number of materials to possible minimum (unless you have an idea to shade different parts of the hair differently).
It is done by consolidating materials of the same type (those have the same texture maps). You need to visually analyze and compare materials and texture map assigned to them.
In my case I figured I can reduce number of materials from 8 to 3. By visual comparison, I noticed that materials, those names start with A and B respectively have the same texture maps assigned.
Plus a unique material for the Base/Scalp mesh.
It is also possible to have just one material, but in that case a UV map would need to be recreated, which might be time consuming.
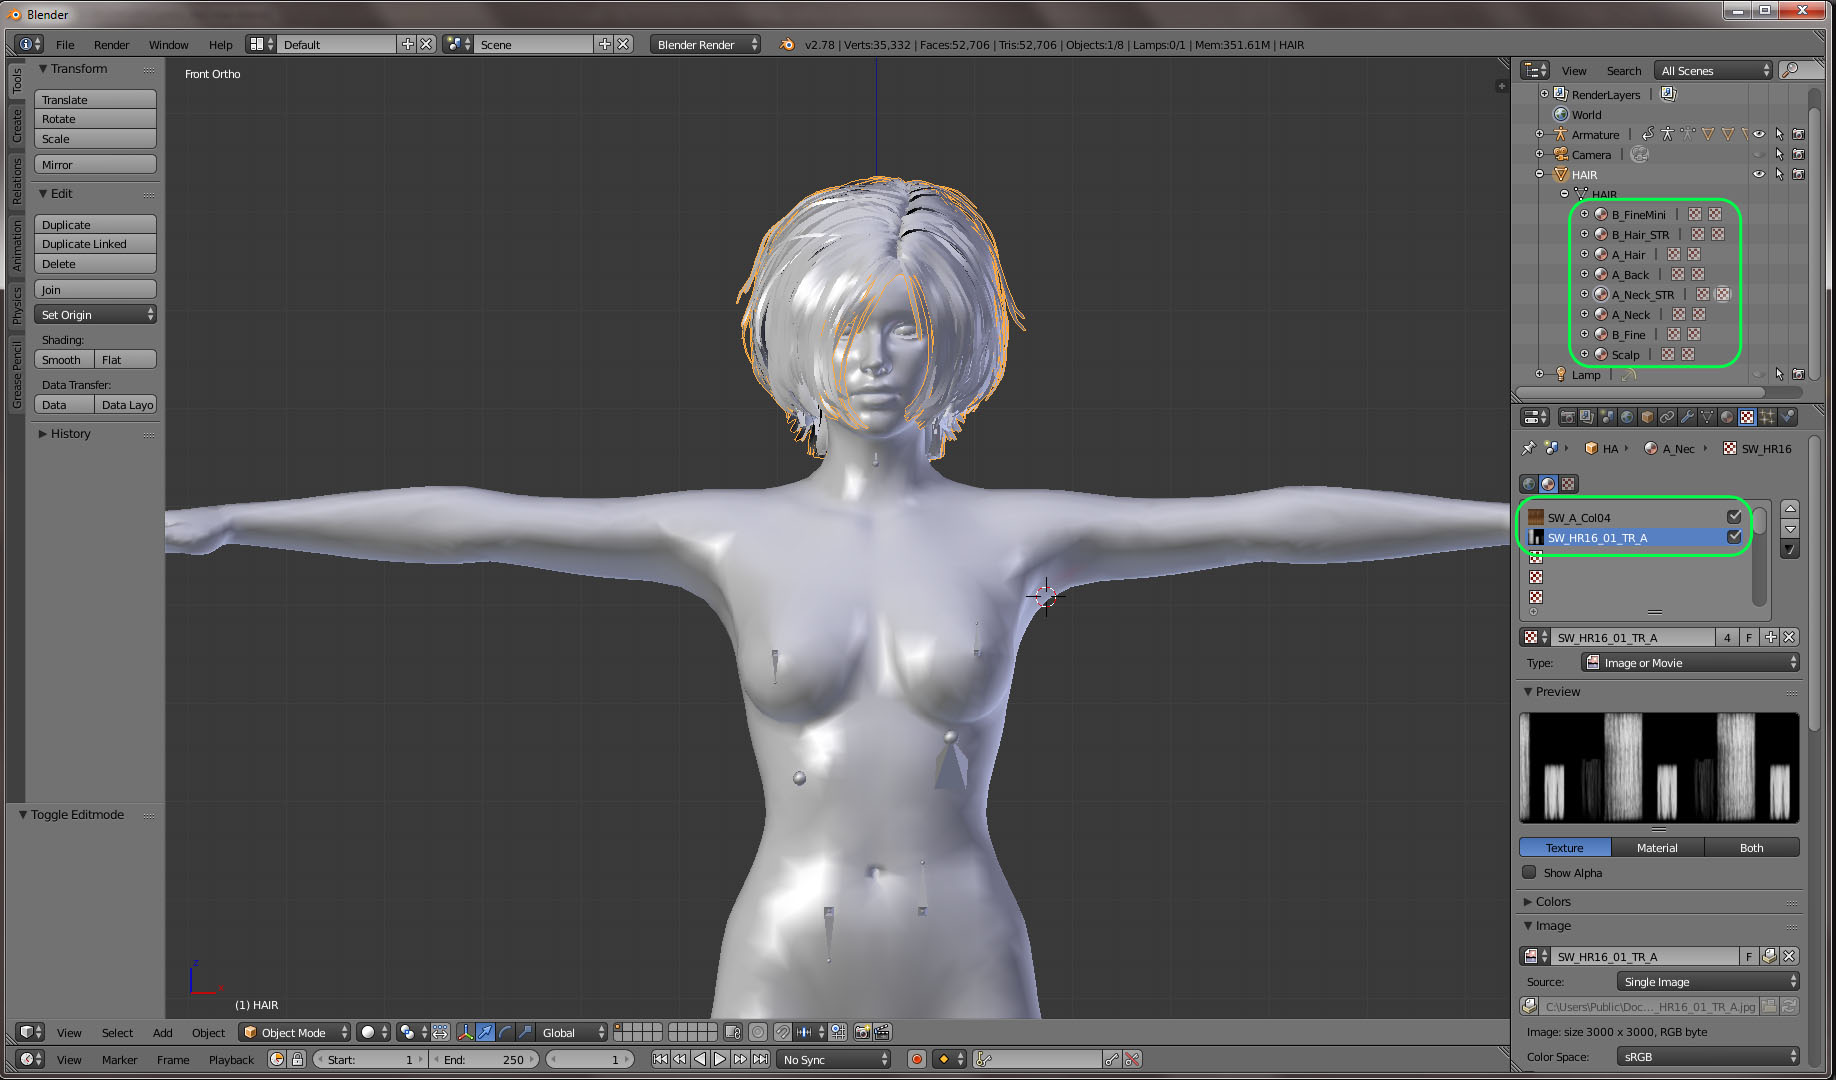
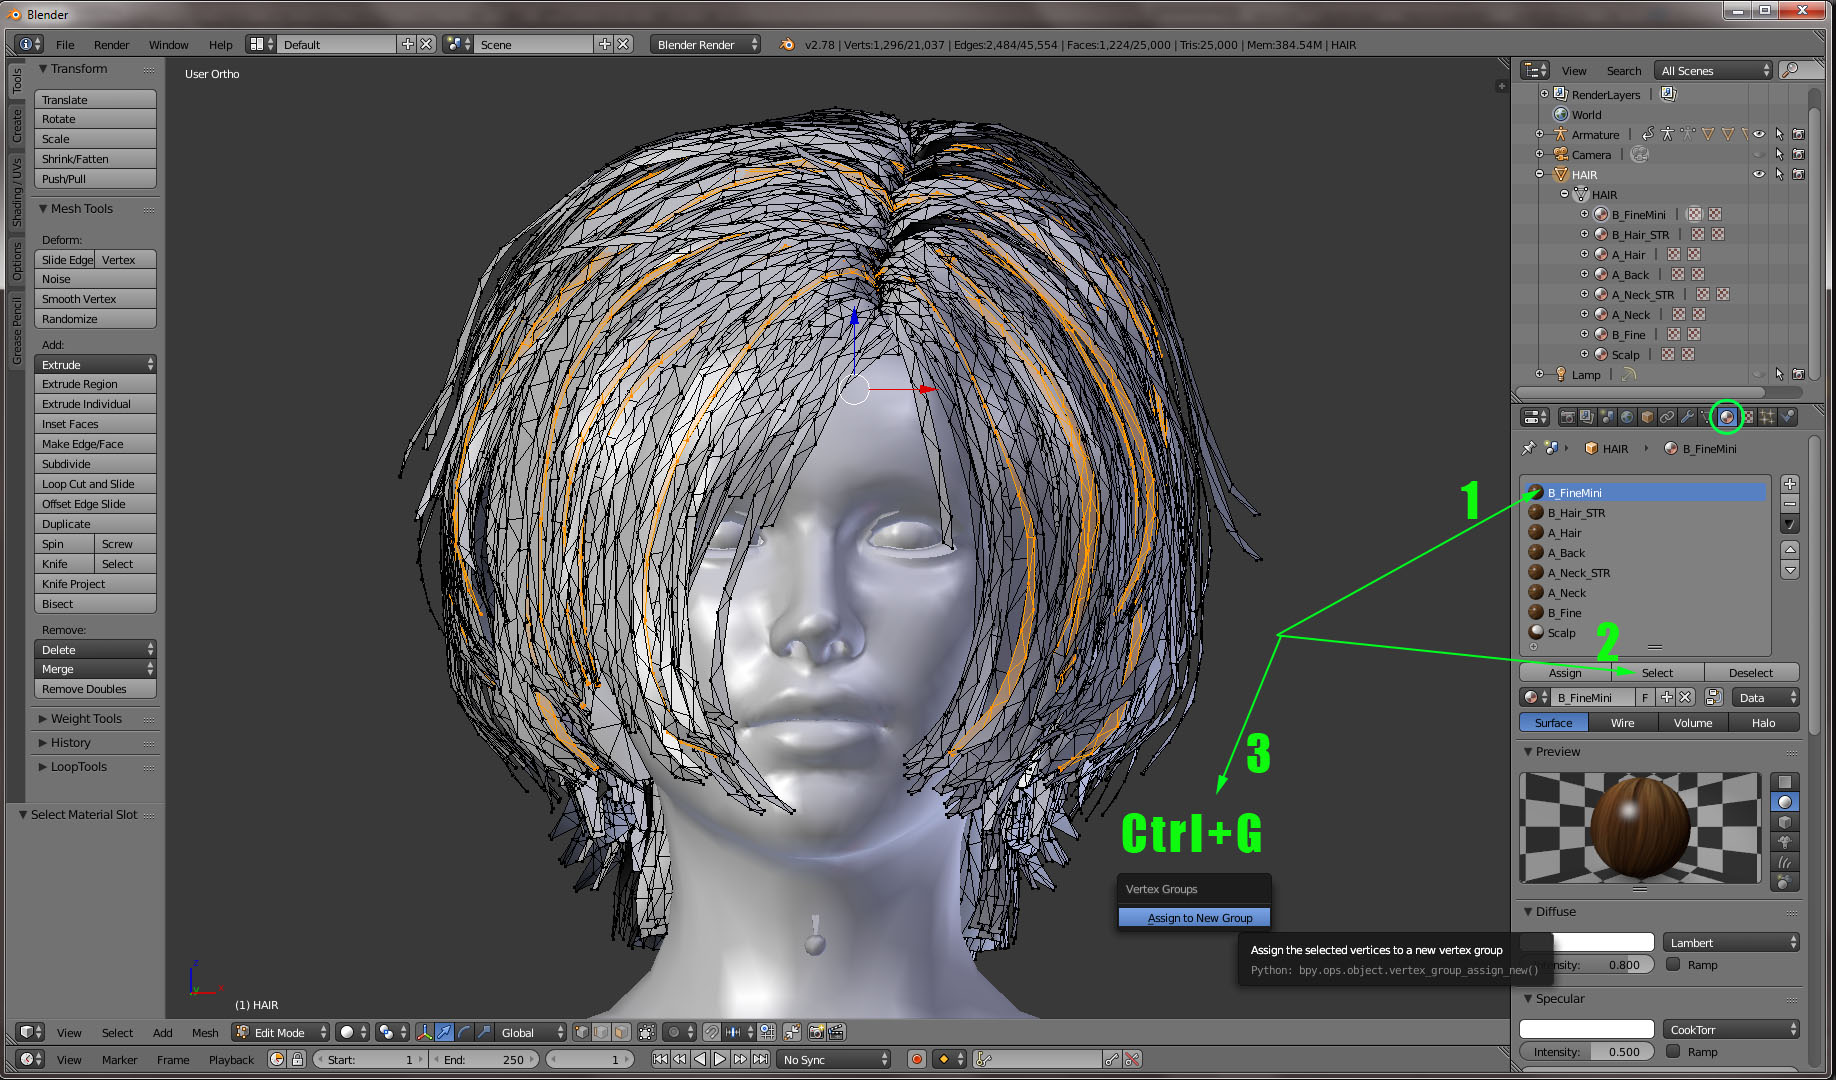
9. Before reducing number of materials, I prefer to save a current material-vertex reference as vertex groups.
This might be helpful in the future, when you need to identify a certain group of strands on a UV map.
So switch to Edit Mode. Make sure nothing is selected (hit A couple of times). Click on first material in the list, then click Select button.
All mesh strands associated with this material would be selected. Bring cursor to the stage, hit Ctrl+G and choose Assign to New Group.
Note: Save Blender project often. As any other software Blender crashes once in a while (though it has an excellent built-in last session and auto-save recovery tools)
