|
Author
|
Message
|
|
A3DArtist
|
A3DArtist
Posted Last Year
|
|
Group: Forum Members
Last Active: Last Year
Posts: 17,
Visits: 22
|
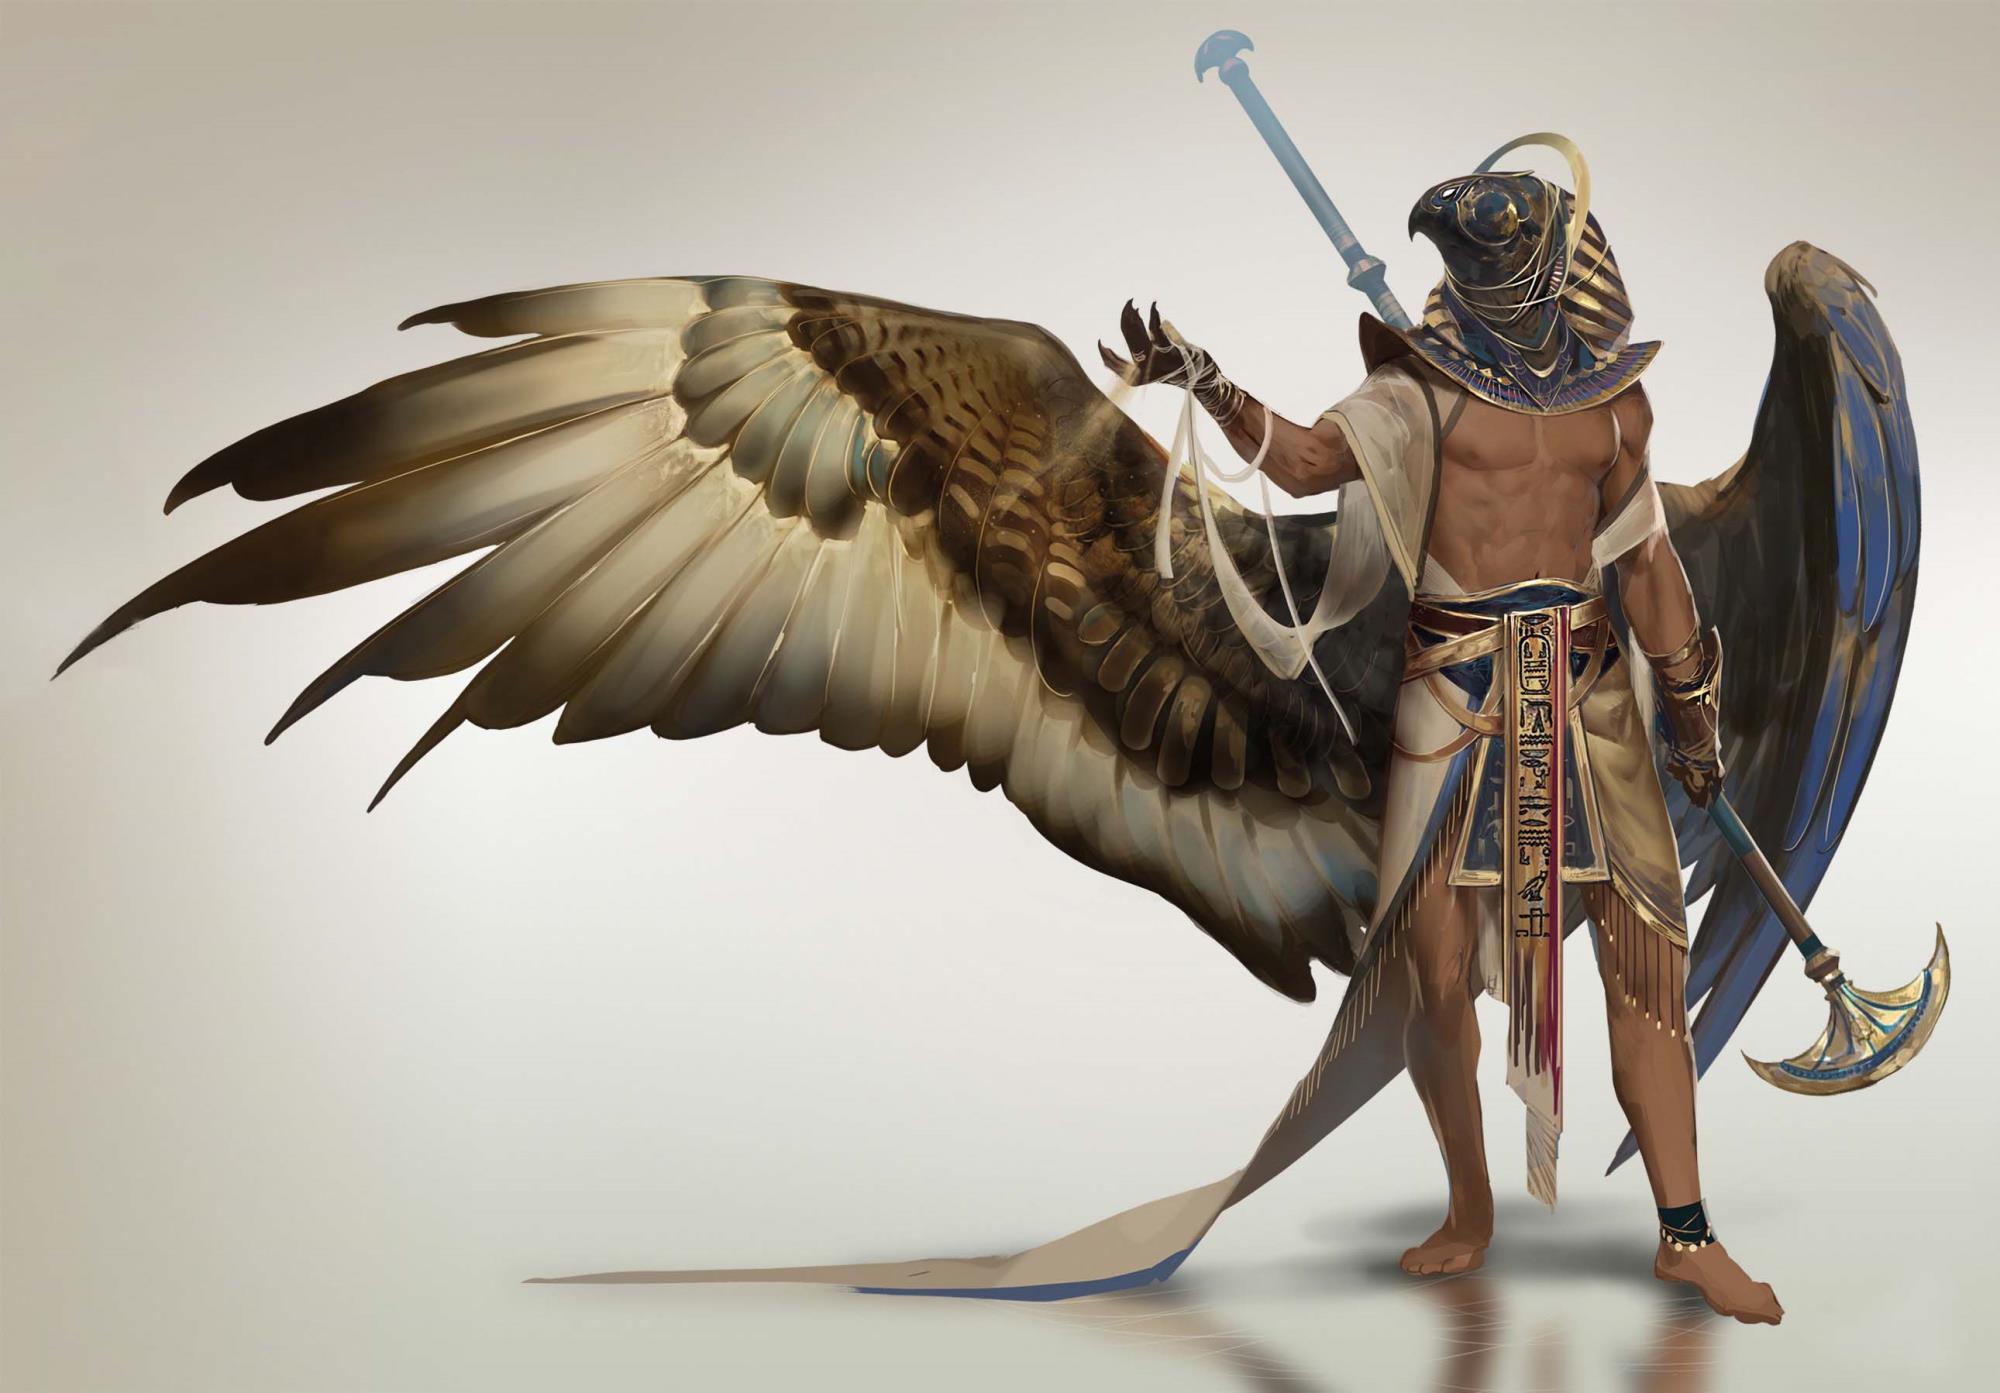 Hello everyone, new member here. saw this 2024 reillusion character creator contest and there is no better place to show your skill as a student. this complete software is new to me. Time is very few in hand, the desire to complete is strong. Hopefully to make the best and be the best in everyone. I decide to make this character name "Horus". this character based on Egyptian mythology. he is a God. i choose this character because it has perfect balance of everything from peripherals and anatomy. also i make a supportive character for this project later. all my work in progress images will be uploaded in here and artstation. this amazing character concept made by Gianlucca Rolli and i'm glad he permit me to create this in 3d. Wish me luck. Regards and Gd luck everyone.
|
|
|
|
|
A3DArtist
|
A3DArtist
Posted Last Year
|
|
Group: Forum Members
Last Active: Last Year
Posts: 17,
Visits: 22
|
Create my desire base mesh in cc4 to start. Primary blockout uploaded soon. then i will move to secondary details. 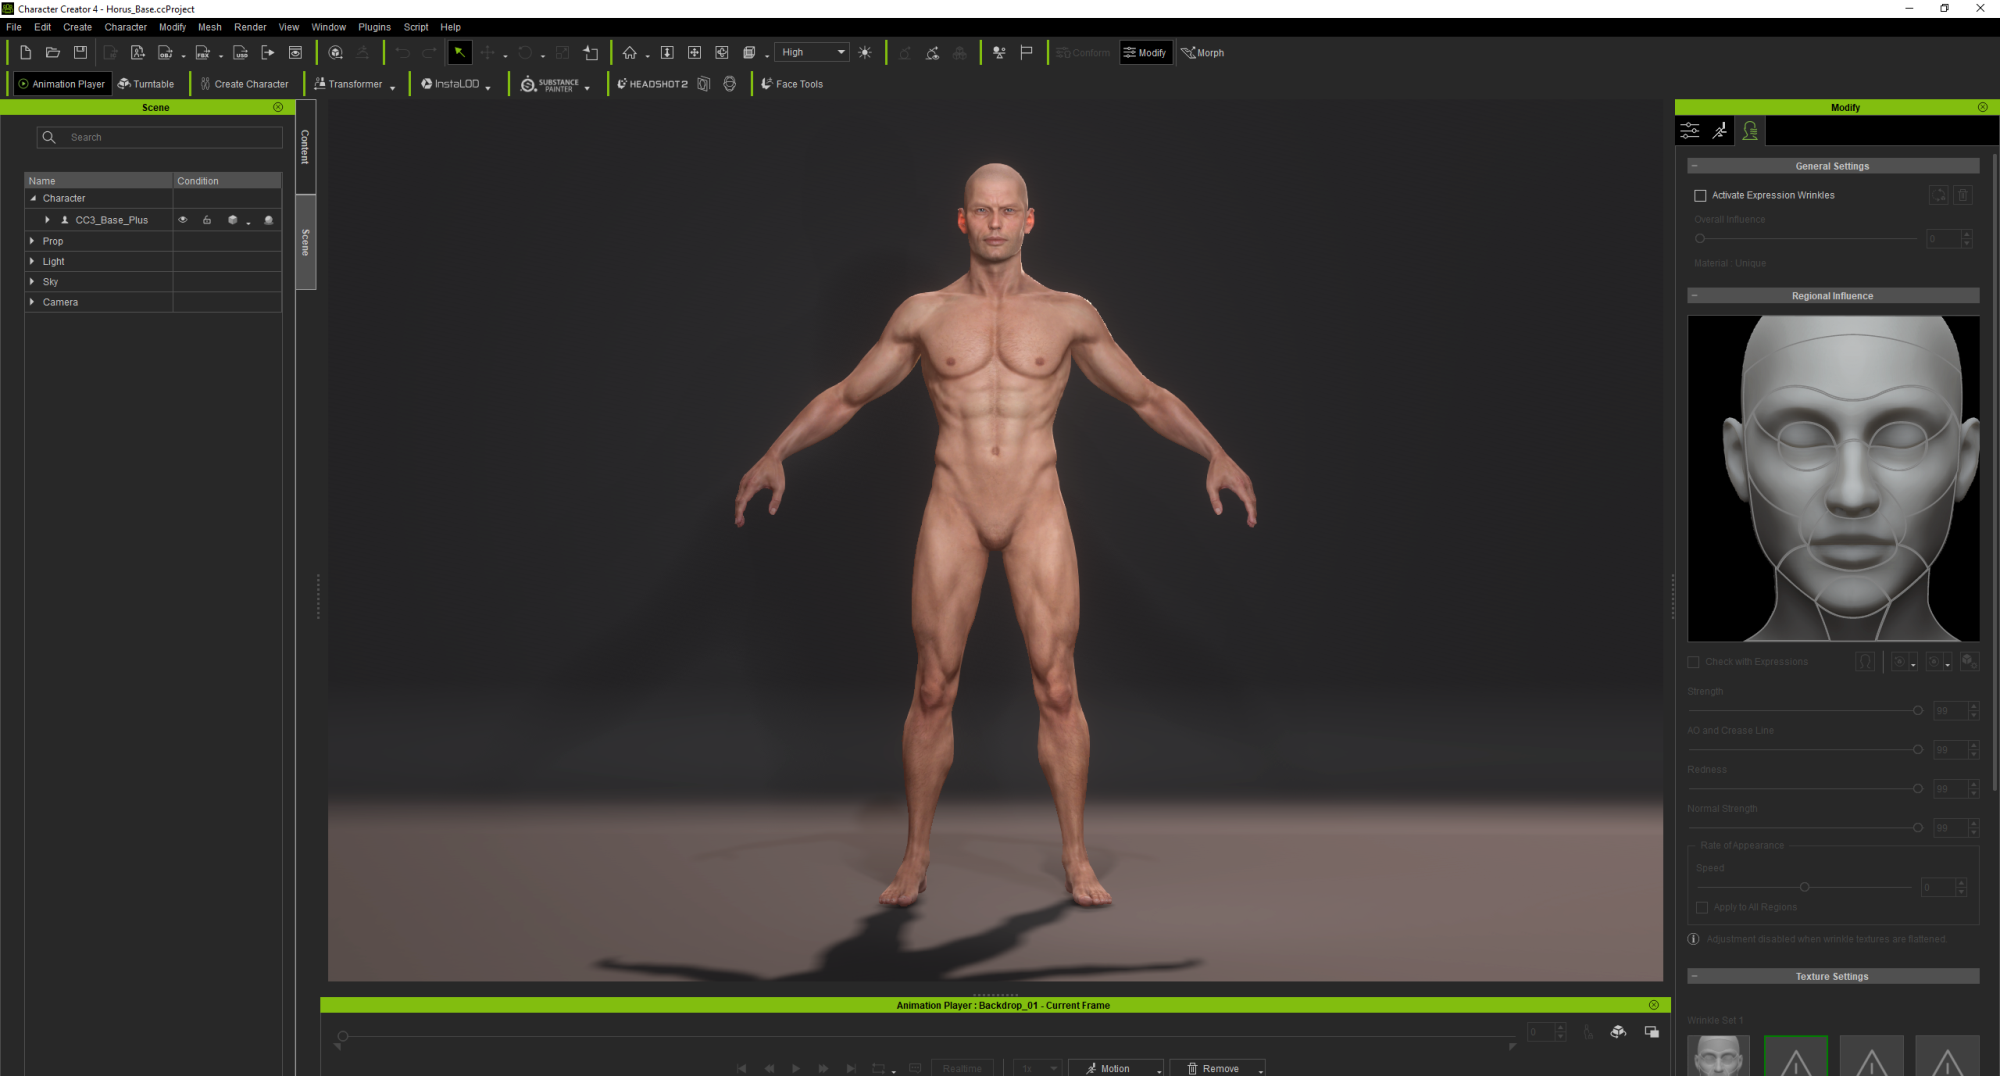
|
|
|
|
|
A3DArtist
|
A3DArtist
Posted Last Year
|
|
Group: Forum Members
Last Active: Last Year
Posts: 17,
Visits: 22
|
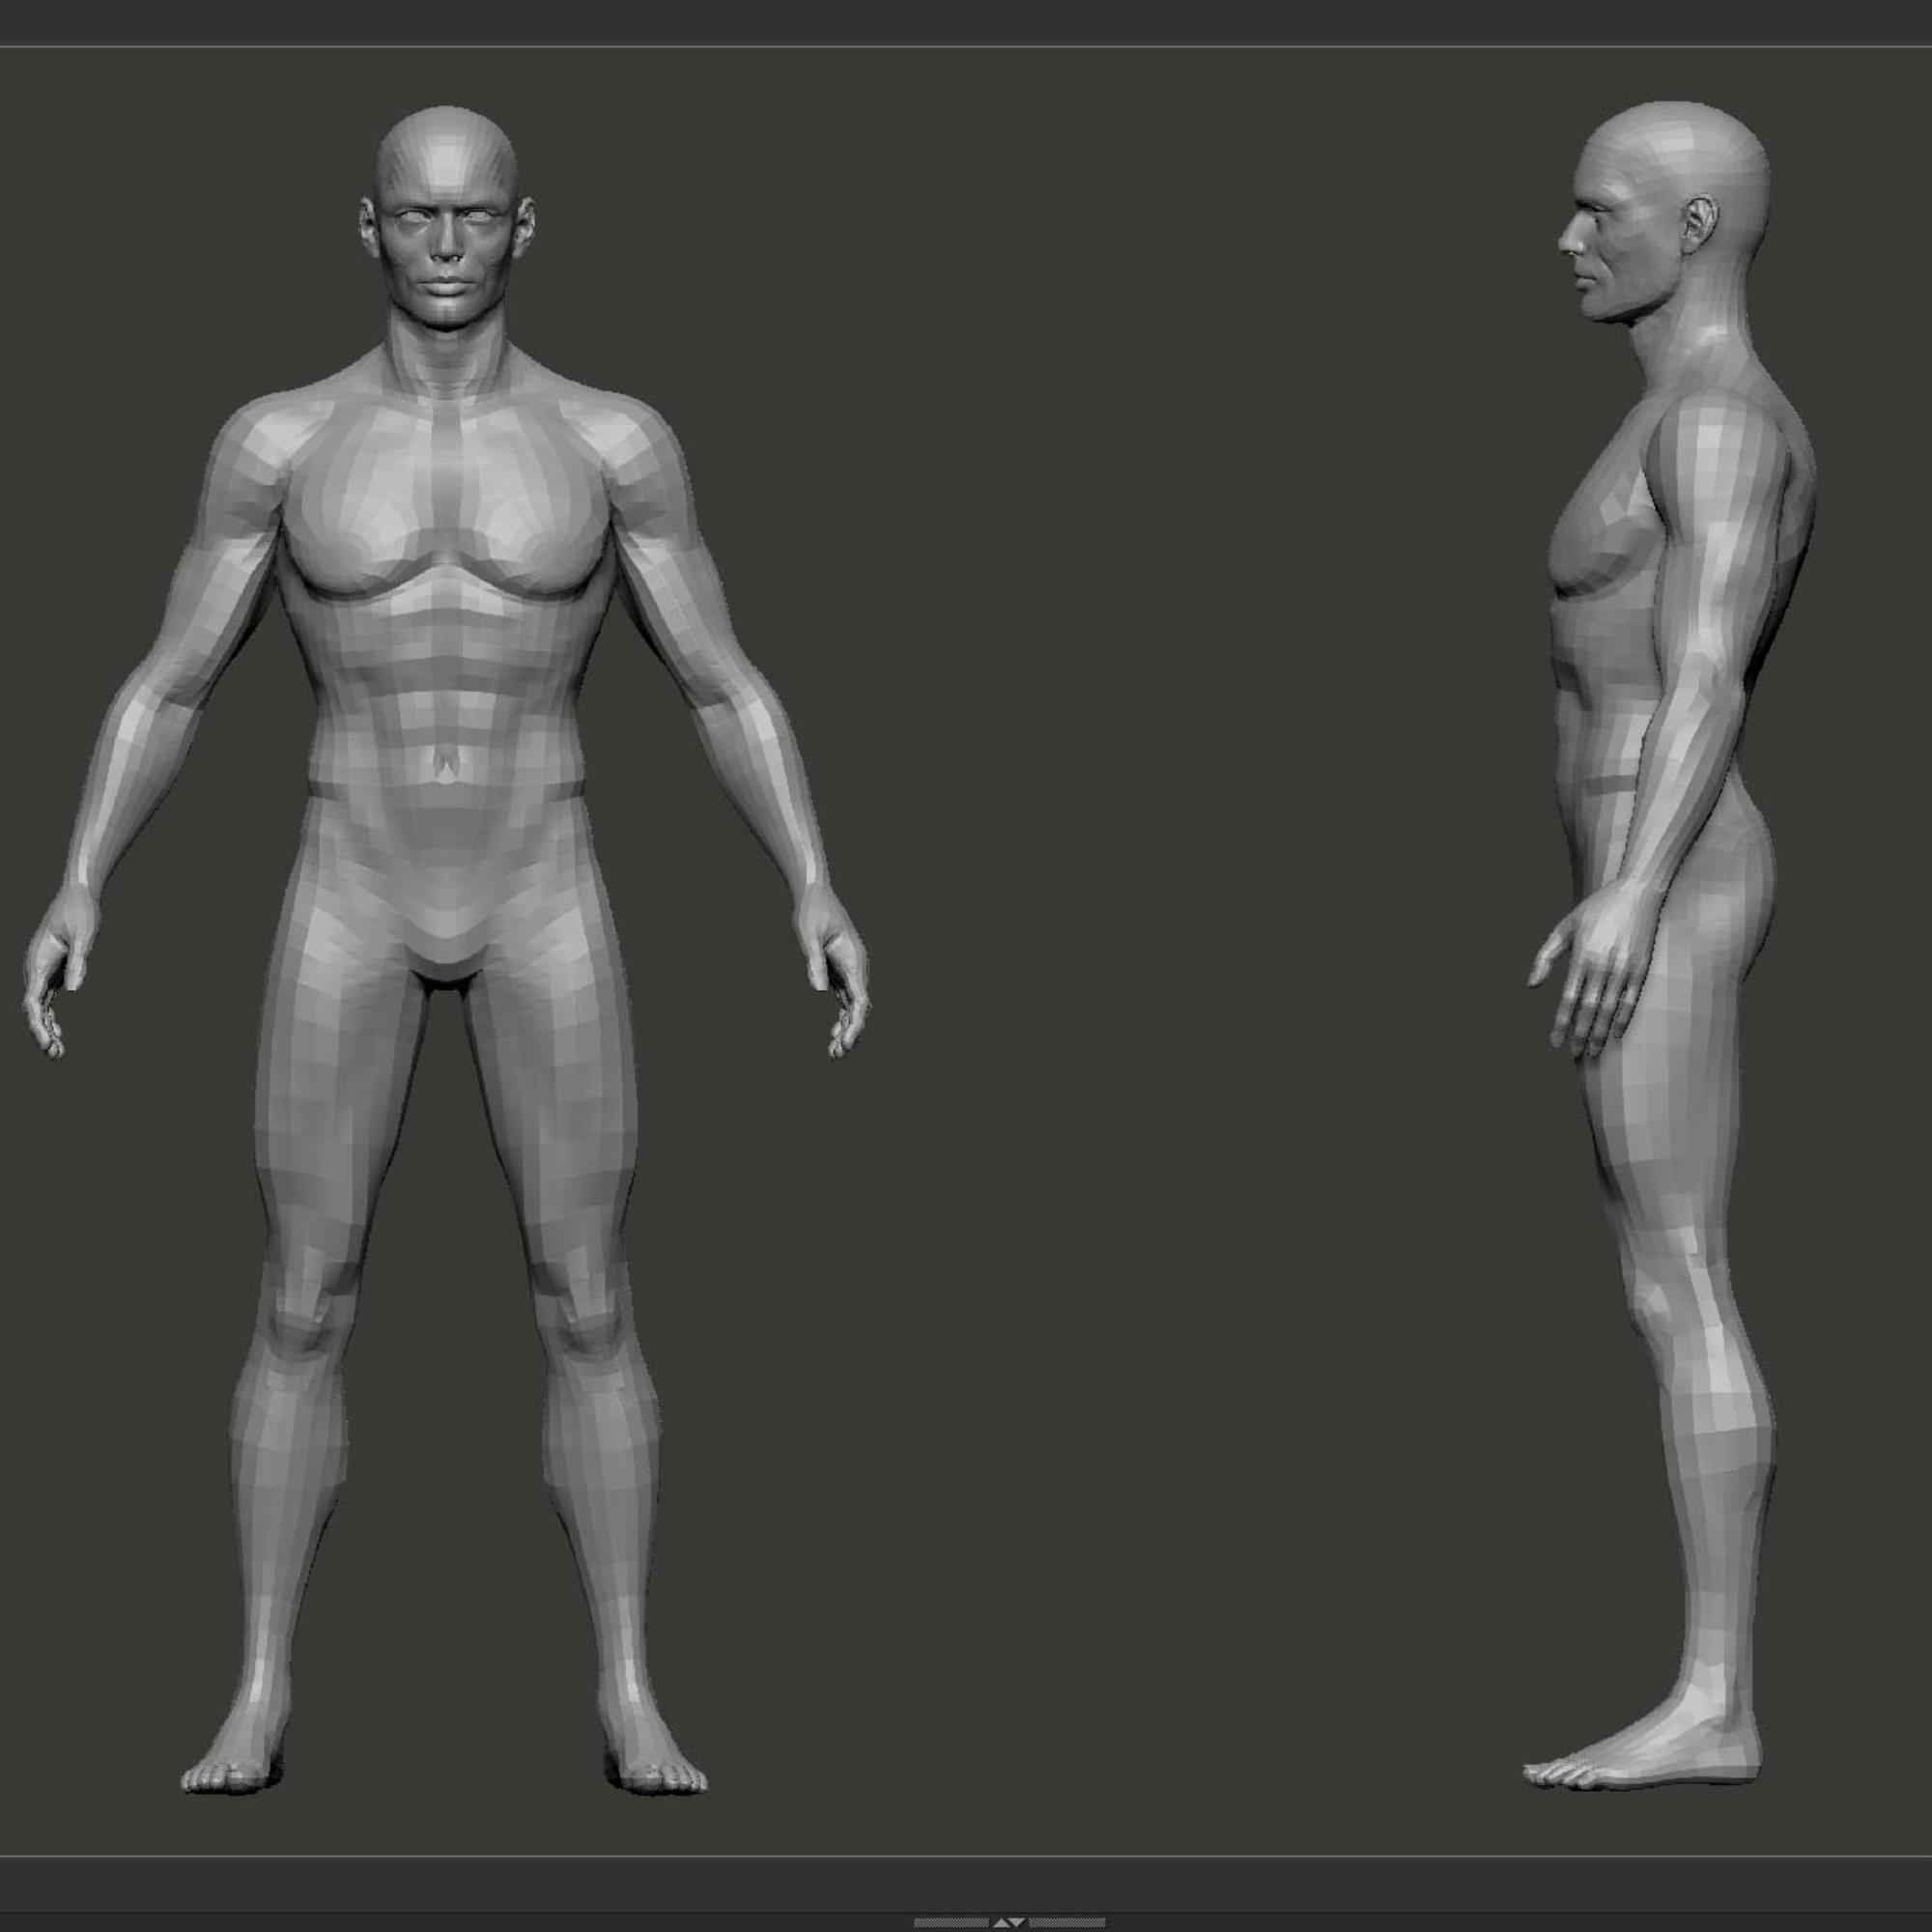 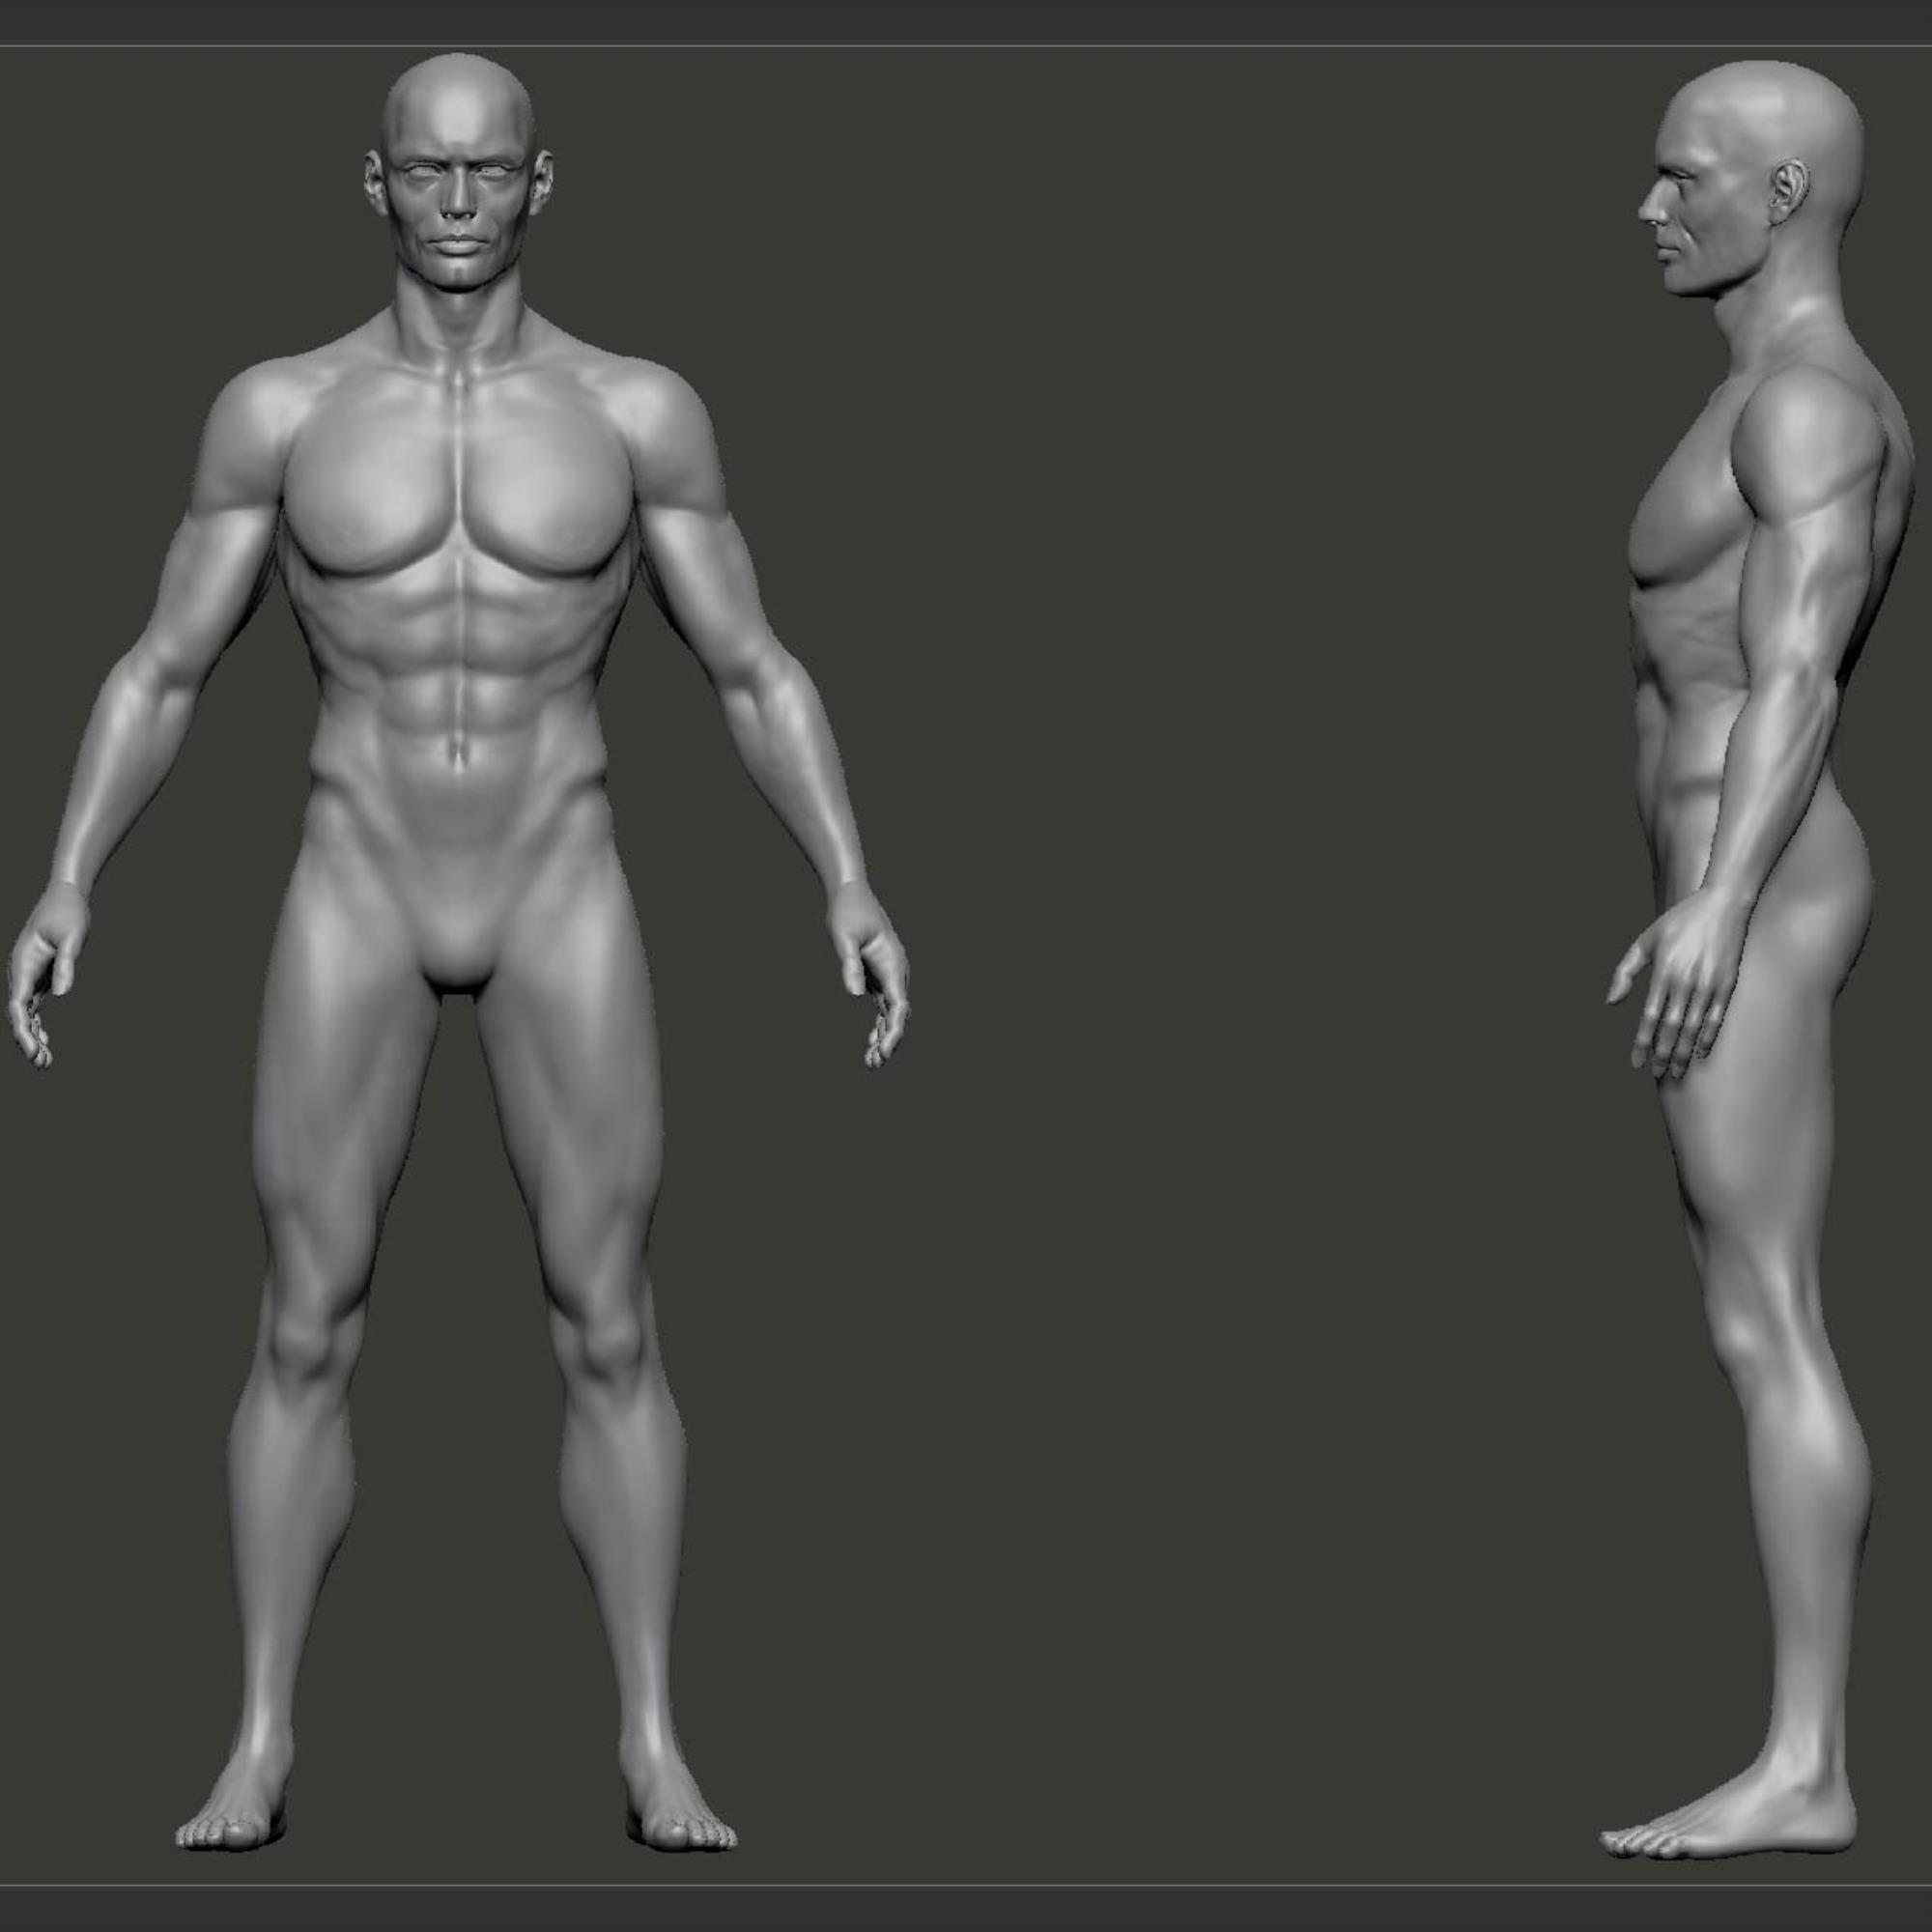 My progression after 2 weeks. from choose a CC base character to almost complete high poly character. After exporting from CC4 i started working on zbrush. Add some divisions (6) to the mesh and give a good primary and secondary details. after i reach my desire result i started blocking the Ornaments, Clothing and Accessories.
|
|
|
|
|
A3DArtist
|
A3DArtist
Posted Last Year
|
|
Group: Forum Members
Last Active: Last Year
Posts: 17,
Visits: 22
|
After completing the secondary details on body I move to eagle head creation. this is a hard surface object. so I started with a simple cylinder. then with the help of deformers give it a desire shape of eagle head. then add some division a sculpted some area with damstandard brush to create the blockout 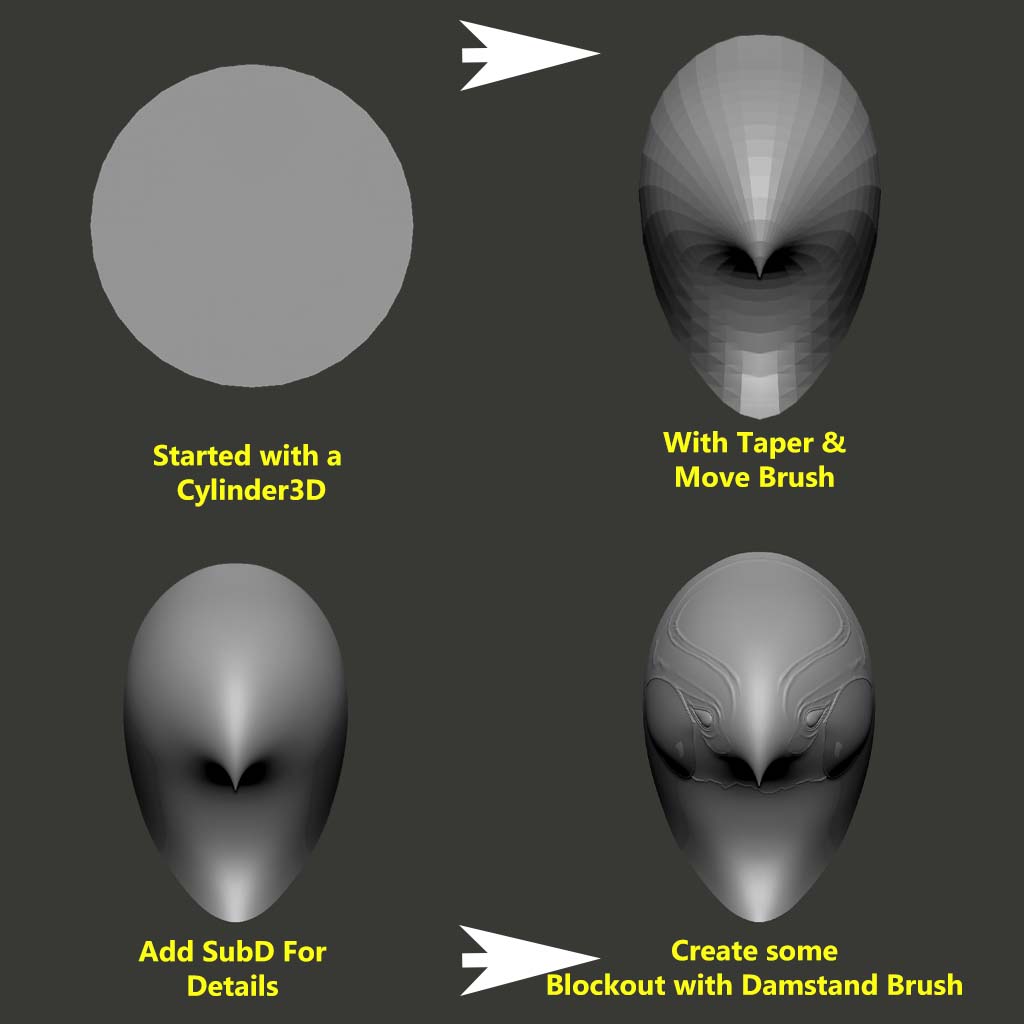
|
|
|
|
|
A3DArtist
|
A3DArtist
Posted Last Year
|
|
Group: Forum Members
Last Active: Last Year
Posts: 17,
Visits: 22
|
For the Eagle head detailing i started extracting and clean up the geometry for low topo and smooth surface. after that i added more ornament details with curvetubesnap brush, ring and cylinder primitives. 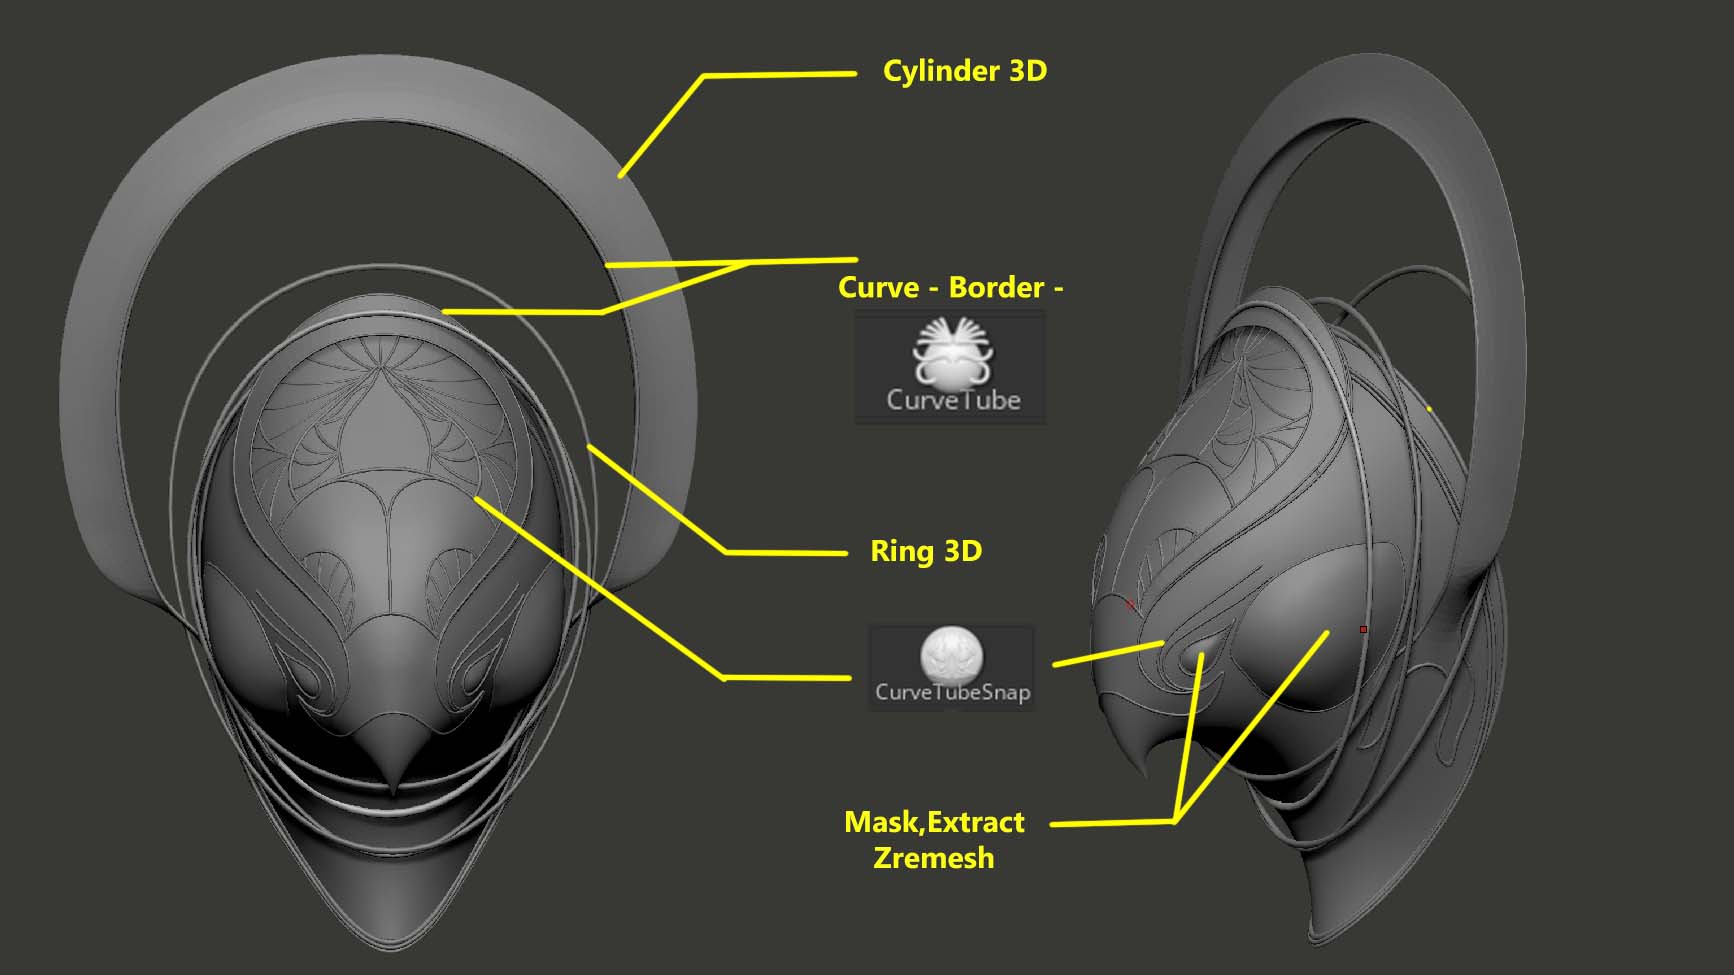 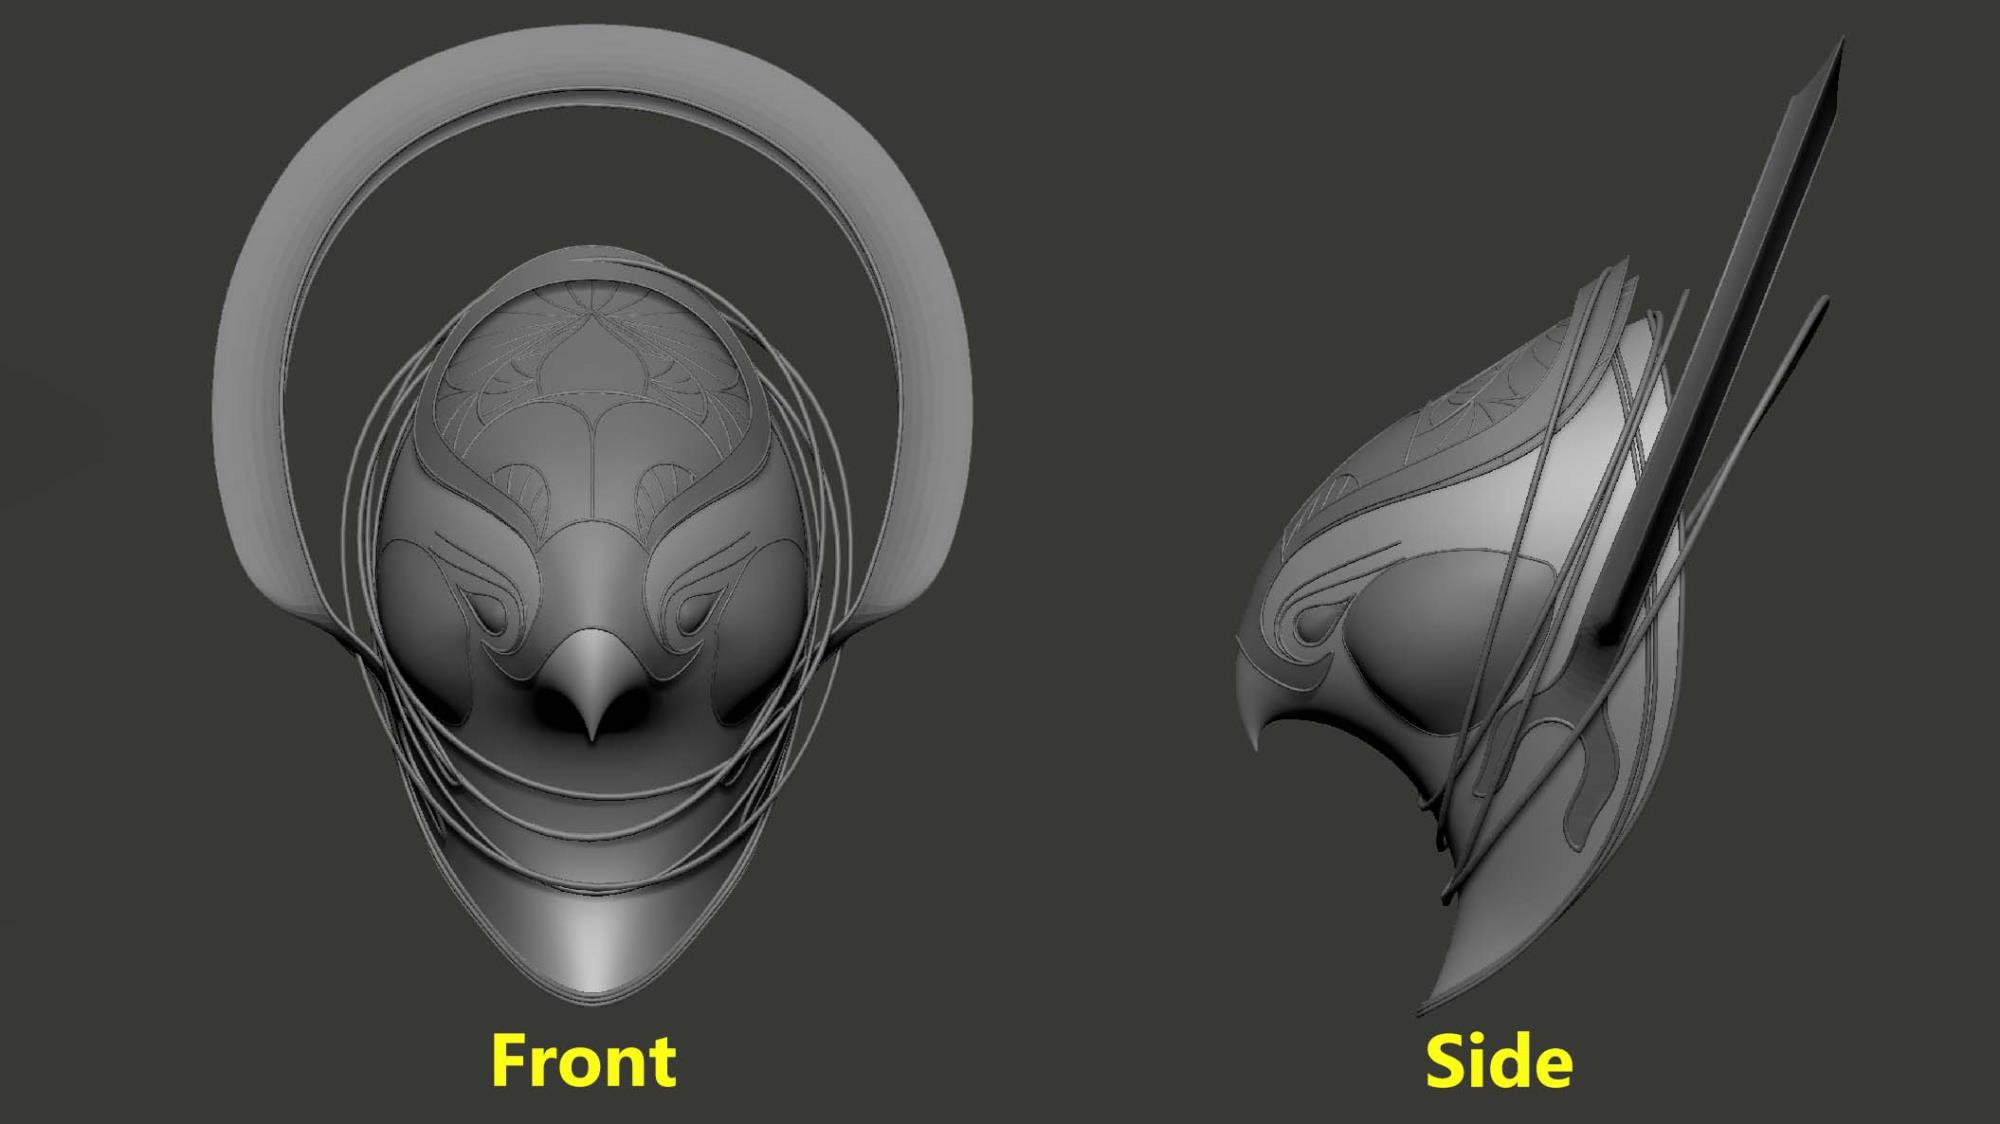
|
|
|
|
|
A3DArtist
|
A3DArtist
Posted Last Year
|
|
Group: Forum Members
Last Active: Last Year
Posts: 17,
Visits: 22
|
Then i moved to the neck ornament. Always in starting i try to figure out what is the simple shape of the whole geometry. for the starting point i choose a cylinder. then give it a nice shape according to the shoulder and neck. as its a hard surface object i add 2 division for smoothness then started the detailing. assign multiple polygroups and extrude from the surface to gain crystal look. for the small diamond like crystal i create a simple mesh > turn that into a nanomesh >create a copy of neck base mesh > assign poly loop into desired area > assign a polygroup > select zmodeler brush> nanomesh > drag brush on to the polygroup to get the desired result. For braided brush i pick a custom imm braid brush >create a copy of neck base mesh > assign poly loop into desired area > assign a polygroup > select polygroup mesh border> Imm brush curve on > tap on the border > adjust brush size to get the desired result. For the small area i need to scatter some meshes, with the help of micropoly and dynamic subd i create that details. have a look into the image for better understanding. 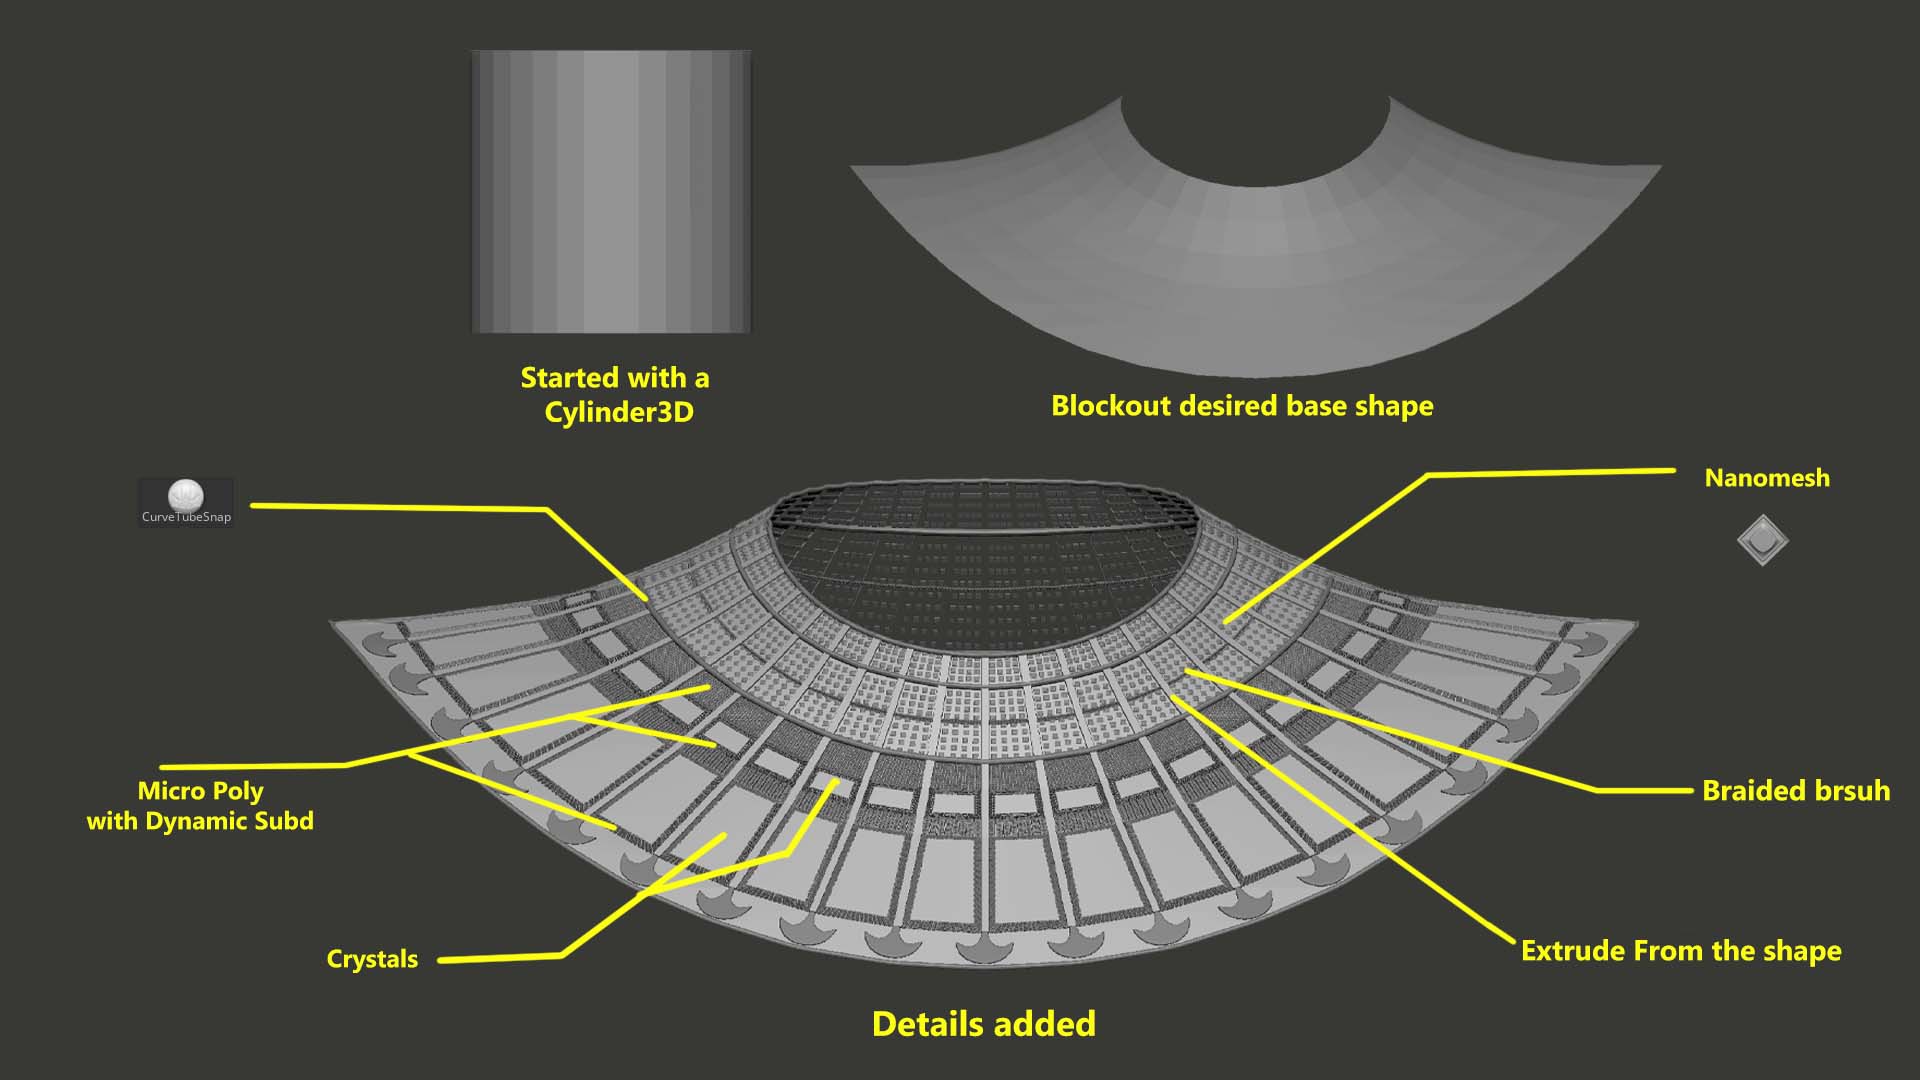 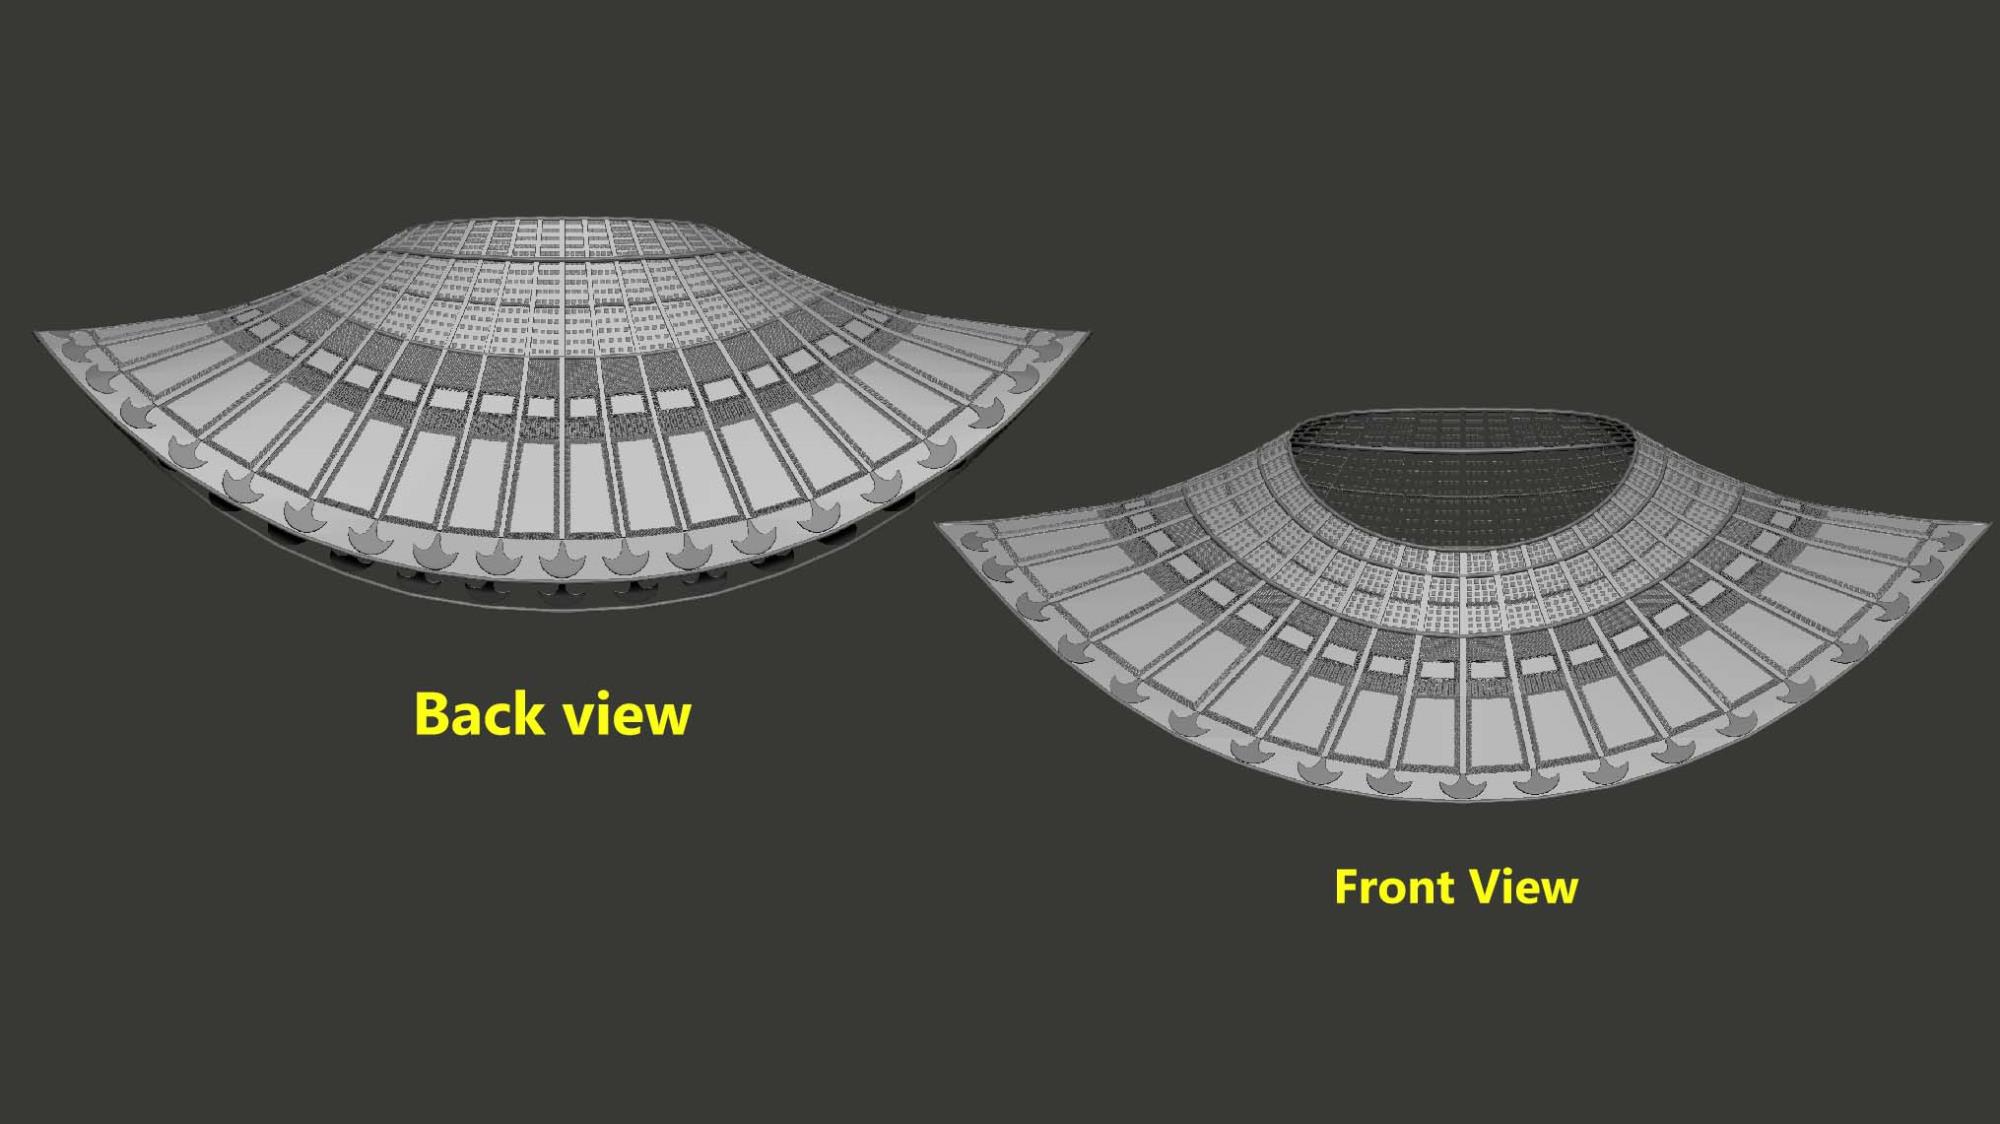
|
|
|
|
|
A3DArtist
|
A3DArtist
Posted Last Year
|
|
Group: Forum Members
Last Active: Last Year
Posts: 17,
Visits: 22
|
Follow the same steps as neck ornament to create this back side ornaments 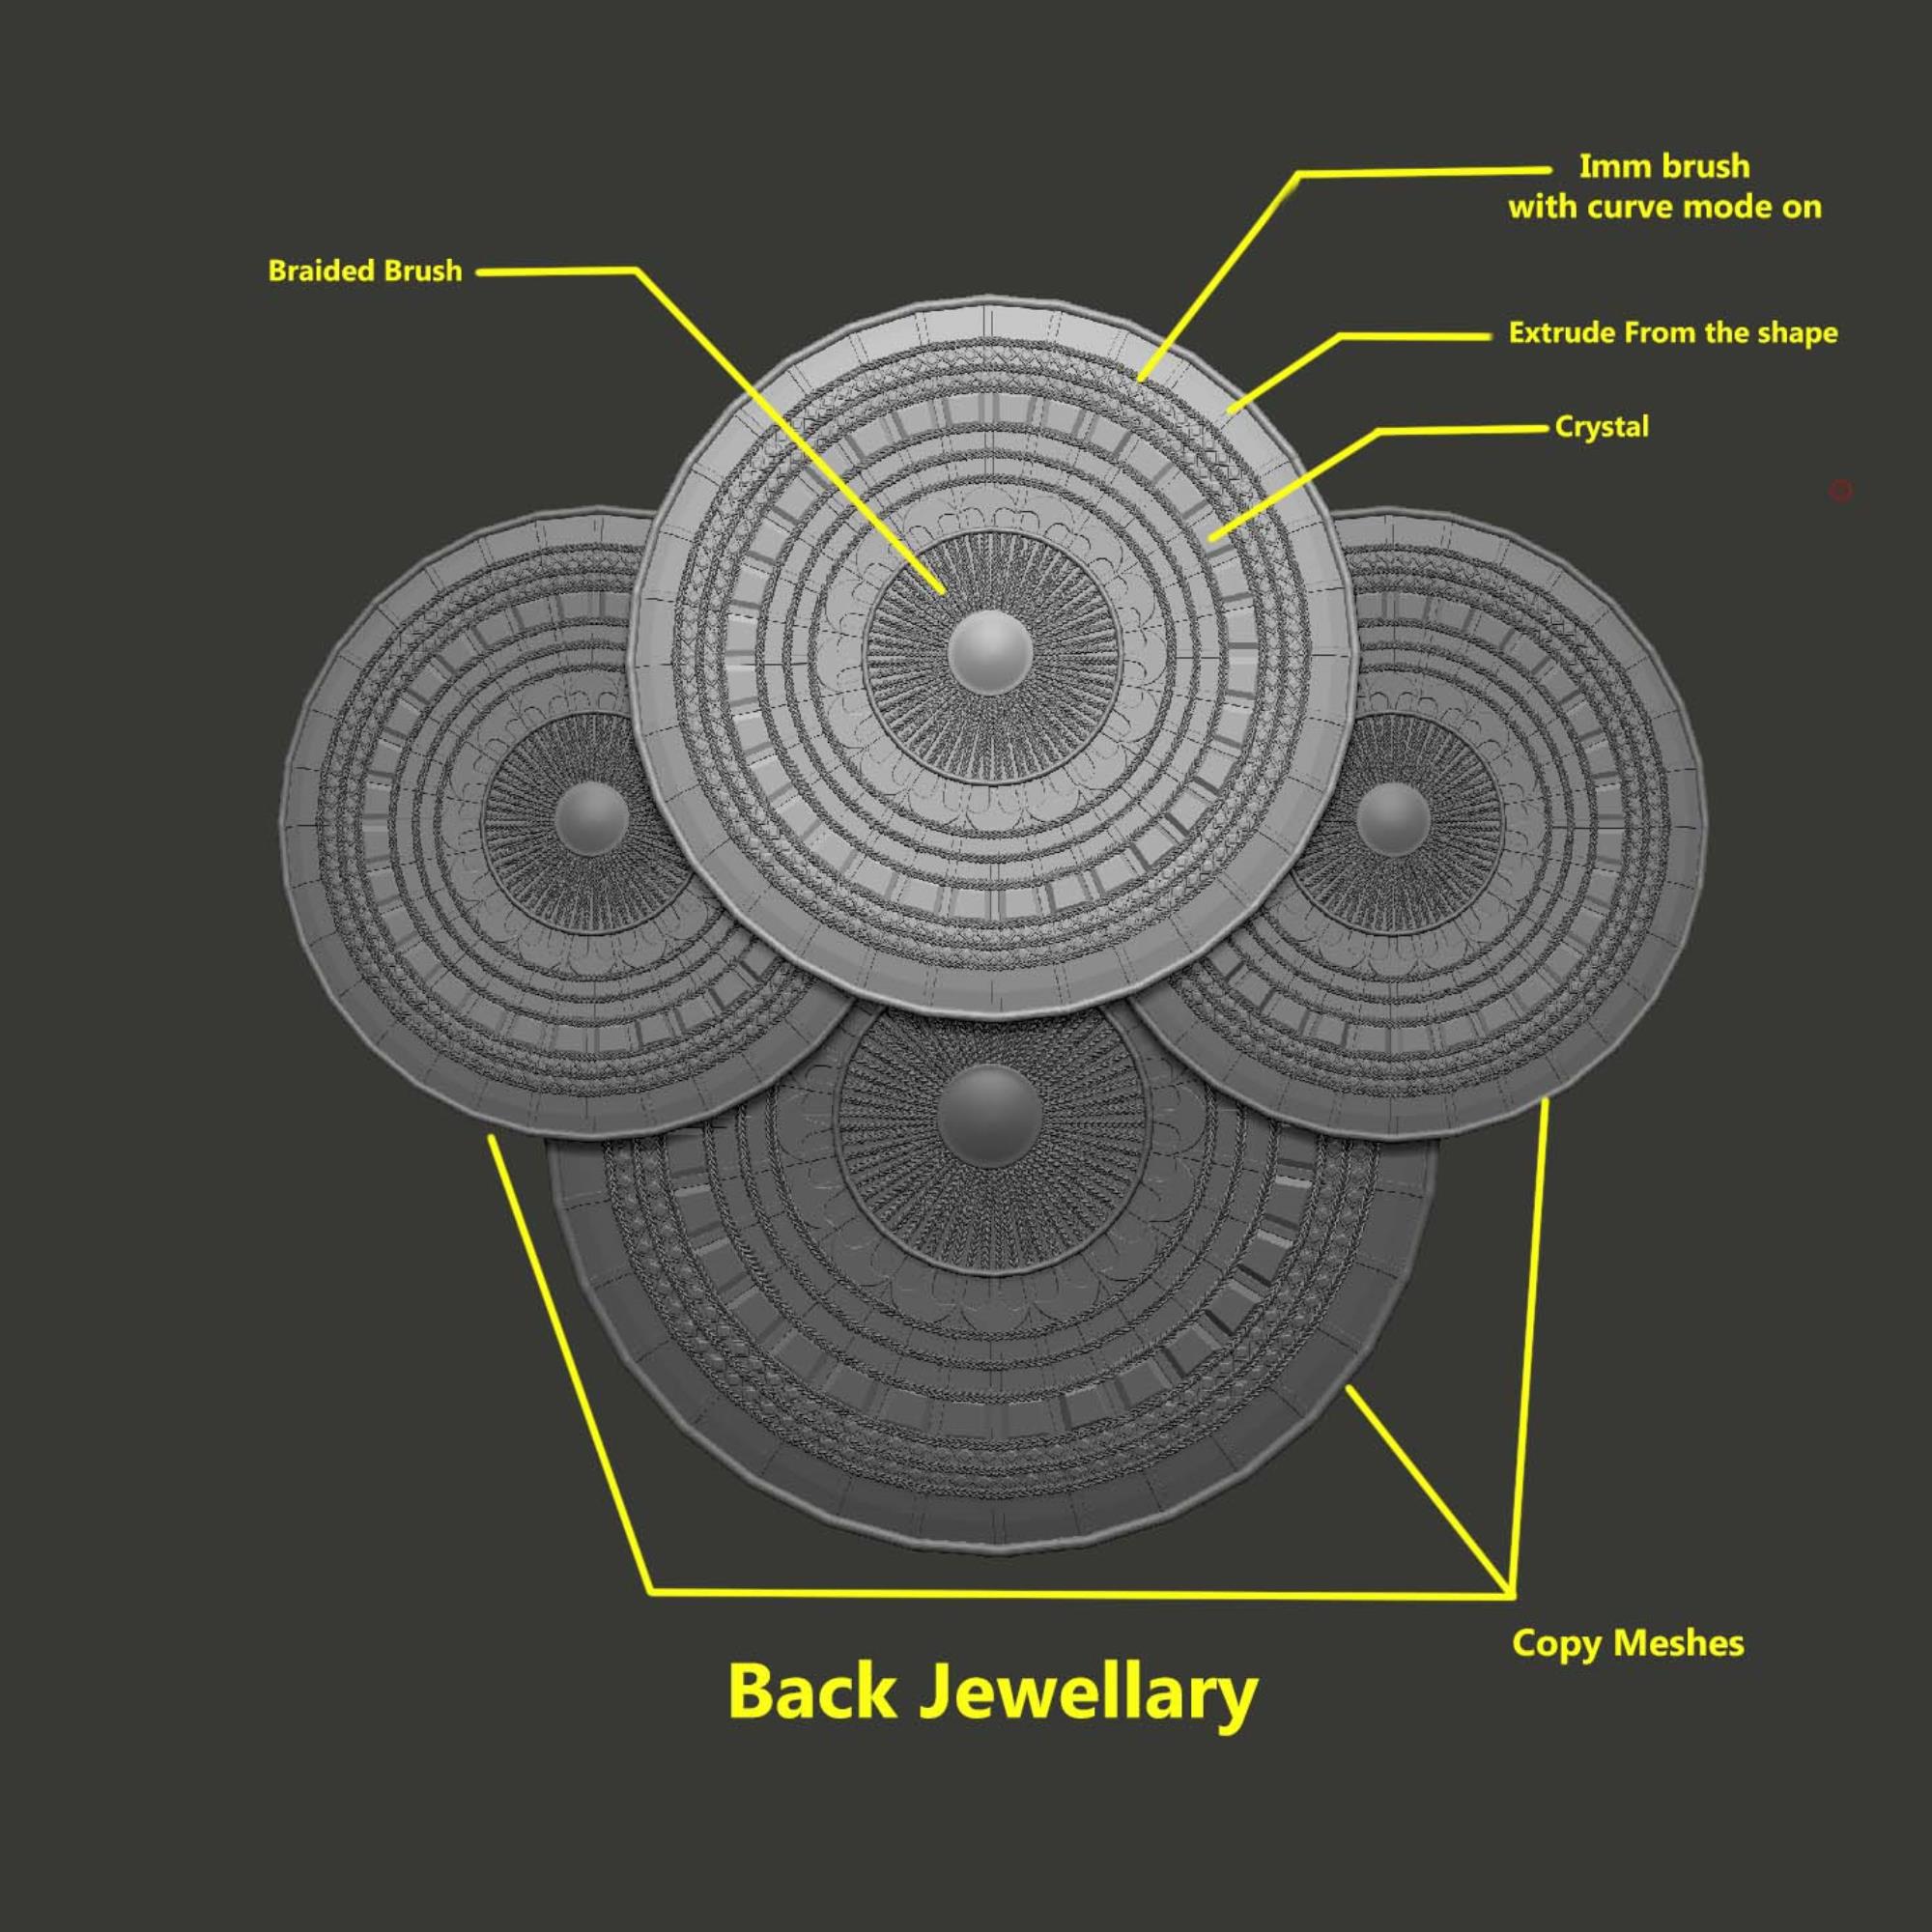 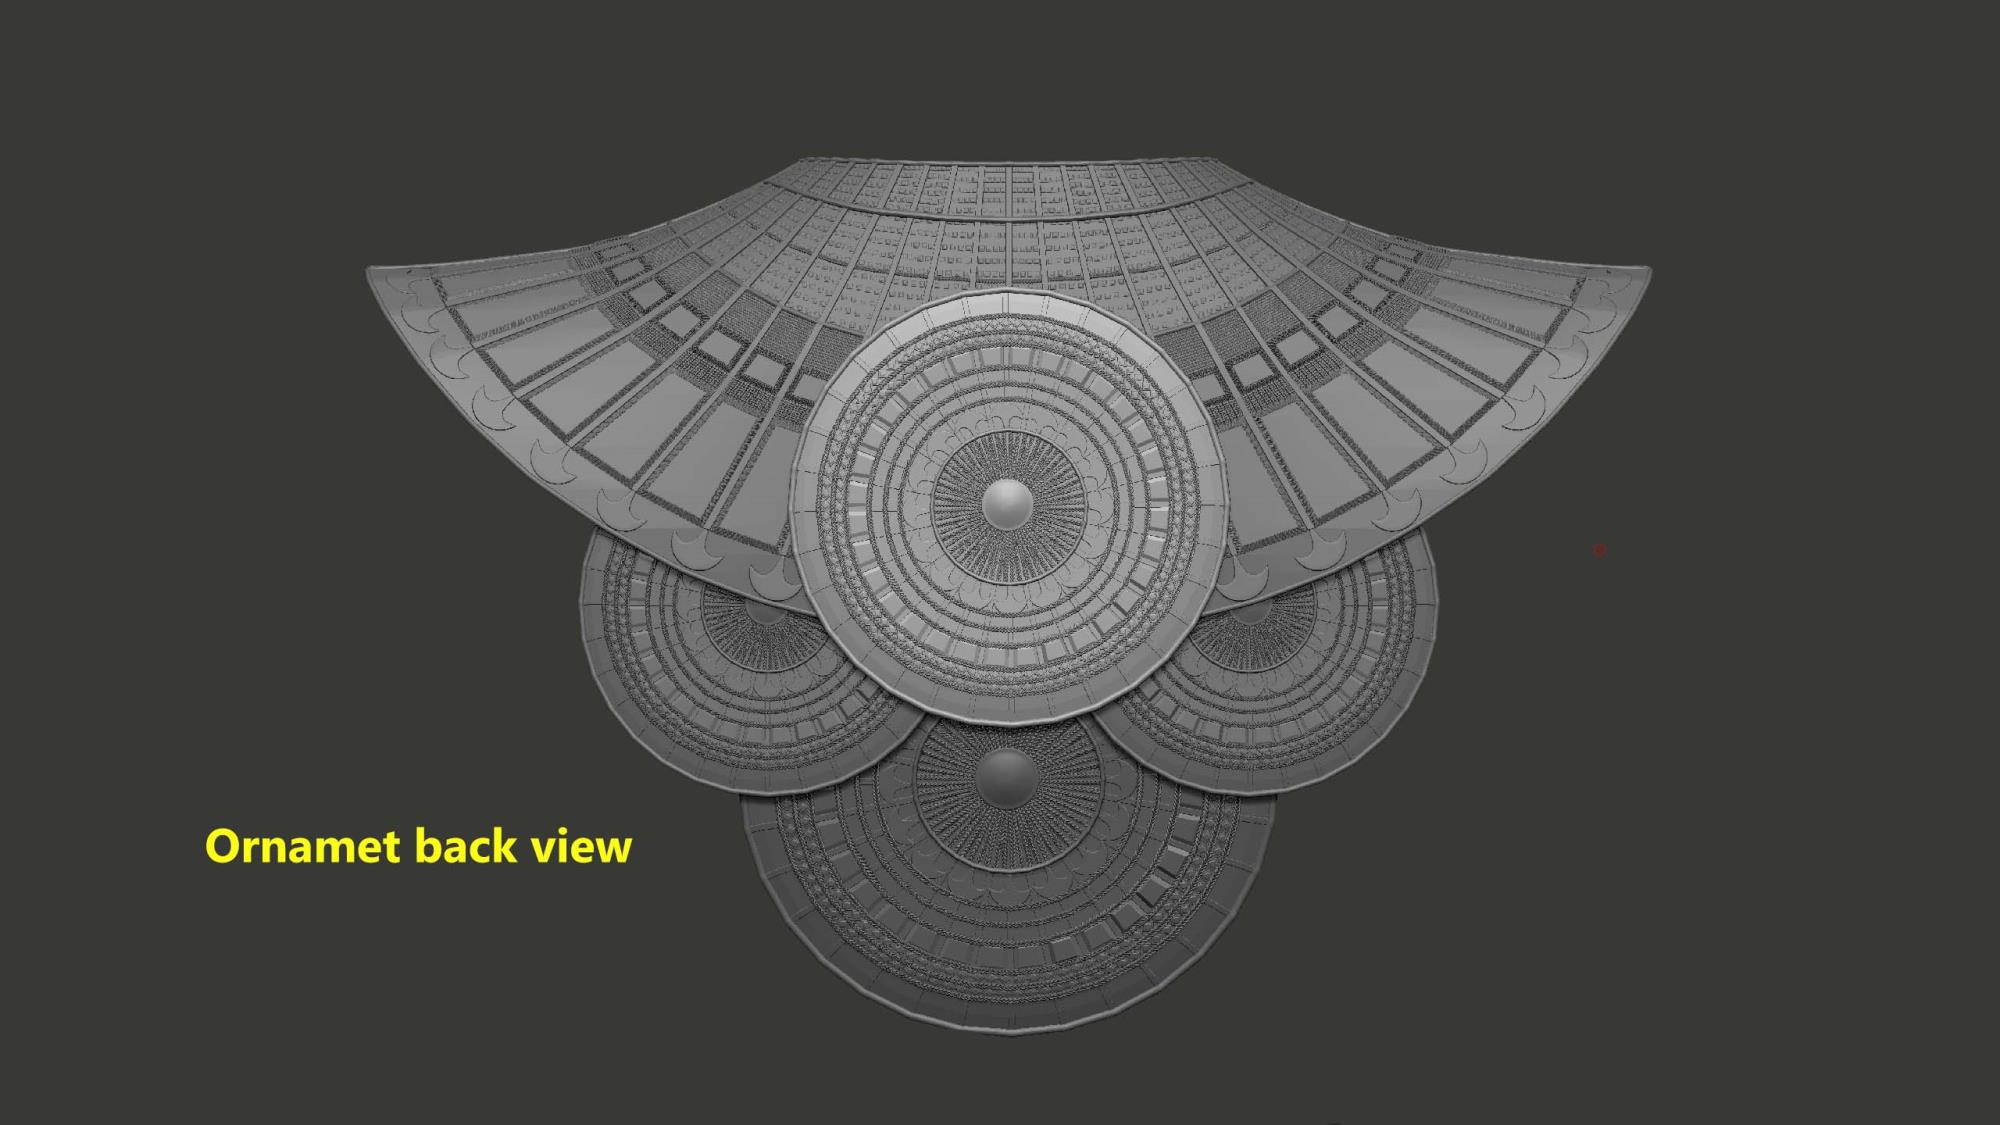
|
|
|
|
|
A3DArtist
|
A3DArtist
Posted Last Year
|
|
Group: Forum Members
Last Active: Last Year
Posts: 17,
Visits: 22
|
Complete Head View. 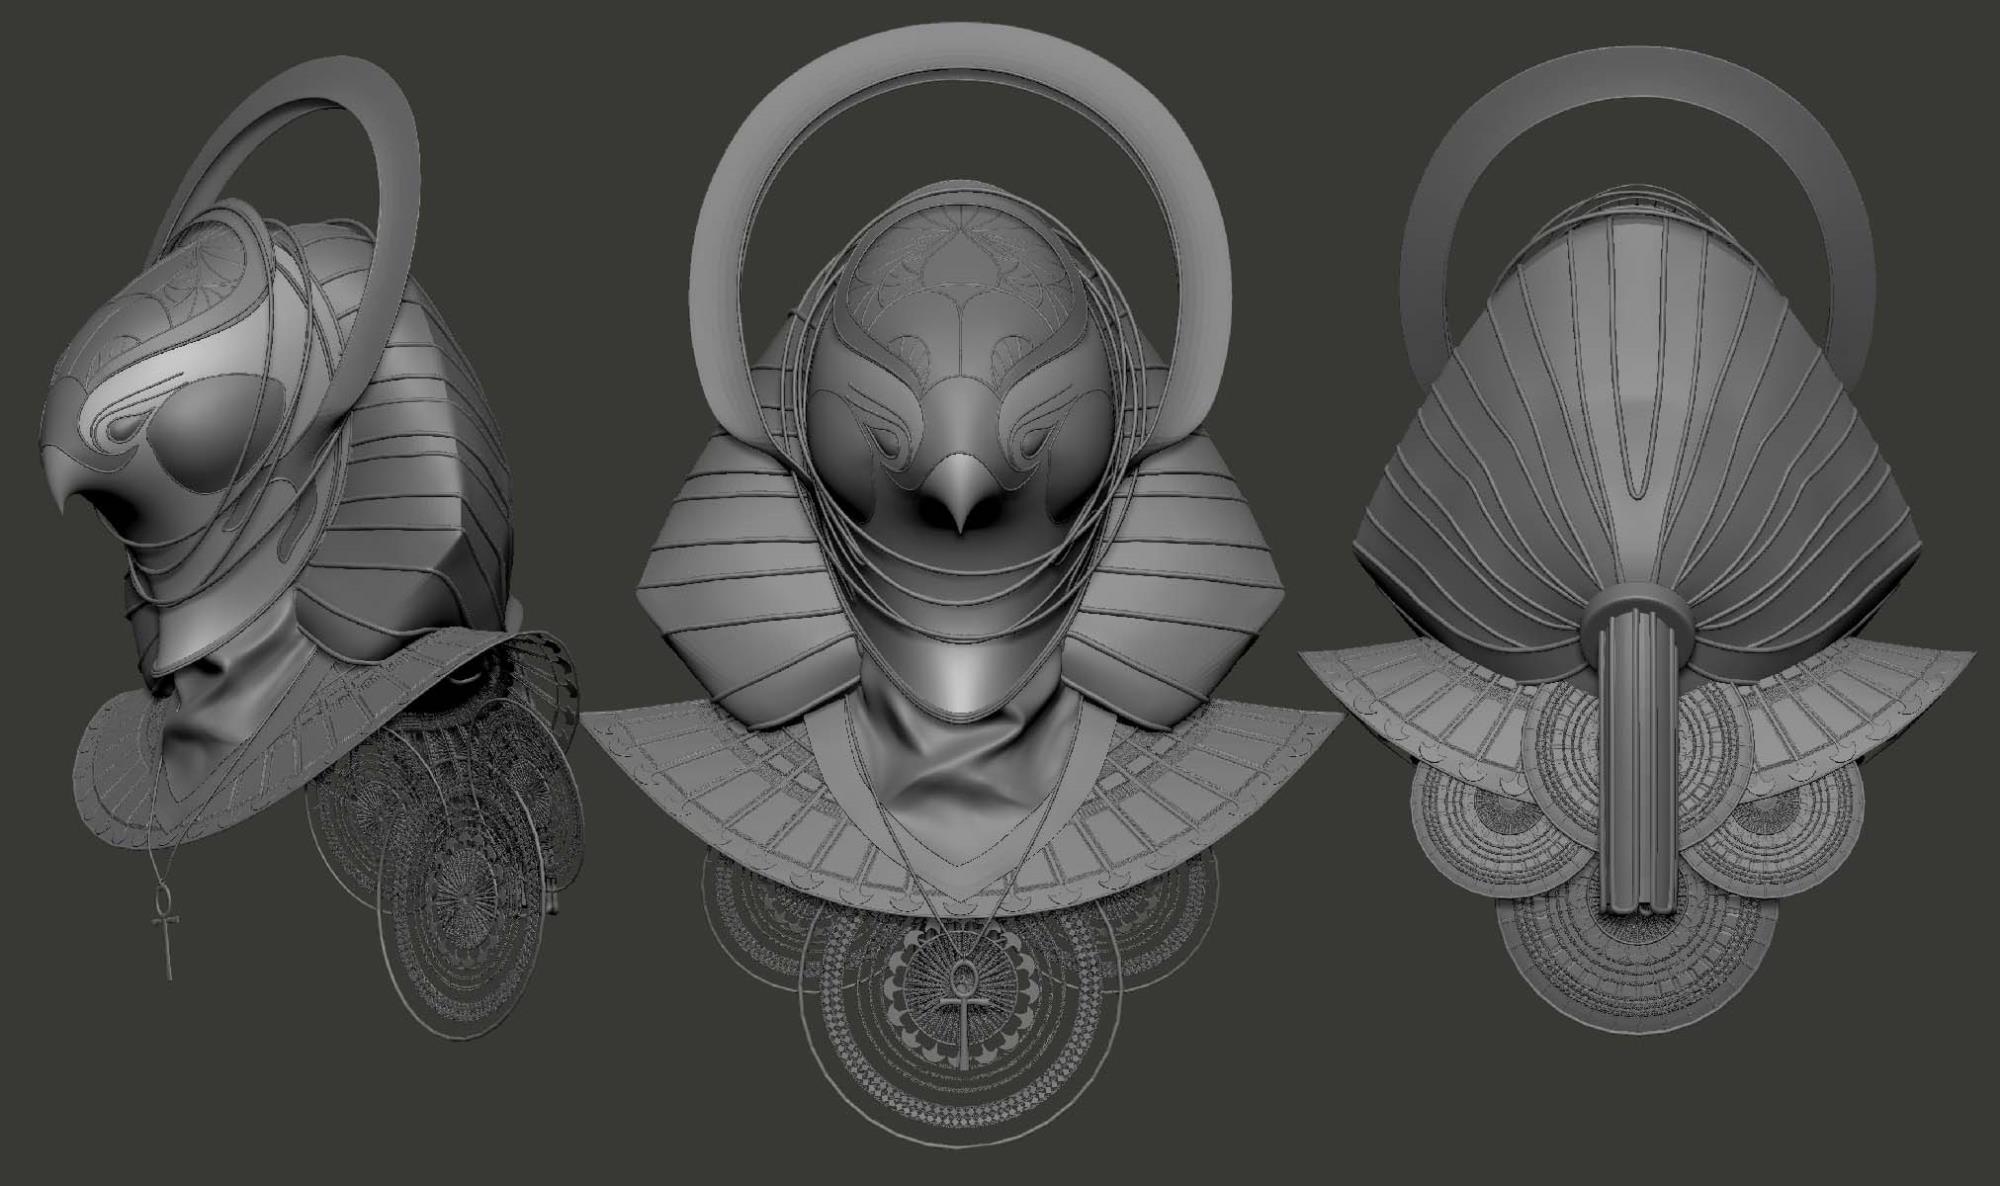
|
|
|
|
|
A3DArtist
|
A3DArtist
Posted Last Year
|
|
Group: Forum Members
Last Active: Last Year
Posts: 17,
Visits: 22
|
Left hand ornament. again started with a simple cylinder > give it a desired shape > subd multiple times> started blocking > cleanup with smooth stronger, h polis brush and smooth by polygroops. For the sequin material i use micropoly and for the meshes i use imm brush with curve mode on. i model that eye sign separately but i need to place that on that curve area. with the help of matchmaker brush placed it on the top of the area. the results are pretty good. 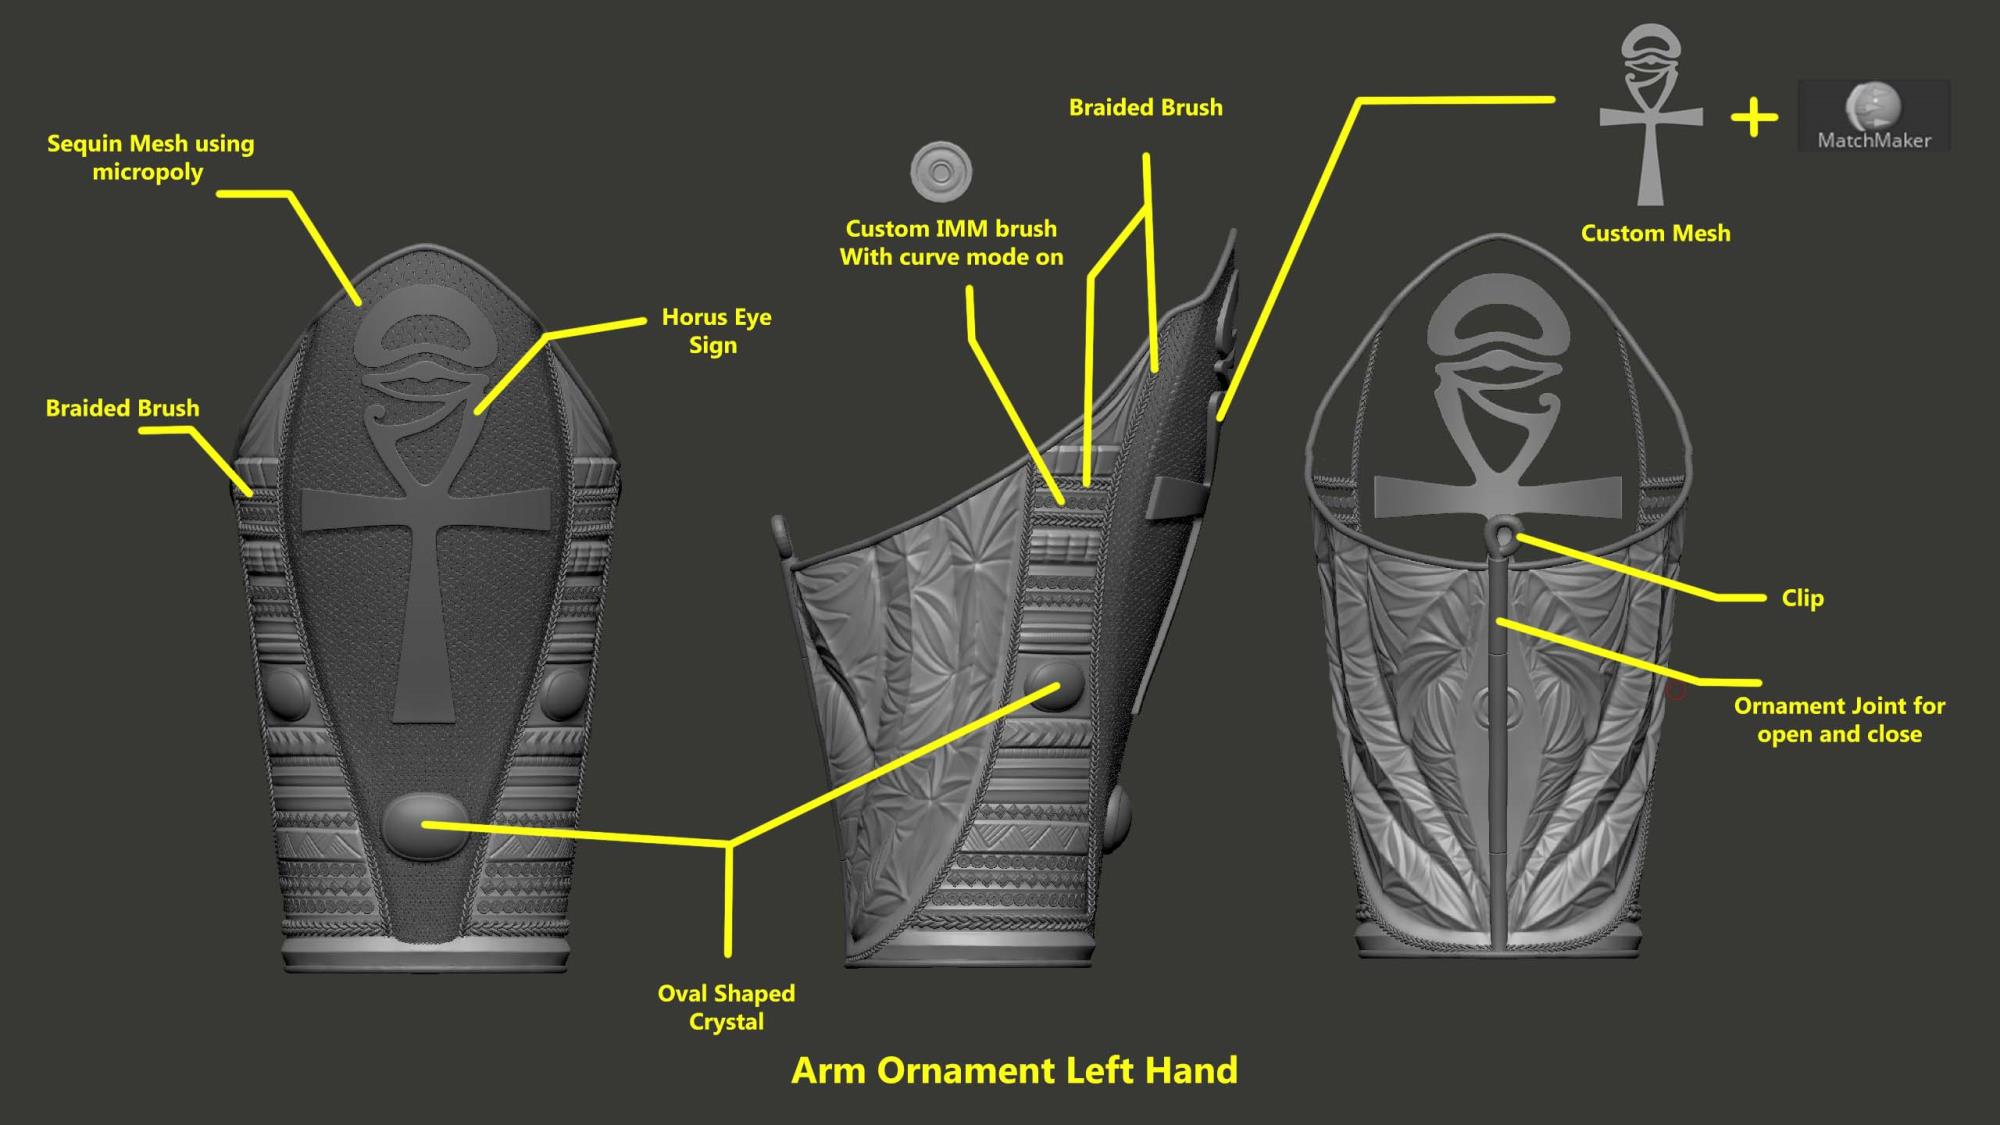 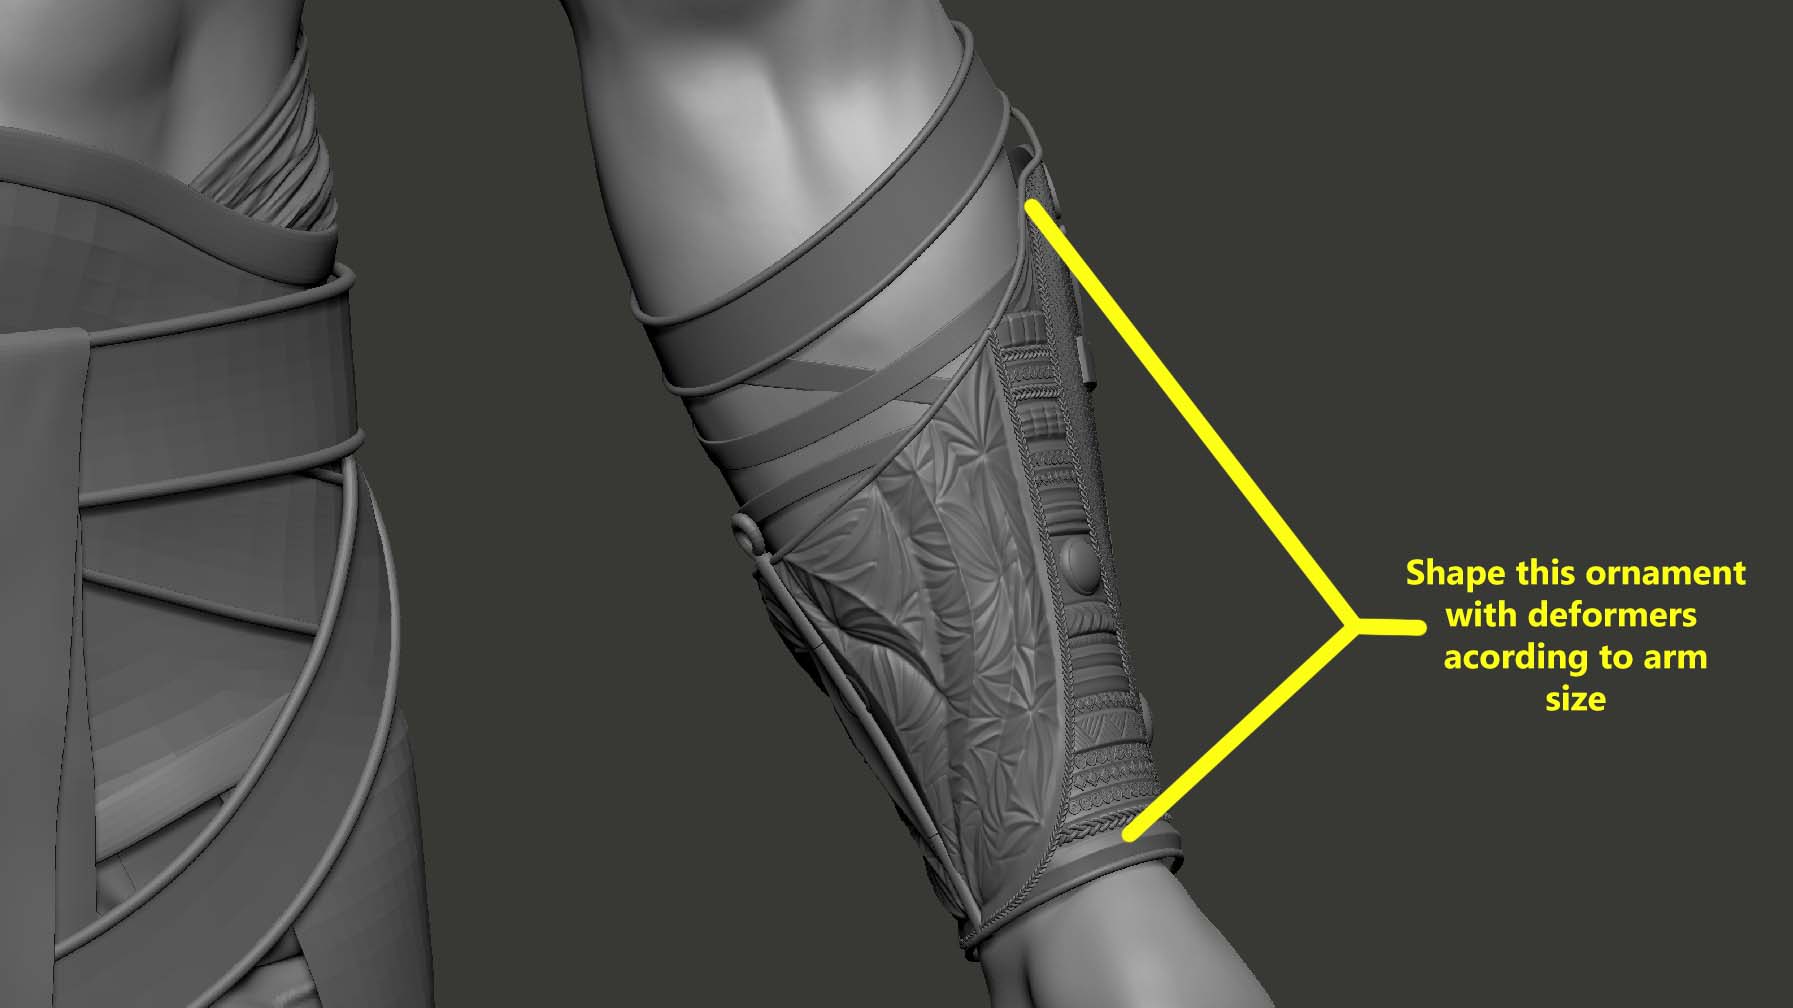 
|
|
|
|
|
A3DArtist
|
A3DArtist
Posted Last Year
|
|
Group: Forum Members
Last Active: Last Year
Posts: 17,
Visits: 22
|
Right hand ornament with some tricks. i want to achieve a high detail on that ornament in less time. 1. create a plane > place the meshes on top of the plane. as it's a flat surface its easier to place meshes and create the design. after place and complete the design, merge all the meshes into a single mesh. 2. insert a cylinder. with the help of curve deformer i wrap the cylinder half way and mirror that. that's give me the round or oval shape meshes just like a cuff bracelet. 3.then add more details like the eye sign, cuff joints and the wing like ornament. give it a shape according to the wrist with soft deformer. 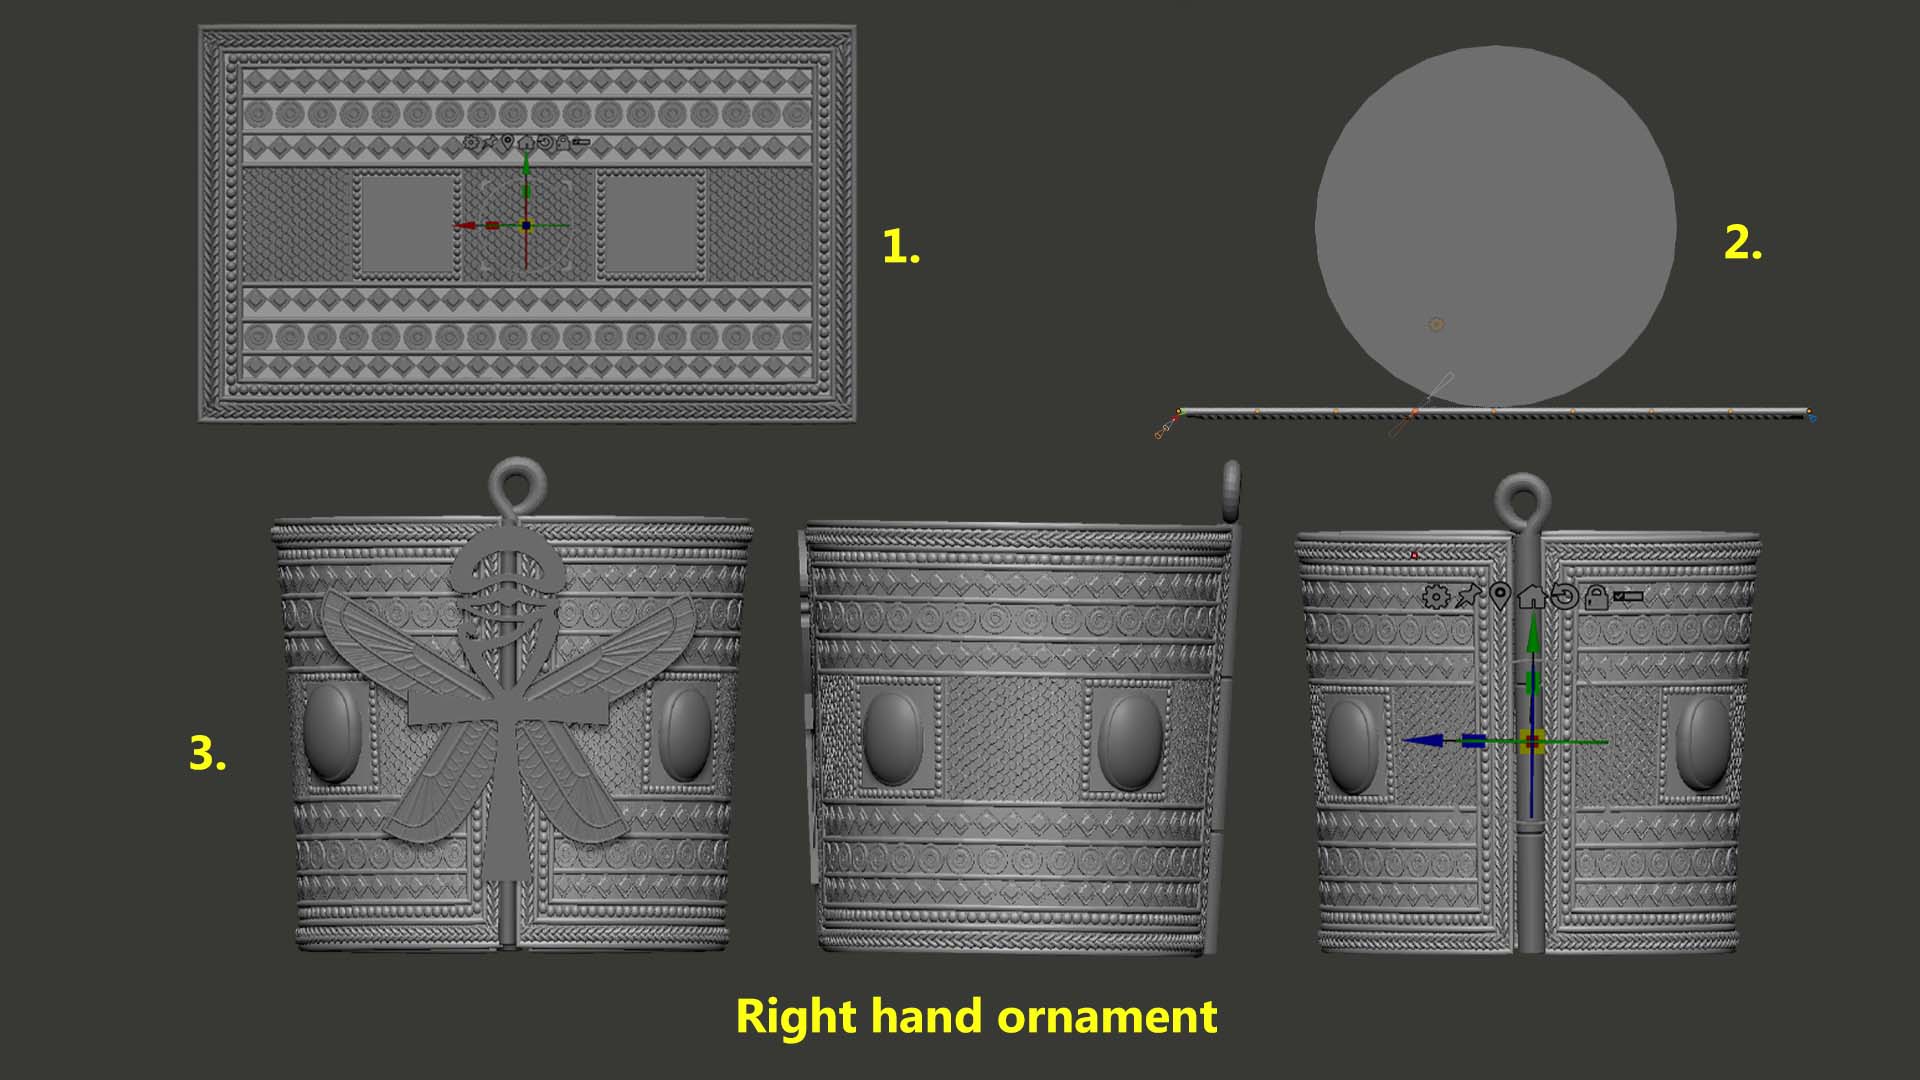 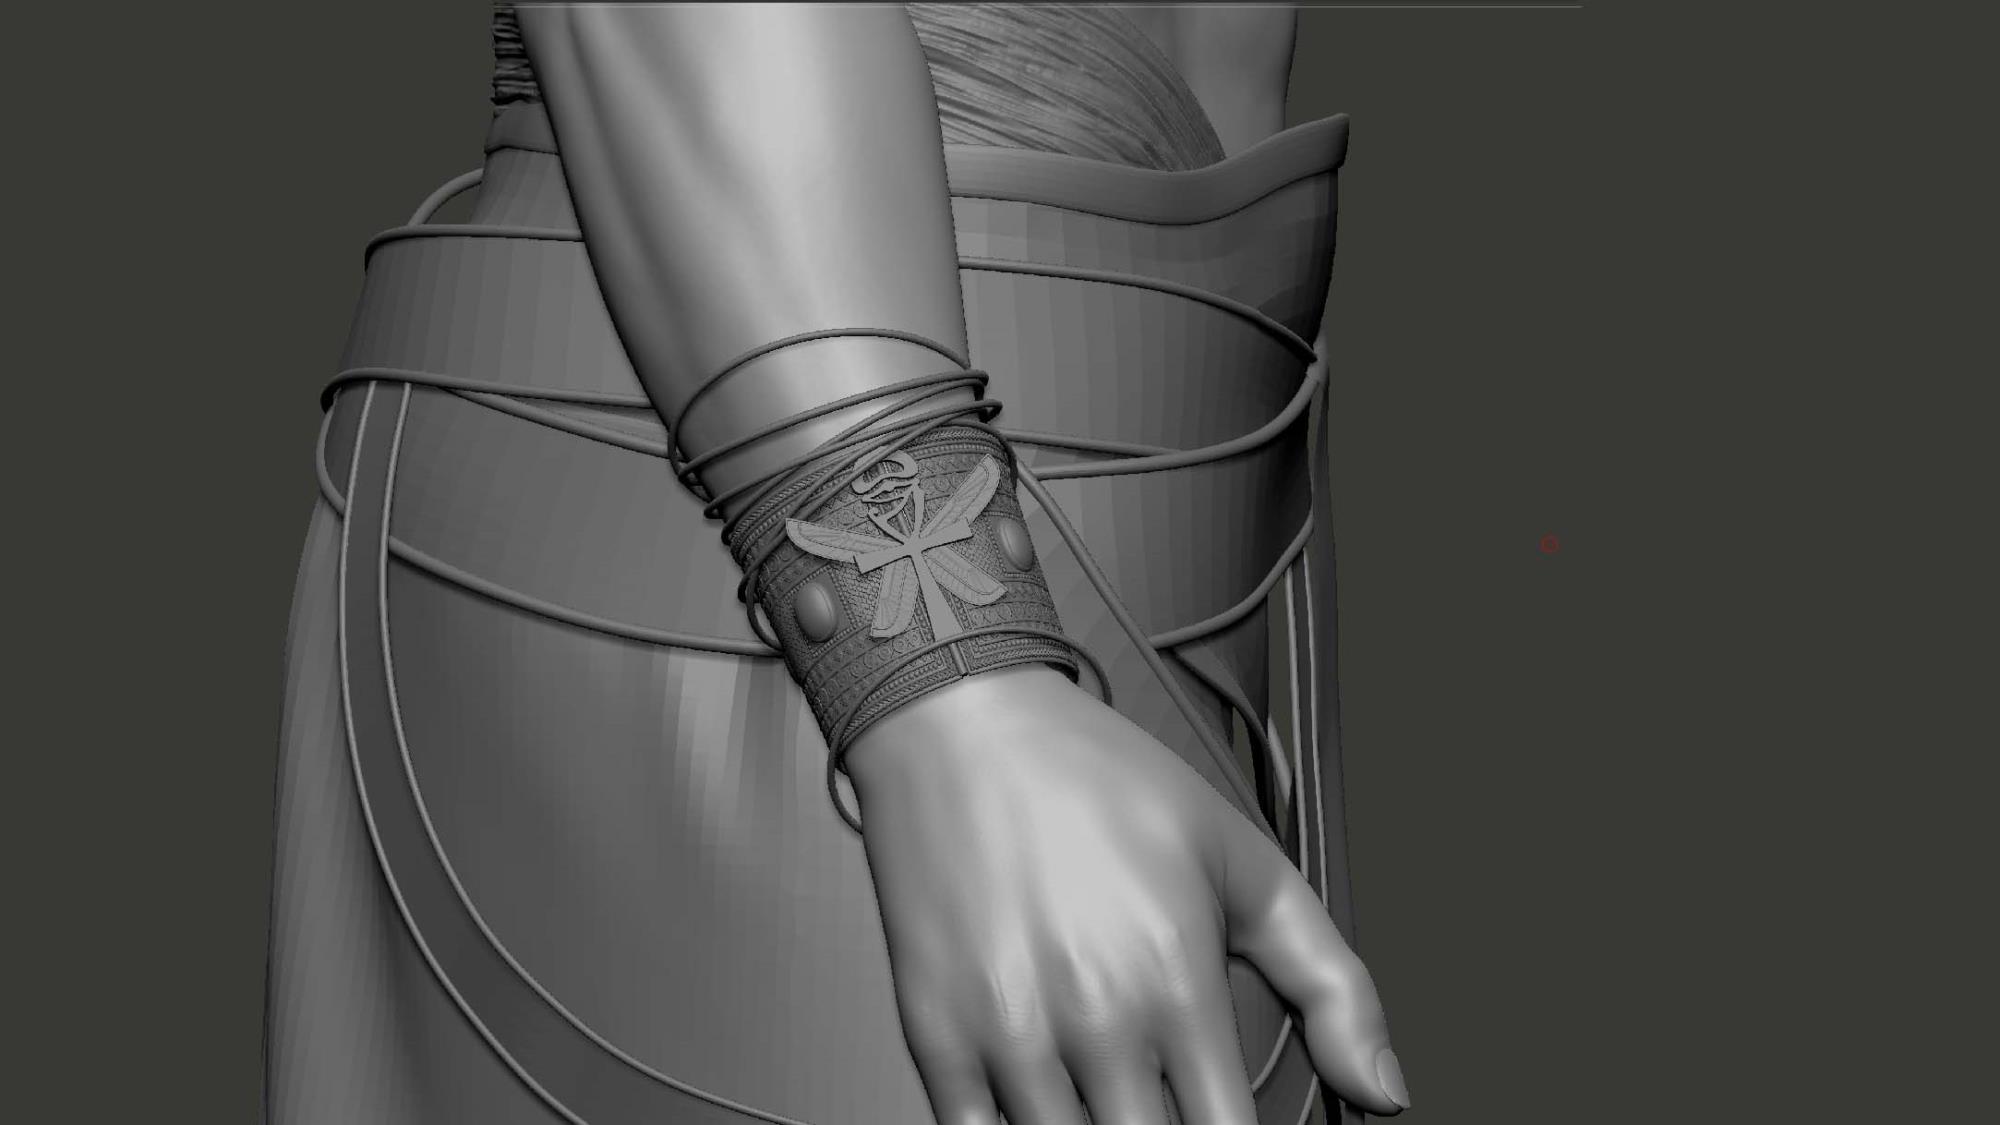
|
|
|
|