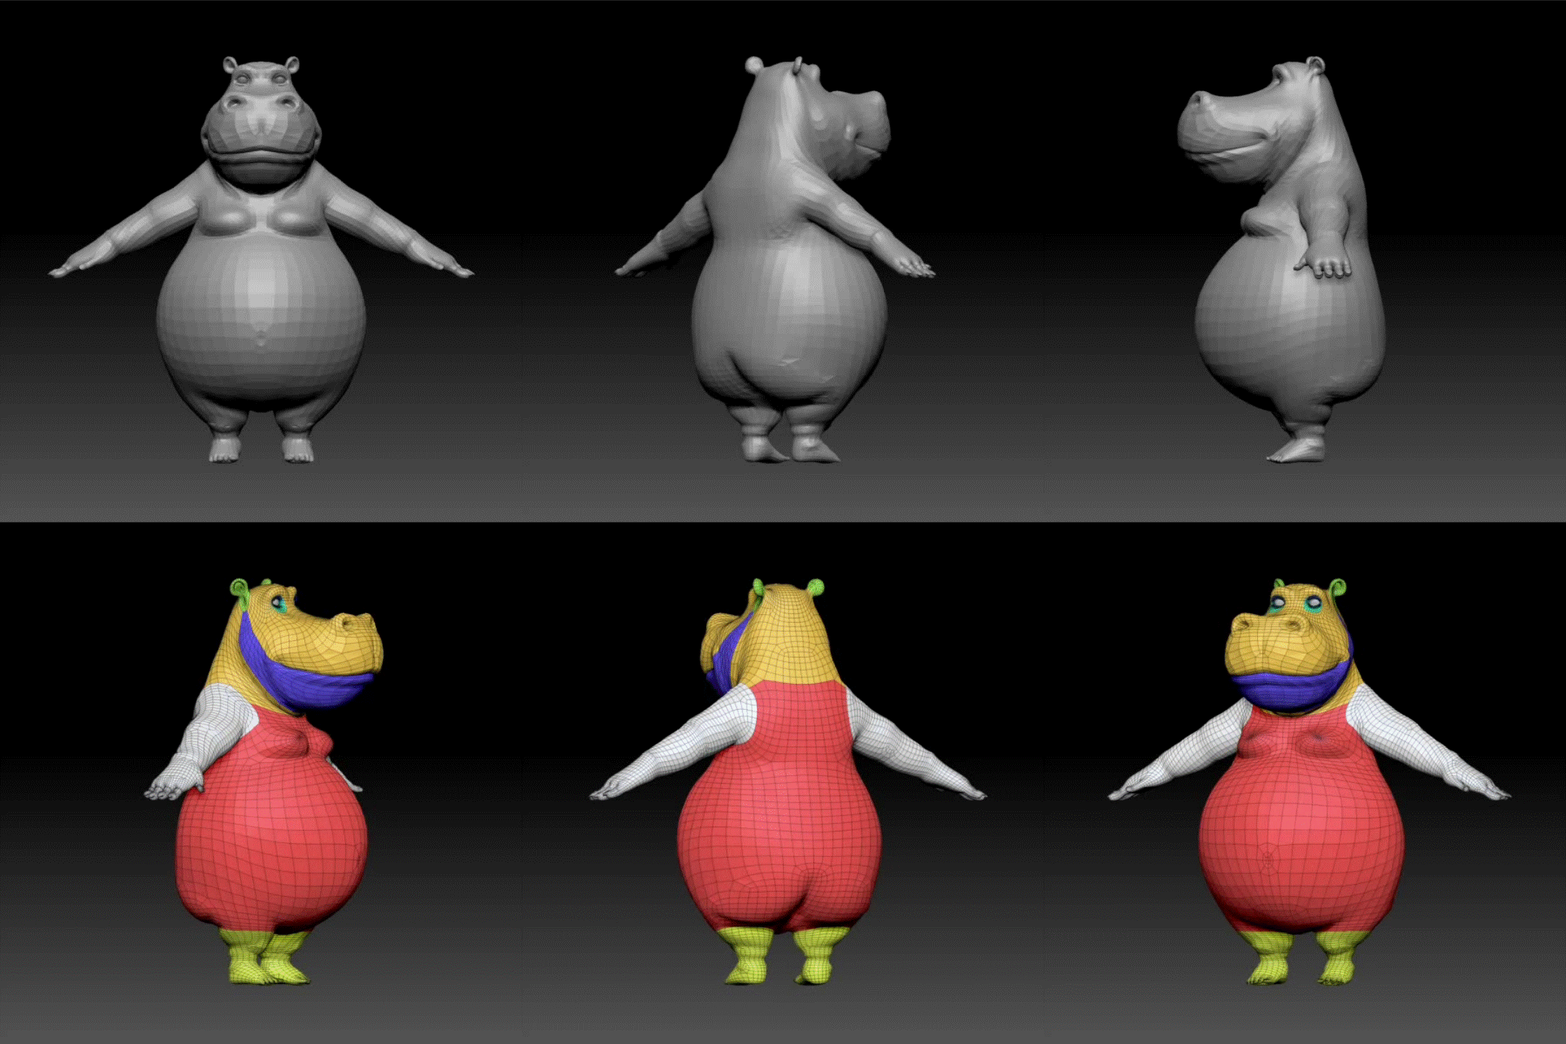
This is the current state of the Lady Hippo project. I exaggerated the mesh to more closely match the concept. My next goal is to sculpt higher resolution details, polypaint the mesh, and also work on creating a dress. Thanks to the new GoZ Plus addon, I'll be able to transfer the Color Map and Normal Map details over to Character Creator with a single command, after I've created those details.

To create a dress, I masked the main character in the shape a dress, and then clicked 'Extract' in the Subtools menu. I set the Thickness to zero, giving me a single sided mesh.

To be a cleaner mesh, I created some polygroups, checked 'Keep Polygroups' in the Zremesh options, then used Zremesh with Smooth Groups dialed up to 1. After this, if I I need to Zremesh again, I turn the SmoothGroups down to Zero (as they are already smoothed; smoothing them further will deform the low resolution mesh).


I did some basic work on the teeth. Hippos have spare but large teeth, so I hid every tooth but the relevant front ones. By hid, I mean I push the meshes into the gums so that they are not visible. Don't actually hide the mesh, otherwise it will not be rigged as Teeth when you sent it over to Character Creator (it will just be a polymesh asset).

I did a basic UV unwrap in Zbrush, but I will probably have to send it to Blender for proper UV mapping and also mesh editing.

I've created a basic flower, which I will duplicate within Character Creator and assigned as a 'Hair Accessory', and parent the objects to her head.
