|
Author
|
Message
|
|
3DPiXL
|
3DPiXL
Posted 3 Months Ago
|
|
Group: Forum Members
Last Active: 3 days ago
Posts: 279,
Visits: 2.8K
|
|
|
|
|
|
3DPiXL
|
3DPiXL
Posted 3 Months Ago
|
|
Group: Forum Members
Last Active: 3 days ago
Posts: 279,
Visits: 2.8K
|
Exported the character into blender using the GoB plugin to refine some more facial shapes and features. Reallusion Tutorials and Tips: https://www.youtube.com/@3DPixl
|
|
|
|
|
3DPiXL
|
3DPiXL
Posted 2 Months Ago
|
|
Group: Forum Members
Last Active: 3 days ago
Posts: 279,
Visits: 2.8K
|
More sculpting in Blender to get cleaner lines for the face. I don't use a very high sculpting multi-resolution, Set to only Level 2. Just enough to define a few face lines and body enhancements. Then I bake the textures prior to sending the toon back to Character Creator. 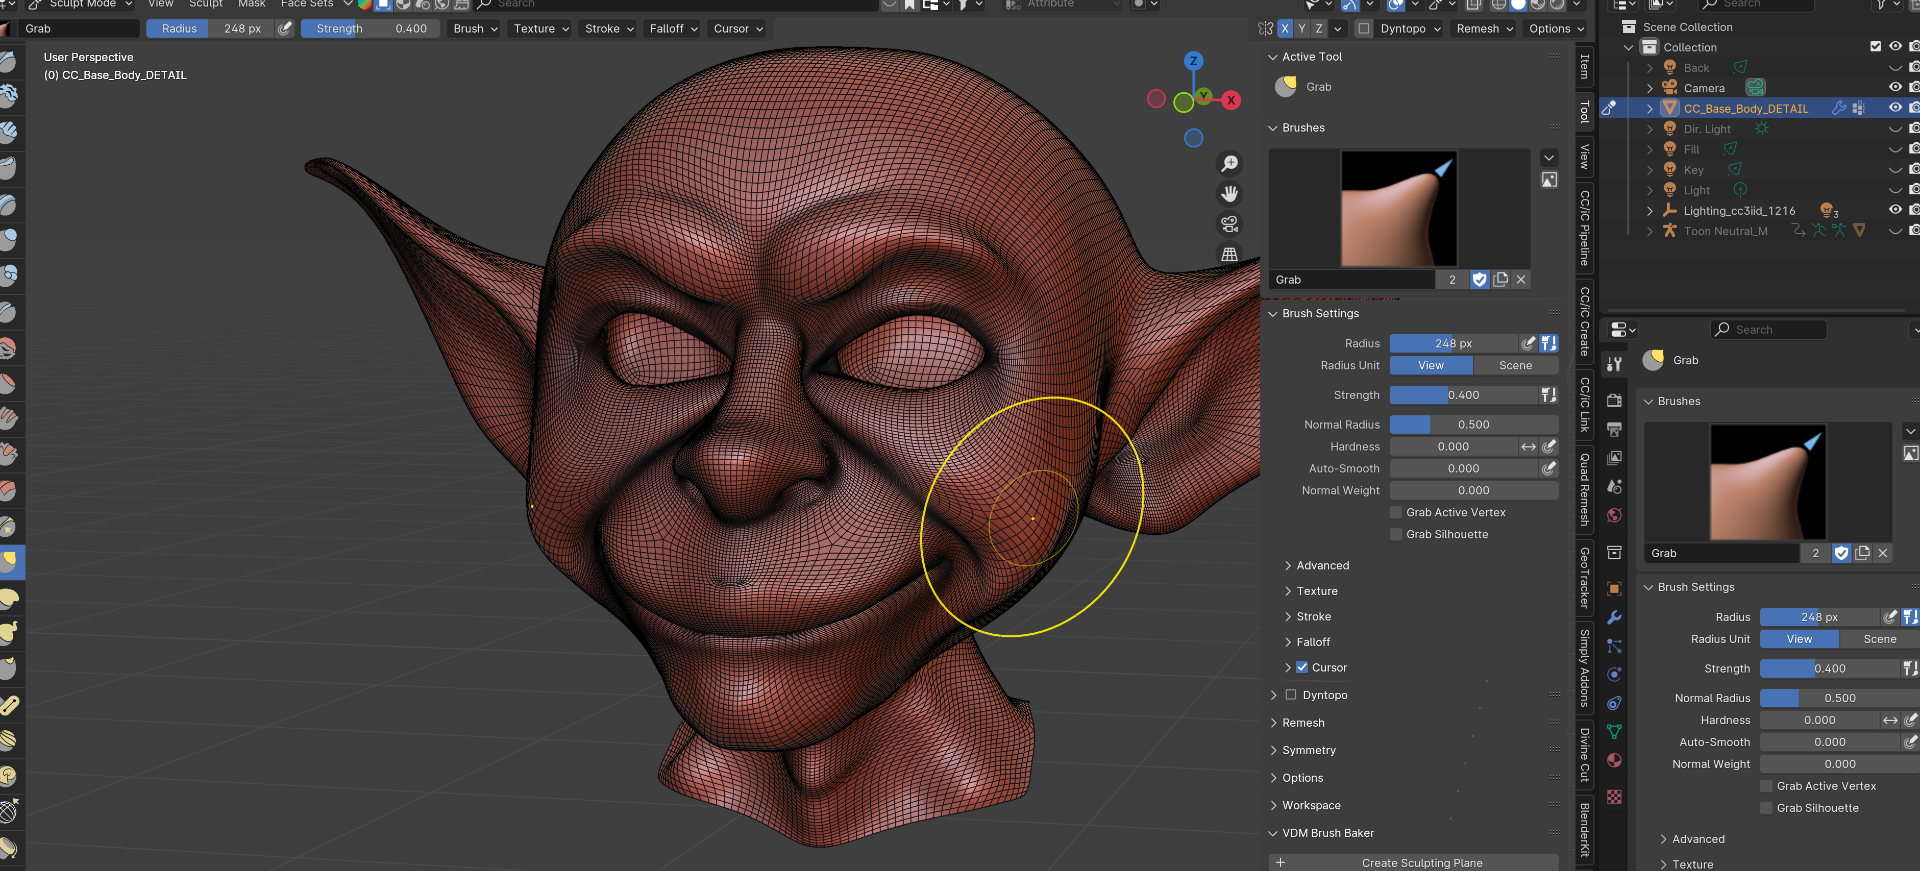 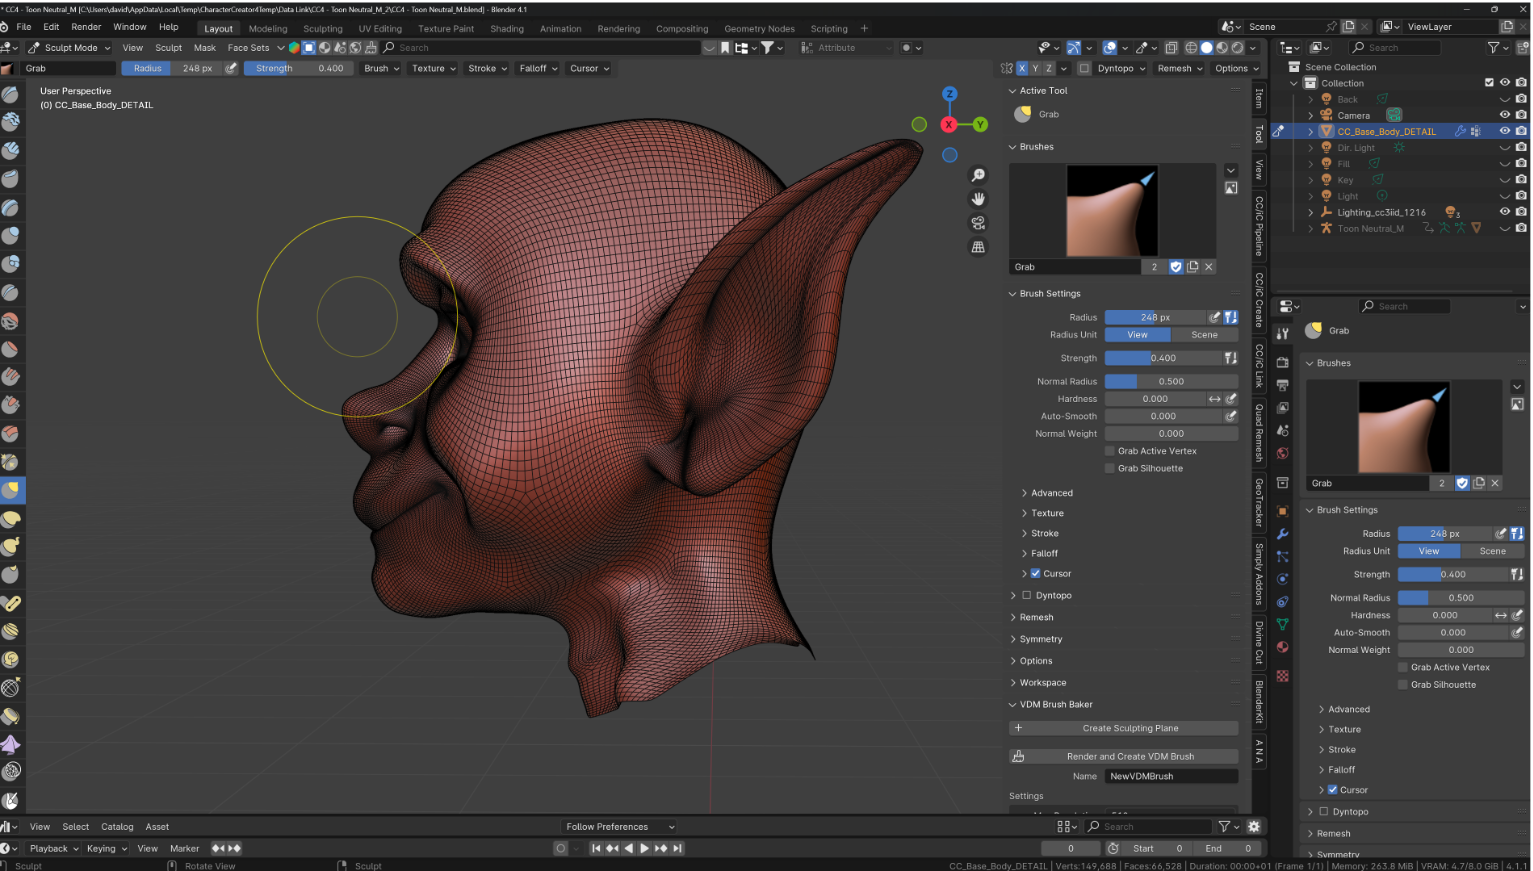 Reallusion Tutorials and Tips: https://www.youtube.com/@3DPixl
Edited
2 Months Ago by
BlueyCreative
|
|
|
|
|
3DPiXL
|
3DPiXL
Posted 2 Months Ago
|
|
Group: Forum Members
Last Active: 3 days ago
Posts: 279,
Visits: 2.8K
|
Time for a bit of hair. For hair I prefer to use a blender plugin called "Hair Tool For Blender" It allows you to create custom hair and bake & export the required image maps for Character Creator. I export the following maps: Opacity Map Ambient Occlusion Map Flow Map Root Map ID Map These give you enough control within Character Creator to be able to set your hair shader type to Digital humar Hair. Once the hair model is imported back to charcater creator I assign each map and adjust the colours and highlights. 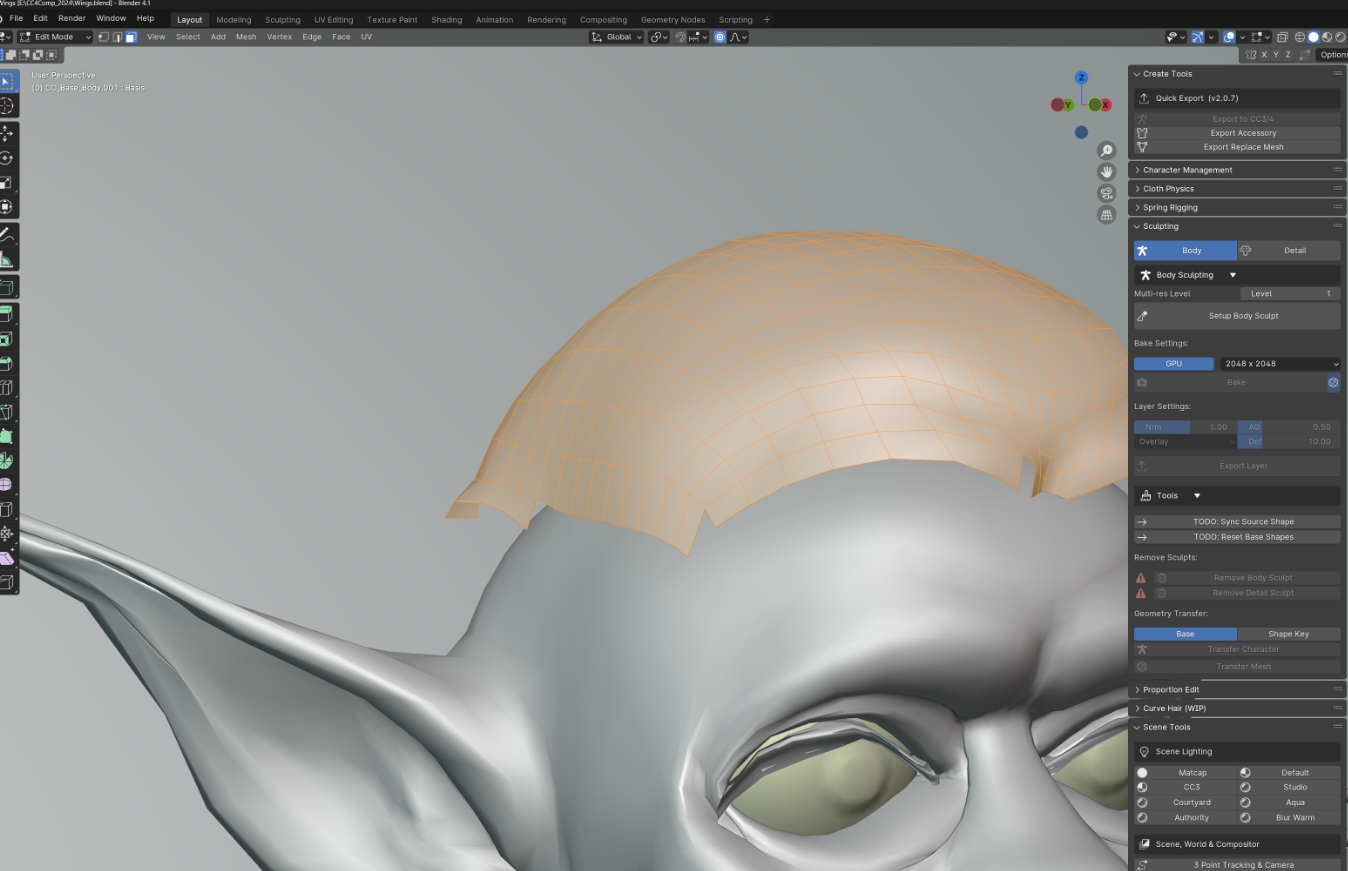  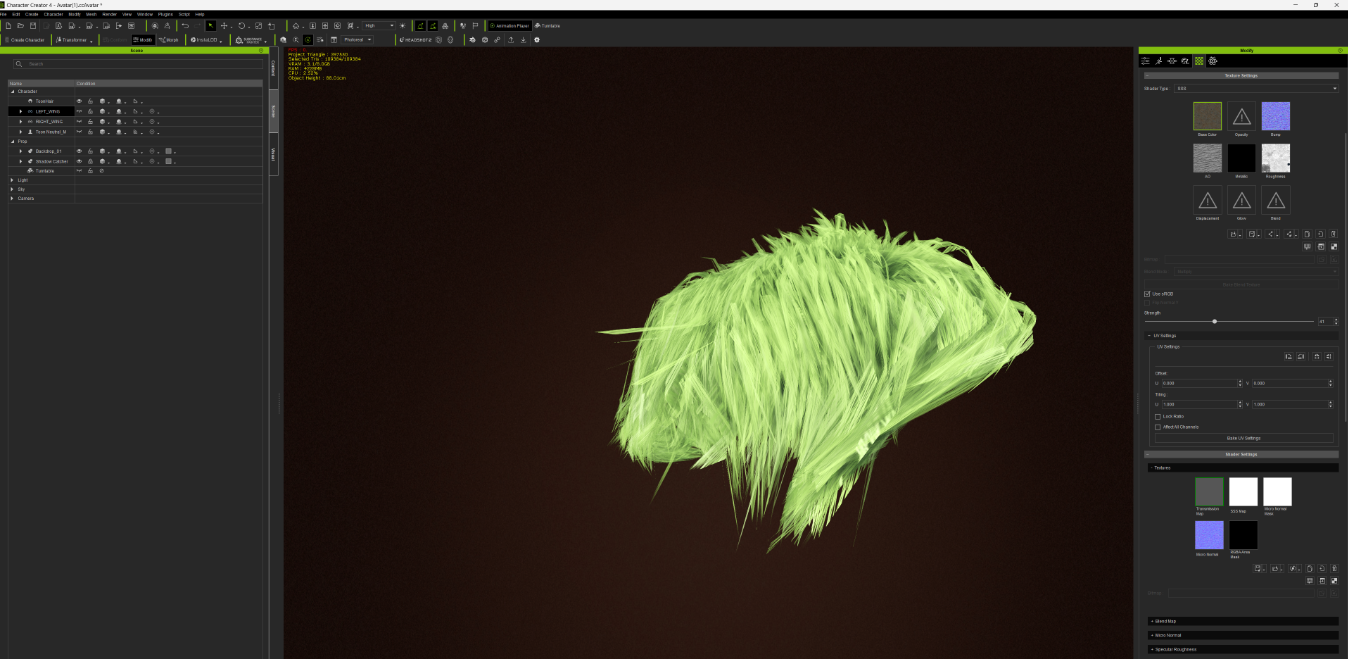 Reallusion Tutorials and Tips: https://www.youtube.com/@3DPixl
Edited
2 Months Ago by
BlueyCreative
|
|
|
|
|
3DPiXL
|
3DPiXL
Posted 2 Months Ago
|
|
Group: Forum Members
Last Active: 3 days ago
Posts: 279,
Visits: 2.8K
|
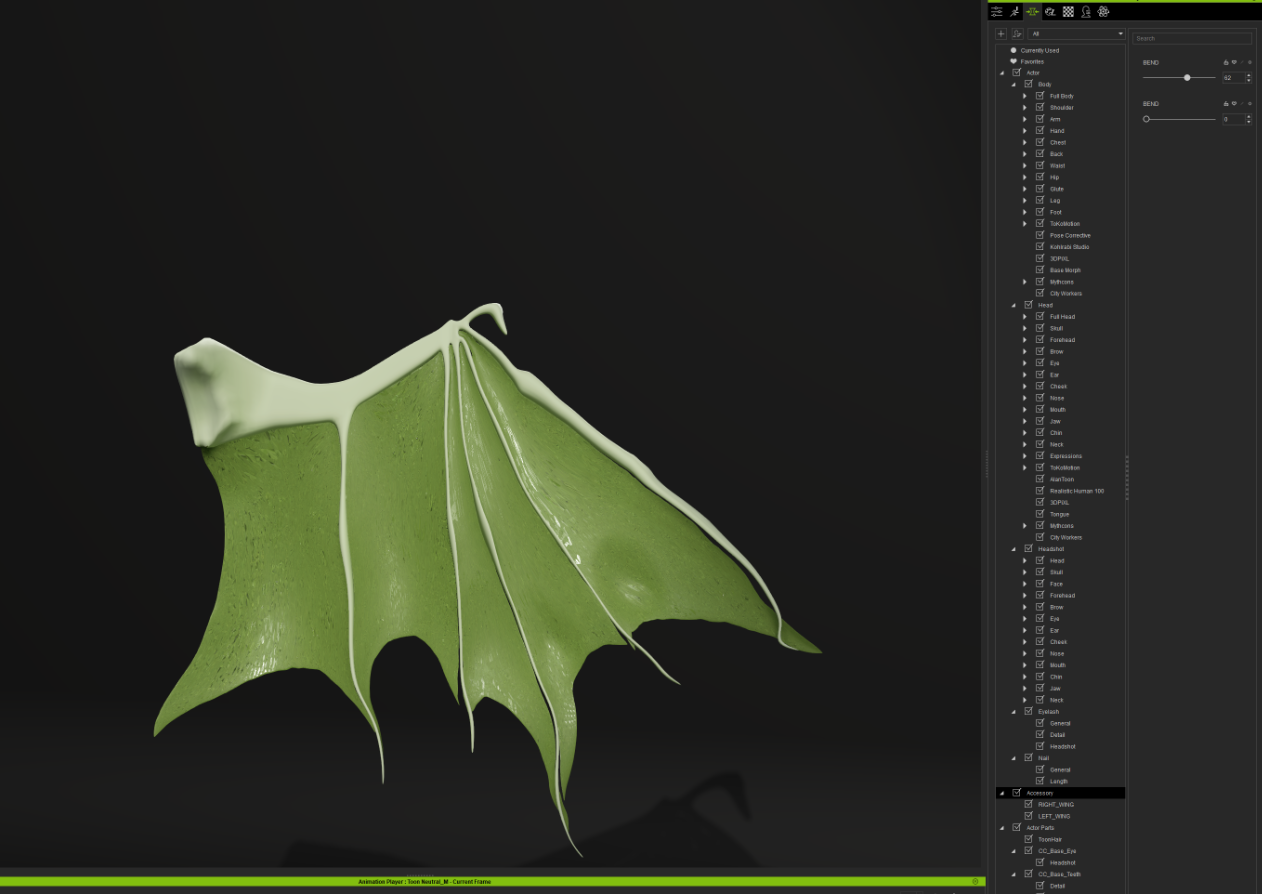
Accessory: Wings The character i'm creating is stylized so I decided to add some wings to add more depth to the final product. Based on the reference images I gathered I decided to go with bat styled wings. Once again I imported a image reference and modelled the wings in blender from a simple plain, adding loop cuts and adjusting vertices to match the shape. 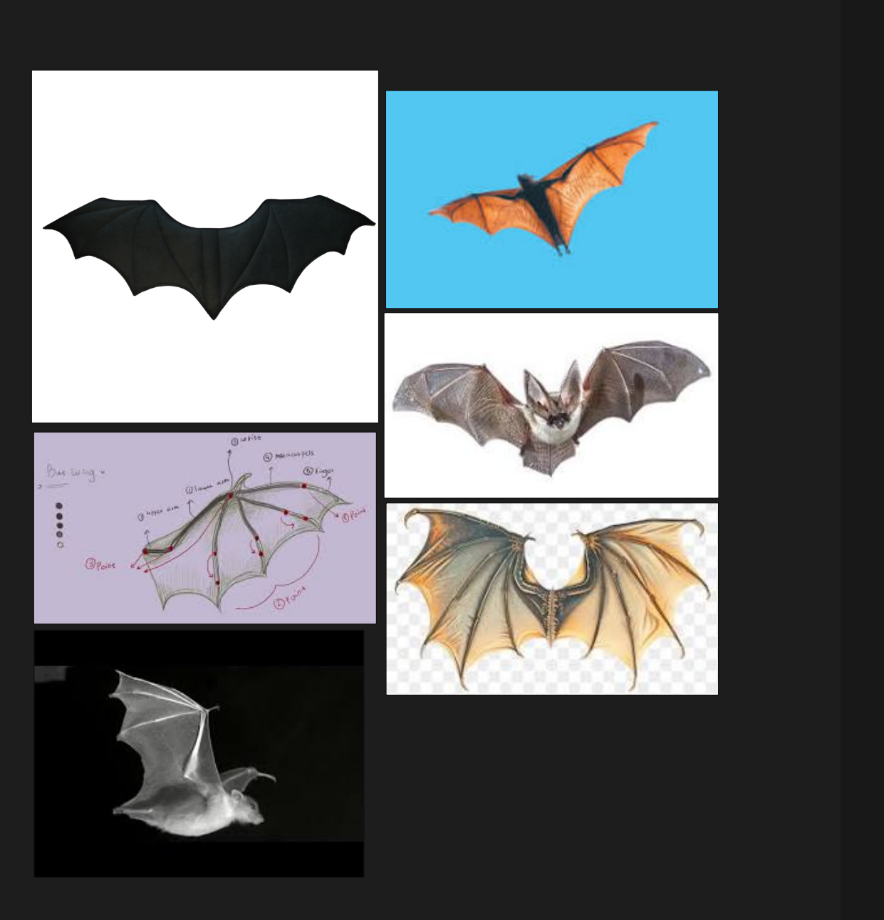 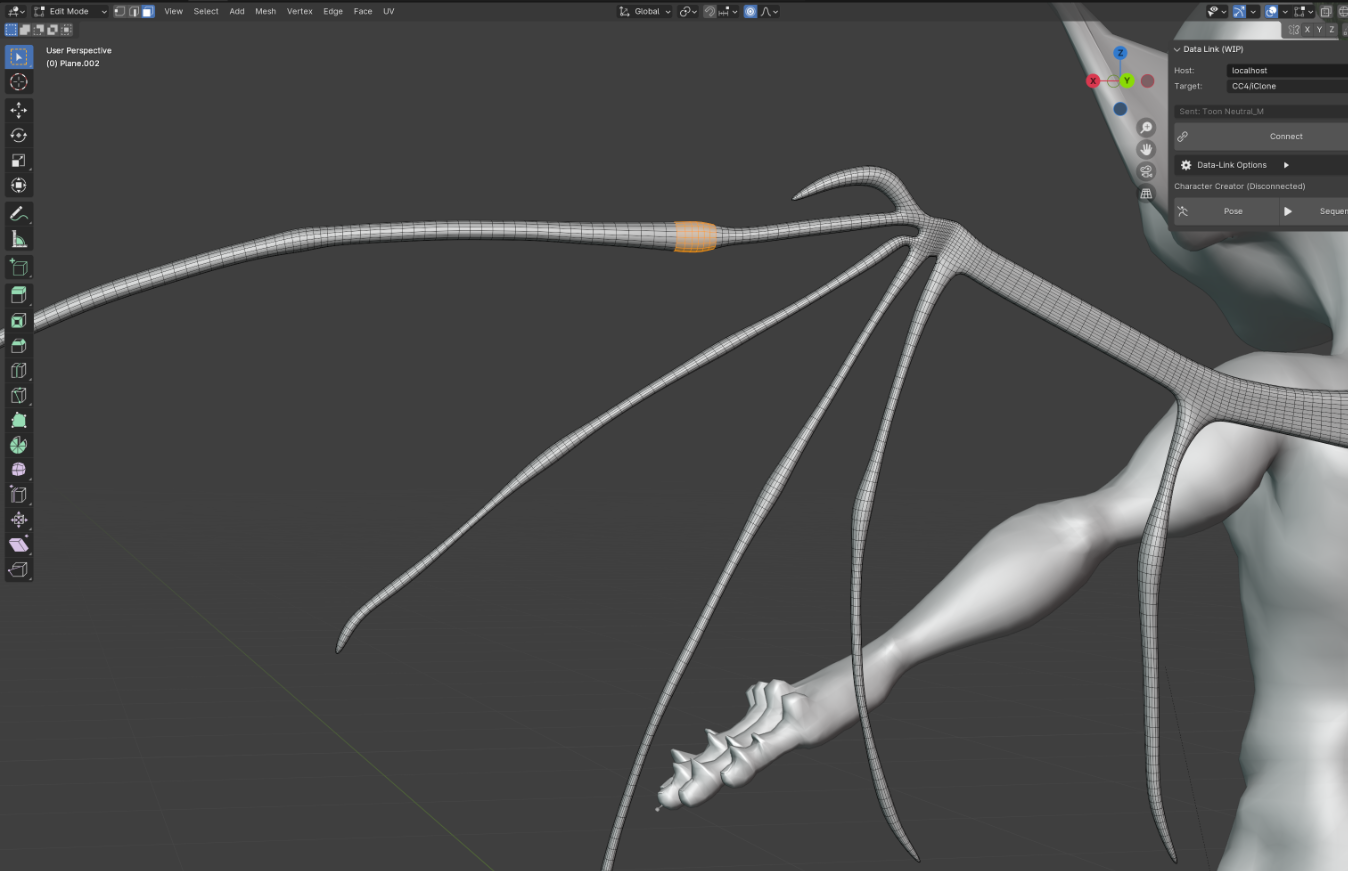 Reallusion Tutorials and Tips: https://www.youtube.com/@3DPixl
Edited
2 Months Ago by
BlueyCreative
|
|
|
|
|
3DPiXL
|
3DPiXL
Posted 2 Months Ago
|
|
Group: Forum Members
Last Active: 3 days ago
Posts: 279,
Visits: 2.8K
|
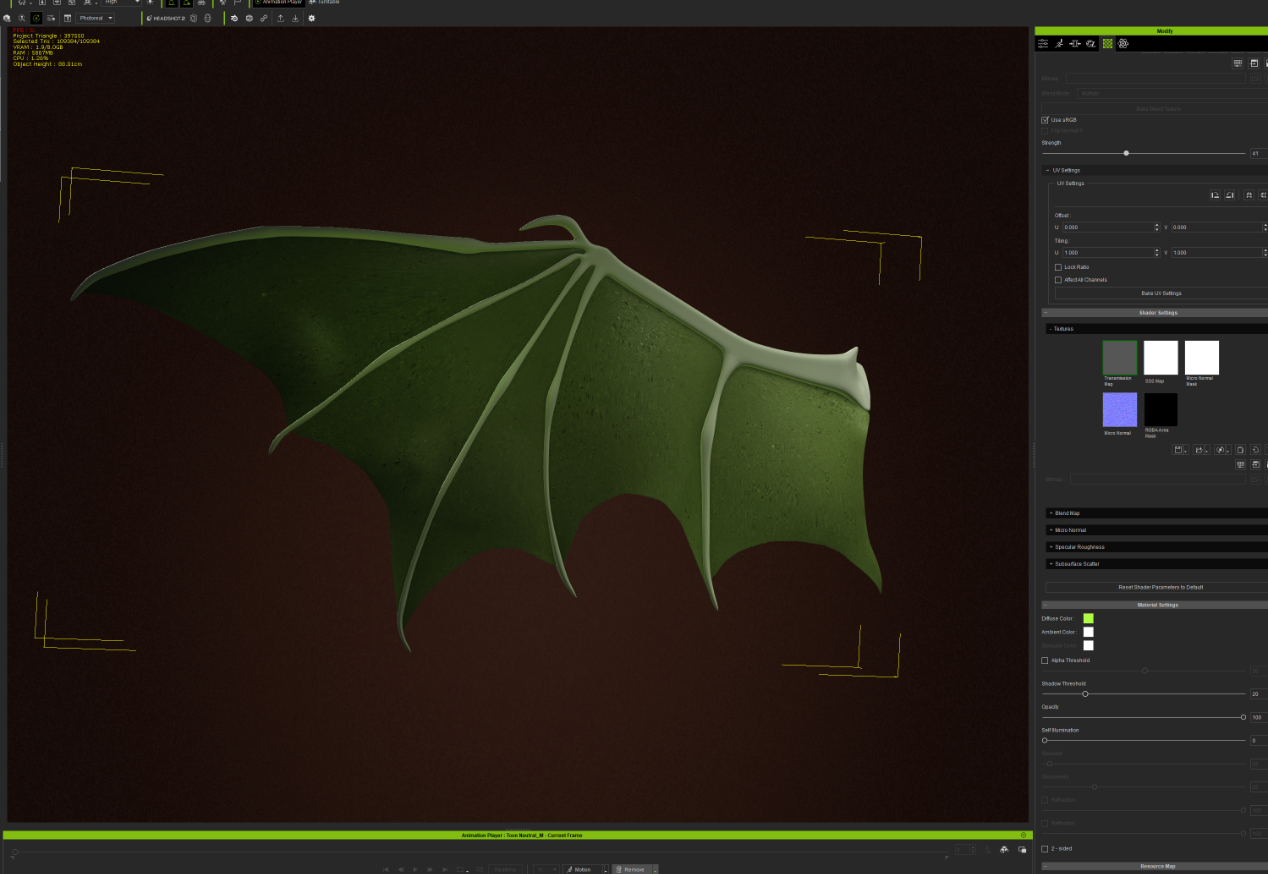
I decided for ease of posing to create a simple shapekey to allow the wing to bend. In blender I added a shapekey with a value of 1 and scultpted the wings into a closed postion using the move tool. Exported the wing as a fbx file from blender and then imported it into Character Creator as a Prop. This also brings in the shapekeys as morphs. Bat wings are almost transparent so I wanted them to have a good amount of Sub Surface Scattering. The Charatcer Creator library has a elephant skin SSS texture which was the perfect texture and bump required. I tiled the texture 5x4 and changed the Diffuse Colour to the same colour as the skin. 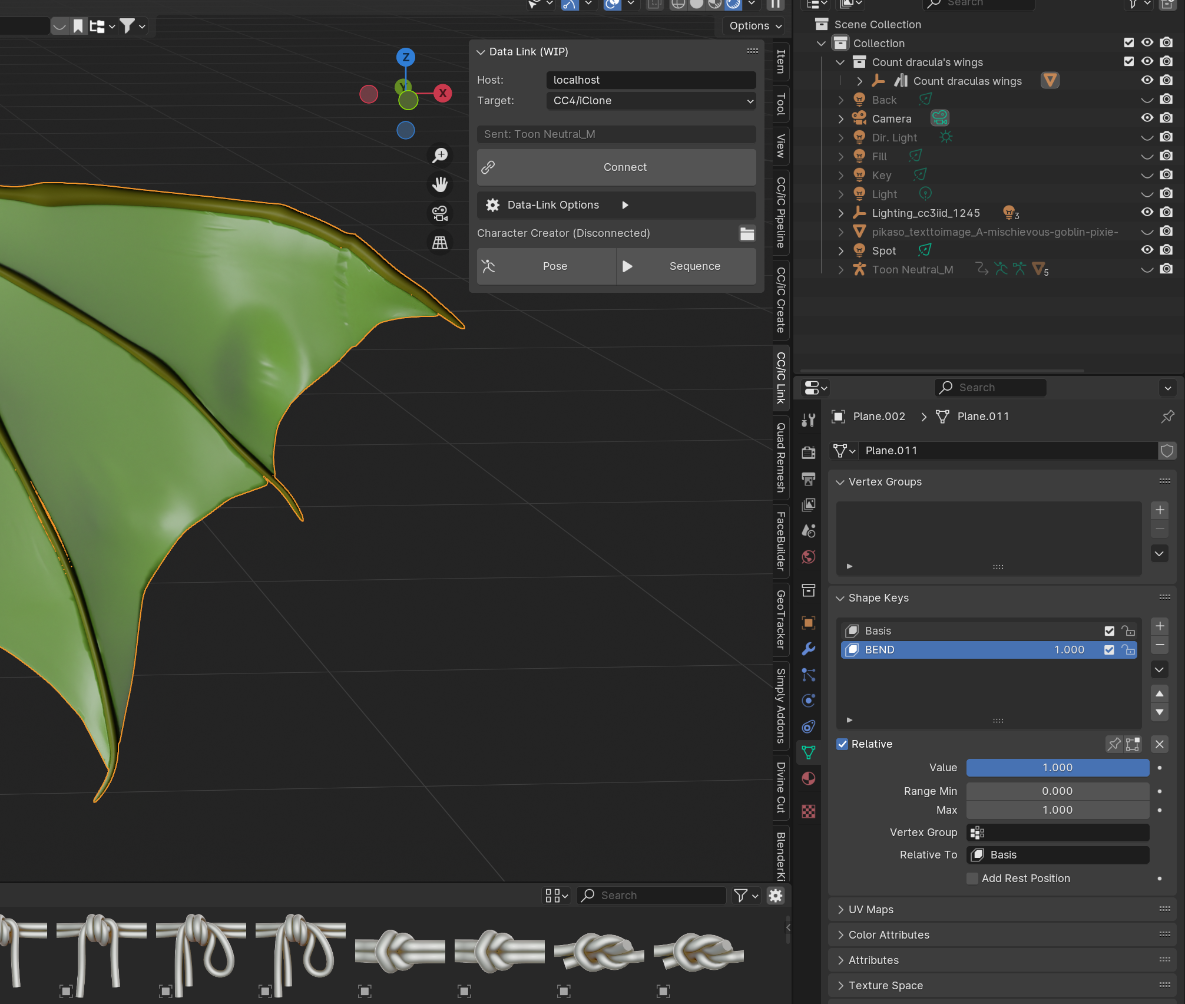
 Reallusion Tutorials and Tips: https://www.youtube.com/@3DPixl
Edited
2 Months Ago by
BlueyCreative
|
|
|
|
|
3DPiXL
|
3DPiXL
Posted 2 Months Ago
|
|
Group: Forum Members
Last Active: 3 days ago
Posts: 279,
Visits: 2.8K
|
Body shaping and skin textureFor the body I simply used the standard morph sliders to tweak the toned shape i had based on my original sketch, to enhance the muscles I used a couple of textures located under the skin details tab within normals, I had to turn down the stength of the maps as it caused a fair amount of noise within the body. I imported the toon into blender again (GoB) and made a few simple sculpts to enhance the tones, baked out the normals added a couple of red blemishes to the body texure as well. For texturing I use the built-in texture editor in blender and then clean up the textures in Affinity Photo. 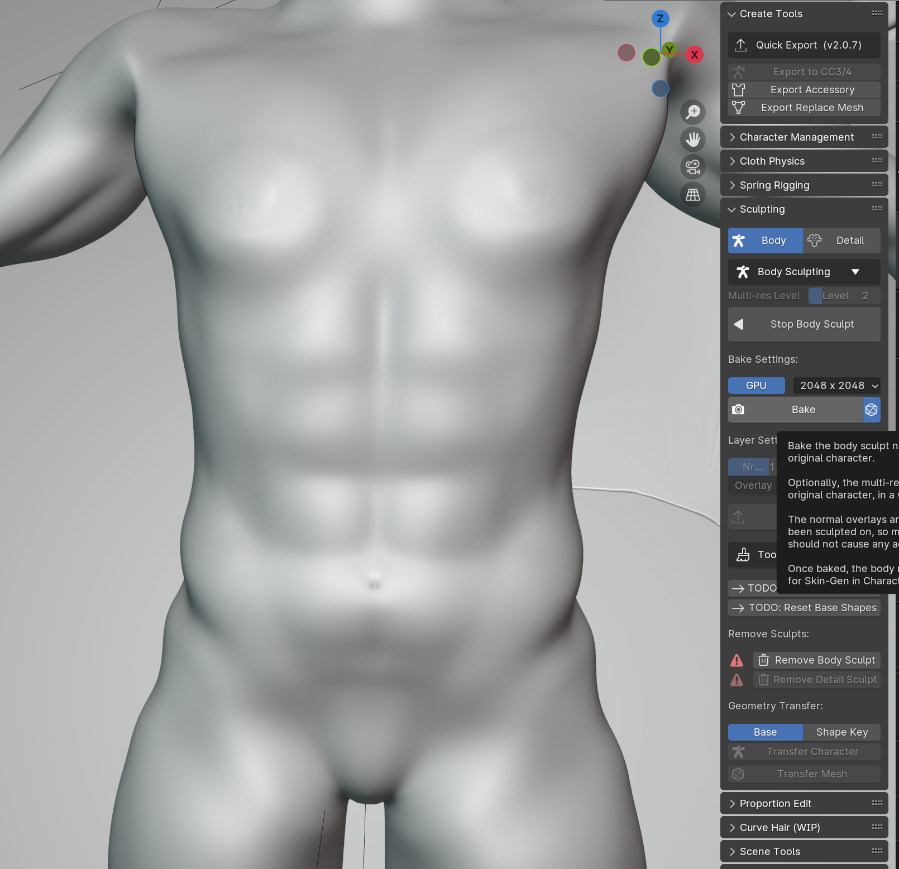 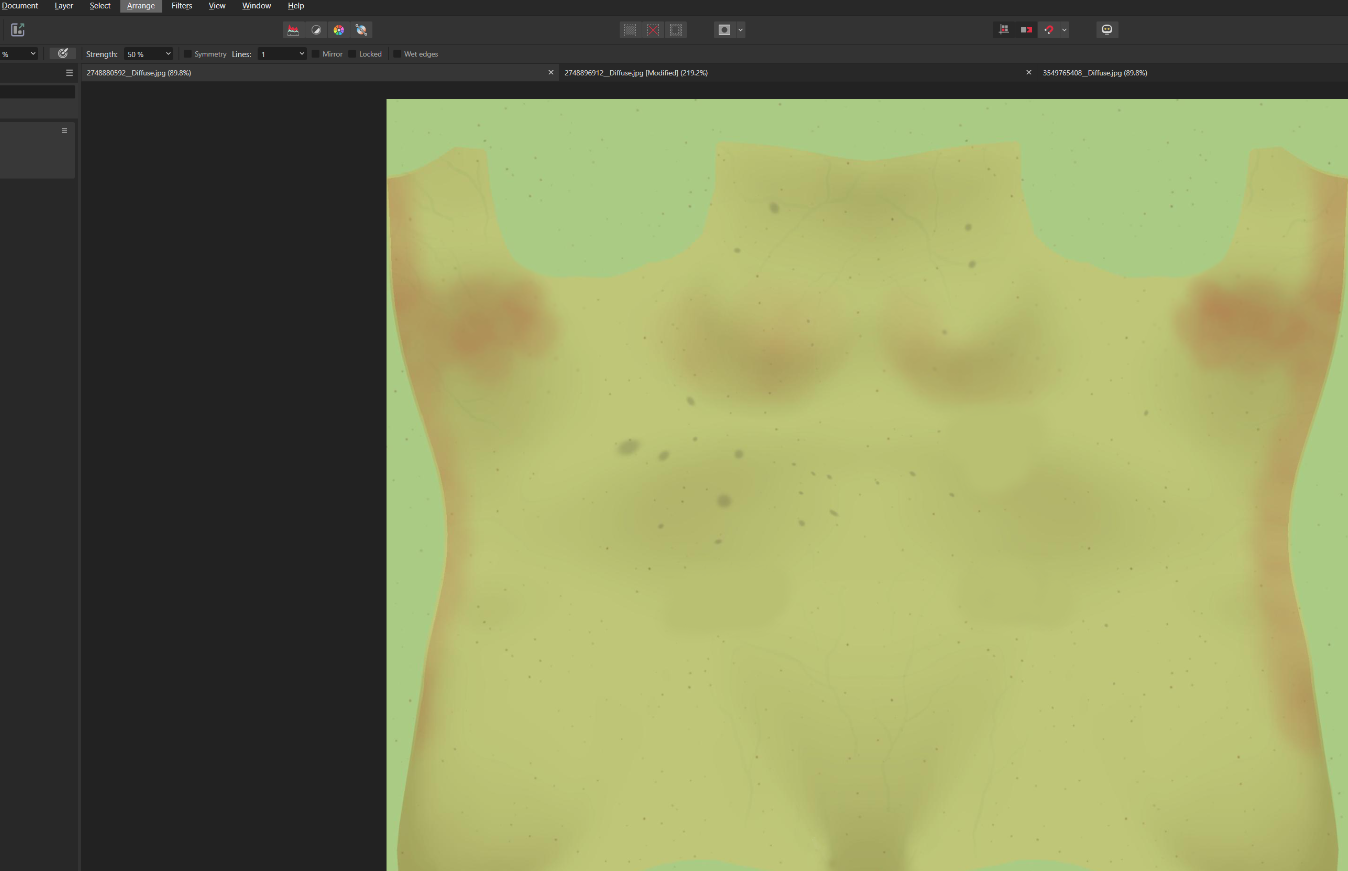 Reallusion Tutorials and Tips: https://www.youtube.com/@3DPixl
Edited
2 Months Ago by
BlueyCreative
|
|
|
|
|
3DPiXL
|
3DPiXL
Posted 2 Months Ago
|
|
Group: Forum Members
Last Active: 3 days ago
Posts: 279,
Visits: 2.8K
|
Hands and Feet:I decided to add a little more so I culpted the hands and feet a little in Blender giving them a more stylized look 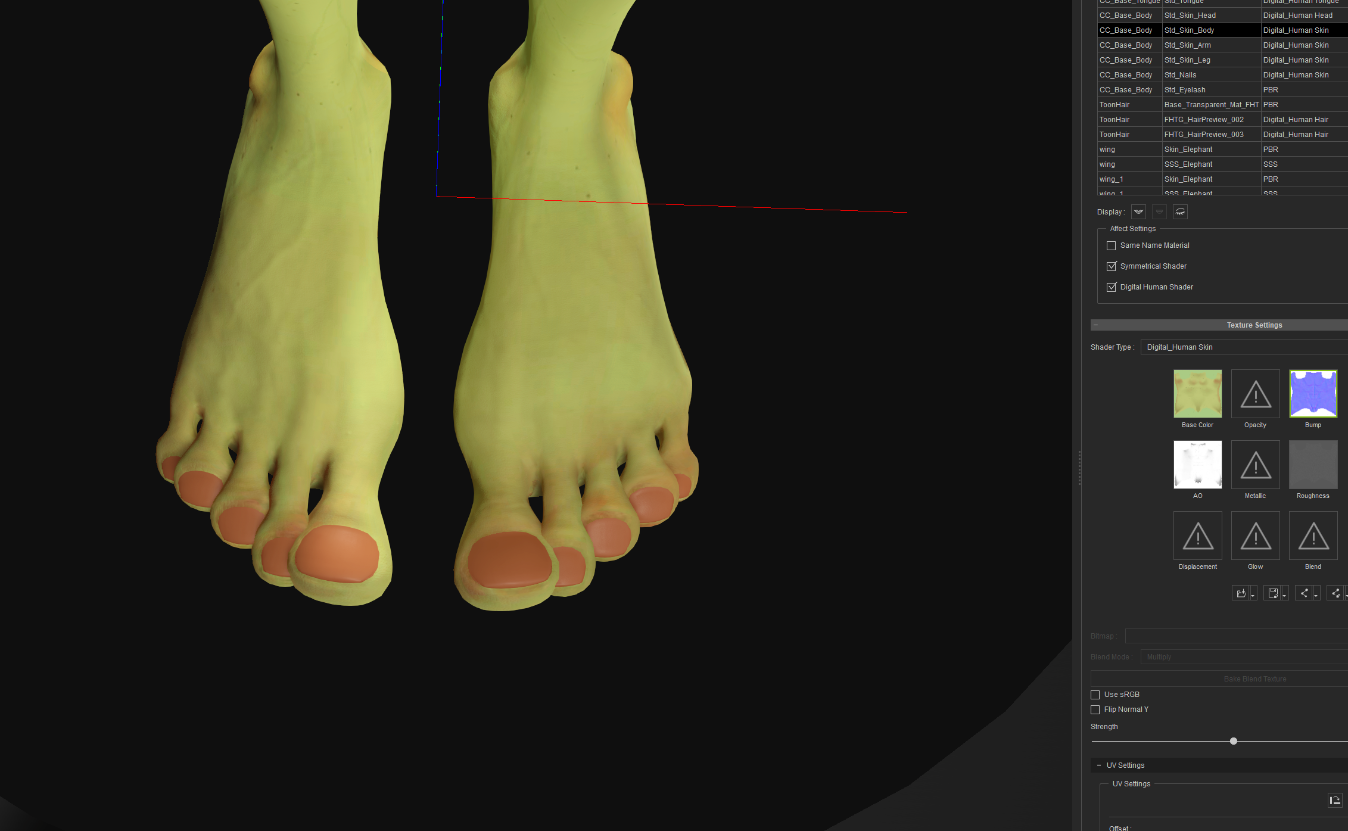 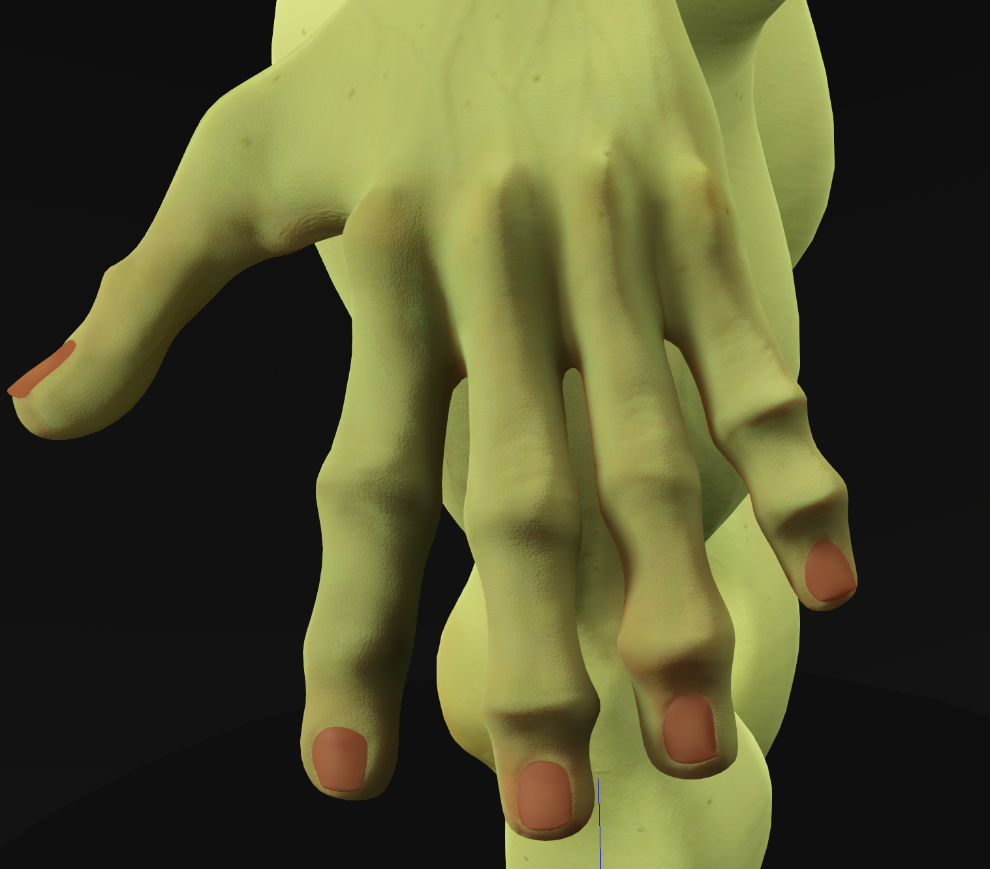 Reallusion Tutorials and Tips: https://www.youtube.com/@3DPixl
|
|
|
|
|
3DPiXL
|
3DPiXL
Posted 2 Months Ago
|
|
Group: Forum Members
Last Active: 3 days ago
Posts: 279,
Visits: 2.8K
|
Final sculpt completed. Now that the final sculpting and texturing has been completed it's time to see how it looks and start adjusting the facial profile and tweaking the bones.  : 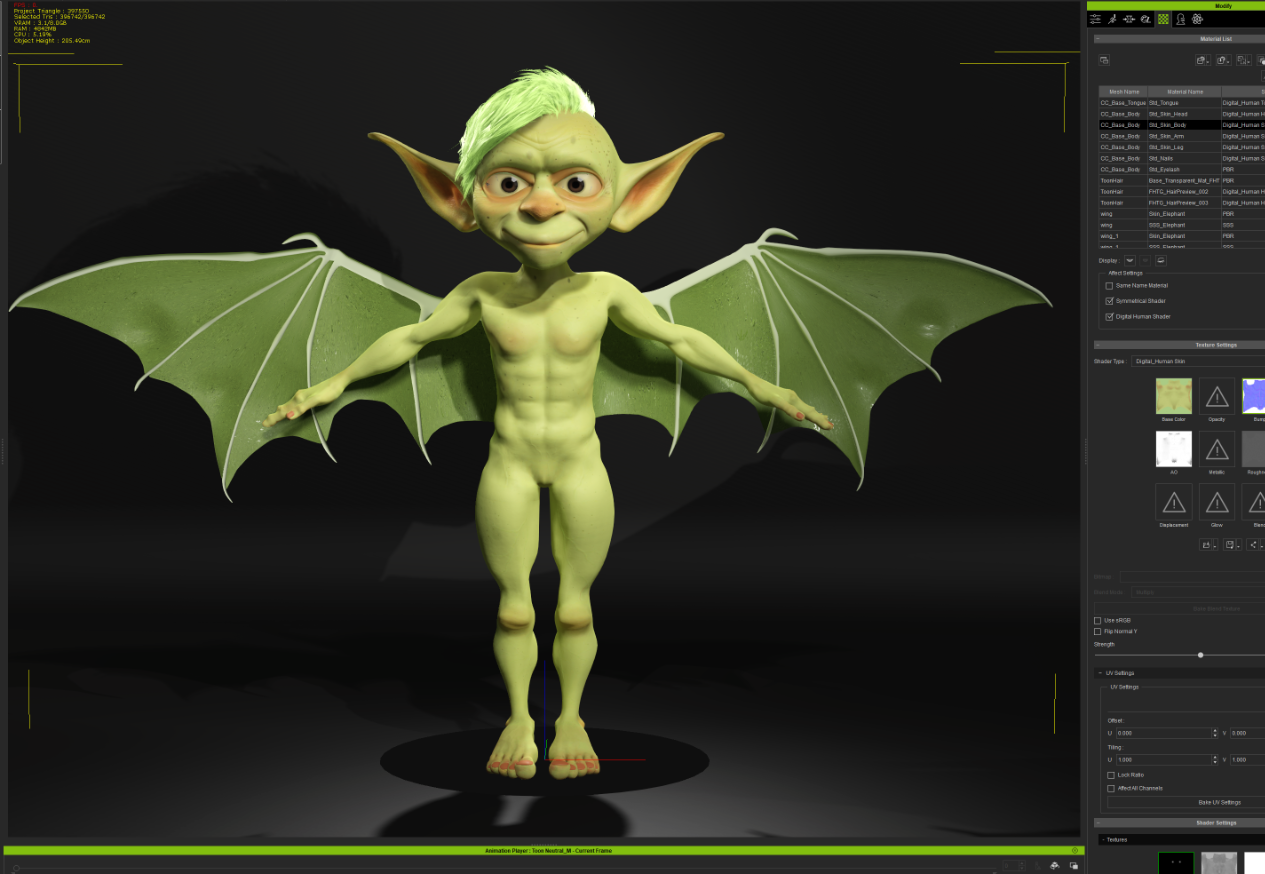 Reallusion Tutorials and Tips: https://www.youtube.com/@3DPixl
Edited
2 Months Ago by
BlueyCreative
|
|
|
|
|
3DPiXL
|
3DPiXL
Posted 2 Months Ago
|
|
Group: Forum Members
Last Active: 3 days ago
Posts: 279,
Visits: 2.8K
|
|
|
|
|