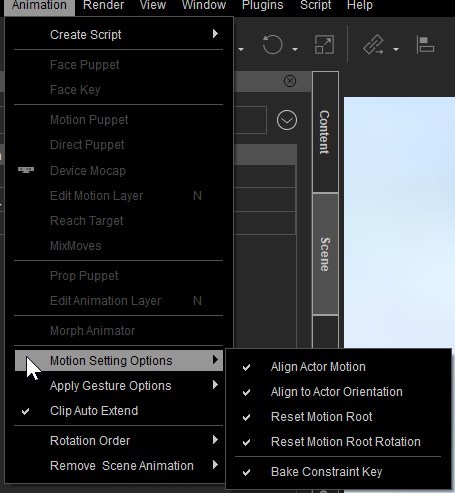
In your animation menu, motion settings options, there are 4 options for how the root is tracked. By default they should all be checked. In this case, where you have motions that are meant to flow together, the rotation tracking can be thrown off. So try un-checking the "Align To Actor Orientation", and then insert the second motion. So the second motion you added got rotated to the pelvis orientation of the last frame of the first clip, which is not what you wanted.
Think of your character as being in a box that you insert into your scene. You can move the box all around with the gizmo, move the character within the box using the motion layer, or move both.
The motion setting options track the character's pelvis, and align the box to the character. In a game engine, this is called "root motion".
New motions are always inserted at the position and orientation of the box.
You can move the character within the box so they are no longer at the root location. The right-click align on a motion clip in the timeline changes the bone locations, not the root of the box. That is why you see the offset.