CREATING YOUR OWN OPTICAL STYLE MICROSCOPESOK, this pack has 70 models that can be double clicked to add it iclone and create a Microscope in a style that you want.
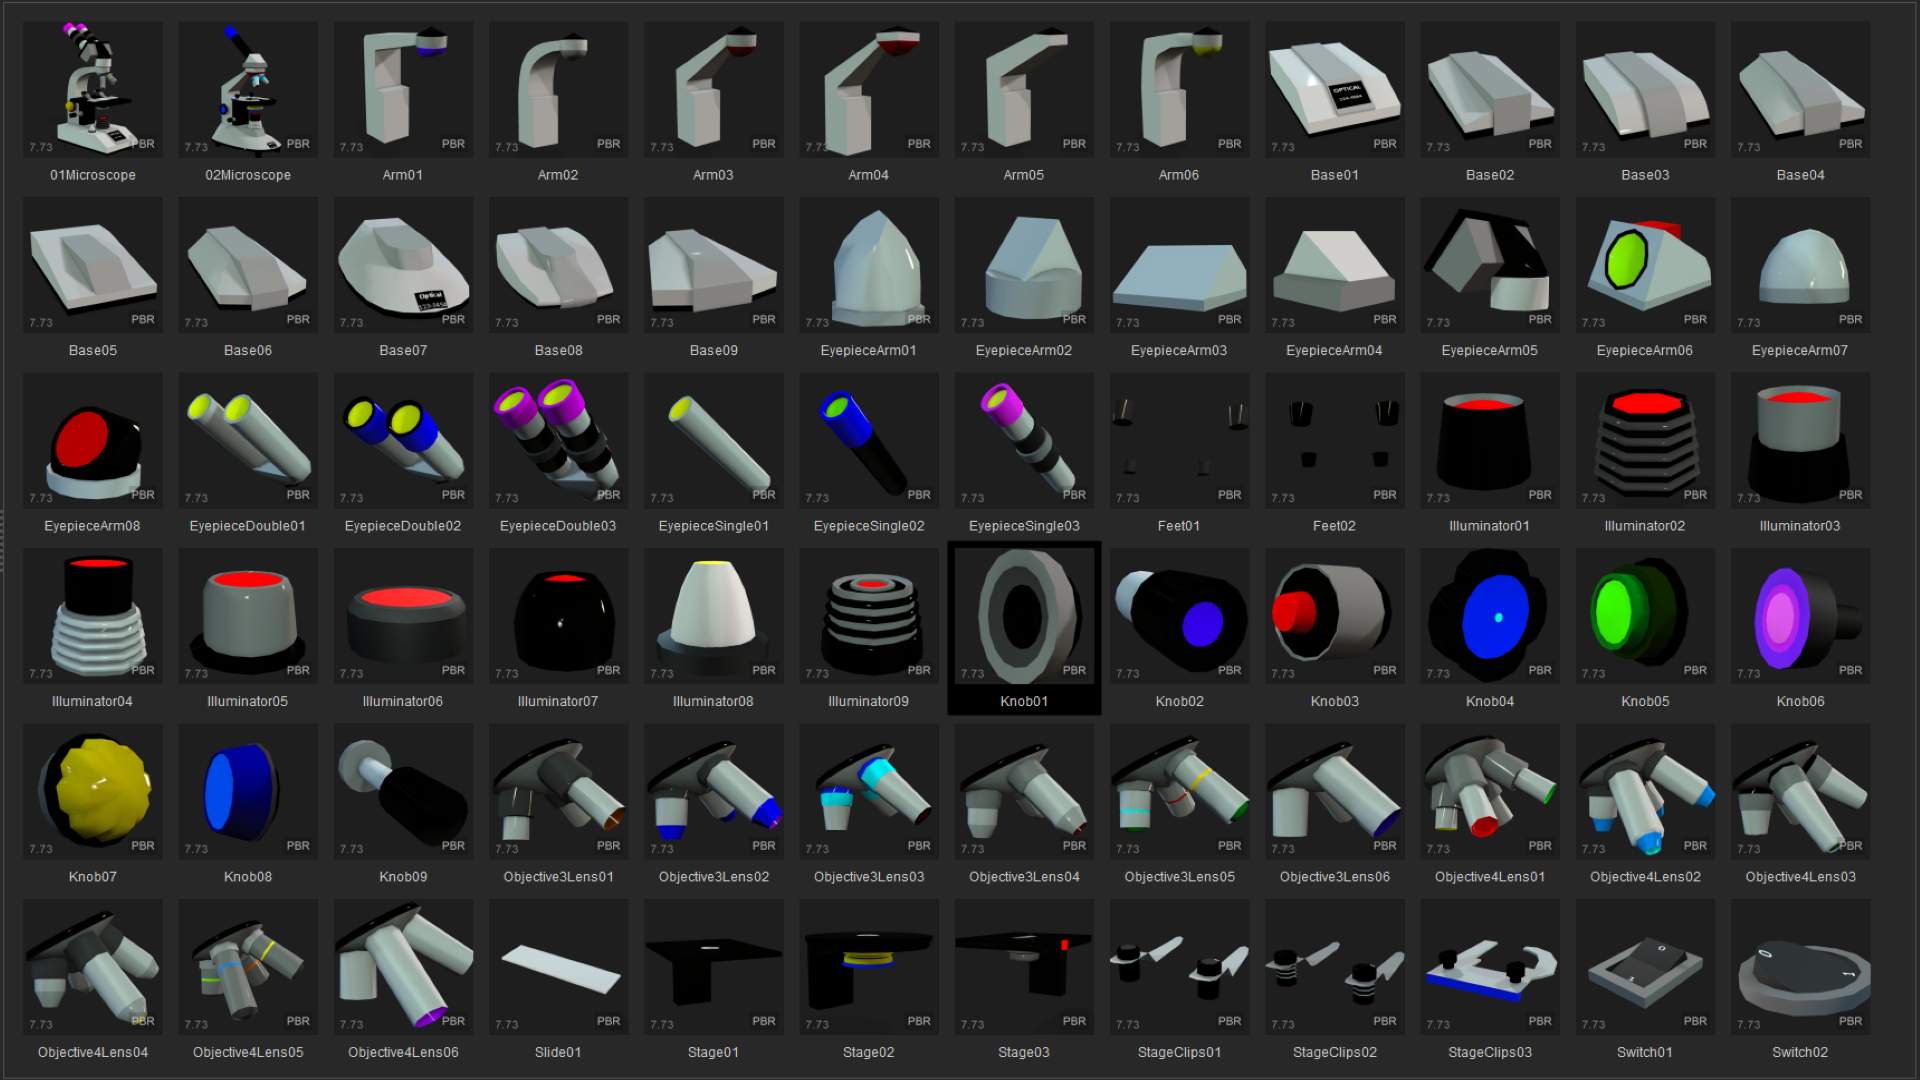
Here is an image that shows all the 70 models and their names. Also at the top are 2 versions of Microscopes that I created using these models.
And here is a video I made in 1 hour that demonstrates some ways that the Microscope can be animated by a character.
CREATING YOUR MICROSCOPEThis is pretty simple, Just double click each model you want to create the Microscope you want.
I have positioned the parts so the load up in the correct place for the microscope although depending on which models you use you may need to move or rotate them so they match with the other models you used.
There is especially one set of model types you will difinitely need to move, rotate and scale. This is because I set the Knobs so they all load in the same position. But Microsopes need more than one of them so you will need to load one, move and rotate it where it needs to be. Then load another and position it. Repeat repeat repeat untill you has all the ones you need and they don't all show up in the same position.
Another thing to consider is that I have created models with specific names. But you can also use other models that have different names, scale, rotate and position them so they look like a different version of a part in the Microscope. To highlight what Im trying to say here you could load Knob 4 and then scale and position it so it gets used as an Illumator instead of a Knob.
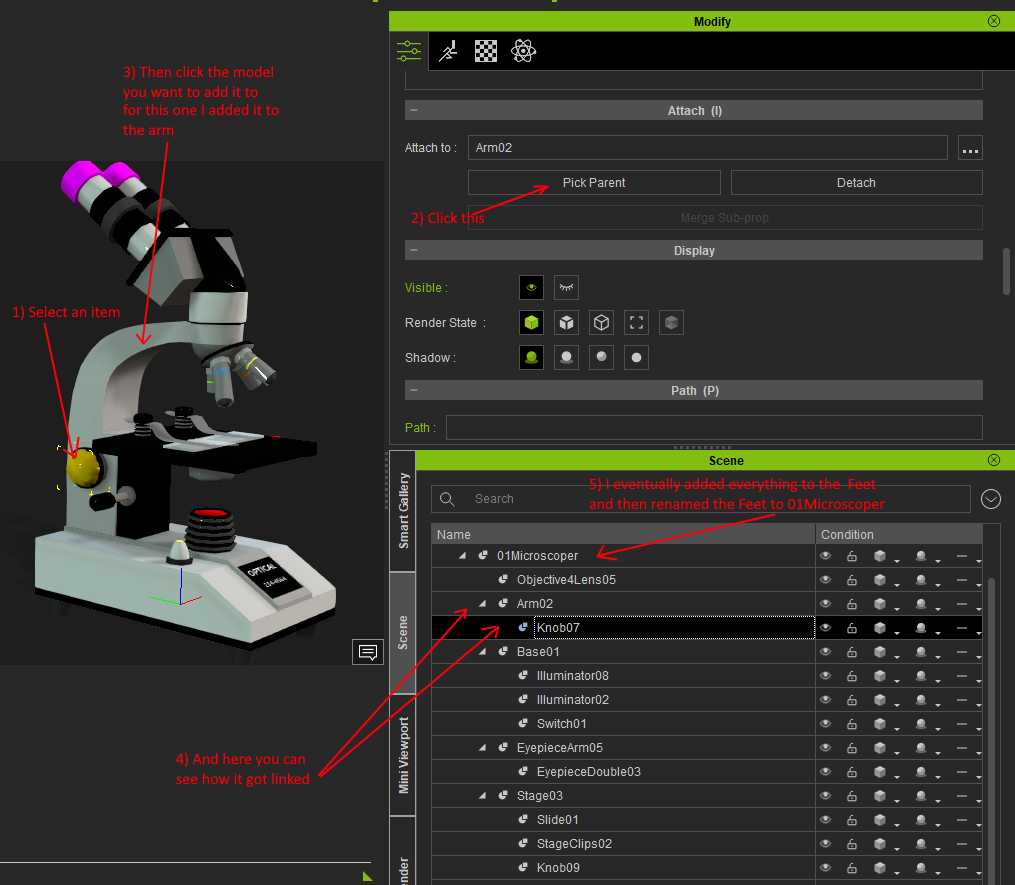
Once you have loaded, posioned, scaled and rotated all the models you want to make your Microscope you want then I suggest you should join them all together so it acts like a single model. That makes it easier to set its size and position in the video your making with it. But also you can go inside the single model as select parts so you can move and rotate them for animating it.
Here is an image that demonstrates how I did it
 TEXTURING THE MODELS
The key thing to do here to make your own image styles is to send the models UV map to your 2D program (I use paint.net). Although if you just want to change the colors I have set up then you can just send the models base color I created to your 2D programmer, select a color I set and then just change its color to what you want. Its pretty easy. If you don't know about UV maps I have written a high explanation of them
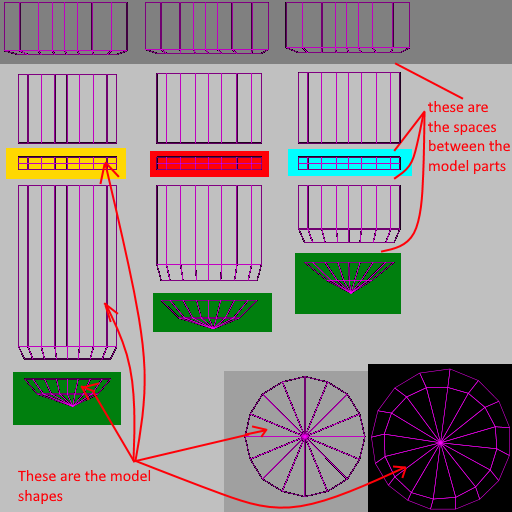
here. Hopefully that will help you to understand it. I key point I have done with the UV maps for this set of models I created is I set empty spaces between the models parts that I see can be made different collors. I did that because it makes it easier to set different cololors without the edge between the 2 colors not looking smooth like they should be.
Here is an image that shows what I mean
 ANIMATING THE MICROSCOPES PARTS
I haven't used morph animation for these because round shapes don't rotate correctly. So you just need to select what you want to animate and move scale or rotate it in the time lines.
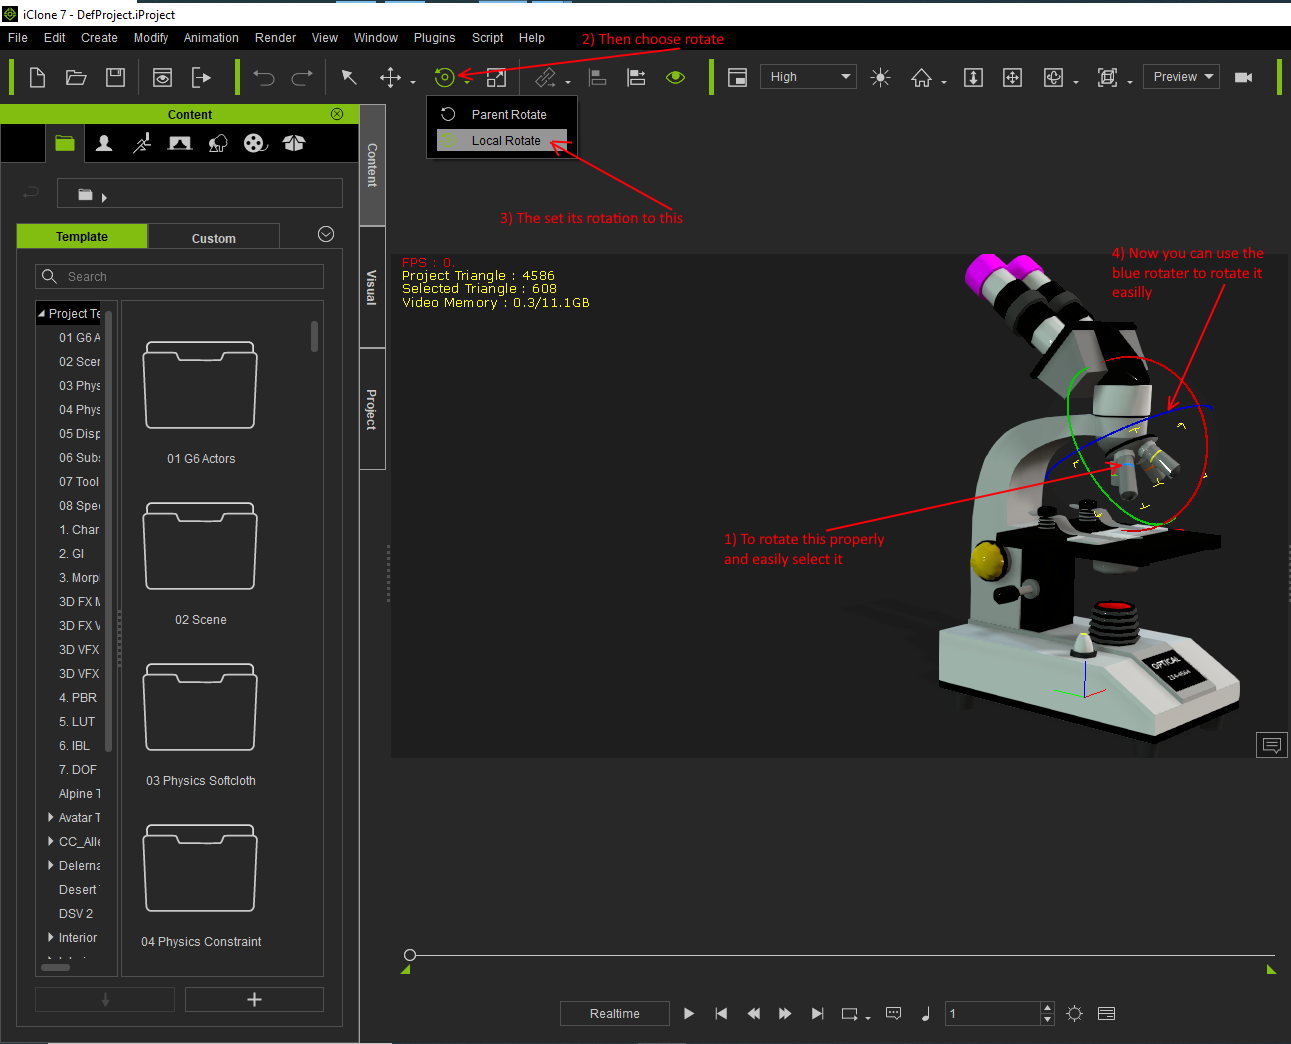
One thing im going to show here is animating the Objective lenses.
Select it, set it to rotate and set rotation to Local Rotate. This makes it so you can use the plue rotation line to rotate it easilly.
Here is an image of what I am saying.
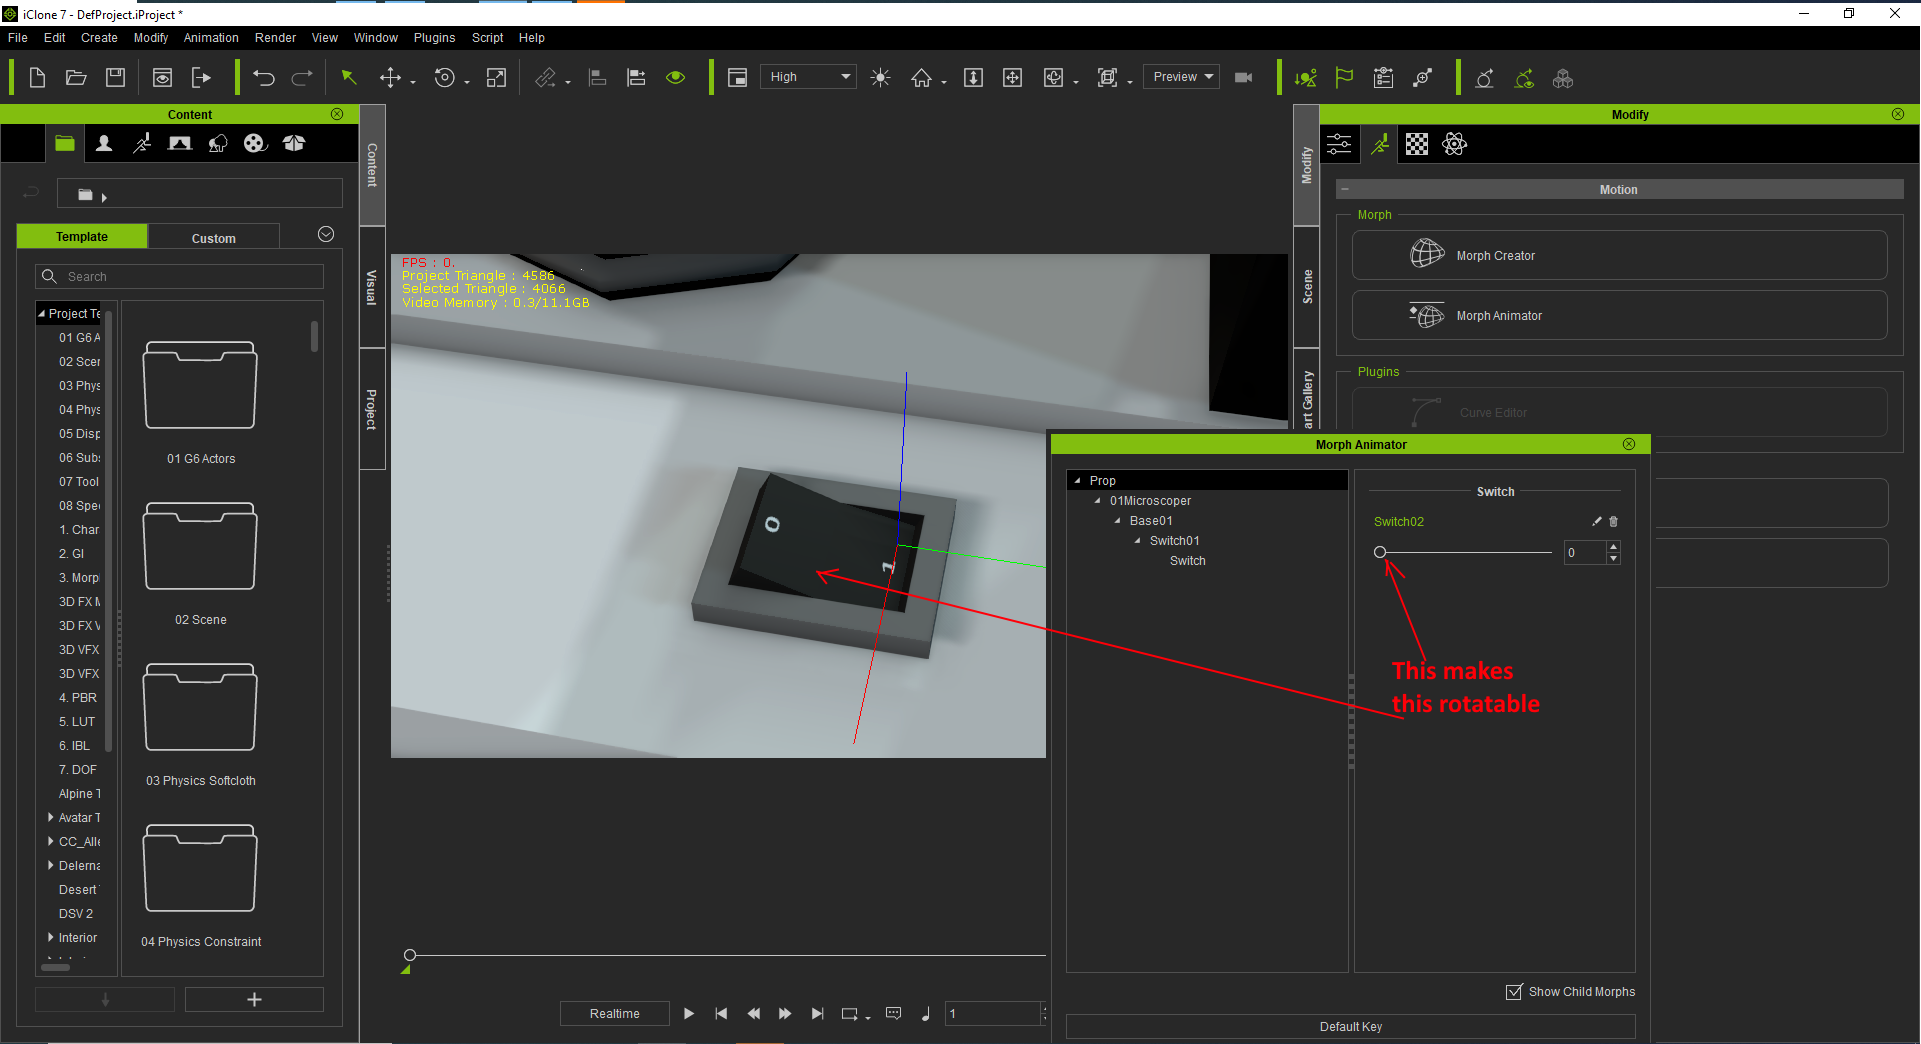
I said there are no orphable animations. Well there is one. The 2 switches.
Here is an image showing what it does
 i7-3770 3.4GHz CPU 16 GB Ram
GeForce GTX1080 TI 11GB
Windows 10 Pro 64bit