|
Miranda (RL)
|
Miranda (RL)
Posted 8 Years Ago
|
|
Group: Administrators
Last Active: 4 Years Ago
Posts: 1.8K,
Visits: 11.2K
|
March 19th update: the Beta 2.0 script is released. Please find the process HERE. Introduction
The process of bringing an animated CC character into the Unity can be tedious. This is exacerbated by the inordinate amount of time it would take to manually assign every material property, adjust texture settings, modify animation properties, model configuration, along with other complicated manual tasks. In response, we are providing this plugin to trim your production time by automating the aforementioned idiosyncrasies. Process Overview- Export FBX from Character Creator 3
- Download and Install the Auto-Setup Script
- Import the FBX File into Unity to Prompt Auto-Setup Process
- Adjust Some Settings in Unity (Optional)
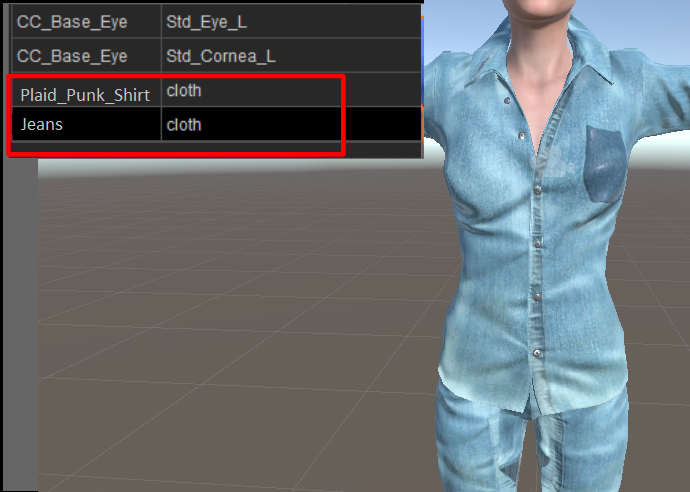
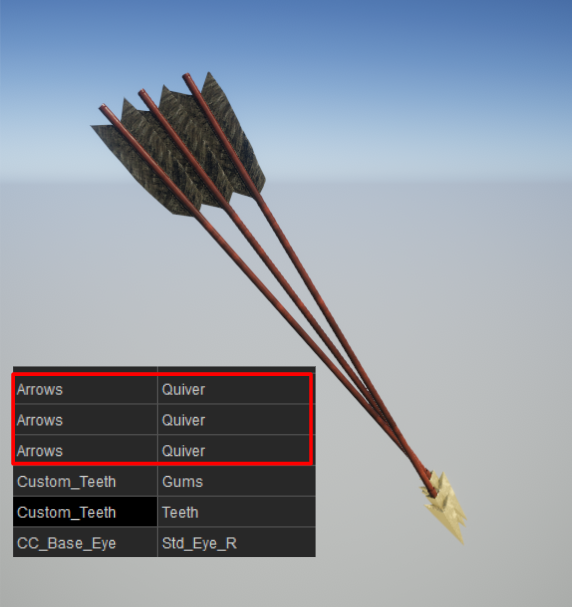
Step 1 - Export FBX from Character Creator 3- Materials and textures with the same name cannot be correctly configured, causing them to adopt the same attributes. Because Unity treats objects of the same name in identical fashion, one should give a proper name to each individual object in Character Creator 3 before export.
*From CC v3.05 onwards, identical material names from different objects will automatically append a sequential number suffix.
Example: The auto-setup results in Unity when there are different material/texture names on shirts & jeans.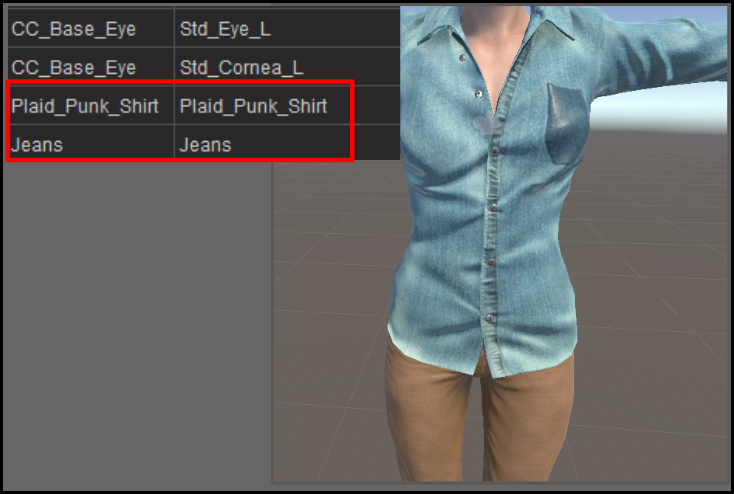
Example: The auto-setup results in Unity when there is same material/texture name on shirts & jeans.
Example: The auto-setup results in Unity when there is same material/texture name on the arrows.
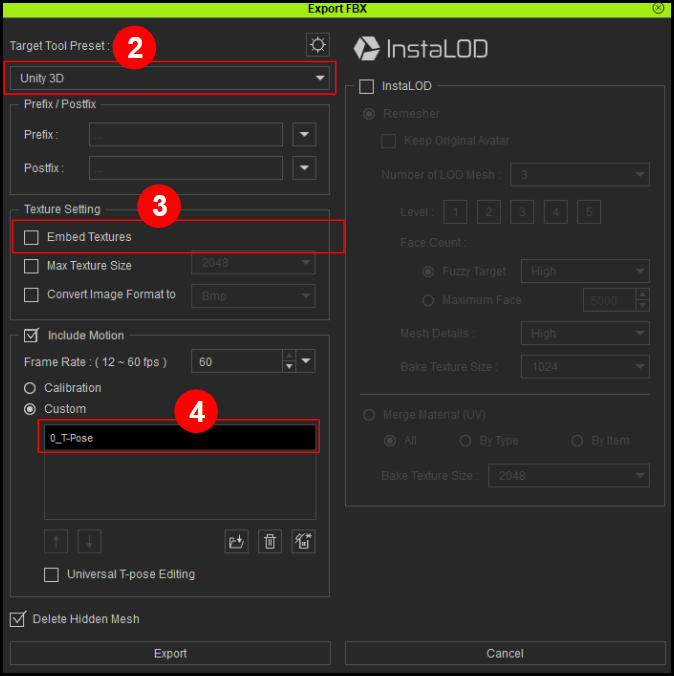
- Choose the Target Tool Preset as Unity 3D.
- Uncheck the Embed Textures option. Auto-Setup Script will automatically connect all textures to the proper channels in Unity.
- Characters and motions can be exported from Character Creator. If one needs motions from iClone, please save them in rlMotion or iMotionPlus format and bring them into the Character Creator workflow. The first motion file should be T-pose for correct re-targeting, and the file name must be "0_T-pose".
*From CC v3.04 onwards, T-pose will be automatically added as the first motion file when exporting motions.
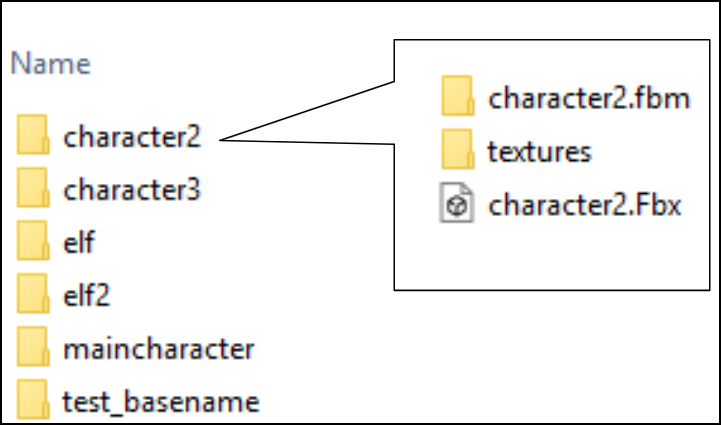
- Please create a new folder for each new character import. Importing multiple characters into the same folder directory will create problems with texture map configurations.
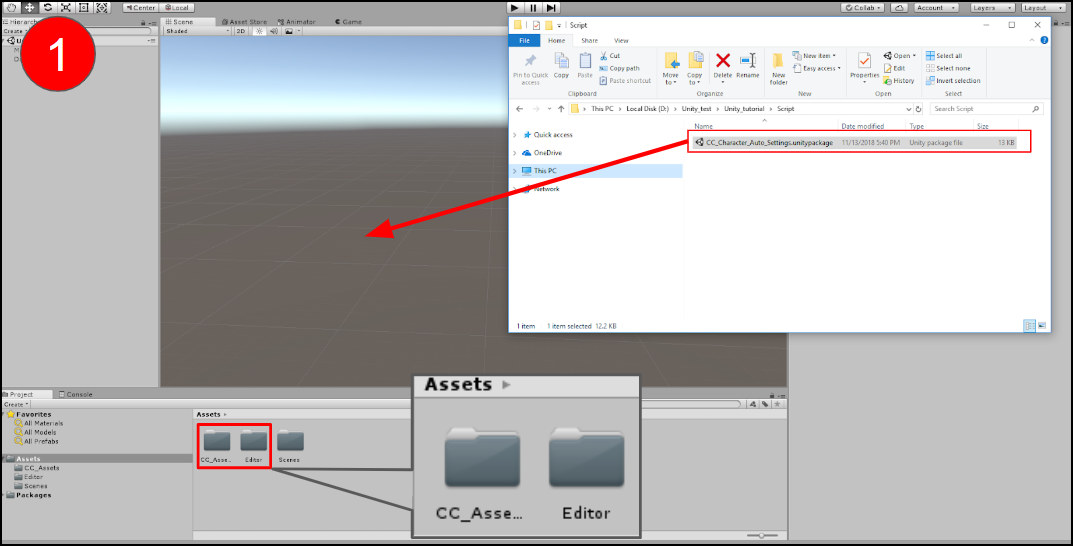
Step 2 - Download and Install the Auto-Setup ScriptThere are two ways to install the Auto-Setup Script in Unity. The Editor folder and the CC_Assets folder will be automatically generated under the Assets folder after installed. - Drag the Auto-Setup Script to the Assets folder in Unity
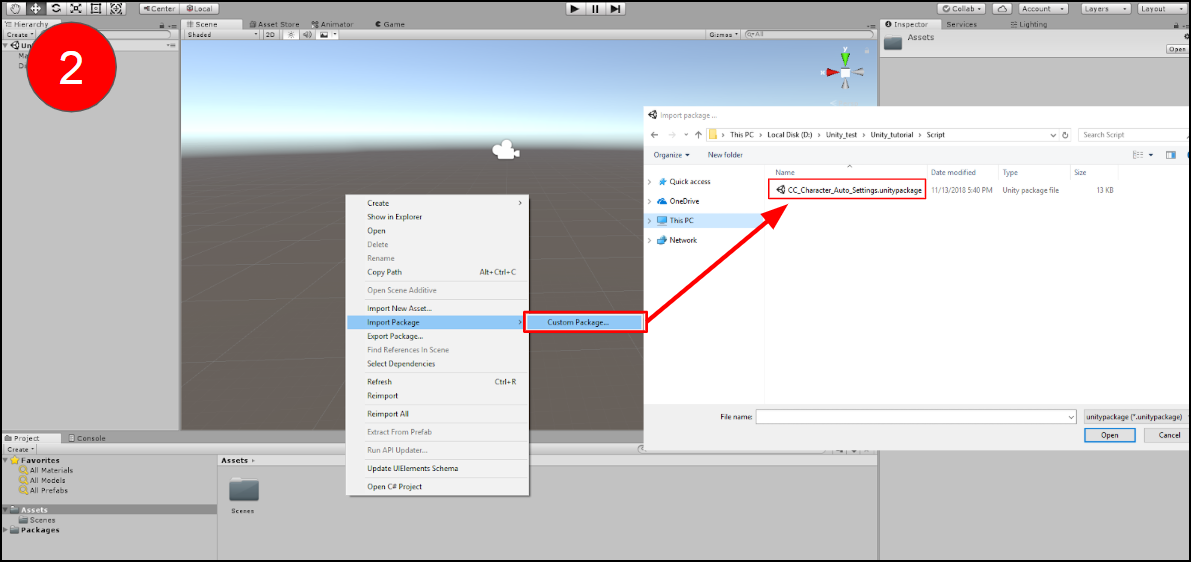
- Import the Auto-Setup Script by right-clicking the Assets folder.
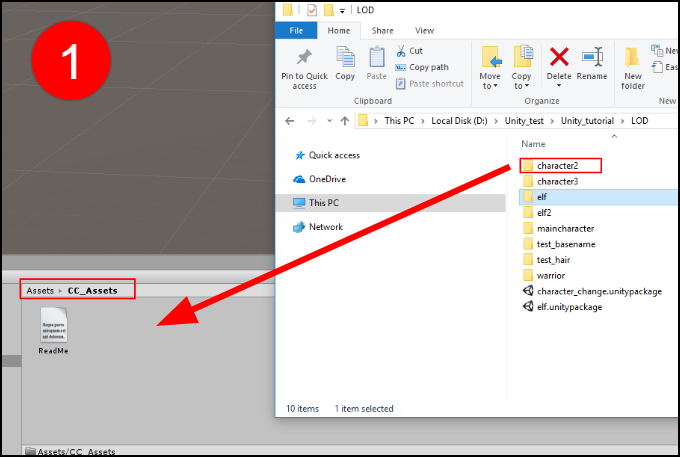
Step 3 - Import the FBX File into Unity to Prompt Auto-Setup Process- Drag the exported folder which contains .fbm, textures, .fbx to the CC_Assets Folder.
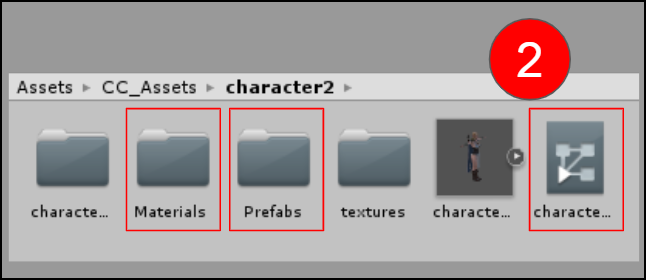
- There will be a Prefabs folder, a Materials folder, and an animator controller file generated after processing.
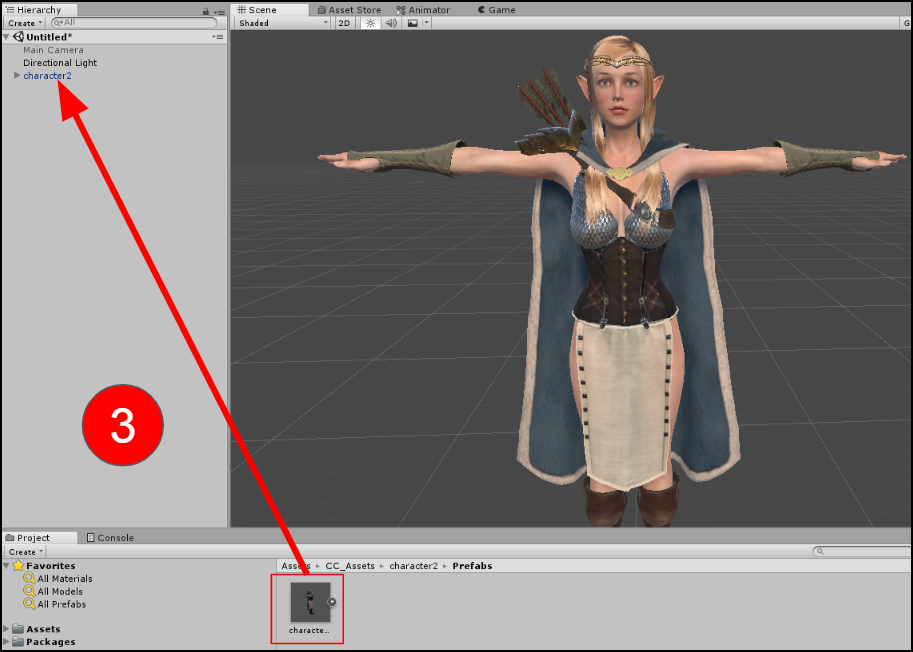
- Character will be shown up after dragging the file (.prefab) under the Prefabs folder to the scene.
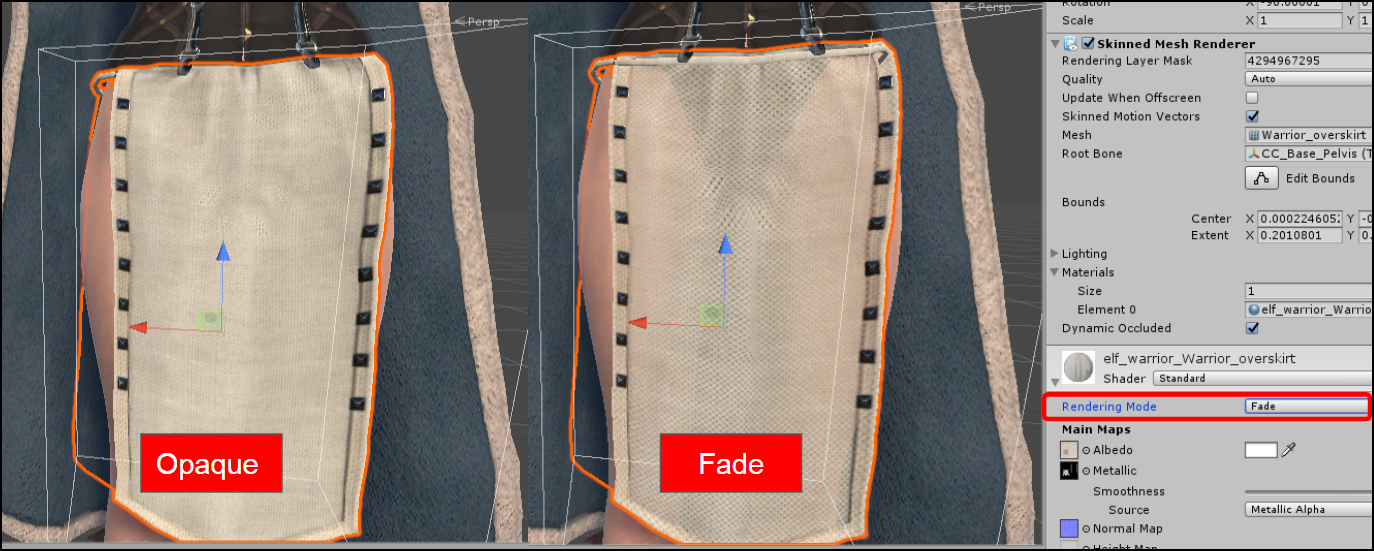
Step 4 - Adjust Some Settings in Unity (Optional) - Correct the Rendering Mode for each element. Take the warrior overskirt for reference.
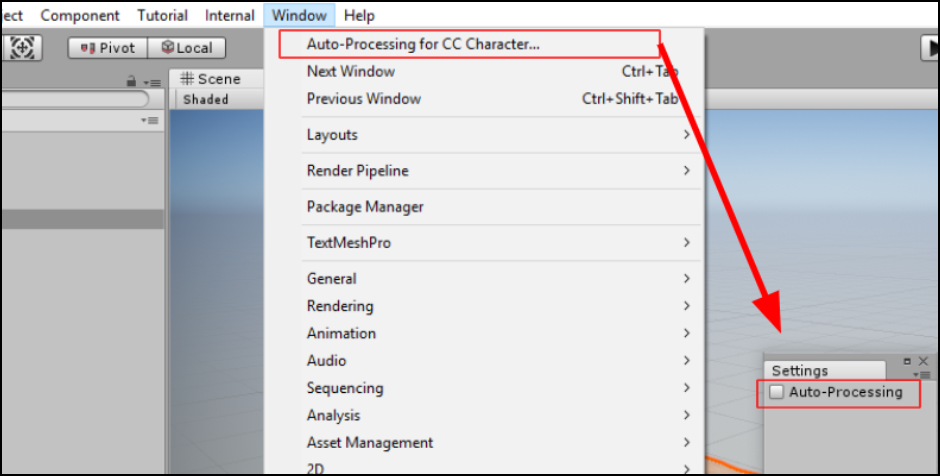
- Before adjusting the settings of the imported CC assets, make sure that Auto-processing for CC Character > Auto-Processing is turned off. These adjustments can include tweaking motions and replacing materials.
Script & TutorialTo download the Auto-Setup Script, and learn more details from step-by-step training videos, please visit >> https://forum.reallusion.com/396261/CC3-to-Unity-Importing-CC3-Base-Characters-to-Unity-Using-a-Script-for-Auto-SetupImportant Considerations
To run the auto-processing effectively, please read the following notices first:
- There is only full support for Character Creator 3 G1 and G3 characters with FBX being the primary format of exchange.
- Characters and motions should all be exported from Character Creator. Be aware that characters processed directly from iClone or 3DXchange may need some manual re-assignments for motion re-targeting.
- Please import each character separately as unexpected issues may arise from importing multiple characters at once; such as improper linkages to texture files.
- Some special keywords in the naming of FBX file and/or materials can interfere with the auto-processing procedure. Since the following keywords are used to identify specific features for configuration, it is best to avoid using them: diffuse - ao - normal - metallicAlpha - metallic - roughness - glow - specular - transparency - hair - eyelash - ga_skin_body - skin - loop LOD0~N
- There is no support for auto-assignment of Blend, Displacement and Reflection channels.
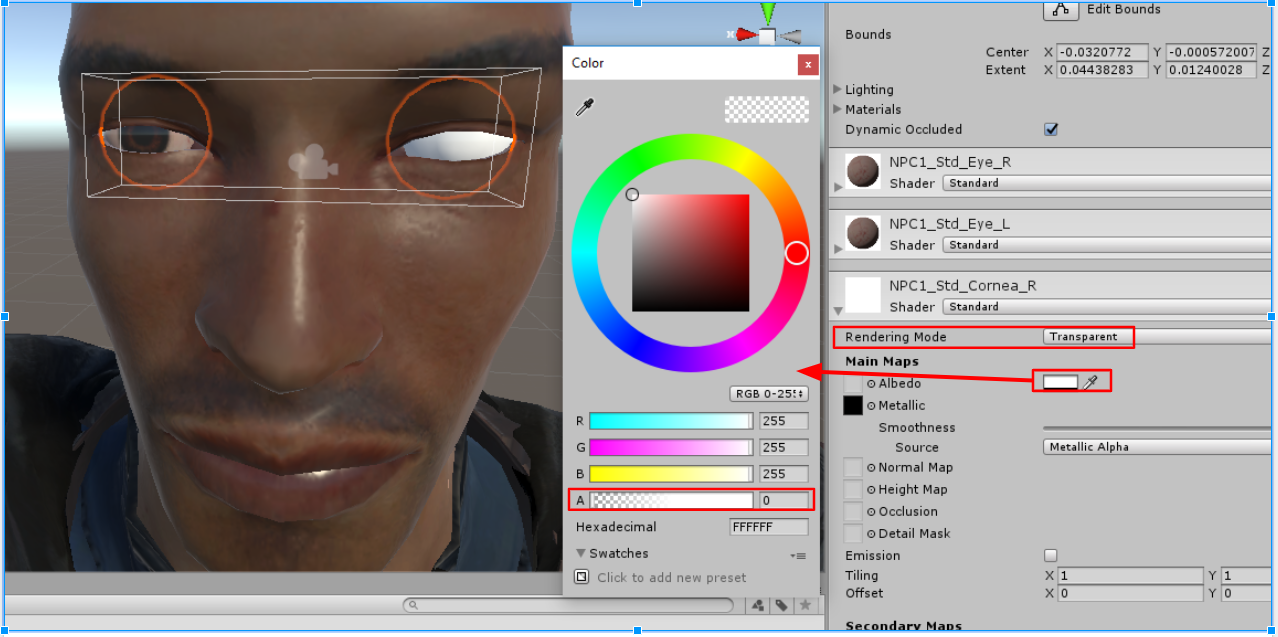
- Daz characters in CC that have not undergone replacement for the eyeballs will cause the eyes to turn white when imported into Unity. This issue will be addressed in a future update (Script Beta 1.1), for now, one can easily remedy this issue by changing the cornea material's Rendering Mode to Transparent and changing the Albedo alpha to zero in Unity.
- Unity and Character Creator calculates mesh normals in a fundamentally different manner which can cause mesh edges to appear hard inside Unity. Fix this by trying out different settings for the Normal & Tangents > Normals parameter. However, before doing so, don't forget to disable Auto-Processing.
|