7) my scene is not yet done, i need to add a ship and have that ship move across the water
so off to coolcreators, clones2go and 3D warehouse i go to look for a ship - got one from
clones2go and used it below

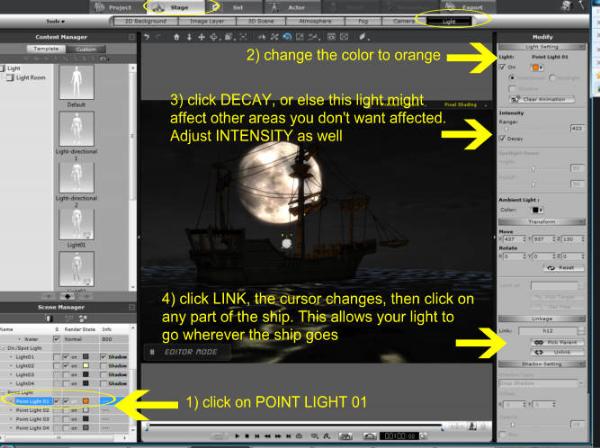
8) now let's apply some lighting on the ship to bring out some of the details of the ship - but if you are ok with a silhouette you can leave it alone - me, i like details so we'll us a a point light and have it linked to the ship so it allows us to see some details of the ship

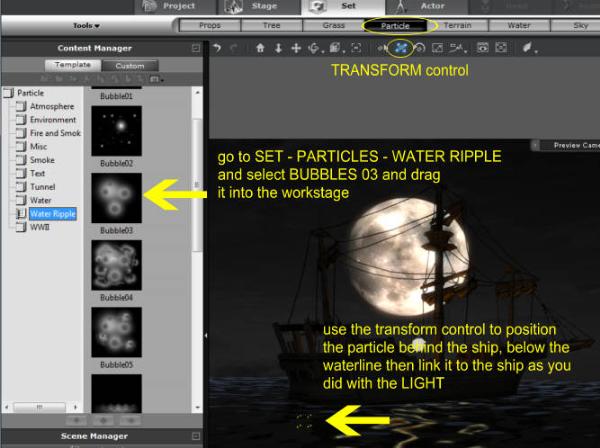
9) Thinking ahead, now when my ship moves i want it to have some sort of water wake - so some trial and error with particles led me to choose one and use it to simulate the water wake

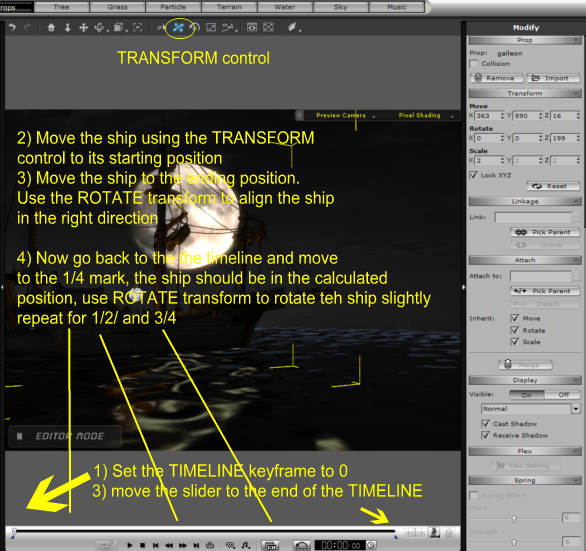
10) Now lets animate it - review how we did it above when we had the SKY rotate. Same thing here. The idea here is we tell iClone where the ship starts and where it ends, iClone calculates where the ship might be in between these two points. After we do this we jump into around the 1/4 mark of the timeline, the 1/2 and the 3/4 mark and ever so slightly adjust the ship's rotation in each of these points. This simulates the ship moving/bobbing with the waves

Okay so we now complete the first scene - at my discretion, i can tweak the entire scene more to improve the look, the motions, add rain and fog etc..
11) Now notice we did not touch the camera, everything is captured from the point of view of the PREVIEW camera. we'll work on the other cameras later.
RENDERING
12) now i am ready to render the scene - if you go to EXPORT you will see the various formats you can export (image, video, image sequence, widget) select VIDEO. Under FORMAT i always export uncompressed AVI for my movies. I use an external video editor to assemble the movies and from there export to the format i want to use for uploading to YouTube. This way i always have the uncompressed MASTER in case i need it in the future.
WATCH VIDEO HEREsince we put all that work in, here's a rendering of the image

