|
Group: Forum Members
Last Active: 5 Years Ago
Posts: 2,
Visits: 83
|
UDPATE: My entry!! All comments, feedback and questions are very welcome! Thanks for coming by and taking the time to read this thread. Hi! This post is meant as a log for my future entry, both to share my process and struggles, as well as a means to try and stay motivated and focused (: I'll be updating it as I achieve development hallmarks. Rules: I've set some self imposed rules to keep me from going off rails: - Scope, scope, scope: Know what the project is and what is required; focus on that first.
- Embrace the "amateurism": Don't forget this is your first time using this tool. In the process you will encounter many challenges. Don't get bogged down if what you have in your head does not match the final rendered video.
- KISS (Keep It Simple, Stupid): Use the tools, workflows and tutorials that Reallusion provides, and try to come up with solutions when facing challenges; Remember, scope.
Brief: A free-form interpretation of the poem Do not go gentle into that good night by Dylan Thomas, as narrated by Sir Michael Caine (Interstellar, 2014). Workflow (may change during actual development): - Gather reference.
- Since I already have a pretty good idea of what I want to achieve in terms of shot composition, I will focus first on learning and exploring Character Creator and try to accomplish a decent character model. This may look counterproductive, but A) I have no prior experience with the sotware and/or character animation in general and B) I know I won't be taking too long in the storyboarding and staging portions.
- Draft a storyboard (shot for shot) NOTE: I will try to keep shots and camera movements to a minimun, and focus on framing the performance.
- Edit sound clip(s).
- Staging: Create a simple-yet-functional (properly scaled) set to use in the shot composition stage.
- Shot composition: set all the cameras necessary and quickly draft and refine the shots based on the initial storyboard; use temporary props (static base meshes, simple objects, etc,) at this stage.
- Previz/animatic (no lighting): To preview and adjust timing beforehand.
- Wardrobe (OPTIONAL): I will be using the provided clothing asset samples, but, if there is time, I will dedicate time to try modify things a bit to better match my idea.
- Export and test character and audio clip to iClone for lip-sync. NOTE: I'm leaving this step all the way down because I'll be using the trial versions of Reallusion's software, and I'm sure I'll need all the extra time I can get, so I'll be downloading the iClone 7 trial only after I'm confident about my character models.
- Refine lip-sync (if necessary).
- Set dressing: I will not dedicate too much time to this, since it's not the main focus of the project.
- Lighting and lookdev: export static (non-animated) character from CC, import into stage and setup lights for each shot. NOTE: I will go about this rather informally due to time and hardware constraints (on my end). Will follow the KISS rule (see above).
- Renders tests (Eevee).
- Render animation.
- Composite: I'm using the term very lightly here. I will do some basic coloring and (probably) a few post-processing effects; will most likely not deal with render passes.
- Upload!!! :D
Development:
1. Reference:
 My main character for this project is Sir Michael Caine. Because I'll be working with likeness, gathering reference photos is a given. Luckily, being a public figure, images of his face abound. One thing I didn't really consider, though, was the stark differences in his appearance throughout the years. Because of this, I decided to try and represent the Michael Caine from 2007-2014 (the Batman movies, Insterstellar). NOTES: - You'll notice I added very old pictures of him in his 20's-30's. These give a much better understanding of the shape and proportions of his face, eyes, etc., without getting me bogged down with details like the naturally more loose skin around the eyes, cheeks, neck; if I can get the basic shapes close to right, it'll be easier (I hope) to "age" him later.
- I also found this amazing mini sculpt of his head, which I find to be valuable reference because it helps focus on shapes.
- While I was trying to find image with even lighting at first, I started to notice that more dramatic lighting accentuated certain features, which is good when attempting to work with likeness!
Resources: 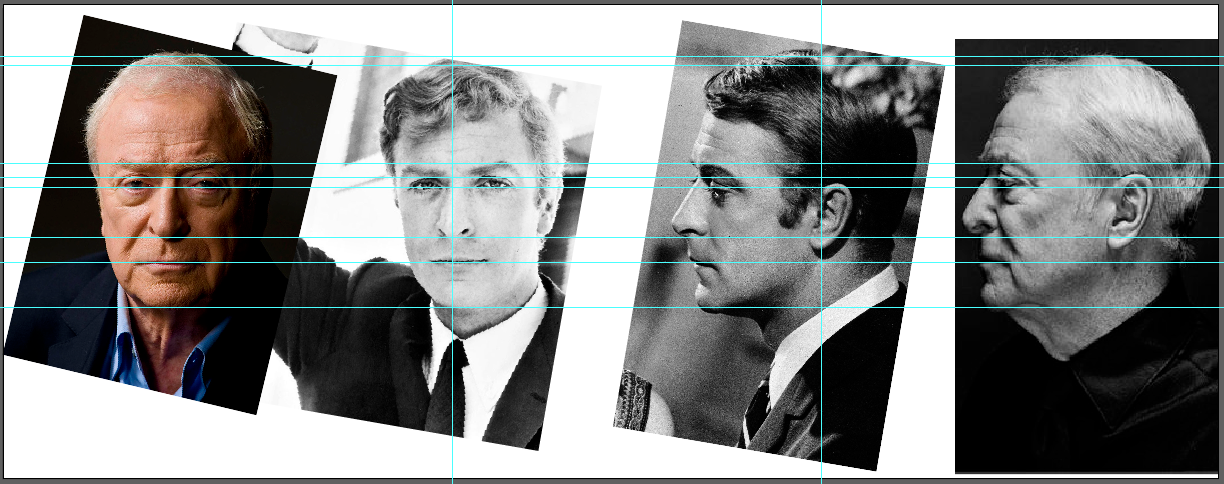
Like I explained before, the objective for the reference is to check for proportions, shapes and face landmarks to match on Character Creator. To make my life a little easier, I used a few pictures that I found to be in similar angles (front / side), both from a young and old age, and drew some guides to better visualize broad shapes, distances and angles of facial features and, by doing so, understand the face of my model a bit more. This also helps me "see the trees from the forest", by simplifying complex shapes (eyes, nose, skull, etc.) using lines and simple polygons.  2. Character Creation (in Character Creator) 2.1. Using HeadShot for base
Resources: I figured since I'm working with likeness, a good start would be to use the Headshot tool , to kickstart the creation process. I chose a picture that I considered the best amongst my references in terms of angle, lighting and expression (neutral). After some Phosothop work, this is the result I produced:
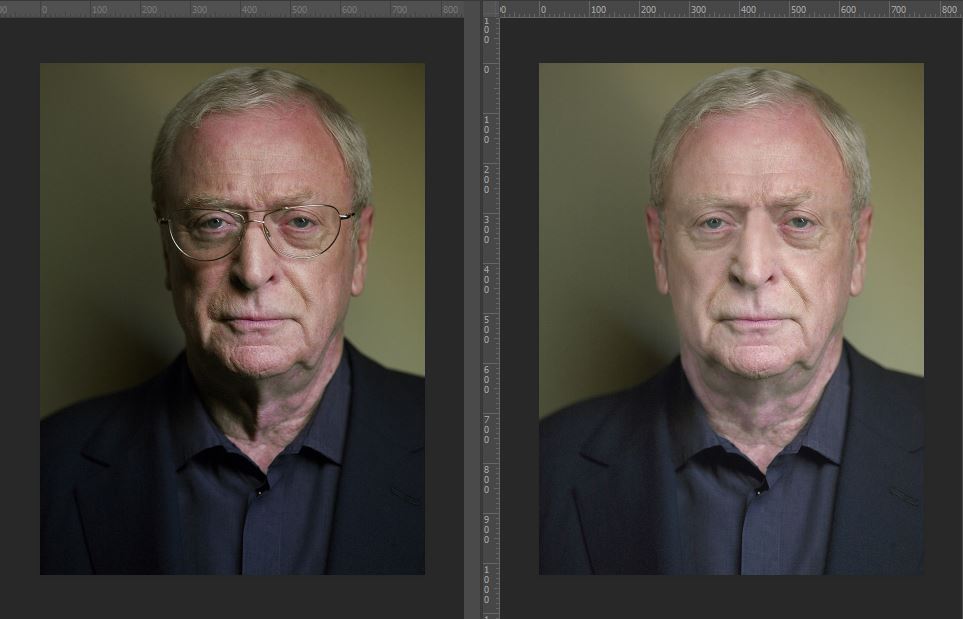 Original (left), Edit (right)NOTE:- I intentionally made the edit assymetric. This is because I wanted to see if the AI would pick up the subtle differences on each side; I also flatened the lighting to avoid artifacts, as advised in the advanced image edit tutorial.
I then proceeded to plug in the edit into HeadShot. After a few minutes, it came up with this result: 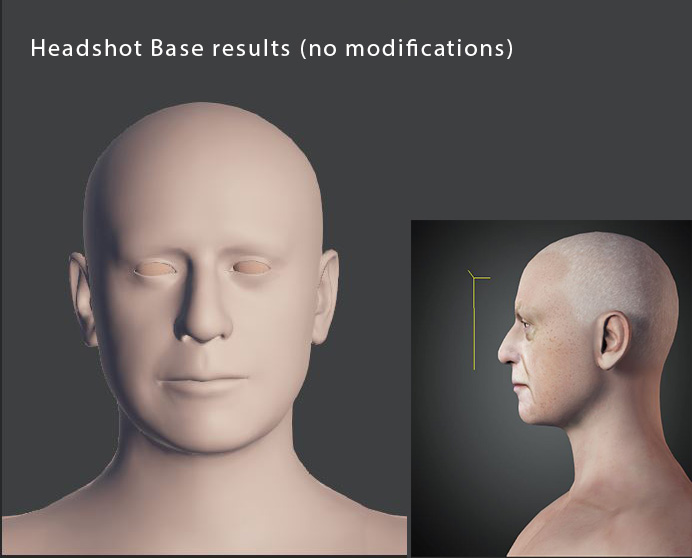 I believe the results are quite alright on the front, especially around the areas of the lips and brow; the side, however, needs work. 2.2. Matching and Adjusting inside Character Creator using references:
This being my first time using CC3, I found myself overwhelmed with the amount of sliders and granular levels of freedom it gives you to modify your character. There are sliders for small details for each major feature, but I tried to focus mainly on the proportions and broad shapes of the head and face first. It was difficult to use my marked down reference because CC3 didn't let me (or at least I couldn't find a way to) change the camera focal length to better match my photo references (outside Headshot camera matching). Regardless, I did manage to get relatively close, and used PureRef to place my references on top while adjusting several sliders to try and better match the side angle of the character. 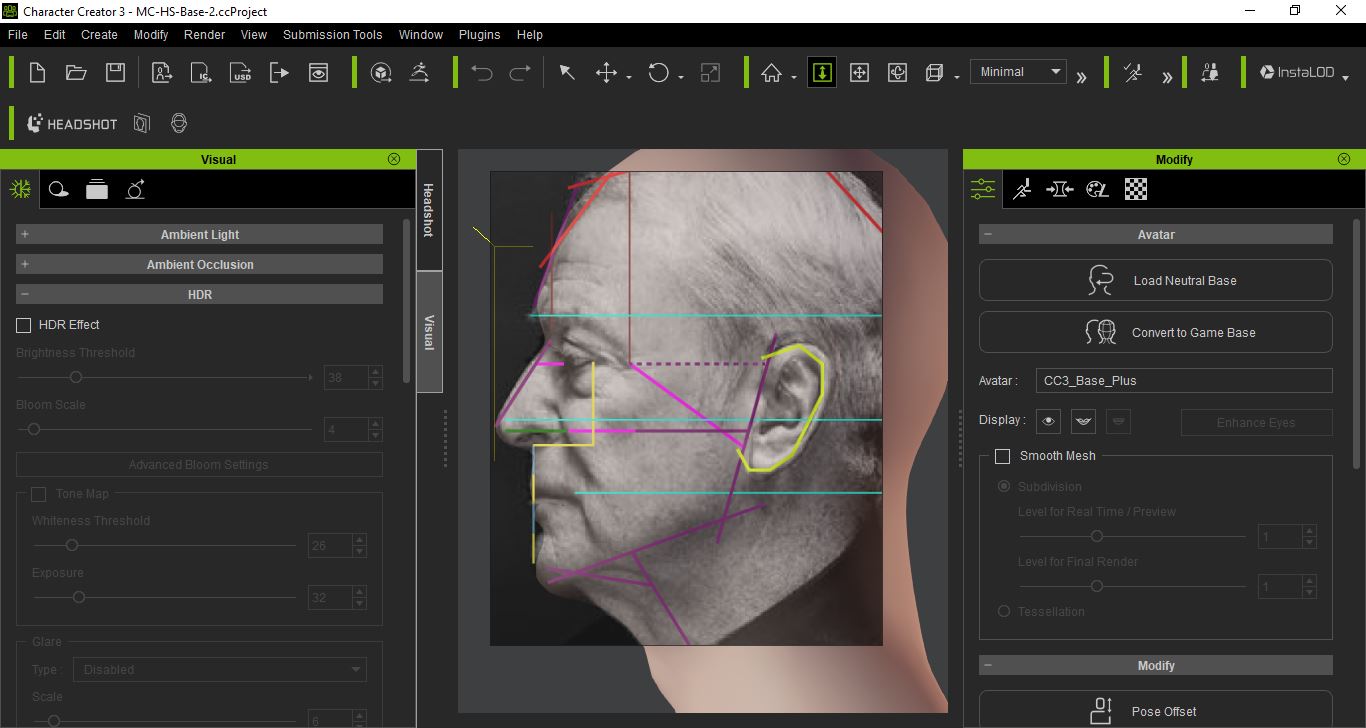 After many hours of playing with the sliders and getting to know its effect of the 3D model, I ended up with base I think looks closer to my reference 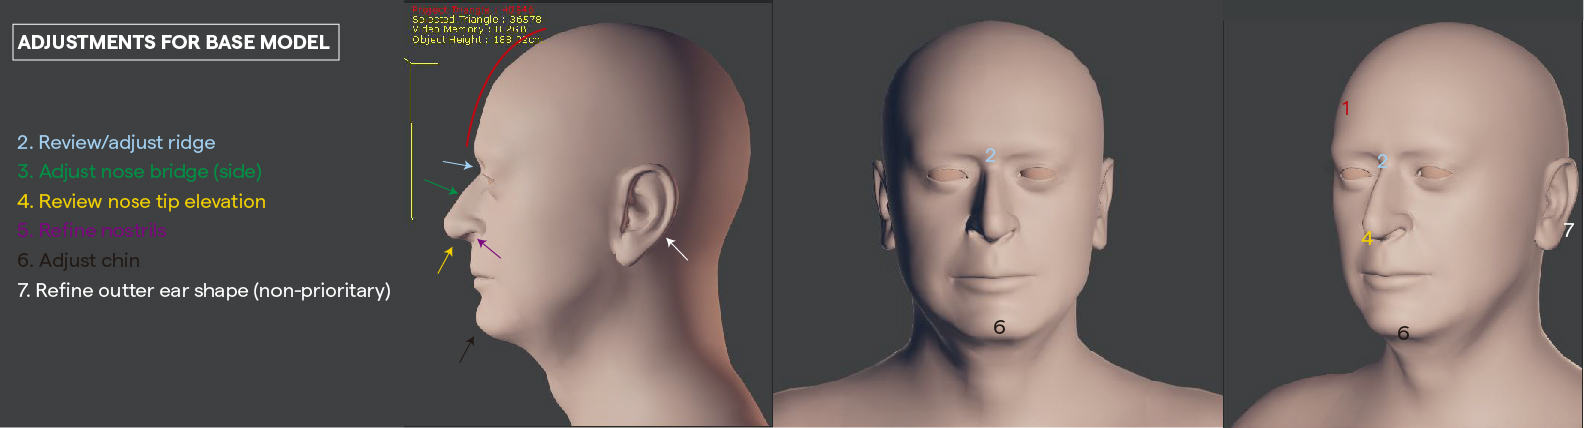 I'm quite happy with this base! There are still some details I couldn't quite match one to one (like the nose and chin), but overall this I think is a very solid base to take over to blender and continue refining.NOTE: I'm quite happy with this base! There are still some details I couldn't quite match one to one (like the nose and chin), but overall this I think is a very solid base to take over to blender and continue refining.NOTE:- I left myself some notes to keep in mind when taking the model to Blender and continue refining and scultping the mesh. These are my main focus.
2.3. Further refining the mesh / morph creation (in Blender):
Resources:
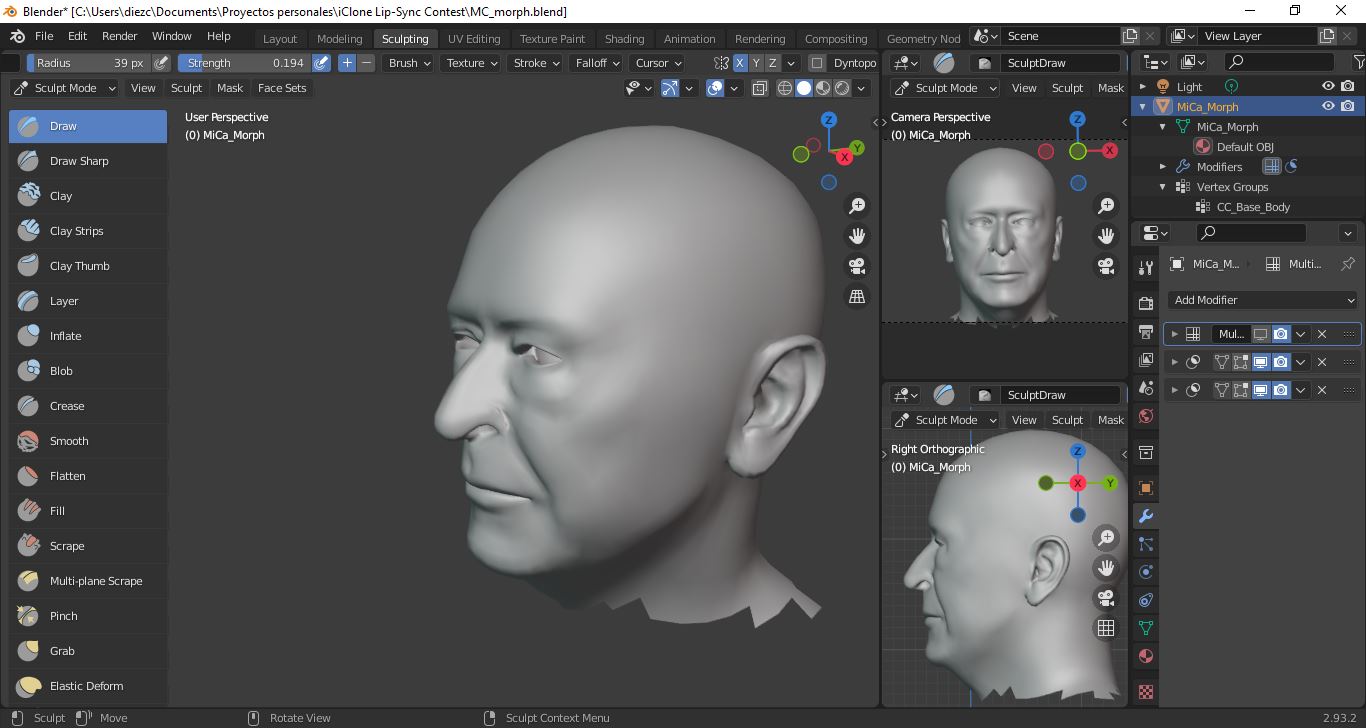
I'm currently working on the mesh in Blender, learning the sculpting tools. This will probably take a little while to get the mesh to a point where I feel comfortable. It's be a while! So, after a ton of learning and trying out the scultping tools in Blender, I managed to refine the CC mesh to my liking, and re-imported it back to CC.
NOTE:- While most of the sculpting was done using symmetry on, I made some small edits individually around each eye and on the nose.
- I used HairTool in blender to create the hair cards, which was then converted to a mesh so it could be imported to CC as an accessory.
 Back in CC3, I used the facial textures that Headshot created. I changed the previz mode to medium to have a more accurate representation of the texture files on the mesh. 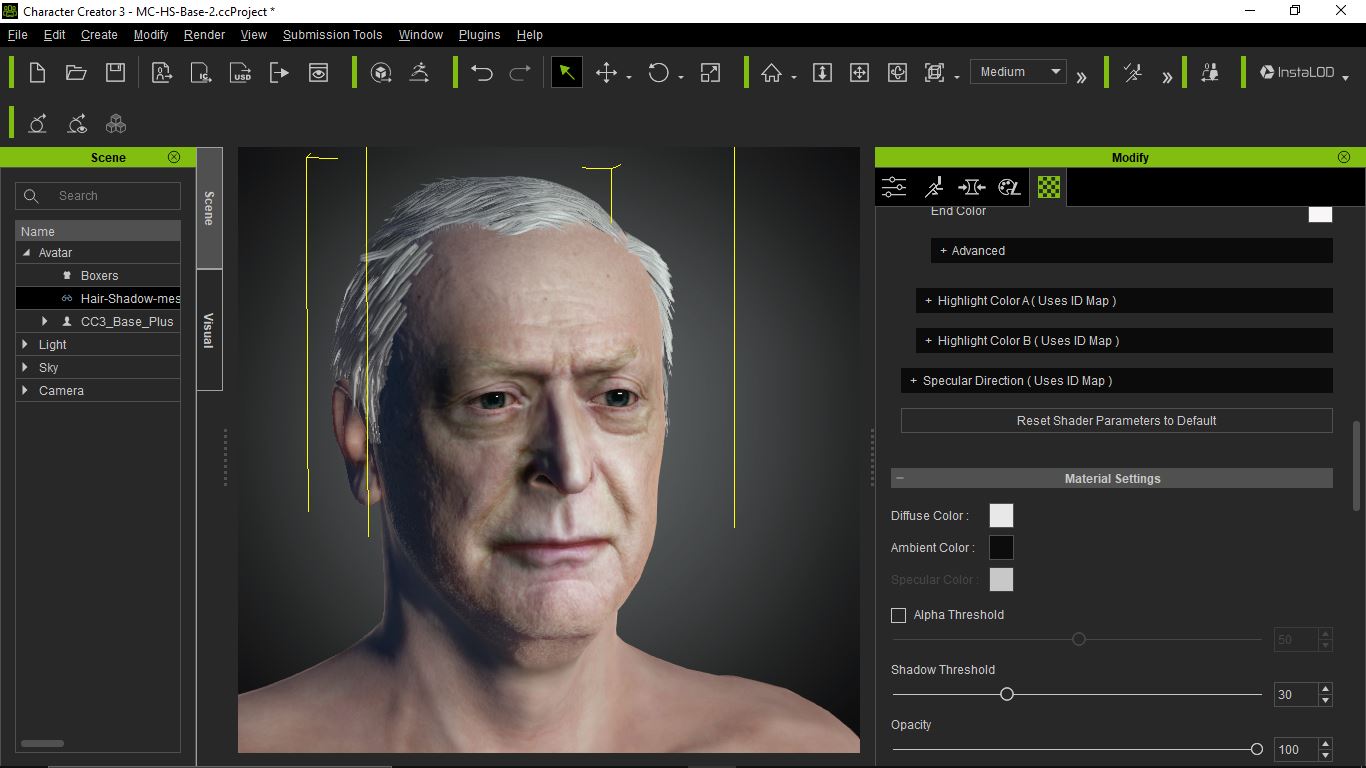 I can see the resemblance now! I specially like the little details around the eyes and forehead that are accentuated by the image used in HeadShot. The hair could use tons of refinements, but that's outside the scope of this project. In any case, I'm very happy with the results! :D3-5-6. Staging, Shot composition: Resources:
- Blender
- CC import plugin for Blender
- iClone 7
I sent the character to iClone 7 using the one-click import option in CC3. I used the free static poses to make a draft of the position I want my character to be, and used the edit motion layer to refine the pose by moving individual bones. In Blender, I imported the character using the free CC import plugin. I then started positioning diferent cameras for all the shots I need. The idea is to use these as positional reference for my mainshot camera. 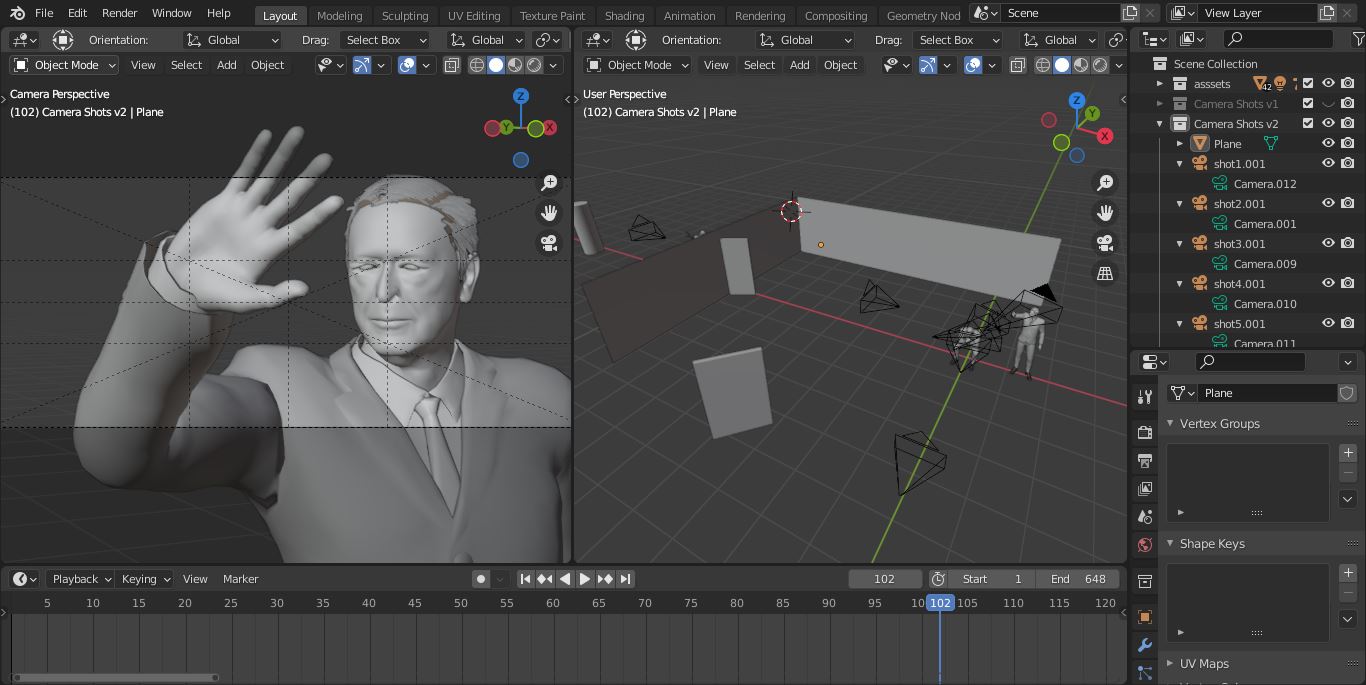 4. Edit audio clip: Resources:
I downloaded my selected audio clip from YouTube. The issue, however, is that it contains a music track. So, in an effort to have a cleaner track for AccuLips to interpret, I used an online "voice separator", and ended up with two tracks. Of course, this process isn't perfect, and there are still some noticeable artifacts on the voice sound clip; for this reason, I tried a denoiser solution online, that dramatically reduced the artifacts. Again, nothing replaces a clean track, and there is still some "background" noise. However, I think it's a clean enough sound clip for AccuLips to handle.I imported the audio to the free editor KdenLive to cut some of the silences to try and get the audio to around the 30 seconds mark, to keep in line with the entry requirements.
9-10. Vocal performance, Lip-Sync and viseme refinement:
Resources:
Finally! Time to try the star of the show: AccuLips! I used my previous pose test iClone project and used the AccuLips option to import the audio. I decided to divide the track into 2 parts. I found this to be more manageable (for me). Again, this is my first time using any of these tools, so I wanted to keep things as far from overwhelming as possible; luckily, the tool itself is super user friendly, and after watching a few tutorials, I had my character performing!! :w00t:
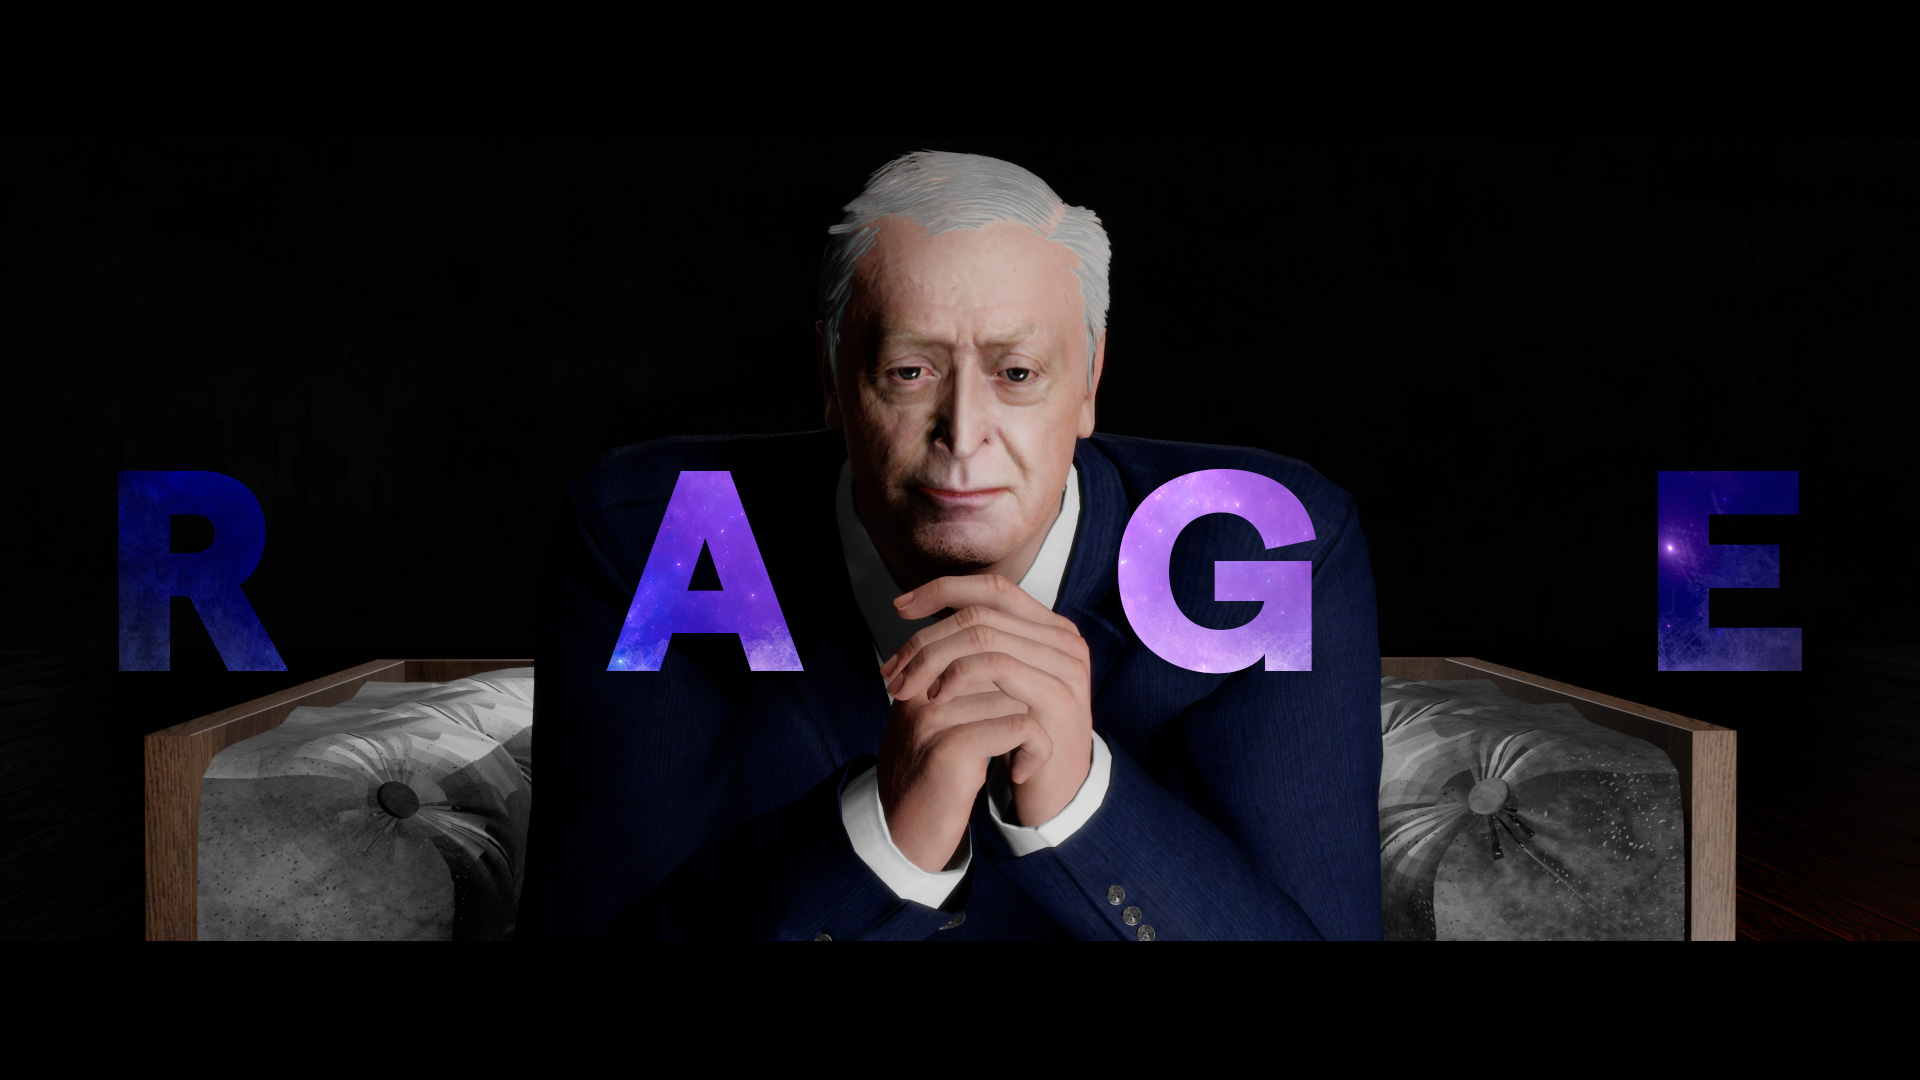
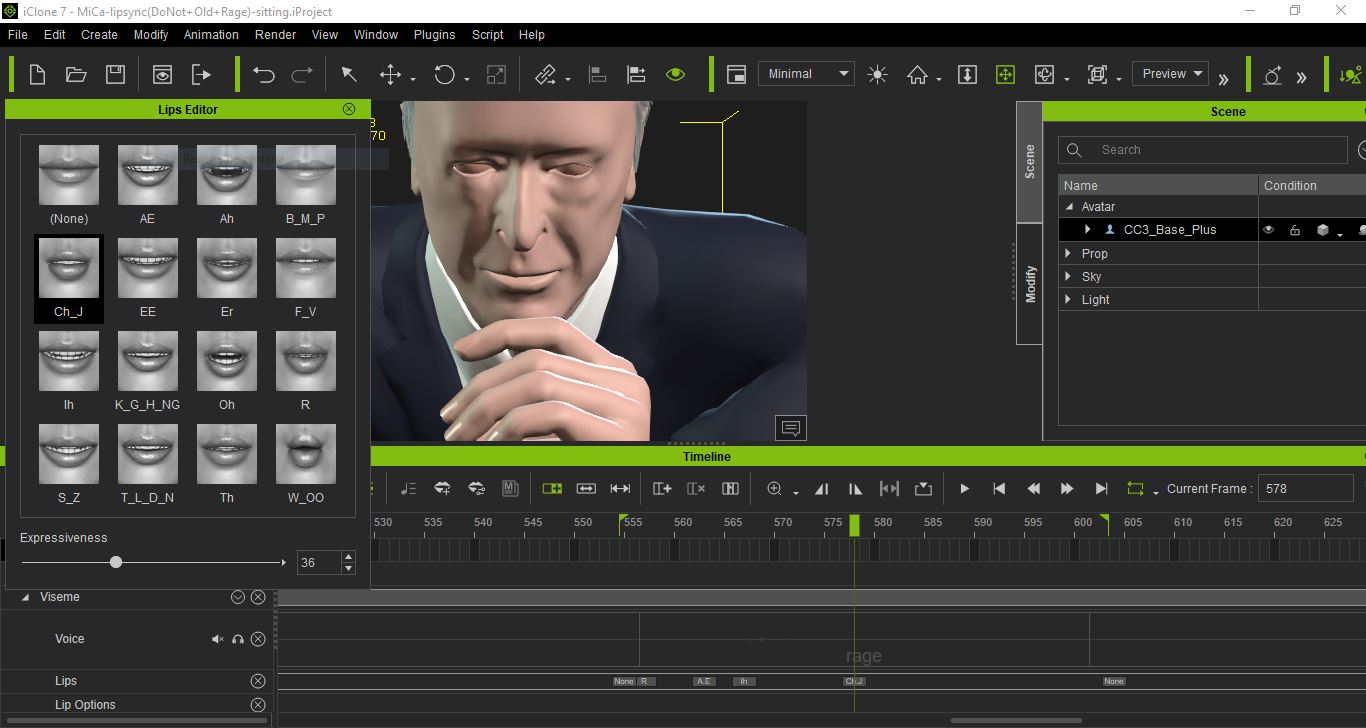 Because the audio was not clean, I ran into some issues with the alignment of phonemes but, again, the tool was very intuitive, and I was able to fairly easily edit the parts I wasn't 100% sure with. In the image above, for example, I edited some of the lips shape for the word "rage" that looked a little off. I also changed the expressiveness function to accentuate or lessen the intensity, which gave a nuance to the performance that I really liked. Definitely a tool worth exploring! 10-A. Body performance with layer edit and Face Puppet (iClone) To breathe more life into the performance, I decided to use the motions and poses available in iClone; I then manually keyframed specific body parts to what I needed using the Edit Layer tool; it made it easy to target and move the joints while keeping the rest of the stock animation intact. 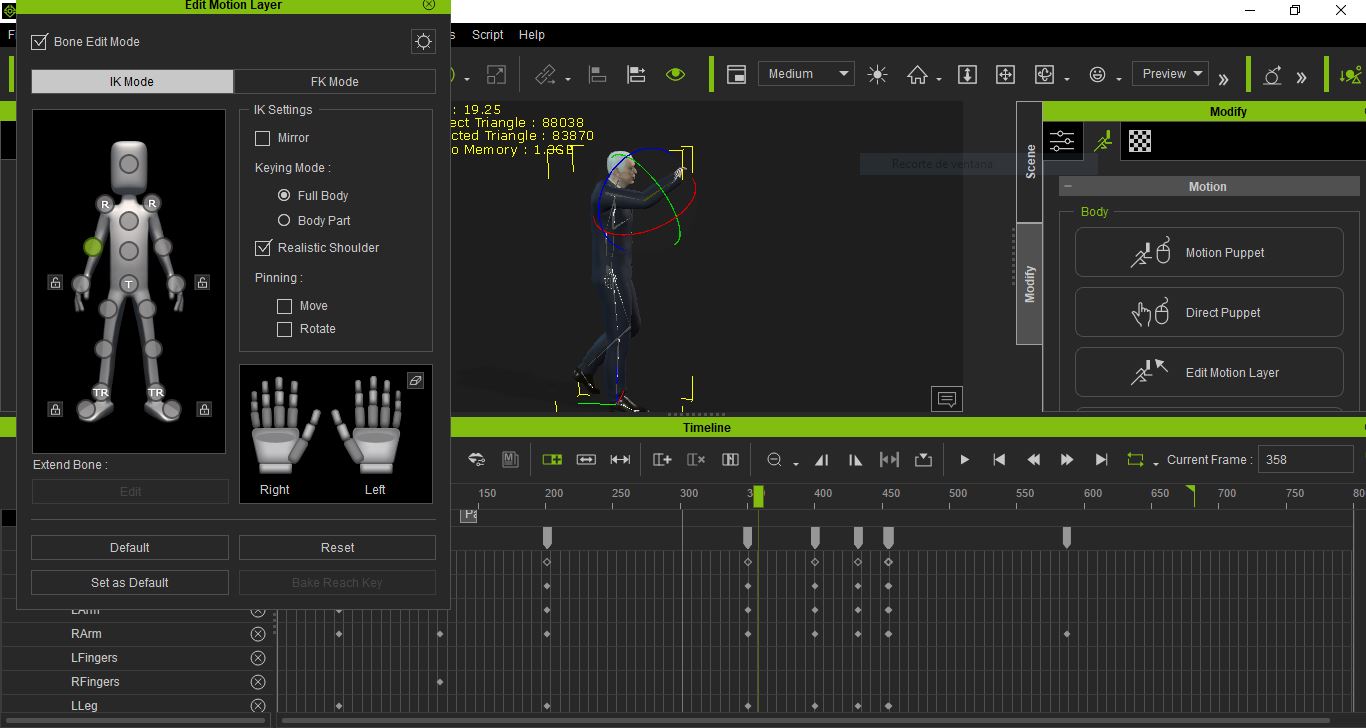 Continuing to add subtle details, I used the face puppet tool and recorded a few eyes and head movement using the mouse. The fact I could blend every recording so I didn't start from scratch everytime was a really neat feature, and it allowed me to build upon each motion with ease. 12. Look Dev in blender: Resources: - Blender
- CC3 Blender plugin
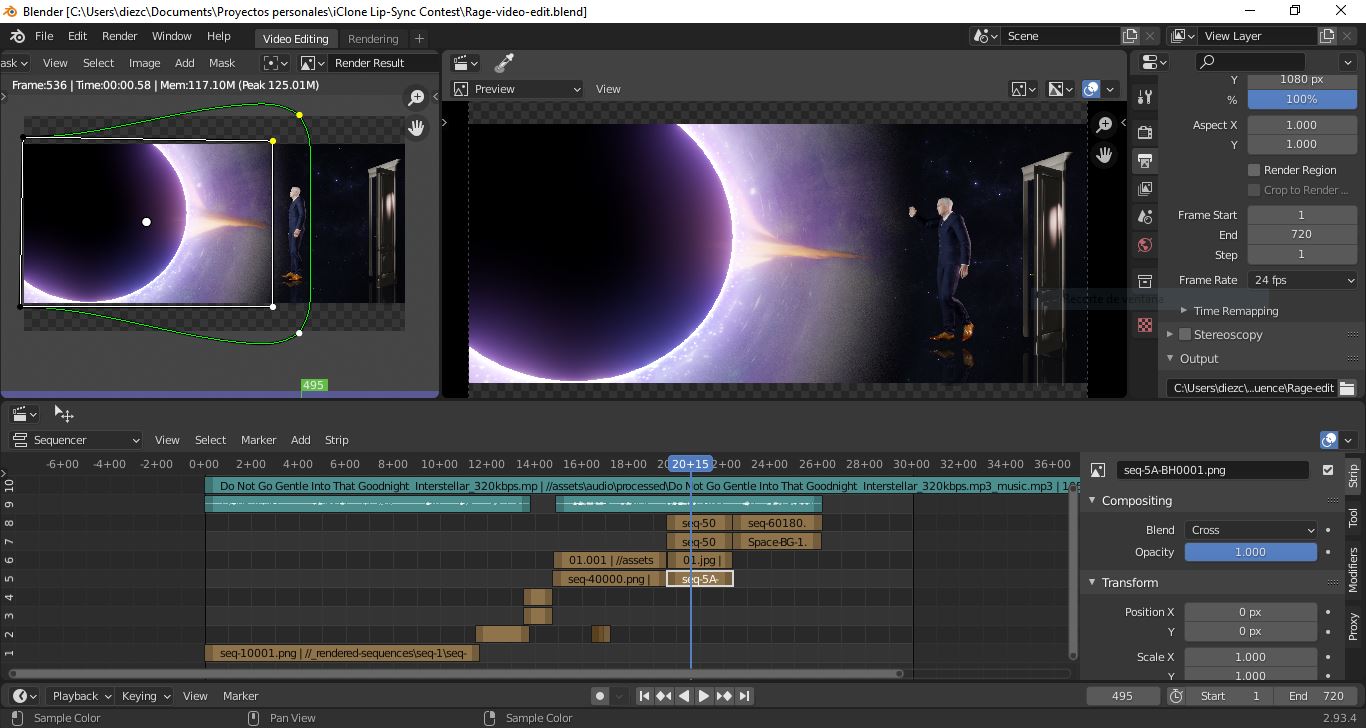
I used the CC3 light rig option available in the CC3 blender plugin as the bases for most of my shots. I added some other lights to accentuate certain areas of the frame. Thanks to eevee, I could iterate rather quickly, seeing results almost instantly. This way I could not only frame the character, but also add some depth to the performance with the lighting without having to create tons of time-costly test renders. 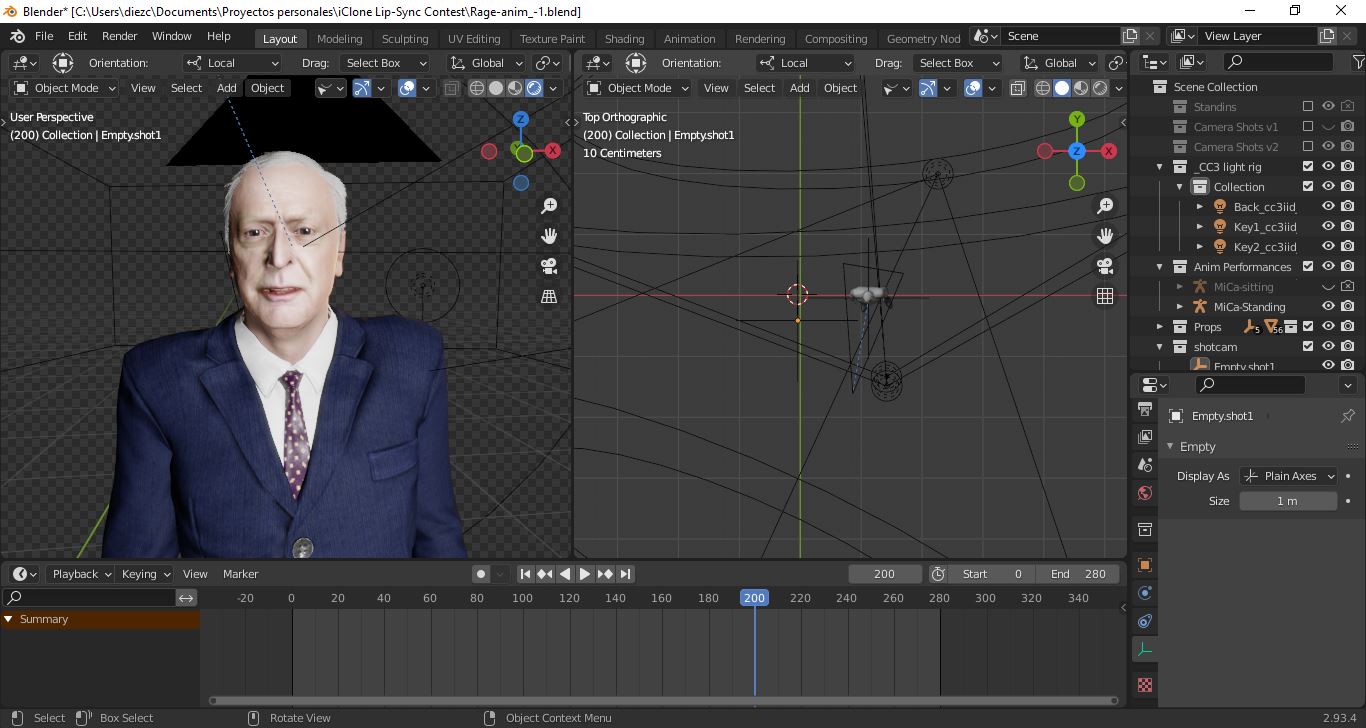 15. Composite: Resources: After exporting each shot as an image Sequence, I used Blender Sequencer Tool to edit all sequences, added the voice and music, and color grade :D for one shot.
 - |
|
Group: Forum Members
Last Active: 5 Years Ago
Posts: 2,
Visits: 83
|
 UPDATE! I am very very happy yo be able to finally share my entry. After quite sometime (much more than I had anticipated), I finally rendered the video and uploaded. NOTE: I upated the first post to reflect this milestone. I hope you enjoy it! and please let me know what you think. All your feedback is quite valuable to me. :)
|
|
Group: Forum Members
Last Active: 3 Months Ago
Posts: 4.6K,
Visits: 29.9K
|
Nice! ;)
Toystorylab on Vimeo :  Crassitudes (my "Alter Ego") on Youtube: Crassitudes (my "Alter Ego") on Youtube: 
|