|
Miranda (RL)
|
Miranda (RL)
Posted 5 Years Ago
|
|
Group: Administrators
Last Active: 3 Years Ago
Posts: 1.8K,
Visits: 11.2K
|
Dear Headshot Users, We are delighted to be the recipient of more and more excellent and engaging Headshot artworks from artists like you. In version 1.1, Headshot can generate CC3 Base+ characters with the potential for comprehensive SkinGen editing, down to the nitty-gritty details and the ability to enhance the look of the eyes with the addition of Tear Lines and Occlusion Meshes. What's more, the new "Baby" body type is available in this version for you to create infant characters with ease. Other than that, there are some usability enhancements coming your way. With all these new wonderful features, we hope to make the process of character creation as smooth as possible in Headshot v1.1. Please enjoy! v1.1 new updates can be divided into 5 parts: - Support CC3 Base+
- New Body Type: Baby
- Image Matching Tool Works in Zoom-in Mode for Accurate Adjustments
- Sculpt Morph Enhancements
- Texture Adjustment Enhancements
Support CC3 Base+ From this version, the Headshot characters will be generated as CC3 Base+ if you select its Body Type as Male, Female, Neutral or Baby. If you select Current as the Body Type, the character generation will remain unchanged (either CC3 Base or CC3 Base+). The main difference between CC3 Base+ and CC3 Base is the optimized result between head and neck. If the Headshot character is generated based on CC3 Base+, you won't see the seam between the head and neck. 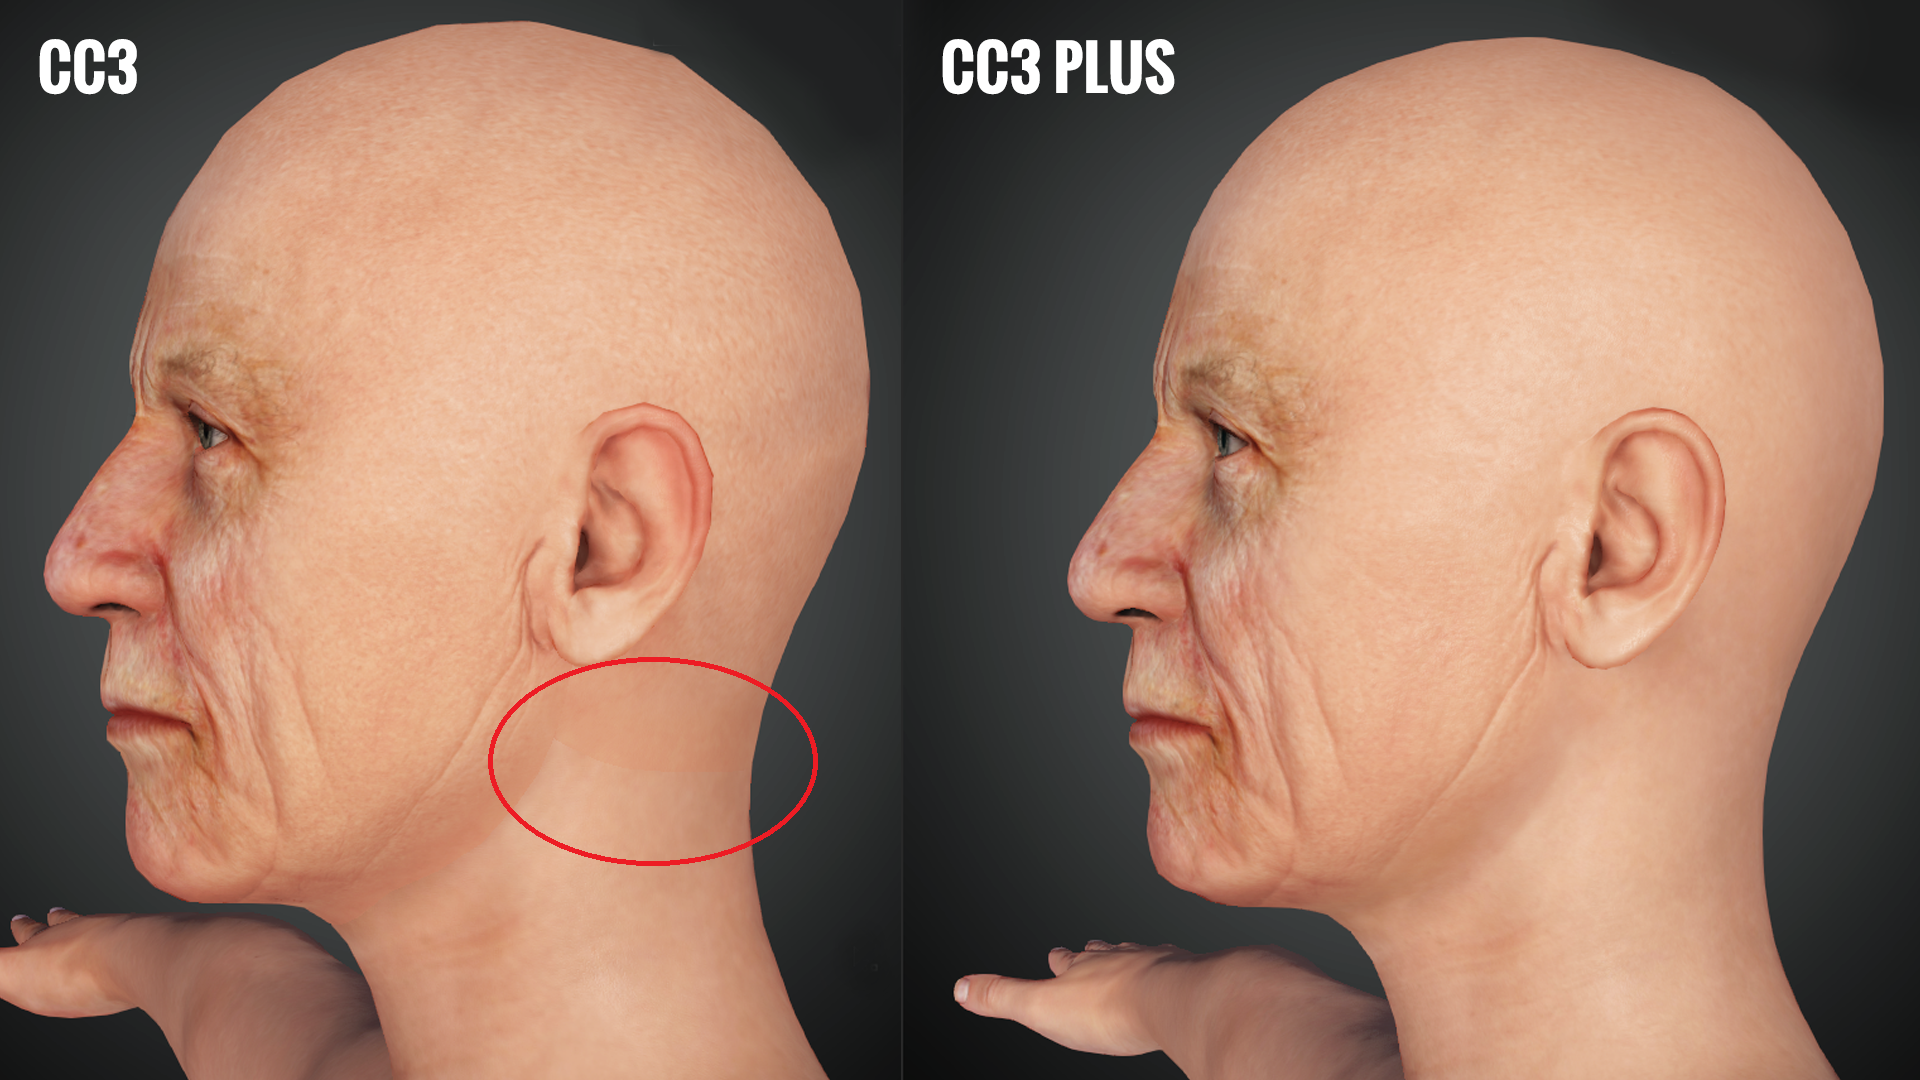 New Body Type: BabyNew Body Type " Baby" is now supported on both Auto Mode and Pro Mode. 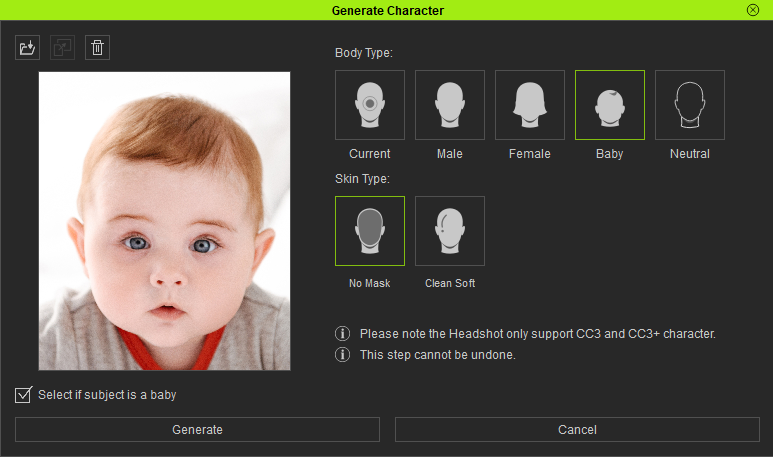 When the new "Baby" body type is selected, the "Select if subject is baby" checkbox will be enabled. This utility will soften and smooth out the features of the character's face to better match those of a realistic infant. This is an example to show the results when "Select if subject is baby" is on / off under the PRO Mode: 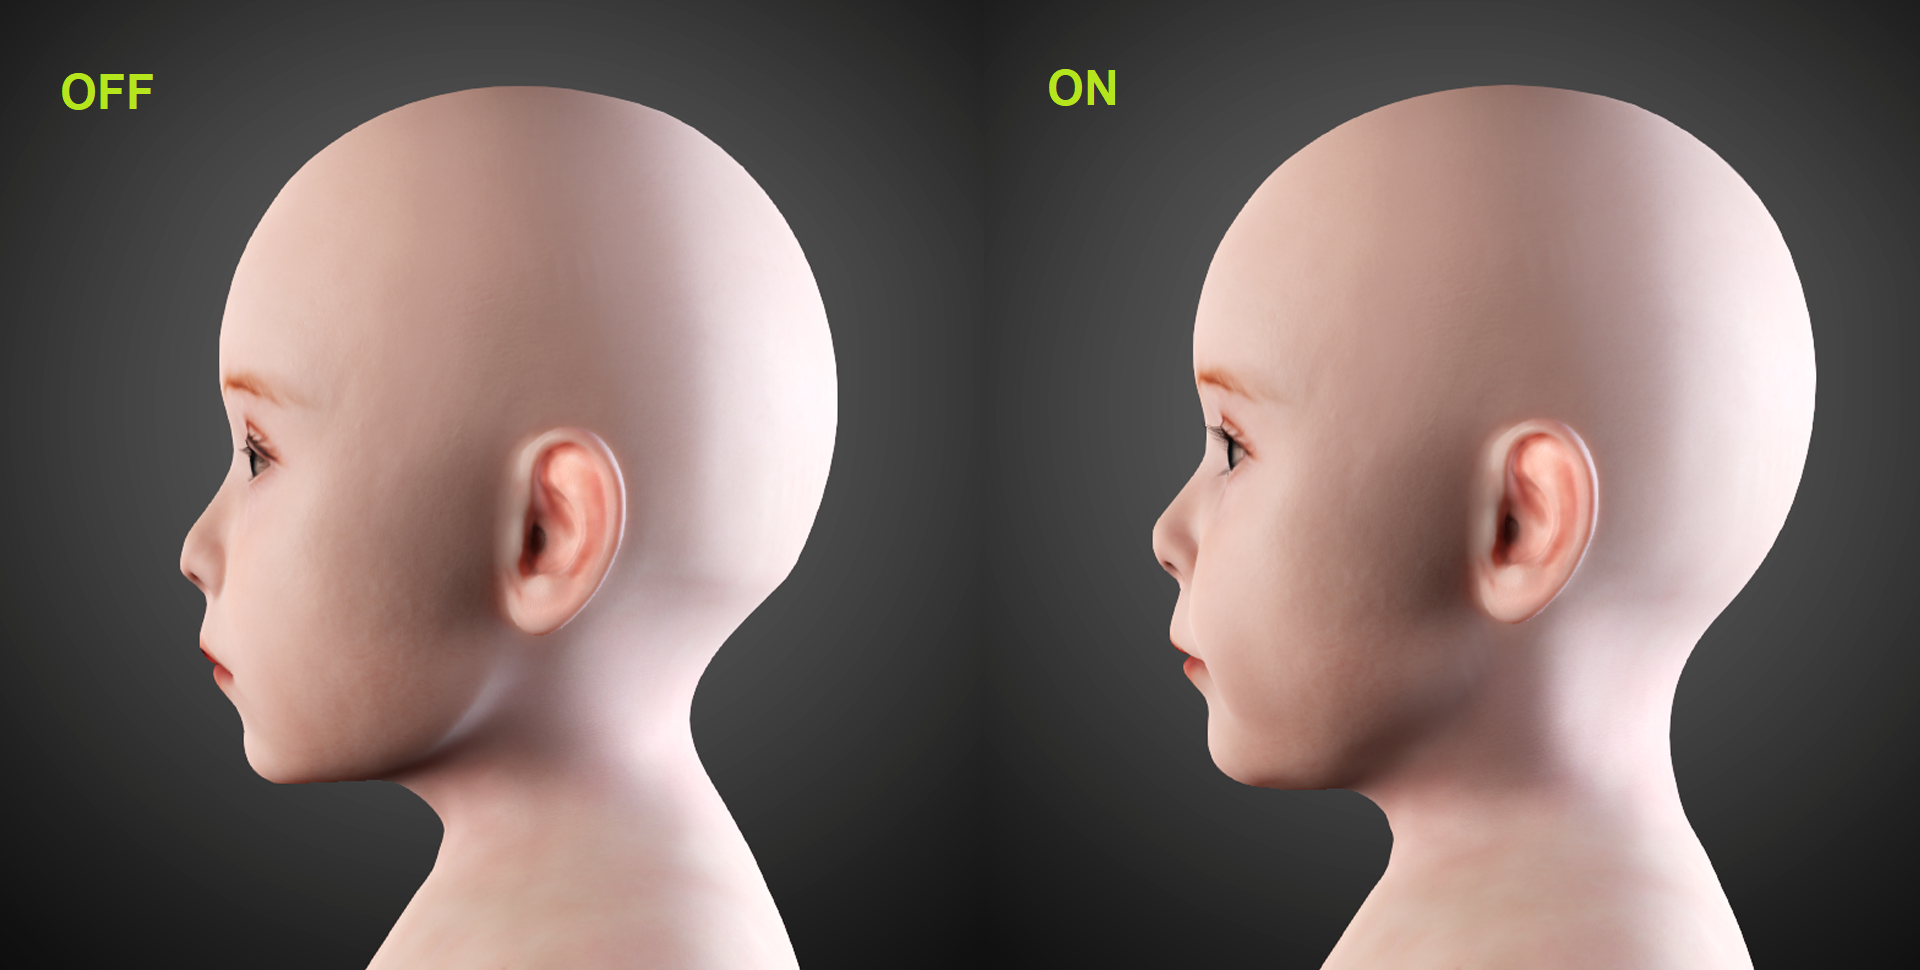 This is an example to show the results when "Select if subject is baby" is on / off under the AUTO Mode: 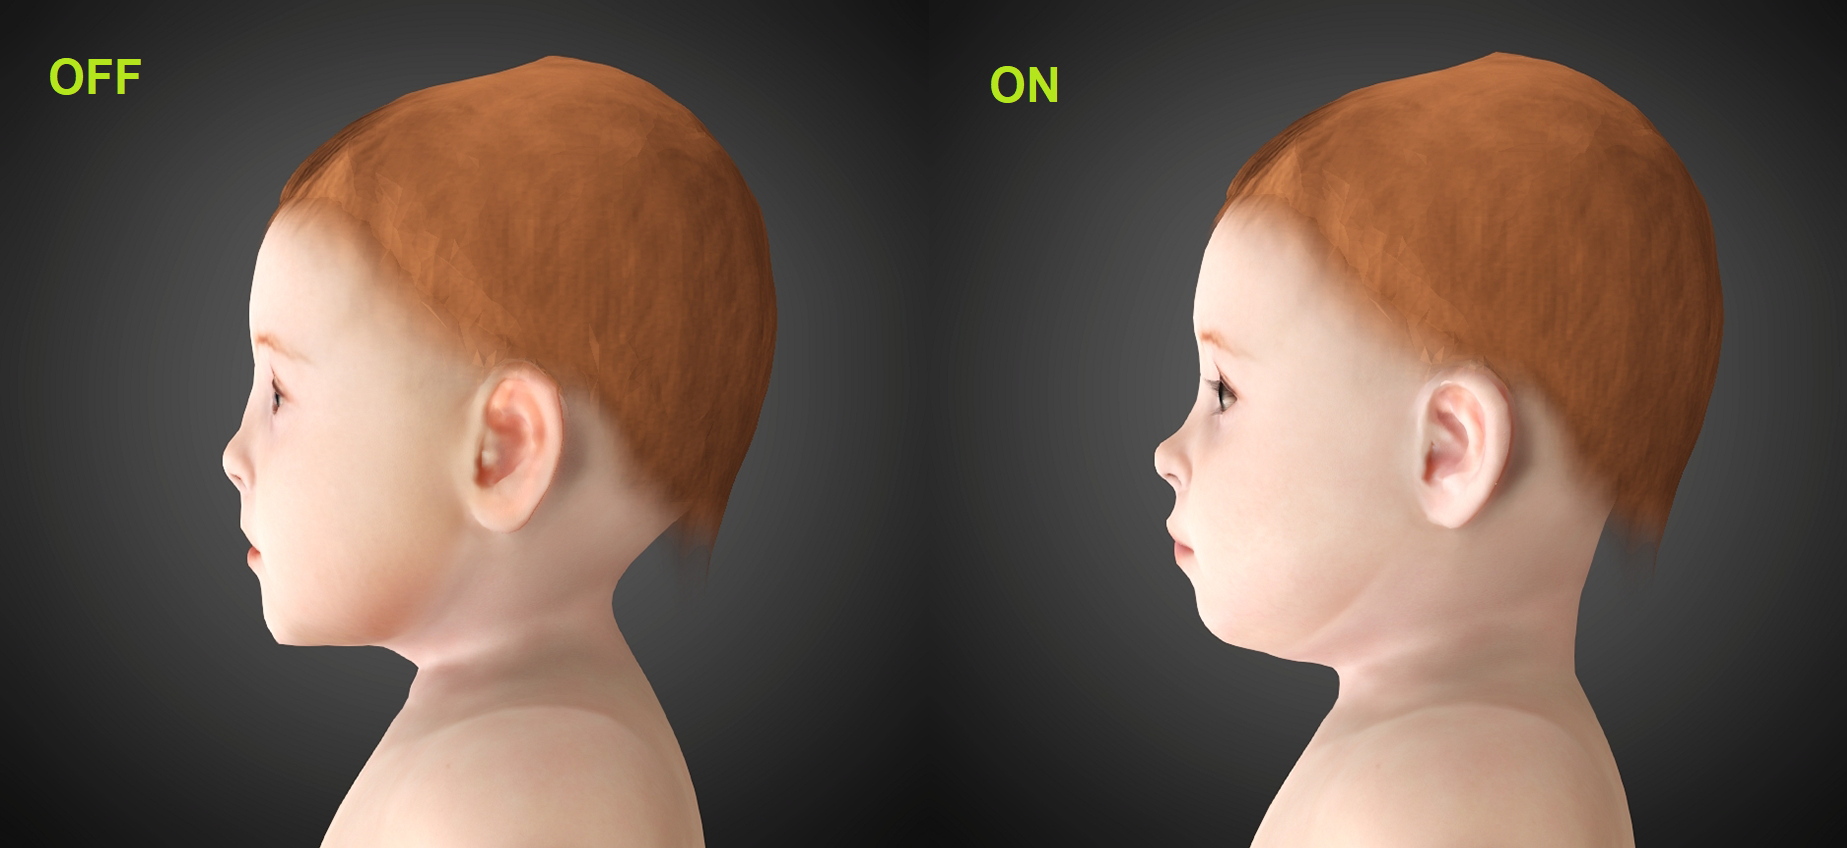 Image Matching Tool Works in Zoom-in Mode for Accurate Adjustments Image Matching Tool now supports zooming in and out of the view-port making it convenient to adjust details to match a larger image. 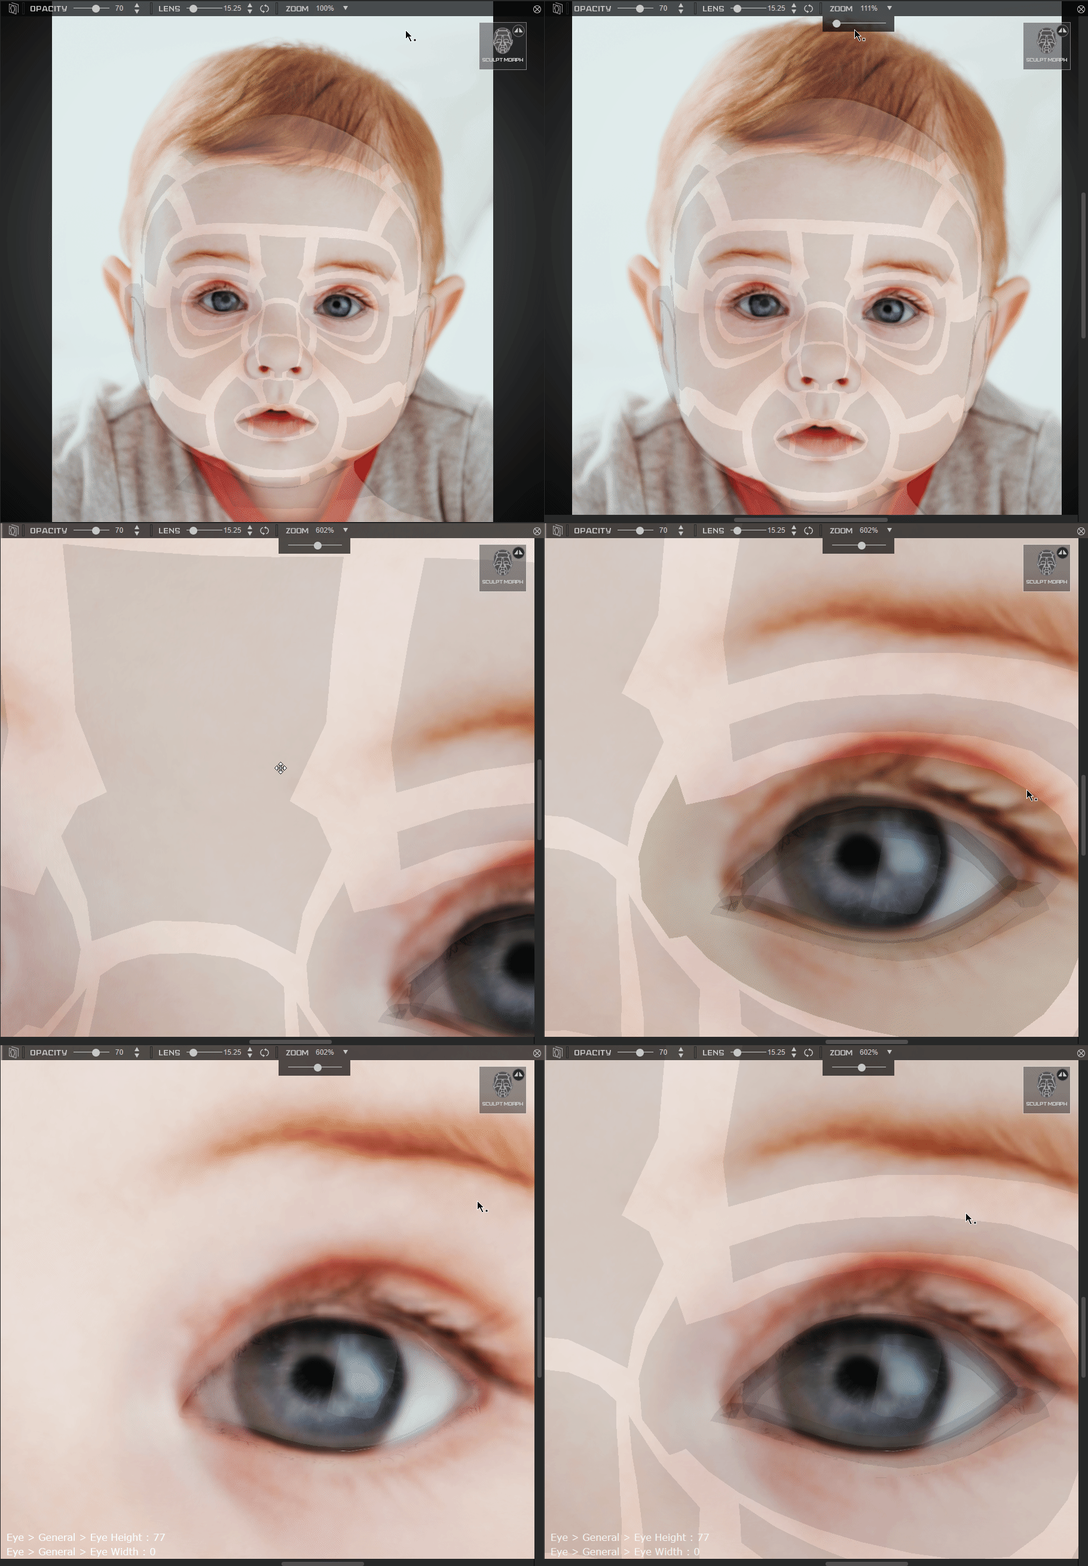 Hotkeys: - Mouse wheel to zoom in and out.
- Shift + Mouse Wheel to zoom in and out in large increments.
- Alt + Left + Right Mouse Buttons to zoom in and out in small increments.
- Alt + Left Mouse Button to pan the camera.
Sculpt Morph EnhancementsThere are three enhancements for the Sculpt Morph tool. Supports Dark Color & Opacity Adjustment for Control Area Sculpt Morph's Control Areas in version 1.0 tend to stack on top of the image in a way that makes it hard to see. Therefore, in version 1.1, the Dark Color mode is added along with the ability to adjust opacity in order to deal with a variety of images. 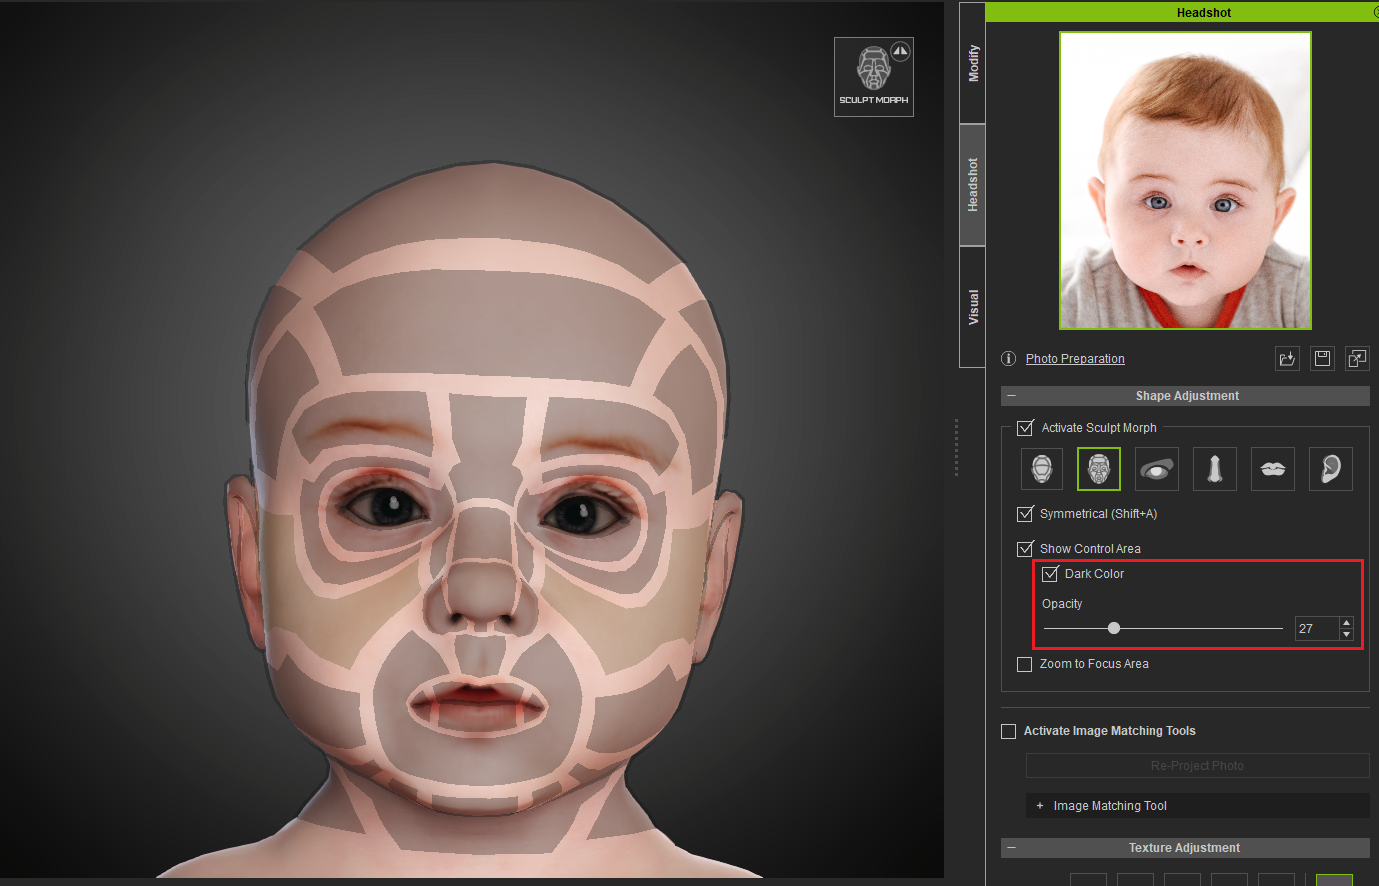 Support Head Scale Control of the Contour Category Support Head Scale Control of the Contour Category New Head Scale morph slider under the Contour sculpt level to adjust the size of the entire head. 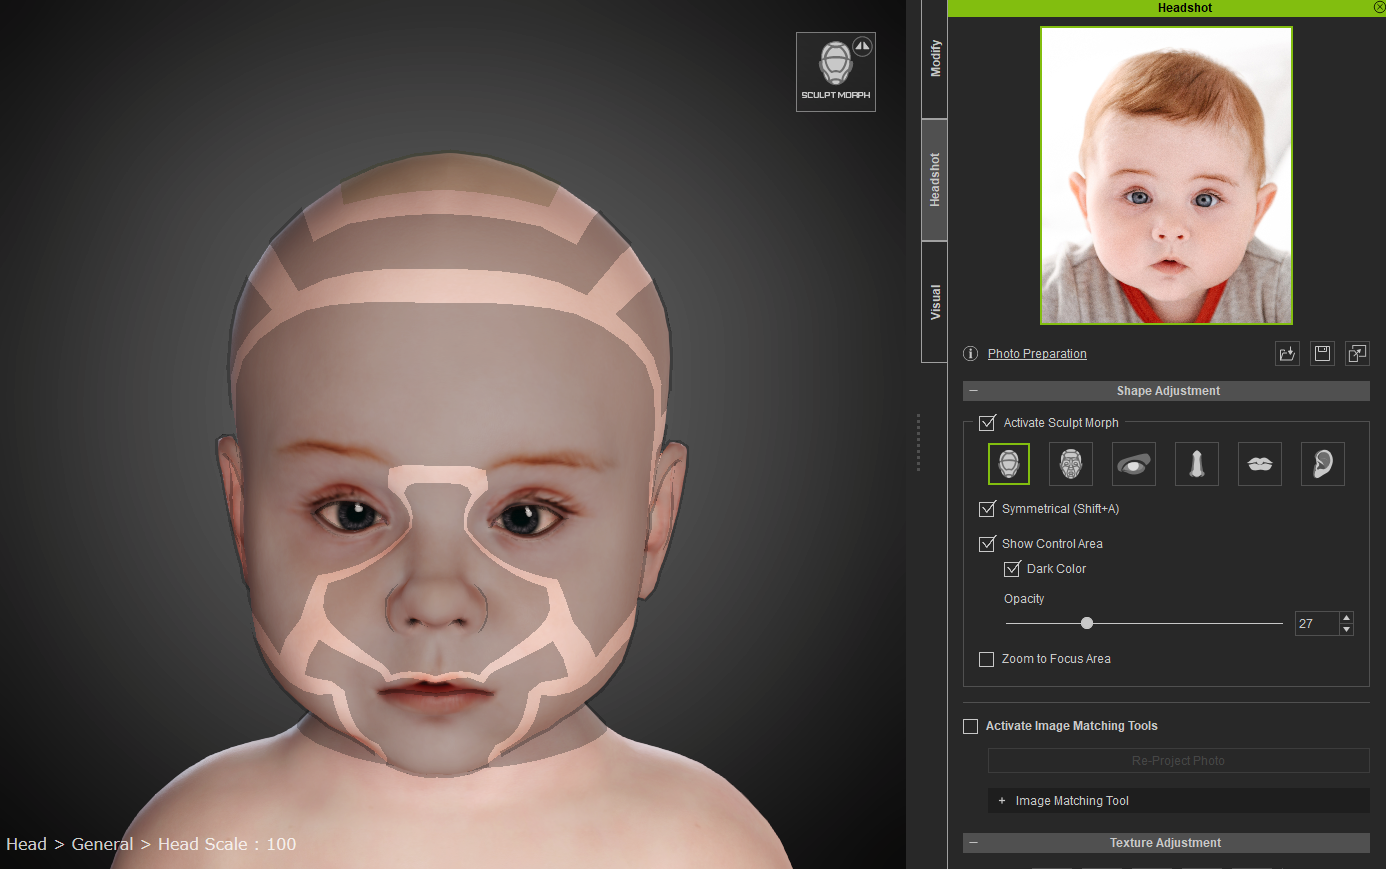 Support Eyeball Control Support Eyeball ControlBecause eye positioning can vary slightly between different subjects, and in order to have the 3D model faithfully represent the actual real-life photo of a person, Headshot v1.1 allows for the fine-tuning of the eyeball positioning with corresponding morph sliders for the Face and Eyes sculpt levels. Keep in mind that these morphs will change the transformation of the eyes by way of mesh modifications, while keeping the eye bone rotations untouched. This is so that the pivot points for the eyeballs remain centered during facial performances. For example, a cross-eyed character will remain so with Facial Expressions deployed from the Face Editor, and even after Reset Facial is performed. 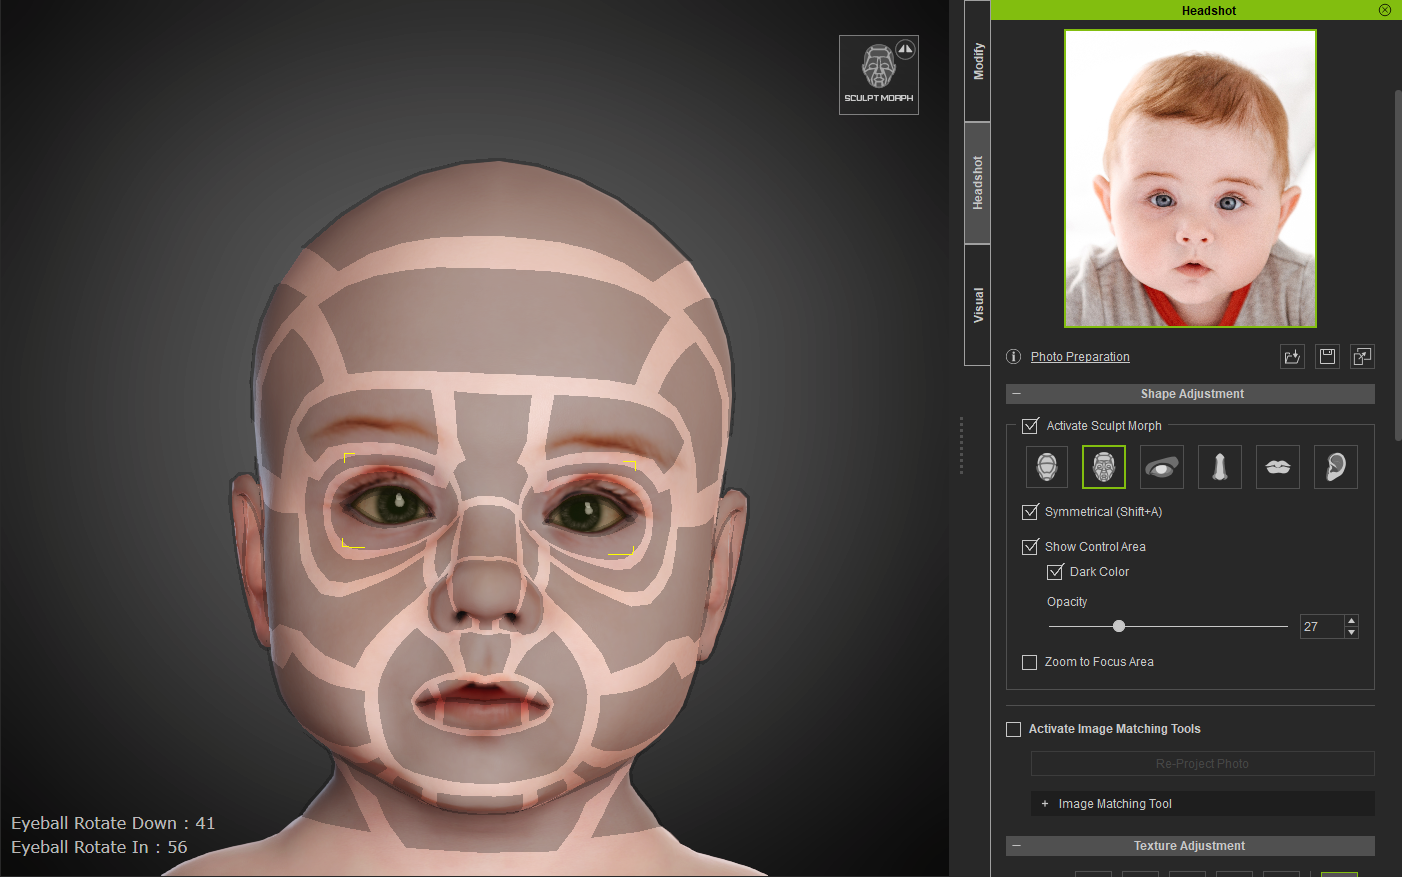 Updated & New Morph Sliders in Headshot Morph 1000+ Content Pack Updated & New Morph Sliders in Headshot Morph 1000+ Content PackBesides the changes made in Headshot plug-in, all morph sliders in Headshot Morph 1000+ has been updated to be compatible with CC3 Base+. What's more, more morph sliders are added in Headshot Morph 1000+. Texture Adjustment EnhancementsThere are a total of four enhancements for the Texture Adjustment process. Adjust Eyeballs into Any Color New Custom Color which will open up an editing window to obtain the desired Iris color. Iris recoloring happens in real-time. If you are not satisfied with the color adjustments, simply click on Reset Color to restore the original coloring, or double-click on the Eye Color label. 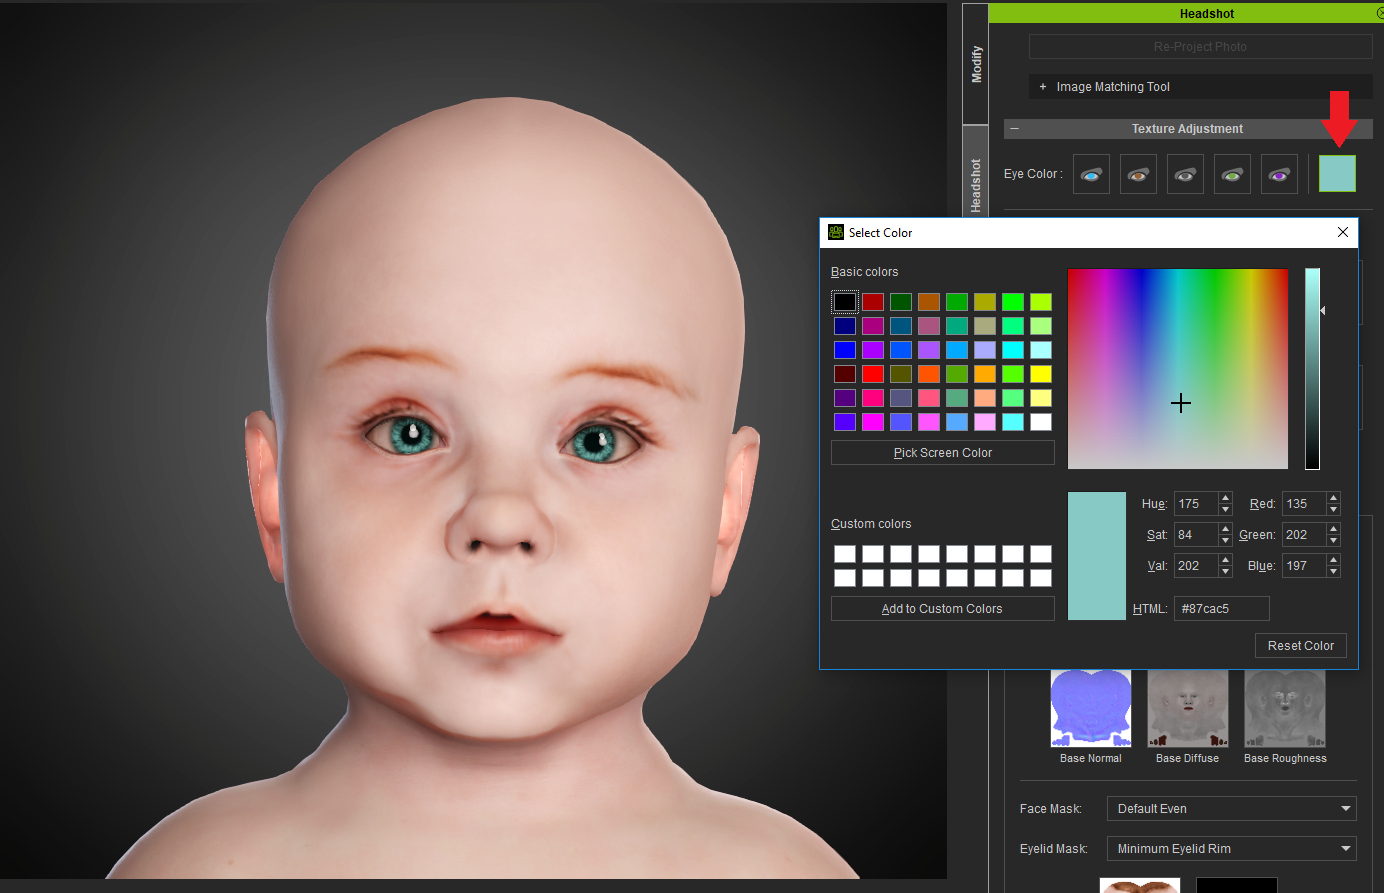
Restore Skin Color
If a mistake was made during the course of editing, one can press the reset icon to bring back the original skin color, or just double-click on the Skin Color label itself.
Performance Optimization when Applying Texture Preset
In version 1.0, selecting a Preset caused the application to freeze for 1 to 2 seconds. From version 1.1 onward, this operation becomes a background process that does not interfere with normal user operations.
Intuitive Skin Texture Update When an update is available for a skin texture, an intuitive Update button will appear on the bottom of the panel reminding the user to perform an update. 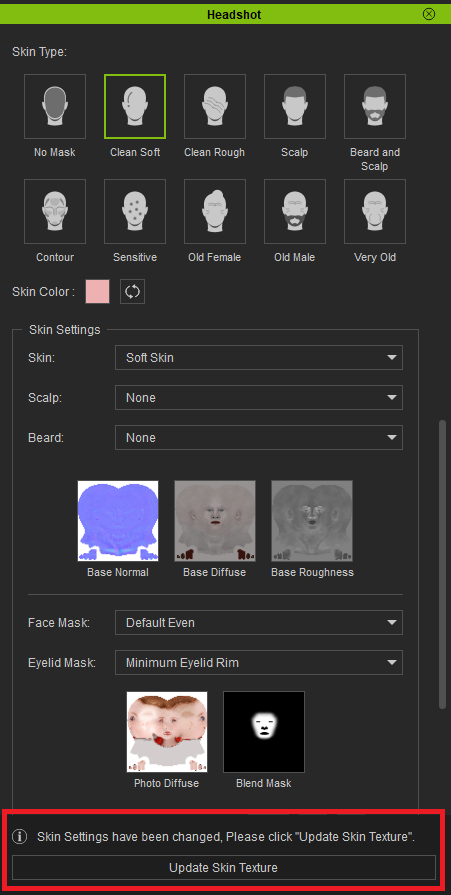
|
|
Miranda (RL)
|
Miranda (RL)
Posted 5 Years Ago
|
|
Group: Administrators
Last Active: 3 Years Ago
Posts: 1.8K,
Visits: 11.2K
|
Hi everyone, We released version 1.11 today to fix the issue that updating the skin textures multiple times causes the color for the body and head to deviate more and more. ( FT# 7104)
|
|
zeekaira
|
zeekaira
Posted 5 Years Ago
|
|
Group: Forum Members
Last Active: Last Year
Posts: 4,
Visits: 59
|
Hello
I have updated the CC3 to the latest version, however, couldn't find the link to update the headshot plugin, could you please help
|
|
Miranda (RL)
|
Miranda (RL)
Posted 5 Years Ago
|
|
Group: Administrators
Last Active: 3 Years Ago
Posts: 1.8K,
Visits: 11.2K
|
zeekaira (11/30/2020)
Hello
I have updated the CC3 to the latest version, however, couldn't find the link to update the headshot plugin, could you please helpDo you have Reallusion Hub? Reallusion Hub help centralized software download and update management. If the update still not work, please contact our Support for help. https://www.reallusion.com/CustomerSupport/UserEx/QForm.html
|