|
sterlingy
|
sterlingy
Posted 8 Years Ago
|
|
Group: Forum Members
Last Active: 5 Months Ago
Posts: 206,
Visits: 712
|
Is it possible to re-link my base CC3 mesh to Zbrush after modifying the model in Zbrush using the 'Auto Groups with UV' tool? It does come in, but as a new mesh. Alternatively, is there a way to re-project the original mesh's textures onto the updated Zbrush mesh if it cannot swap out with the original? In the pic, you can see the original mesh as well as the ZBrush version 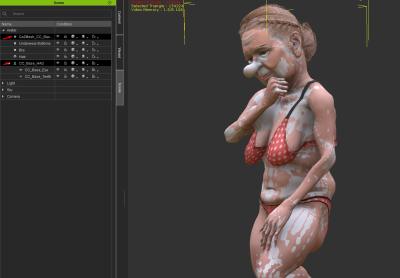 Cheers, Sterling
Stick with the flock, end up a lamb chop!
www.ShivooStudios.com
|