|
Eric (RL)
|
Eric (RL)
Posted 9 Years Ago
|
|
Group: Administrators
Last Active: 9 Years Ago
Posts: 99,
Visits: 1.0K
|
Hi everyone, here is a quick walk-through of quickly creating morph sliders using the new dialogue box from Character Creator v1.4
One of the new powerful feature introduced in Character Creator v1.4 is the ability to turn your creation into a "Morph Slider", in which you can either blend with other characters, or improve on it by tweaking the body parts to quick create a FAMILY worth of character content.
You can import Character Creator compatible meshes in either:
- OBJ format
- iAvatar format
- Using current character project already loaded in Character Creator

The process is fairly simple. I'm going to bring the old guy from above (also known as Winston) into Character Creator and turn it into a morph slider.
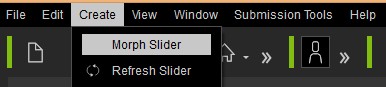
Go top the top menu, under Create, select Morph Slider
A dialogue box should appear: There are a number of selections and input boxes, and I'm going to go through them one by one.

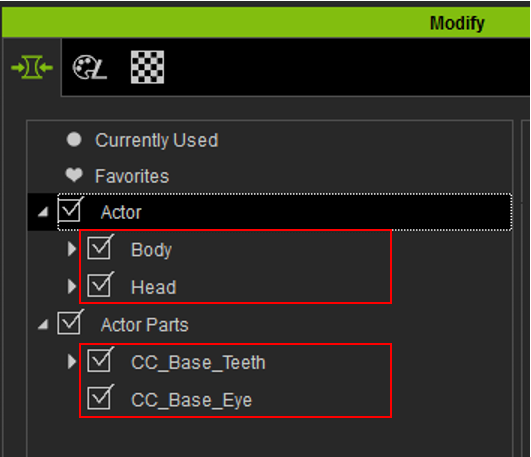
1. Set Category:
This is the place where you can select which category your newly created Morph Slider will fall under in the Modify window. There are four choices: Body, Head, Eyes Teeth. I'm going to select Body since this is a full body character.
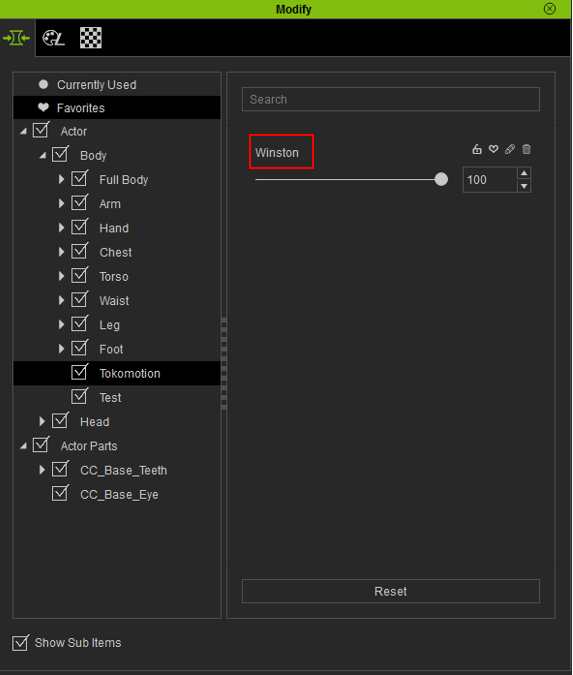
2. Set Slider Path:
You can input the "Group" that your morph slider belongs to. For example, if I selected Body in the previous option and input Tokomotion under Slider Path, then the newly created slider will be in the Tokomotion Group

3. Morph Name:
Simply type in the name of your new Morph that will appear in the Modify window.
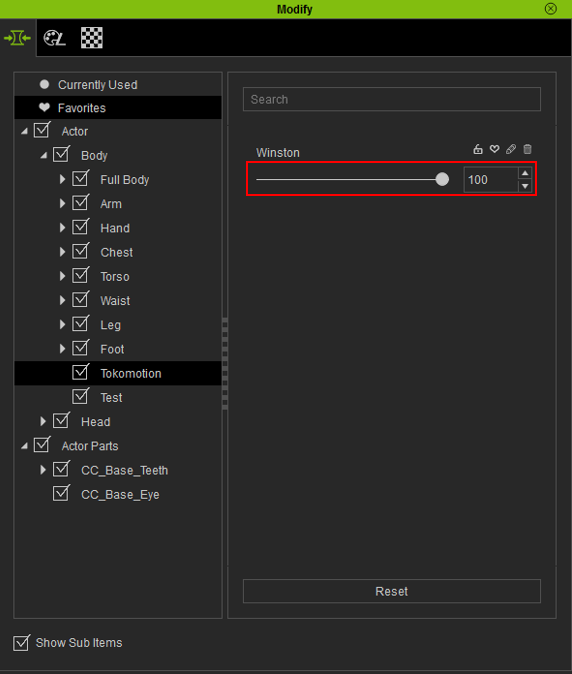
4. The Min and Max Morph Value:
This sets the minimum and maximum ends of your new morph slider. 0 being the Source Morph, while 100 being the Target Morph (More on this later). Caution when setting a negative number for the Minimum value, as it may result in some really funky looking characters when you play around with the slider later! For simplicity's sake, I'm going to leave this in default. (0 and 100 respectively)
5. Thumbnail, select a thumbnail for your new Morph Slider.(Still in Testing)
You can load a 55 x 64 to 64 x 64 thumbnail pic here so that it will display along side the morph slider you have created.
We have included two template files which you can freely use. Find them under:
\Reallusion\iClone Character Creator 1\Image\Thumbnail_Template_Blank.png
\Reallusion\iClone Character Creator 1\Image\Thumbnail_Template_Male.png
6. Source Morph:
The Character Mesh that your morph slider will CHANGE FROM. You are essentially assigning the shape of the character that will appear as when the you set the Morph Slider value to 0.
There are three options:
A. Default Morph (the one that loads to when you press the reset key in the Modify window)
B. Current Morph (the shape of the current character as appeared in Character Creator
C. File: The OBJ or iAvatar File
For this test, since I'm working with a default morph, I'm going to select default morph
7. Target Morph:
The Character Mesh that your morph slider will CHANGE TO. You are assigning the shape of the character that will appear as when the you set the Morph Slider value to 100.
There are two options:
A. Current Morph (the shape of the current character as appeared in Character Creator
B. File: The OBJ or iAvatar File
Since I want my character to morph from default character into Winston, and I happens to have a iAvatar file for this character, I'm going to select File and point to the right location.
This is what my final dialogue box looks like:

Other Settings:
8. OBJ settings:
If you are importing from an OBJ file, you can set the Axis of your character depending on which 3D modeling application you used for further modification. If you are using an Character obj file that is exported from Character Creator, make sure you also load the accompanied checksum file (in .ObjKey format).
Auto Apply to Current Character:
This will automatically change your character's shape into the Target Morph which you have previously set.
This is the end result:
One of the coolest thing you can do is to mix and blend with other characters.
If I load another character and turn it into a morph slider (In this case, Max, the strong dude), I can create new and exciting characters by simply adjusting sliders.

______________________________________
Eric (RL)
Forum Moderator
Reallusion, Inc.
https://forum.reallusion.com
"Simplicity is the ultimate sophistication." - Leonardo da Vinci
|