Hi, folks,
Friendly Neighborhood Martok2112 with another tutorial for iClone.
Here is a tutorial by request of General Kemal 28. How to do, or rather
how I do texturing with UV maps in iClone.
General, and everyone else, please keep in mind that these particular UV maps seem to differ slightly from when I was first assembling my K't'inga battlecruiser for this latest version. I'm only using these maps for examples.
Further caveat....this is pretty much a down and dirty tutorial. Not quite as refined as my previous tuts, but I will still try to be as precise as I can with my succinctness. (Accompanying images can be enlarged via PhotoBucket) :)
Now, the advantage of working with UV maps, as opposed to just arbitrarily slapping on a texture and hoping it aligns with one of the UV presets is that you get a more accurate lay of the original texture, especially if the texture is photorealistic.
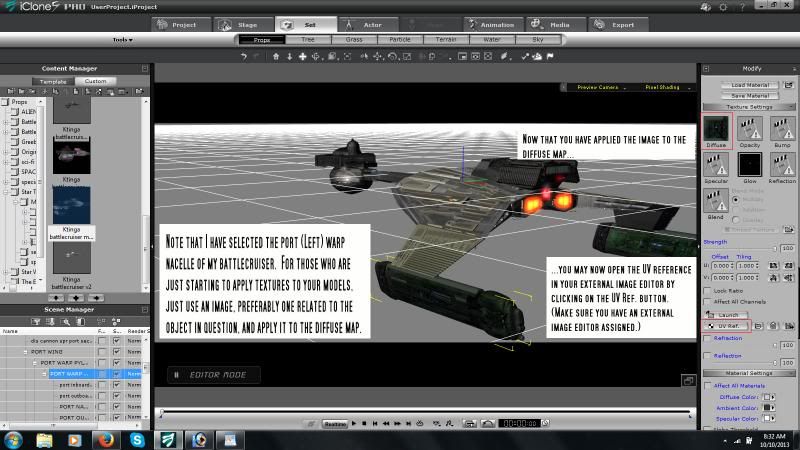
The section of the ship I've chosen for this example is the port warp nacelle. (Fig 001) This is actually comprised of several different components, and I got several UV maps, one for each component. But for now, the UV map we're focusing on is the shell of the warp nacelle.
Fig 001
-----------------------------------------------------------------------------------------------
When selecting a segment of your model, you will first want to just apply an image to that segment. (It doesn't matter what kind of image, but it definitely helps if the image is somewhat related to your component in question.) Once you've applied the arbitrary image, you can now activate the UV reference box found under the "Texture Settings" image boxes on the right of the User Interface (UI). (Fig 002) The two most heavily preferred external image editors for iClone are either PhotoShop or GIMP. I use PhotoShop, myself. When you click on the UV Ref button, the UV image will open up in whatever external image editor you assigned to iClone. What you are looking for, when opening up the UV Ref image in PhotoShop/GIMP is the simplest possible shape that you can apply the image to. When initially working with UV map, stick with the Planar setting (look for these bullets under UV Settings as you scroll down the right side of the UI.) Click on the UV Ref button after you've "applied" your X, Y, or Z axis setting. Most of the time, many of my best UV Mapping images came from Planar Z Axis. That is where I got the simplest possible outline of the component I was attempting to map. Your actual mileage may vary. :) (Fig 003)
Fig 002
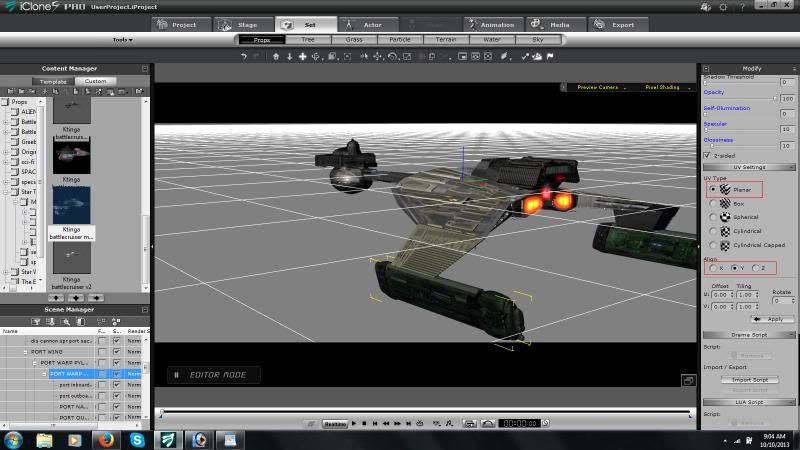
Fig 003
-------------------------------------------------------------------------------------------------------------
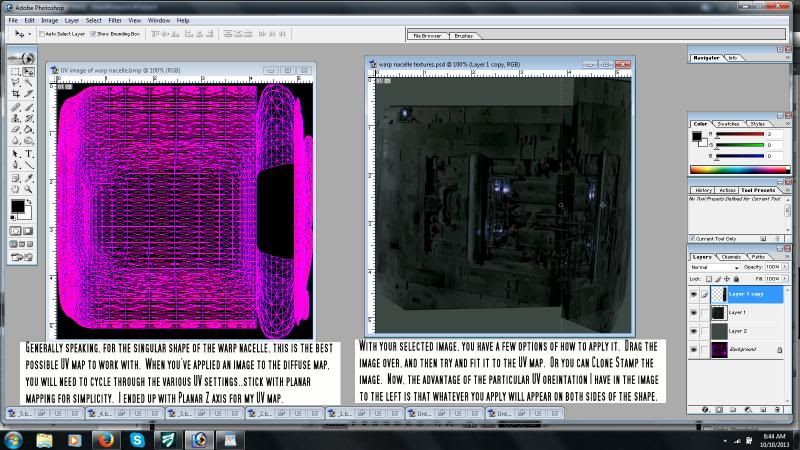
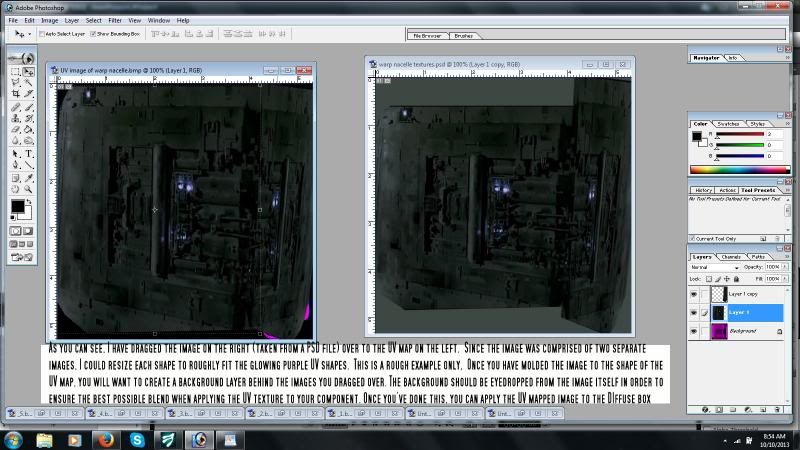
Once you have the best possible UV Ref map up on PhotoShop (I will singly refer to PhotoShop from now on, since it is the external image editor I use), then open up the image you wish to apply to this map in PhotoShop. (Fig 004) Once that is done, there are a couple of ways you can go about applying the image to the UV map. One is by directly dragging the image over to the UV map. The disadvantage here is that you may have to rescale and distort the image to try and fit it onto the glowing purple UV outline. Another method is Clone Stamping the original image onto the UV map. (Folks, make sure you work in LAYERS in Photoshop or GIMP so that if you make an error, you only have to correct for a single layer, and not the entire image itself.) With Clone Stamping, you will need to resize the original image's canvas to about the same size as the UV Ref Image. Once that's done, use the procedure for Clone Stamping, and apply the image that way. Also, you can rotate the canvas of the original image so you can try to clone stamp correctly into the UV outline.
Fig 004
-----------------------------------------------------------------------------------------------------------
Once you've applied the image map to the UV Reference image, then you will need to create a background layer to put behind your image layers, and eyedrop a major color from the original image...this allows for the best possible blend on the UV map when applying it to your object in iClone. (Fig 005)
--------------------------------------------------------------------------------------------------------------
Once you've done all your tweaks, you should be able to apply the new UV based IMAGE to the Diffuse map in iCLone. Now, one thing about working in the axis that I've described (or really in any axis) is that the image will appear on BOTH sides of the shape. This is great if your shape is symmetrical, and likewise requires symmetrical imagery. Otherwise, you might need to take your shape, and split it in half in an external 3D modeler.
Forgive me that this tutorial is so short and sweet. I was really sleepy. I hope it provides plentiful information about how I work with UV maps. :) If you still have problems or questions, I'll answer them as best I can. :)
Good Luck,
Friendly Neighborhood Martok2112

"Incompetence will always prevail so long as evil men stand by and do nothing."
-Martok2112