|
By Scyra - 7 Years Ago
|
26, December 2019 Update: Hair Shader mini-guide located here.
A Common Question: Why does my character look different in Unity?
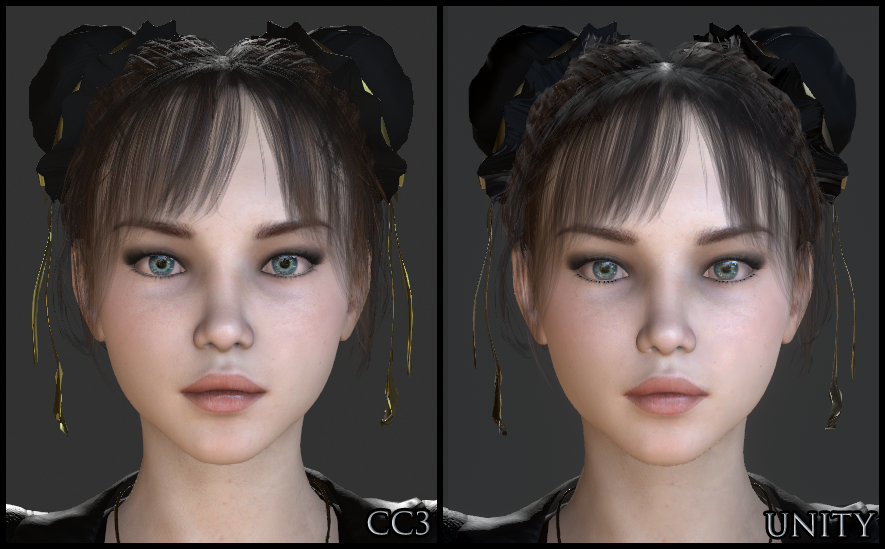
Let's aim for Digital Human realism in Unity. To get there, first we'll start out by emulating the basic CC3 look.
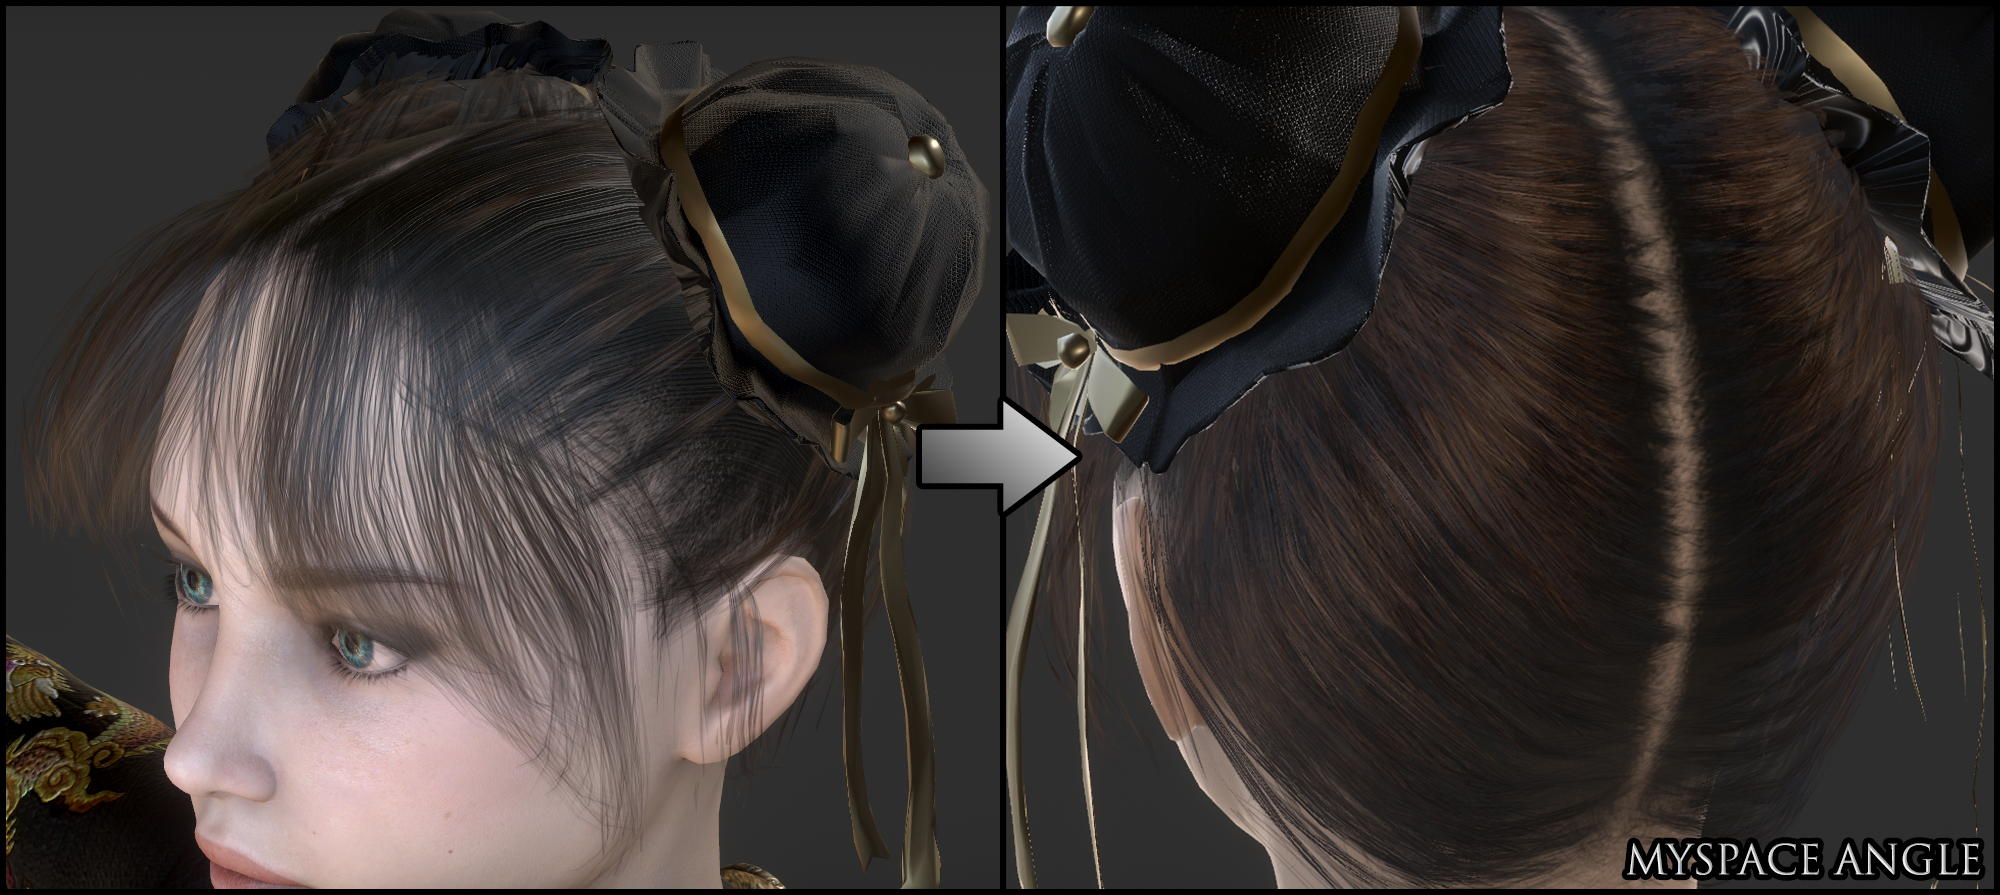
If we could then come close to the quality of Digital Humans within Unity, we'd be approaching industry standard graphics from inside our bedrooms. That'd be nice, right?
Replicating CC3 in Unity: Initial Setup
I made a scene that looks close to CC3's Default Stage. I use this scene to import, adjust, and test characters. Because the lighting setup is similar, it helps me to notice and adjust any material import discrepancies. I'll post instructions so you can make this scene if you'd like. You may find it to be like a crash course..
I am modifying the default SampleScene for a new 2019.2 project using 3D with Extras template. It is the same for HDRP. Here is an image guide for the initial scene setup you may find helpful to clarify the instructions below...
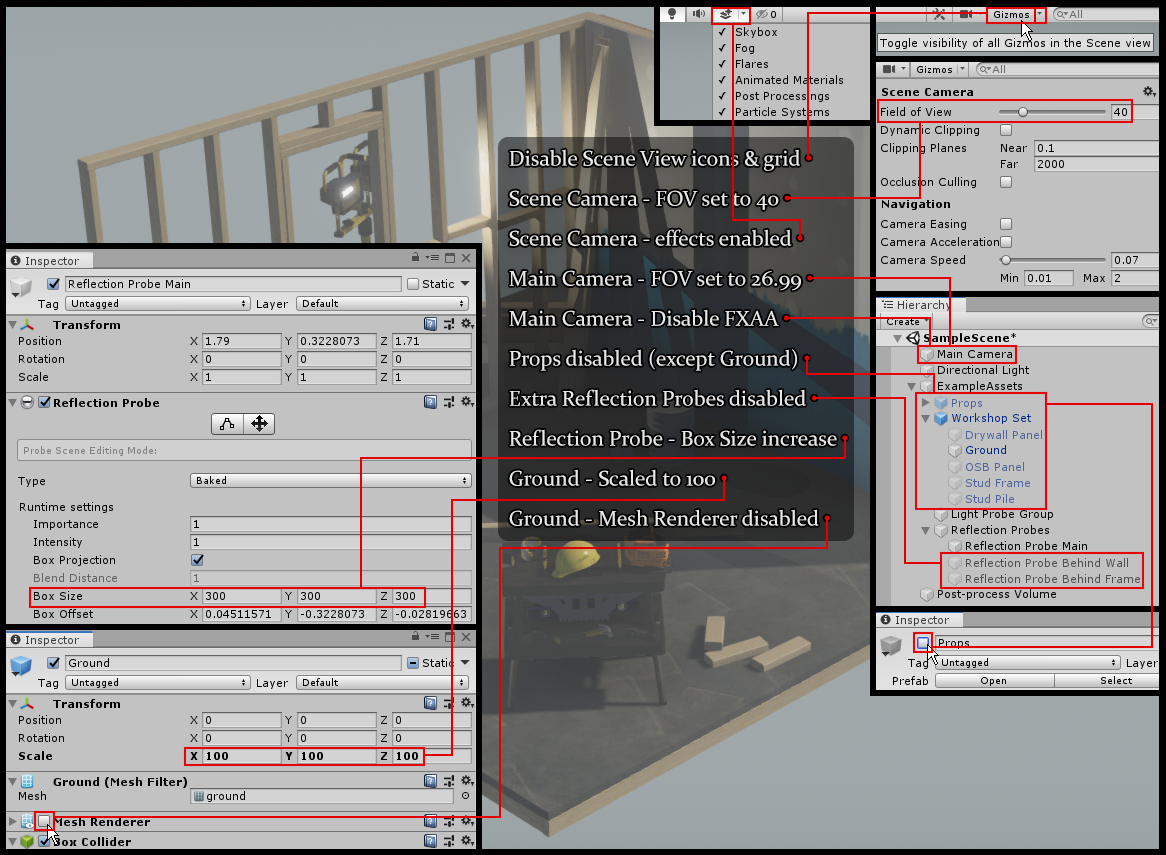 - Window > Package Manager > Update Post-processing (currently version 2.1.7)
- Disable Gizmo Icons & Grid
- In the Scene tab's menu bar, set the Scene View Camera Field of View to 40 & the Main Camera (Game View camera) to 26.99
- Disable FXAA on the Main Camera. This type of anti-aliasing degrades quality and is worse than none at all. I have 4x Multi Sampling set in Project Settings > Quality — this setting takes effect when setting "No Anti-aliasing" in the Post Process Layer component.
- In the Scene tab's menu bar, toggle all Scene View effects on: skybox, fog, and other effects.
- In Hierarchy, expand ExampleAssets and disable Props, expand Workshop Set and disable everything except Ground, expand Reflection Probes and disable all except Reflection Probe Main.
- Set Reflection Probe Main's Box Size to 300 for X, Y, & Z. This one proble will be used to cover a huge (empty) area.
- Scale the Ground to 100 for X, Y, & Z, and disable its Mesh Renderer component. The character will be able to run for a good ways on invisible ground.
It is a good time to import the Character Creator and iClone Auto Setup Script for Unity it is not already in your project. Current version 1.01 is officially for 2019.1 but works with the latest 2019.2. The generated Editor folder can safely be placed inside the CC_Assets folder if you'd like.
CC3 to Unity Export — Traps!
Export a CC character with the proper settings. There are a few special settings you need to be aware of...

The Mouth Open as Morph adds an important corrective BlendShape and is not enabled by default. It is also important to include the Current Pose (export in T-Pose or one of the default CC pose presets). The default CC poses received a corrective update, and if you fail to include Current Pose, this will happen when you go into Play Mode...
Shader Problems & Fixes
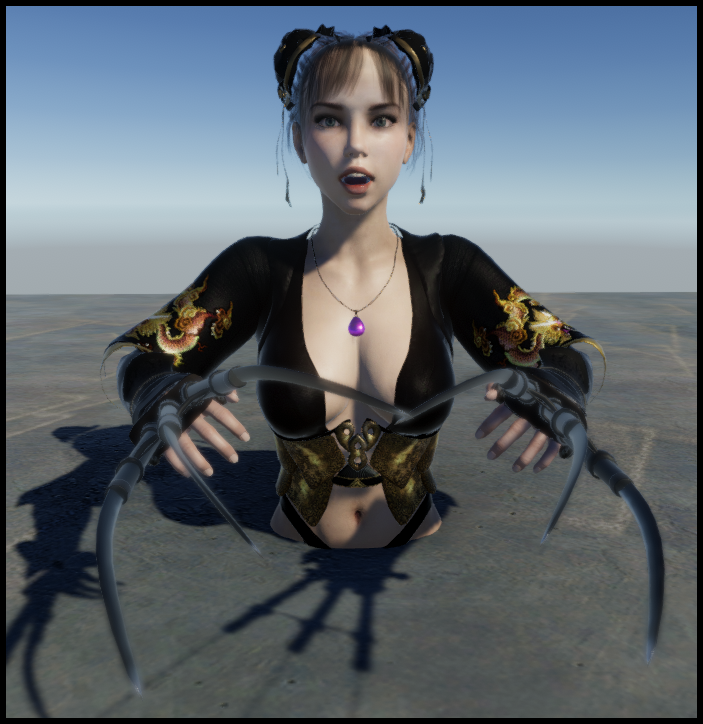
Remember to go into the Tools menu and disable Auto-Processing after import (and re-enable before next import). Characters imported into Unity will have clothing and hair transparency problems...
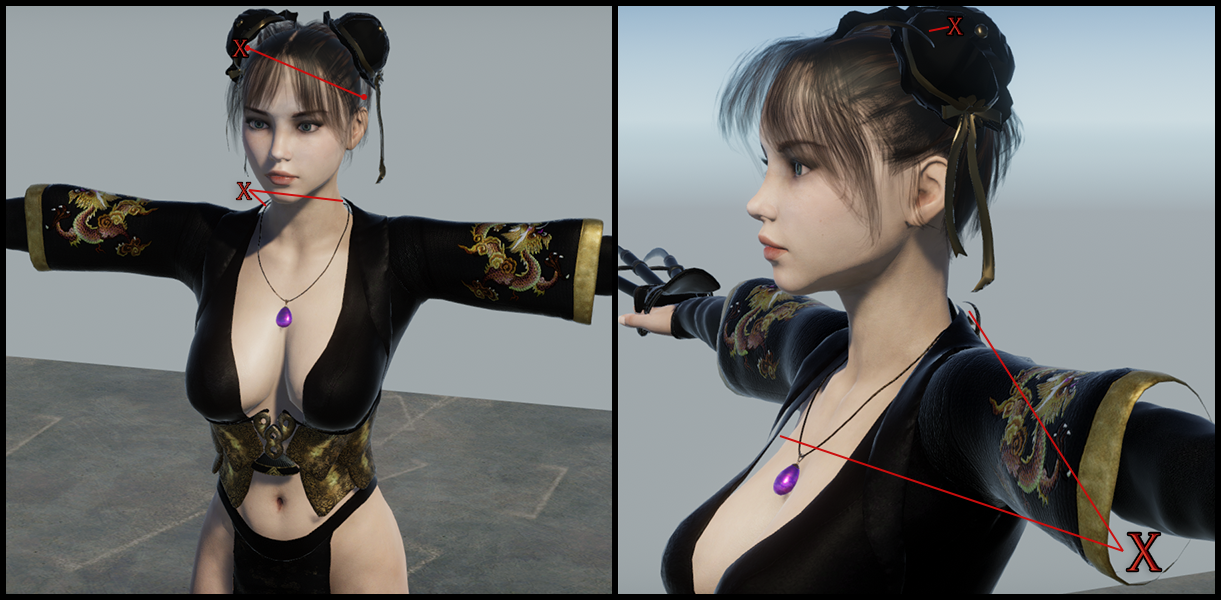
These are limitations with the aging Unity Standard Shader. It is a Unity problem and Reallusion cannot fix this. HDRP users will fare better because the new shader supports double-sided materials, which is the problem we see with the clothing. Because I am primarily working with non-HDRP at this time, I paid $5 for Azerilo's Double Sided Standard Material shader to fix the clothing problem. I tried a few free double-sided shaders and found that they did not support PBR, and looked bad as a result. The hair problem is more complicated and will be covered in the next post.
Note: I use non-HDRP because I bought many assets that do not support HDRP. Standard Unity with paid assets can still compete with and overperform HDRP at the moment, but eventually there will be mass movement to HDRP as it becomes standard...
Another problem you may notice is that the Smooth Mesh options: Tessellation & Subdivision, are lacking in Unity. Again this is a shader issue, and HDRP will have Tessellation, but I paid $10 for the Beast shader to solve the low poly breasts & butts issue in Unity...

Or you could just put some clothes on instead...
You will need to use it at the same setting on all body materials: head, arms, legs & body, else you will end up with seams between parts. It causes the mesh to inflate and look more like it is over 100K polycount rather than the actual Creation Base's 30K; the same way Smooth Mesh setting works in CC3. This can cause pokethrough for clothing and the scalp/hair if you didn't design with Smooth Mesh enabled in CC3. So, if you want to Tessellate the body but not the clothes, you should reflect that in your Smooth Mesh setting while designing. Game Base should also benefit but the single-material version will likely have problems (unintended things like eyeballs & teeth inflating). Tessellation is used sparingly due to performance concerns. Because the head already has a good polycount, Tessellation will have very little effect on it.
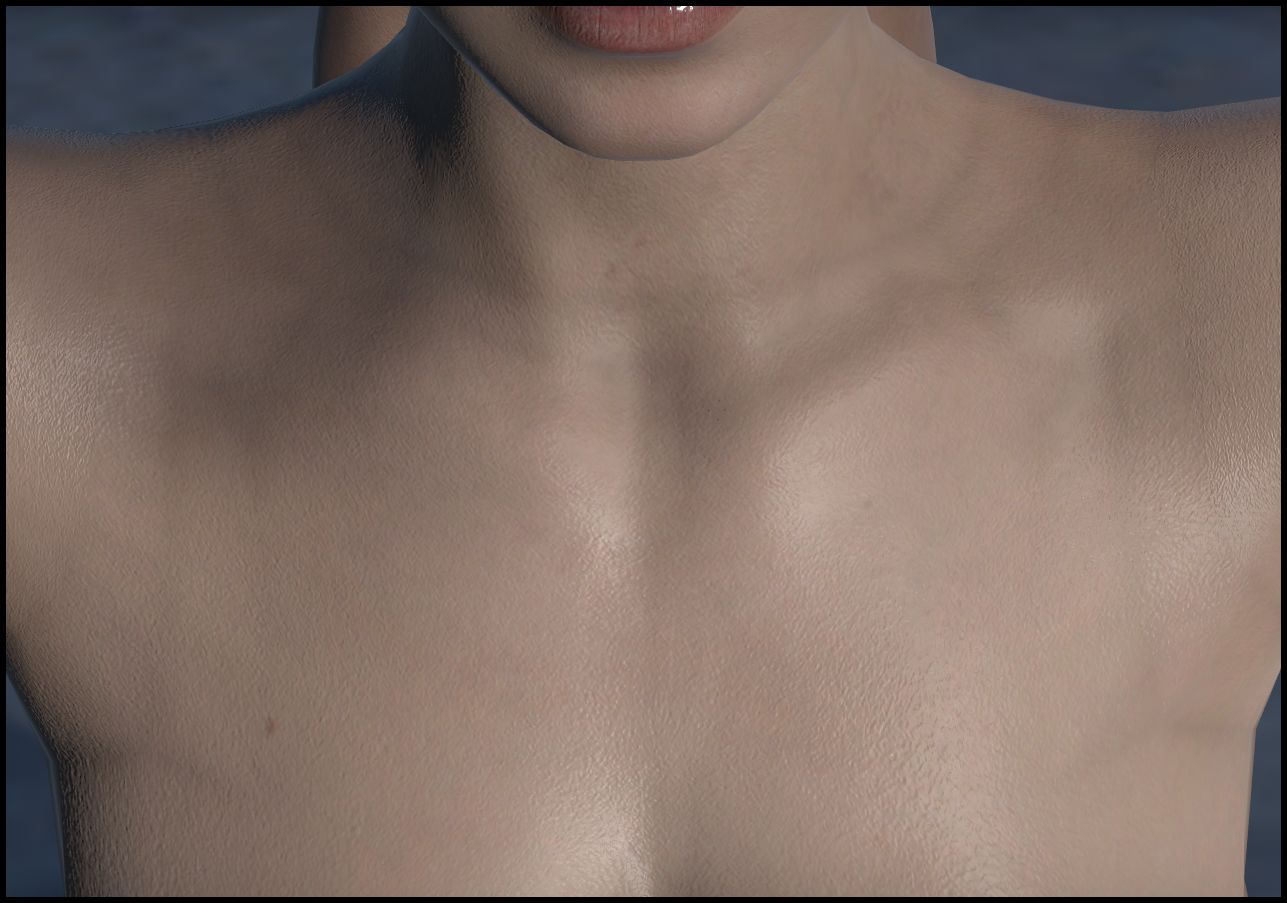
Tessellation also fixes Transformer mesh topology issues like you see here around the neck and shoulders...
Replicating CC3 in Unity: Lighting Setup
In CC3, apply the _Default stage and save out the IBL...
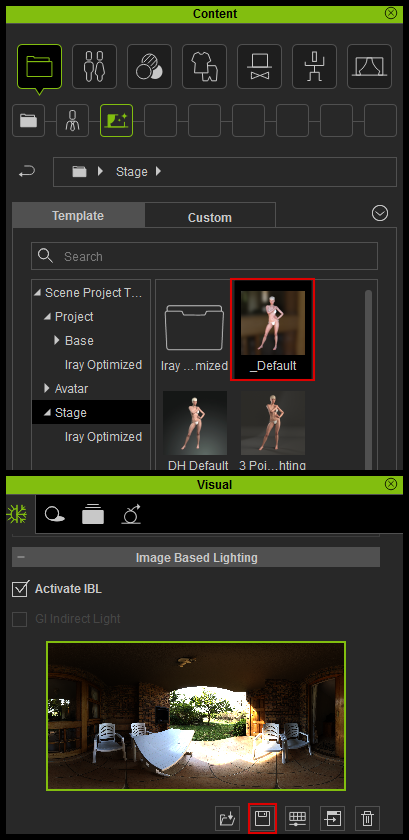
If you currently have a Digital Human Shader project open, pay attention when you load the _Default Stage: It will look like the skin just lost some detail...but rotate the IBL (or just set the Z to 130) and see how the skin detail reappears. Keep that in mind when you are doing lighting in Unity; the angle that light hits your Normal maps has a significant effect on appearance.
Using CC3 IBL's in Unity gives you great lighting for minimal effort. Here is visual guide to accompany the instructions (last two steps below are not shown in picture)...
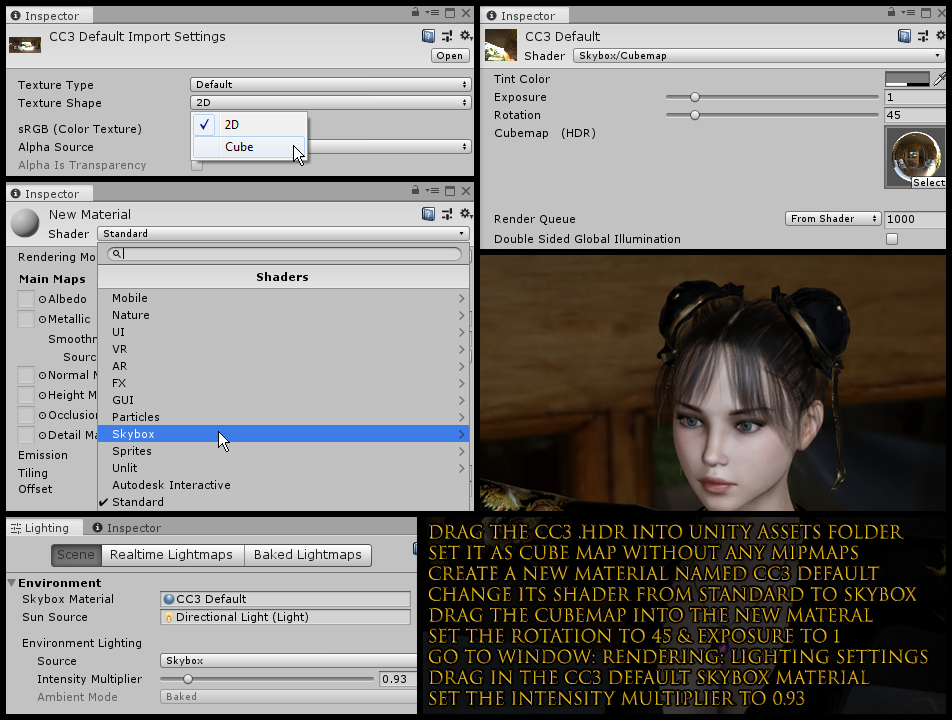 - Drag the CC3 HDR file into your Unity Assets (Projects) folder & set Texture Shape to Cube Map in the Import Settings. Do not Generate Mipmaps.
- Create a new material (Assets > Create > Material) and name it CC3 Default (or whatever you want) and change its shader to Skybox.
- Drag the Cubemap into the new materal and set the Rotation to 45 & Exposure to 1.
- Open Window > Rendering > Lighting Settings and drag in the CC3 Default skybox material. Set the Intensity Multiplier to 0.93.
- Scroll to Other Settings at the bottom of the Lighting settings and disable Fog (not shown in picture)
- Select your Directional Light and change the color to pure white, Intensity to 0.8, and Transform Rotation to X:25 Y:360 Z:-40 (not shown in picture)
Replicating CC3 in Unity: Post-processing / Final Touches
To complete the CC3 Default look, some adjustments were made to the Post-process Volume at the bottom of the SampleScene Hierarchy...
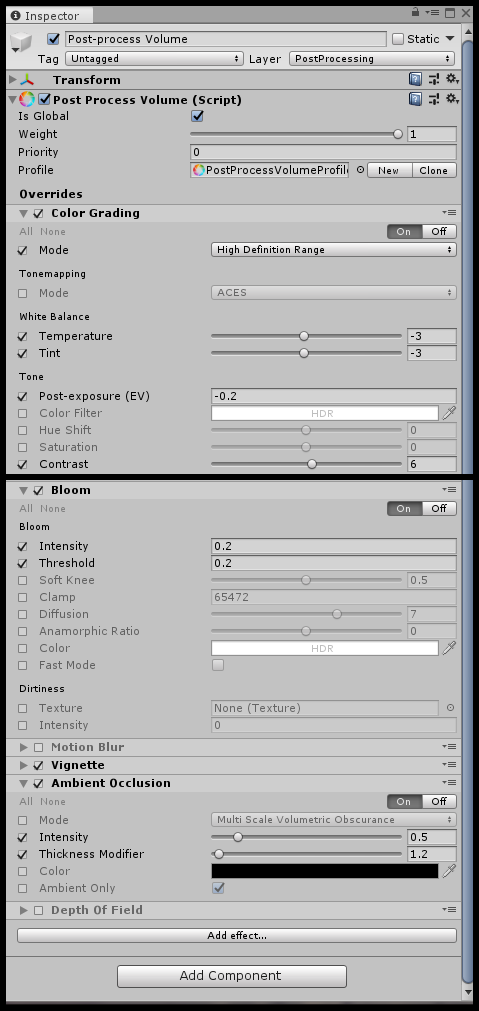 - Color Grading: Tonemapping (ACES) disabled | Temperature -3 | Tint -3 | Post-exposure (EV) -0.2 | Contrast +6
- Bloom: Intensity 0.2 | Threshold 0.2
- Motion Blur & Depth of Field: Disabled
- Ambiet Occlusion: Intensity 0.5 | Thickness Modifier 1.2
The HDR Cubemap skybox we imported is not a perfect match, but it can be toggled off in both CC3 & Unity to display a grey background. Go to Preferences > Colors > Scene > Background and set the Value to 22 and toggle off the Scene View skybox. Set the Main Camera Clear Flags to Solid Color. Besides hiding the Sky In CC3, also go to the Project panel 2D Background section and uncheck Activate Image to disable the gradient...
Besides the hair & eyelashes, which will be covered in the next post, here are the material settings I had to adjust to achieve this...
Eyes Smoothness from .7 to .95, Albedo Value from 100 to 90
Head, Arms, Legs, & Body Smoothness from .88 to .77 (can select all at once), Face Normal from 1 to 1.25
|
|
By Scyra - 7 Years Ago
|
Post reserved for tutorials & experiments...
The next idea for improving character visuals in Unity is to combine Normals from the Digital Human Shader update. If you go in an start deleting the maps you'll notice which ones contribute the most to the visual effect: It's the two normals: Micro Normal and Normal Blend Map, and the Base Color Blend Map. There are Photoshop Actions and scripts that allow us to combine those Normals with our base, and the Base Color Blend Map could be replicated as a Photoshop overlay texture, merged into the Diffuse. The rest of the magic is mostly lighting and good base textures.
Will get to that eventually, but now you have an idea if you want to try something on your own.
|
|
By J__s - 7 Years Ago
|
|
Thanks for lovely teaching ~
|
|
By Scyra - 7 Years Ago
|
You are quite welcome. I will be the one needing the teaching soon when I move on to iClone to CC3. Give and take.
The hair shader settings can be confusing. I have created a cheat-sheet to help you if you are using this particular hair shader...
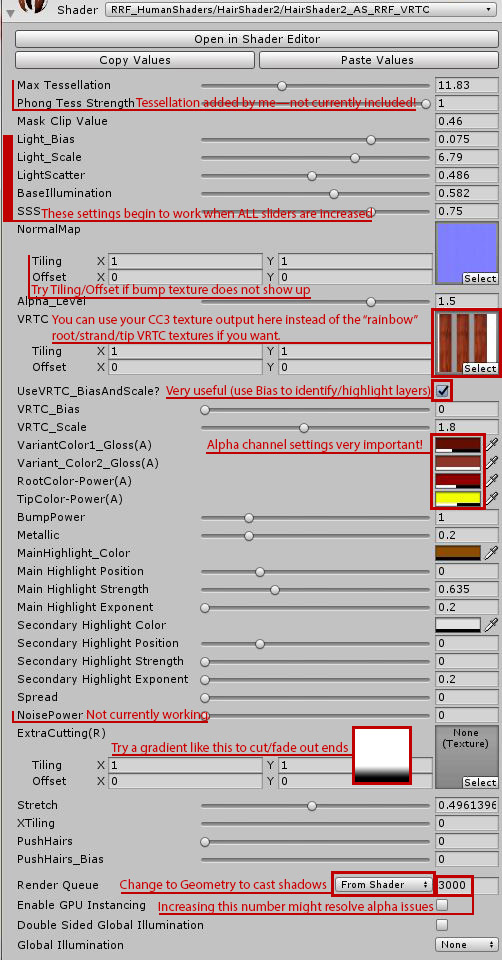
Daz hair such as the one I am using tends to have a number of layers (submeshes). Merging these submeshes can ruin the quality. Choosing one (or two) layers and setting the Render Queue to Geometry allows them to cast shadows on the other hair layers and the face. It looks good and is not too performance-intensive if you have reduced polycount (this hair reduced from ~200,000 to 5000 tris).
Hair Physics
This is another big problem. I spent all day working on a solution. Obi Cloth, which is supposed to be faster than Unity cloth, was a complete disaster. VertExmotion, being a shader, would have to be integrated into the hair shader, which was another problem, and it seemed performance would also not be acceptable. This leaves Dynamic Bone as the best option, but again there is a problem that the CC3 head bone is sort of non-existent (it sits right on top of the neck, at the jaw-level—this will not work for Dynamic Bone)...
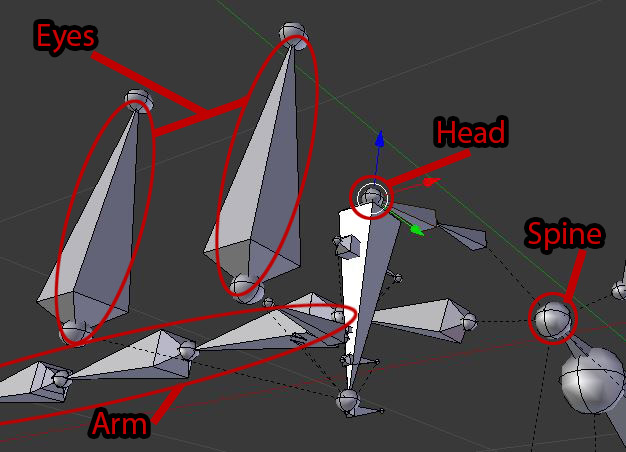
You see, there's nothing above the eyes. You've got to add bones. It needs to look something like...
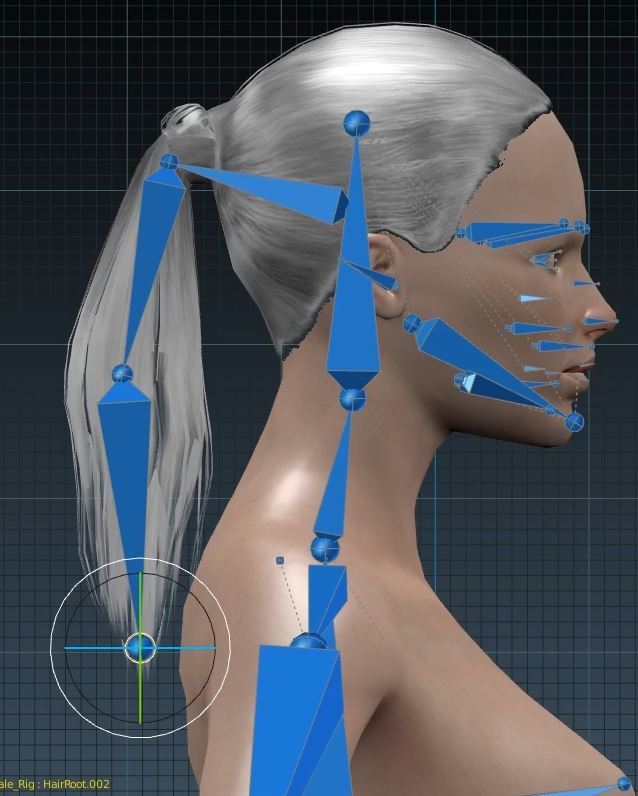
The English language lacks the appropriate words to describe how much I hate Blender. If someone can link a guide to do this in 3DXChange it would be appreciated. I'm looking at purchasing the Puppet3D asset to do this if necessary (but in that case I may wait for a Black Friday sale).
|
|
By Miranda (RL) - 7 Years Ago
|
Like this post!
I like the way you share your experience in using CC. It pointed out something we may not be aware of during product development, tutorial creation, or webpage commercialization.
Are you consider to break out different topics in different threads, and highlight what it's about on the subject?
I didn't notice it's about Transformer and CC-to-Unity before clicking into the page.
|
|
By Scyra - 7 Years Ago
|
Thank you, Miranda. I am honored that you like it. You are welcome to split the thread into separate topics in the appropriate subforums, and to change the title as you see fit.
Actually, I had purposely obfuscated the title as I am somewhat guarded against the idea of sharing pearls with anybody and everybody, but, having realized this to be a rather small yet helpful community, I have completely changed my mind (as you can see I've added the link to my signature).
|
|
By Scyra - 7 Years Ago
|
I'm using Invector. I can post some tips on that if there is an interest.
|
|
By F O R W A R D - 7 Years Ago
|
I'm using Opsive Ultimate Character Controller, if you could make a guide on that it would be wonderful.
Edit:
I just realized that I had bought "Invector" a long time ago, so if you can make a guide with that it's also great.
|
|
By Scyra - 7 Years Ago
|
I'll do Invector because I own the full version and anybody can use the free Basic Locomotion version, which is just unbelievably great for a free asset. I don't own Opsive or Ootii's character controllers, but I ran the demos and I think they are good. Those are the big three, and they seem similar to me; maybe working with Invector will help you figure out Opsive.
I'm going to delete the second and third posts in this thread. The second post will be about hair shaders and I'll make the third one about Invector...maybe check back tomorrow for that.
Invector's Third Person Motion Controllers (Free Unity Asset: Basic Locomotion)
Invector is simple to set up and they have good tutorials and an active and helpful forum that can help you with that asset more than I can. There are a few things to be aware of regarding CC3 characters and Invector, however...
Do not scale your character when using Invector. He mentions this but it's easy to forget.Your character models can have problems when you do a build if you scale them. This means you need to pay attention to the height of your CC3 models, which is impossible because CC3 has no "feet & inches" option. I didn't pay enough attention to centimeters in the second grade and now I'm done for.
The "run forward" animation that comes with Invector is not compatible with the CC3 rig — it works, but the motion is jerky. Nothing is wrong, you just need to replace that particular animation. Invector has a 3 years old video on his YouTube that explains how to replace animations and it couldn't be easier.
Invector's asset warns you not to import it into an existing project. This is because it will overwrte Unity settings. Packages like these tend to overwrite default settings they have no business with. You may not notice your color space is switched to Linear, for example. You can run a second instance of Unity and use it to compare and correct settings if you need to.
The clone of your character that is created by Invector will no longer have the "Current Pose" that you (should have) exported with your character, so the problem in Unity where the character's mouth hangs open will occur. You can either look up how to transfer the pose to the other character, or you can fix this by dragging the lower jaw hierarchy into the upper jaw (CC_Base_JawRoot being the lower jaw). I have not had any problems with that method yet, but if you did, you could simply drag it back to the way it was.
I haven't had any other issues with CC3 & Invector.
|
|
By martinortiz - 5 Years Ago
|
I realize this is an old post, don't know if it is still monitored by OP.
"I made a scene that looks close to CC3's Default Stage."
Can you make this available for download?
|
|
By Miranda (RL) - 5 Years Ago
|
The last active time of Scyra is last year, so it seems to be impossible to see any updates.
I quite like the way Scyra explored and shared his findings. It's a pity. :(
|
|
By coach1 - 5 Years Ago
|
maybe one of the best threads in forum...
|
|
By drew_927096 - 7 Years Ago
|
hi Scrya, how's it going?
Wondering if you've had a chance to upgrade yet to the latest plugin/ Unity 2019.1, and made changes to your workflow?
One of the immediate things I noticed was that the skin and clothing is much less glossy. It looks like they removed the Metallic maps from the skin and clothing.
I actually think some of the clothing looks better with the metallic maps. I'm wondering if you discovered the same thing? Any changes to your workflow now?
|
|
By Scyra - 7 Years Ago
|
I'm making good progress on my project. I have built almost an entire city district in Unity during this time (has it been a month?) . Soon I will need to populate it with NPC's, so lots of CC3 work is coming in the near future (ETA ~2 weeks?). Screenshots show about half of what I've made so far...
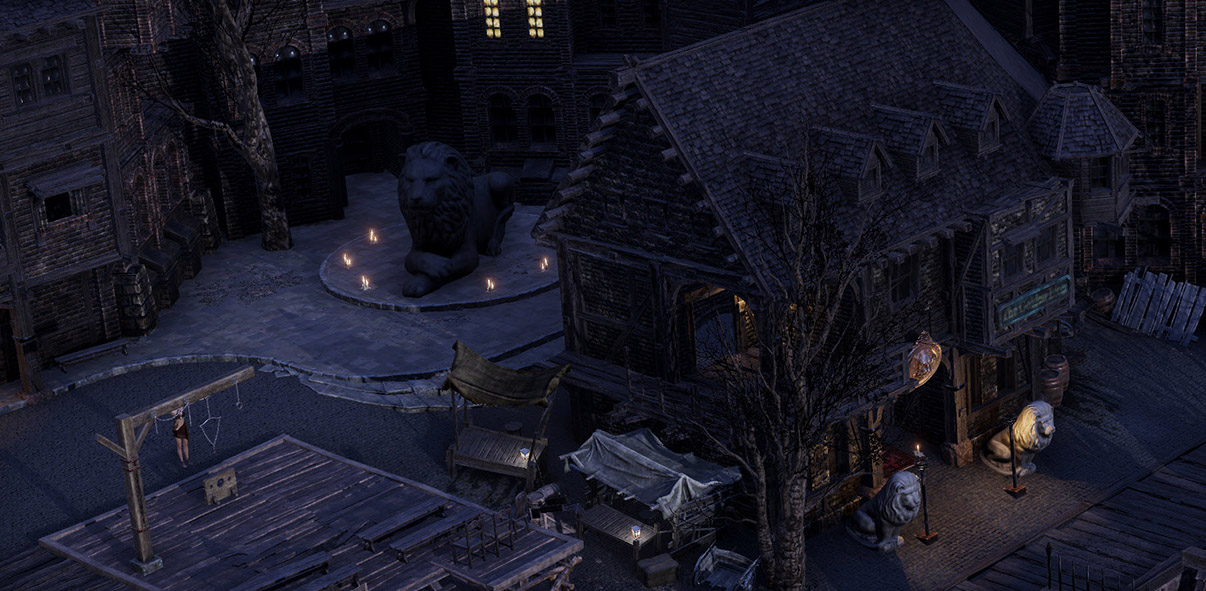
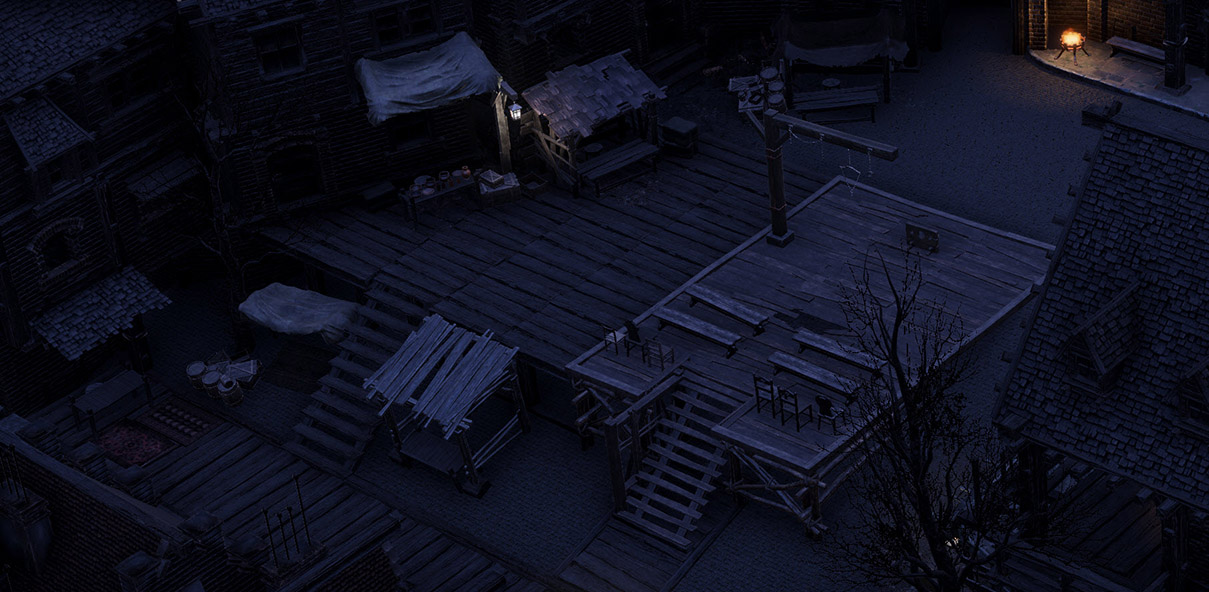 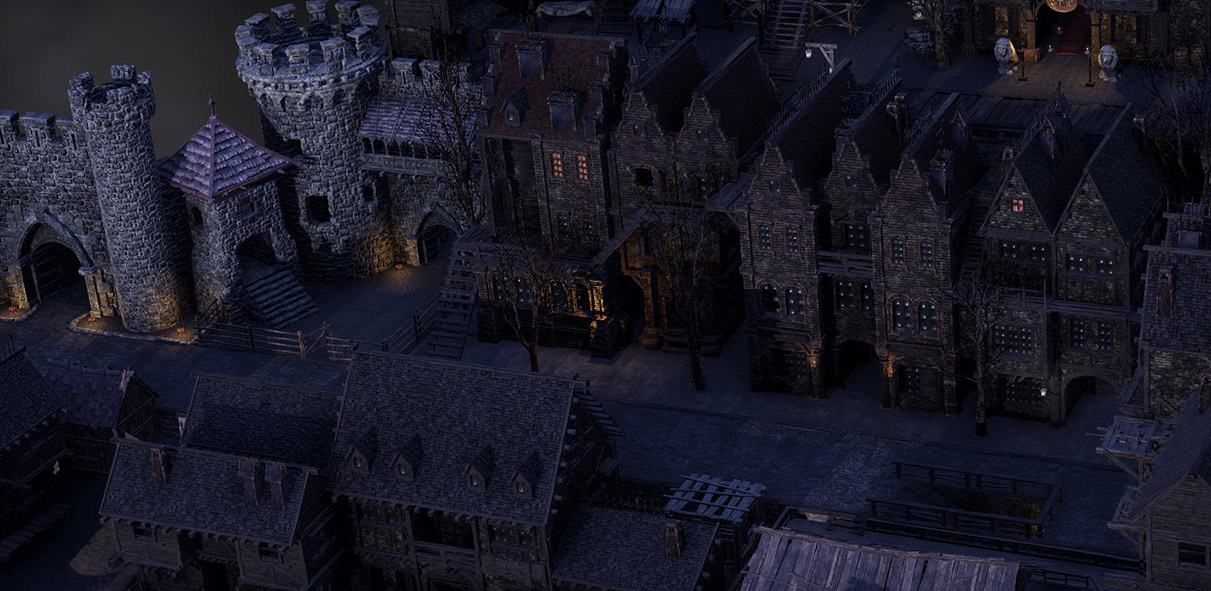
It is good progress considering I have never done any level design before and the aging brain wants to throw a tremendous tantrum when suddenly ordered to learn in months what should have been learned gradually over years.
It is probably a good thing that they've removed the metallic maps as in most cases it was nothing more than a 64x64 black square and I had 30 of them for a single character, which Unity treats as 30 separate textures—better for performance to manually drag & drop a single one of those to whatever material needs it.
I did update the second post in this thread with a small bit of 3.1 info about BlendShapes, and plan to do more later.
|
|
By R Ham - 7 Years Ago
|
All I can say is, what a handy thread. Thank you for taking the time to put it together. The otherwise undocumented nuances of importing are just what I need to look into at this time.
|
|
By Scyra - 7 Years Ago
|
Hi, Rottenham, I'm glad you like it. It is helpful for me too because I learn so much, then I'm off to the next thing and I forget things until I read back over my notes. Eventually I will get to making animations for CC3 characters with Perception Neuron and Live Face..
|
|
By Scyra - 7 Years Ago
|
May as well drop these images off here...
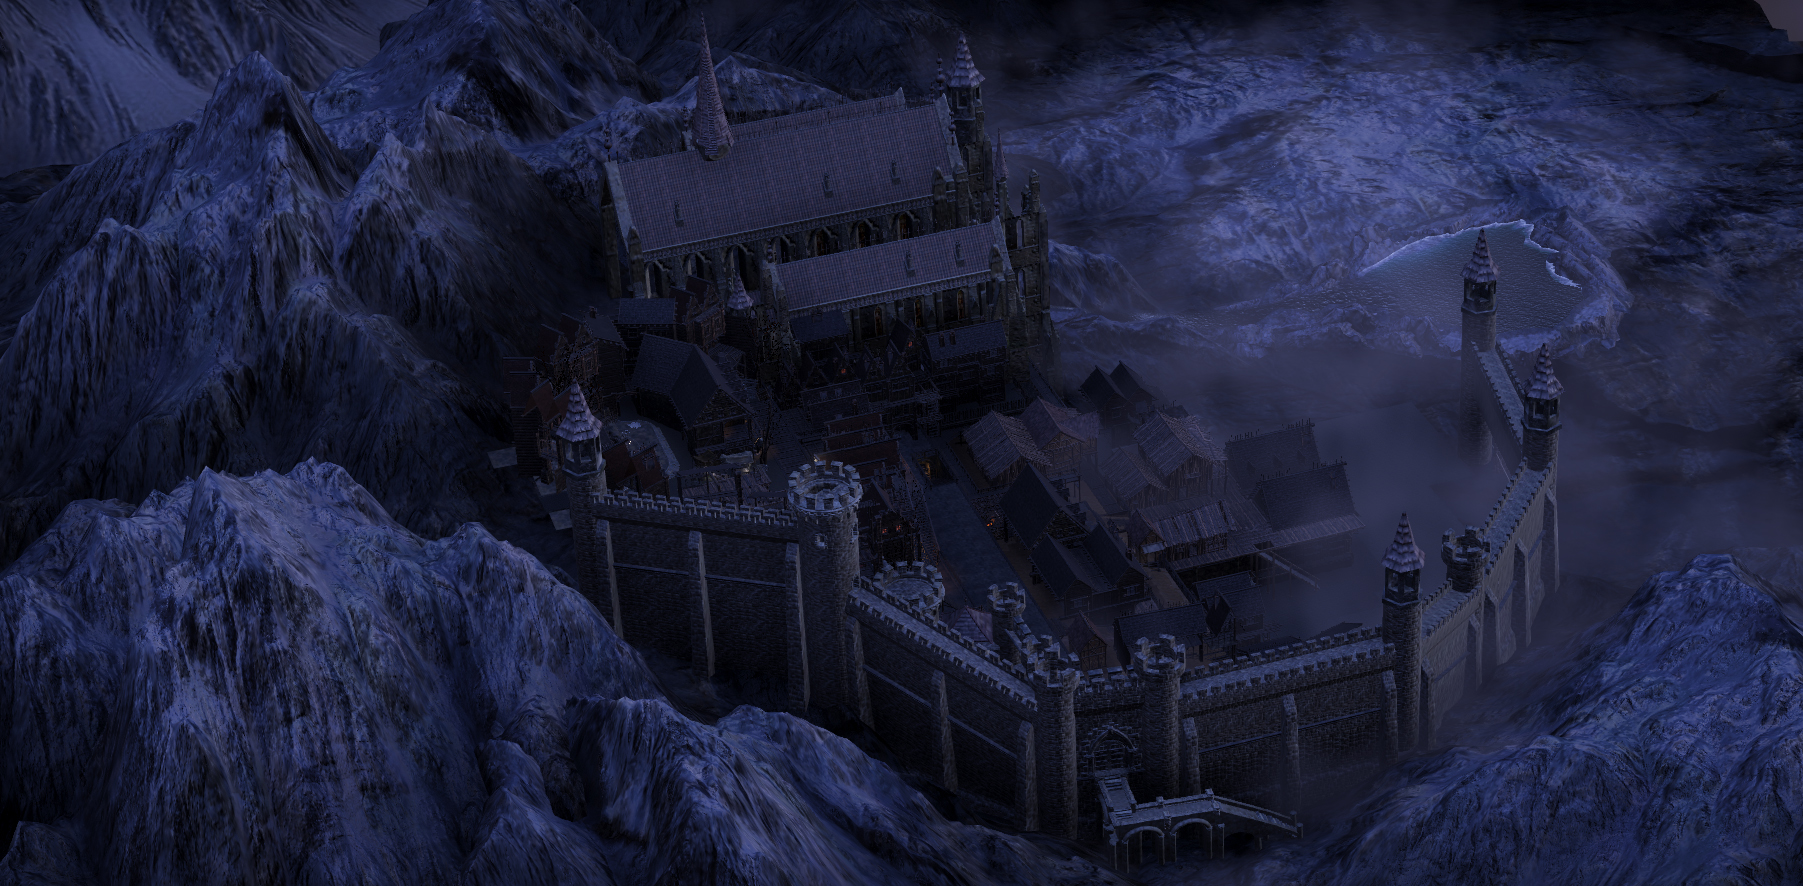
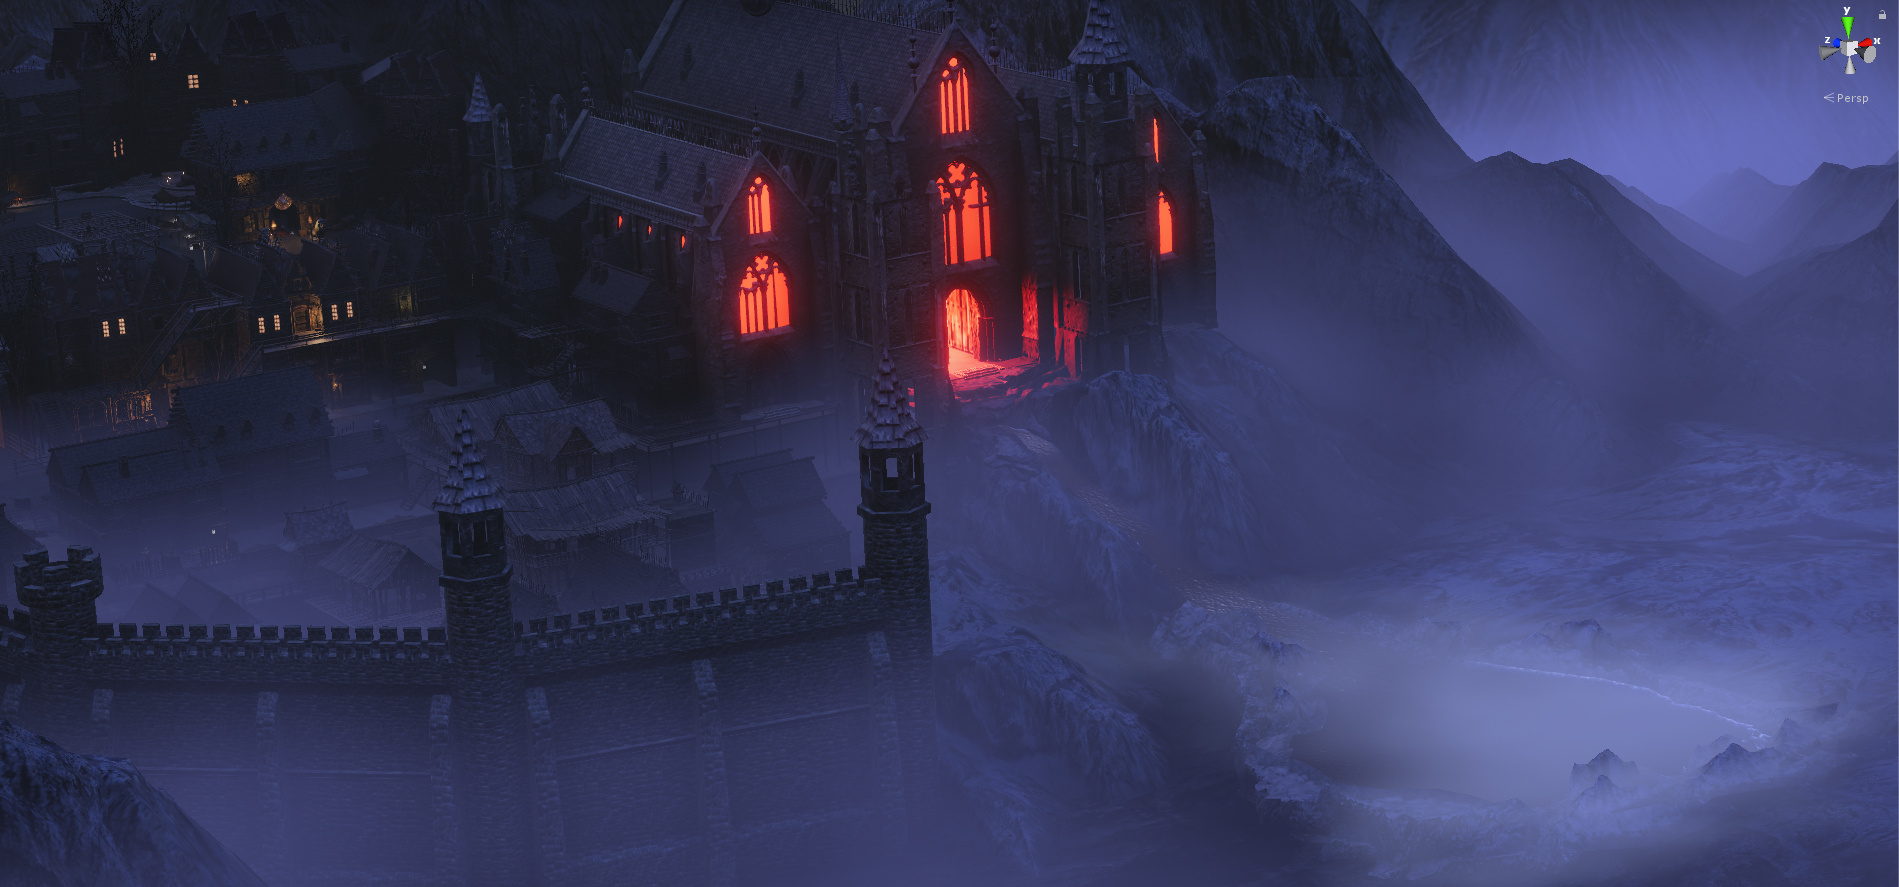
This is where I've left off on my Unity project. This took me a month to make. Now I will spend probably a month making as many Daz to CC3 characters as possible. I am moving new Daz to CC3 tutorial material over to this thread, which will be of higher quality. Then I plan to do a similar thing for CC3 to Unity again...we'll see.
|
|
By F O R W A R D - 7 Years Ago
|
|
Amazing, I hope I can learn a lot from this. So far I'm having some issues by integrating my character to a famous "Player Controller".
|
|
By drew_927096 - 7 Years Ago
|
Scyra (8/16/2019)
There are a couple problems with using combined material, but it is ultimately very desirable. I will be using it for all NPC's. - Currently there is a problem with Game Base eyelashes when using the combined material, but that is due to be fixed in the next patch.
- I may want tessellation on just the body or just the head, and I may want to fine-tune the effect for each part. Too much tessellation on the head causes it to clip through the hair. The upcoming patch looks like it will give me the ability to combine the all the body materials but keep the head separate.
- With separated mesh/materials you can turn off the Skinned Mesh Renderer component to hide the entire torso/legs under clothing, keeping the arms/head visible. This is good for performance. It is useful if you don't want to Delete Hidden Mesh.
thanks for sharing.
How do you turn off a body part? When I import my character into Unity, using "multiple materials" when I convert to Game Base, I still only get a single SkinnedMeshRenderer on the Body section, the difference being I have 6 materials instead of 1. What am I missing here? Seems like instead of masking clothing, if the clothing is full body, we could turn off the rendering of that body part if it was fully covered, but I'm not able to figure out how you do that.
|
|
By Scyra - 7 Years Ago
|
I was mistaken about being able to turn off the Skinned Mesh Renderer for individual parts. I must have been using the Hide Mesh shader to do it and I remembered it wrong. Note that the Hide Mesh shader still results in a draw call each time it is used, even though nothing is rendered.
|
|
By Scyra - 7 Years Ago
|
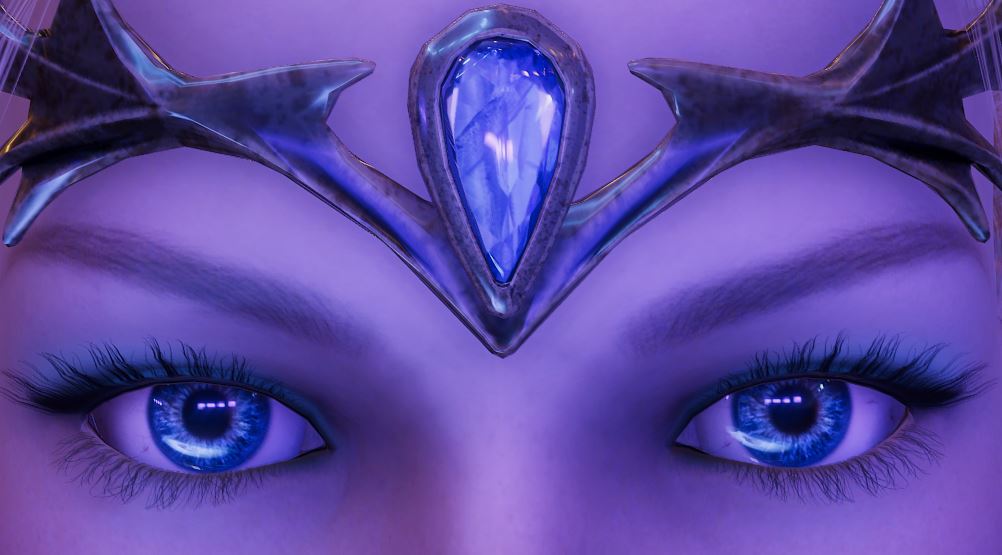
Here is another tip for Unity: If you want to get reflections, increasing Metallic Smoothness in your material settings may work, but you will probably also have to change the Source from Metallic Alpha to Albedo Alpha.
|
|
By drew_927096 - 7 Years Ago
|
|
Scyra (8/19/2019)
I was mistaken about being able to turn off the Skinned Mesh Renderer for individual parts. I must have been using the Hide Mesh shader to do it and I remembered it wrong. Note that the Hide Mesh shader still results in a draw call each time it is used, even though nothing is rendered.
Thanks. I was also able to achieve the same thing by setting the Shader to Cutout and making the Alpha value to be 0.
Not sure if this is more performent than the Hide Mesh shader you use.
|
|
By drew_927096 - 7 Years Ago
|
hi,
I tried buying that hair shader you recommended, however, when I set my C3 character hair to use that shader, it gets very glitchy (she becomes bald).
I tried playing with the "baseton_alpha" and "NormalMap" like in the example scenes, but my head sitll looks mostly bald.
When I change the "AlphaValue" from 2 to 0, most of the hair appears, but still, the hair looks bad, and she has an ugly bald spot in the back of her head.
What steps should I take once I assign the Shader to the hair? Which of the Hair shaders in HumanShaderPack should I use? I'm targetting Mobile BTW.
thanks again for all your help!!
Drew
|
|
By Scyra - 7 Years Ago
|
|
Thanks. I was also able to achieve the same thing by setting the Shader to Cutout and making the Alpha value to be 0.
Not sure if this is more performent than the Hide Mesh shader you use.
I have read that Cutout shaders are expensive, and overlapping transparencies are performance-expensive. I think the Hide Mesh shader would be far better for performance.
The fourth post in this thread has a picture that shows the shader and settings, be sure to check that out. It is the VRTC shader. Here are some notes from an email I sent the author which has some helpful info about this shader...
"It is confusing that ~5 out of the first 6 sliders seem to do nothing (Light_Bias, etc.—these begin to work when they are all set to high values like in the attached image). UseVRTC_BiasAndScale? toggle is always desirable (in my opinion), and users should especially be encouraged to tweak the alpha channels for the Gloss/Color-Powers as these have a huge effect. ExtraCutting and NoisePower I am still not even sure about, but I will experiment."
NoisePower is currently not working. ExtraCutting takes a black & white image just like the mask example I posted earlier. Render queue set to Geometry allows the hair to cast/receive shadows. This can cause some transparency "Z-fighting" so you need to, if you use this setting on multiple layers, increment the Render Queue numbering on each layer like 3001, 3002, etc. It is ok to use it on only the top layer, assuming your hair has multiple materials like mine does.
You mention a bald spot—I recall having some trouble with the bottom "Skullcap" layer of this hair, which you see in the initial images as a bald spot. It took me a while to figure that one out. I think it was the tiling offsets that eventually helped. Here is a screenshot of settings for that layer...
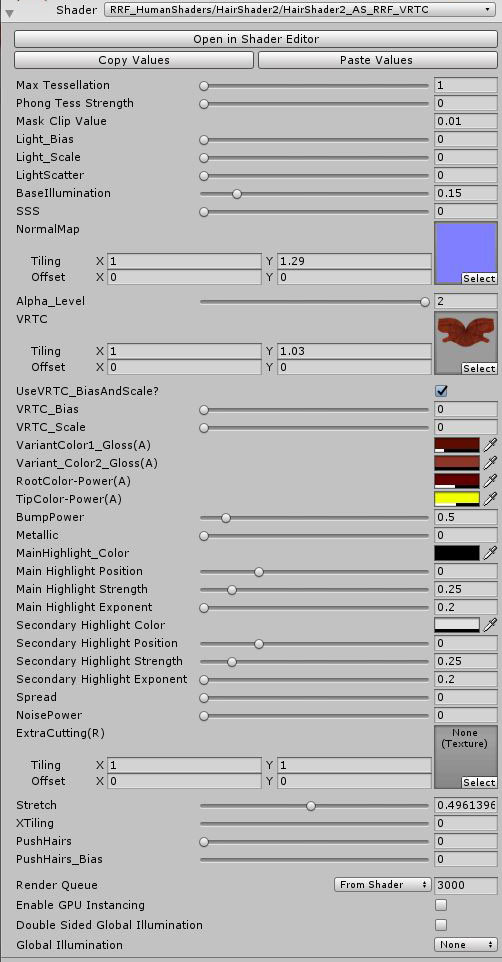
One more thing—the Daz hair I used in the example has multiple materials (and 8 submeshes!); I was not able to fix the bald spot when I merged those materials. That bottom "skullcap" had to remain separate. Attempting to merge the submeshes was also a failure. Do keep us updated on your results.
|
|
By drew_927096 - 7 Years Ago
|
This thread is a huge help, thanks for sharing.
I have issues with clothing clipping into my Avatar when that character animates in Unity.
I have a system in Unity where I can change the characters outfits, so I can't just bake the clothing into the character when I export.
Have you faced and solved this problem? Is the only answer to use weight painting and try to fix it for all animations for all clothing? Or maybe there's some short cuts or hacks to get it to work?
Thanks for your help!
|
|
By Scyra - 7 Years Ago
|
You are welcome. I will come to the problem of outfit swapping, but cannot say whether it will be 2 weeks or 2 months (currently working on terrain until the CC3 update which is scheduled for the end of this month). The product I will be using to do this is Mount Points. The feature list specifically mentions support for masks to reduce clothing penetration, so that is probably what I will be doing. Since you already have a system, you might gain some insight from the Mount Points PDF manual about how the mask system works—seems simple enough to swap mask textures per clothing item.
Making all those mask textures will be a bother, but maybe not too bad with Photoshop's Quick Seletion Tool. If it is minor poke-through, tessellation can inflate the mesh to hide it, but tessellation is probably more expensive than masks and cutout shaders.
Another possibility is to use the hide mesh shader attached to this post to hide the entire torso/legs/arms. I don't think it's a very useful option except, perhaps, to hide the hair for helmets.
|
|
By drew_927096 - 7 Years Ago
|
Thanks a ton man. When you get to the point of doing swappable outfits, let me know, as I have a ton of documentation that I could share with you of the lessons i've learned so far.
I know about mount points and have played with it, but I couldn't get it to work, I think mainly because C3 exports clothing with a weird extra bone or two and attaches the mesh to that weird bone(s).
I actually FINALLY resolved this yesterday, I have no idea why, but your post gave me this idea.
I basically loaded the clothing in C3, then I hit "transfer skin weights", then "convert to accessory", and then "transfer skin weights" again.
Now, when I export the clothes, the weird extra bones are gone! wow! can't believe this worked.
Now that this has been resolved, most of my "poke through" issues appear to be gone, although there is still some minor glitchiness, this is a huge win.
I'm also able to attach the clothing to the bones of the avatar with a simple script found here: https://forum.unity.com/threads/tutorial-how-to-make-clothes-animate-along-with-character.475253/.
Now that the bones are the same as the avatar, this works easily.
I think this simple script here also does masking, if you want to avoid using Mount Points, you can basically replicate the behavior with the script found here: https://forum.unity.com/threads/issue-with-character-body-poking-through-the-clothes-custom-shader-maybe.367220/
I think the place that Mount Points really shines is attaching arbitrary meshes to bones. But if you already have a rigged mesh (like clothing), MP may be overkill.
I am still hoping to avoid having to create a mask per each clothing item, as it seems like a pain, and I don't have artistic skills.
I will look into using the shader you attached and see what results I get.
I'm hoping to just find an automated way to hide the whole body part that the clothing is covering.
|
|
By Scyra - 7 Years Ago
|
UPDATE: I was able to get Mount Points working with little difficulty using the method you decribed in another thread (thanks!)...
By hiding the mesh of the character, and "delete hidden mesh" on export, C3 allows export of clothing only.
I tested this with a jacket. I was able to delete the unnecessary skeleton bones such as the legs, hands, and head—presumably this helps with performance. I think the problem you were initially encountering is specific to Game Base. I have already posted an example of the CC3 Base skeleton a couple posts earlier. This is what a clothed Game Base skeleton looked like in Blender...

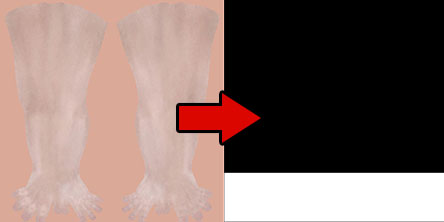
Thank you for sharing your workaround for that. As far as mask textures and pokethrough, I don't think you have anything to worry about; it can be done with nothing but black & white square blocks. I had some poke-through at the elbows of the jacket and this is the mask texture I used to fix it...
Wow, it sounds like you might have spared me a lot of work. "This is a huge win"—I totally get what you mean, I've had plenty of those experiences in Unity so far. Every little thing is a hurdle.
The masking script you posted looks like it functions the same as the Mount Points system. I'm still going to give Mount Points a try because I already bought it at last year's Black Friday/Cyber Monday sale. And I'll look into this sometime within the next few days because it seems it is potentially a bigger problem than I anticipated (seems to be a trend).
I'm not sure that the Hide Mesh script is useful at all, come to think of it—it would be better to just toggle off the Skinned Mesh Renderer component instead. Anyway, thanks for the insights and I'll let you know my results soon.
|
|
By drew_927096 - 7 Years Ago
|
awesome, glad you got it working with MP.
I will try this myself tonight.
BTW, why do not combine all the materials when you convert to GameBase?
It would make creating masks easier and also optimizes draw calls, no?
thanks again
|
|
By Scyra - 7 Years Ago
|
There are a couple problems with using combined material, but it is ultimately very desirable. I will be using it for all NPC's.Currently there is a problem with Game Base eyelashes when using the combined material, but that is due to be fixed in the next patch. Fixed in version 3.1.- I may want tessellation on just the body or just the head, and I may want to fine-tune the effect for each part. Too much tessellation on the head causes it to clip through the hair. The upcoming patch looks like it will give me the ability to combine the all the body materials but keep the head separate.
With separated mesh/materials you can turn off the Skinned Mesh Renderer component to hide the entire torso/legs under clothing, keeping the arms/head visible. This is good for performance. It is useful if you don't want to Delete Hidden Mesh.
|
|