|
By Grace (RL) - 7 Years Ago
|
iClone v7.21 (7.21.1609.1) released on April 11th, 2018
Dear iCloners,
Version 7.21 is yet another great update as a fruition of several months of hard work. Besides the bug fixes in response to the Feedback Tracker and the forum, there are lots of other enhancements that make iClone and 3DXchange a more productive pipeline product and better at expediting the management of large scale projects.
- 63 Custom Facial Morphs for Daz Genesis 8 - Truly Expressive Daz Animation for Face Key Edit, Face Puppet and Facial Mocap
- Automatic Material Assignment and Batch Load Texture Mechanism
- PopcornFX 1.01 Bug Fixes and Updates
Over 60 tickets in the previous v7.2 have been categorized and resolved by the dev team:
- 23 defects are Resolved in this v7.21 patch. check it out >
- 8 issues have been Assigned (to be released in the next version update). check it out >
- 30 issues are set Active for verification and plan of action. check it out >
For the full release notes, see here.
|
|
By Grace (RL) - 7 Years Ago
|
|
Performance Enhancements: Show / Hide, Timeline, DOF Render Options
A. Show / Hide
1. Optimized conditional changes in the Scene Manager, including show, hide, lock, unlock, render state, etc. (Does not include Physics states) Take the following forest scene as an example where the entire project is filled with numerous trees and grass (more than 200 trees). Showing and hiding 238 trees at once in the Scene Manager took more than 40 seconds in version 7.2. This same operation took only 1 to 2 seconds in version 7.21.
- iClone v7.2: operation took 40+ sec.
- iClone v7.21: operation took 2 sec. (see below)
2. Hidden objects now release system resources such as bone skin data so that viewport fps may improve and usage lag mitigated. For example:Having 5 CC characters in a project with a mid-level graphics card, such as AMD R9 200 series, runs at 13~15 fps.
Hiding 4 out of 5 characters in the same project slightly speeds up the scene to 15~17 fps, around 10% performance increase.
Hiding 4 out of 5 characters in the same project will speed up the scene to 30~33fps, 10 times the performance increase compared to iClone7.2.
B. Timeline
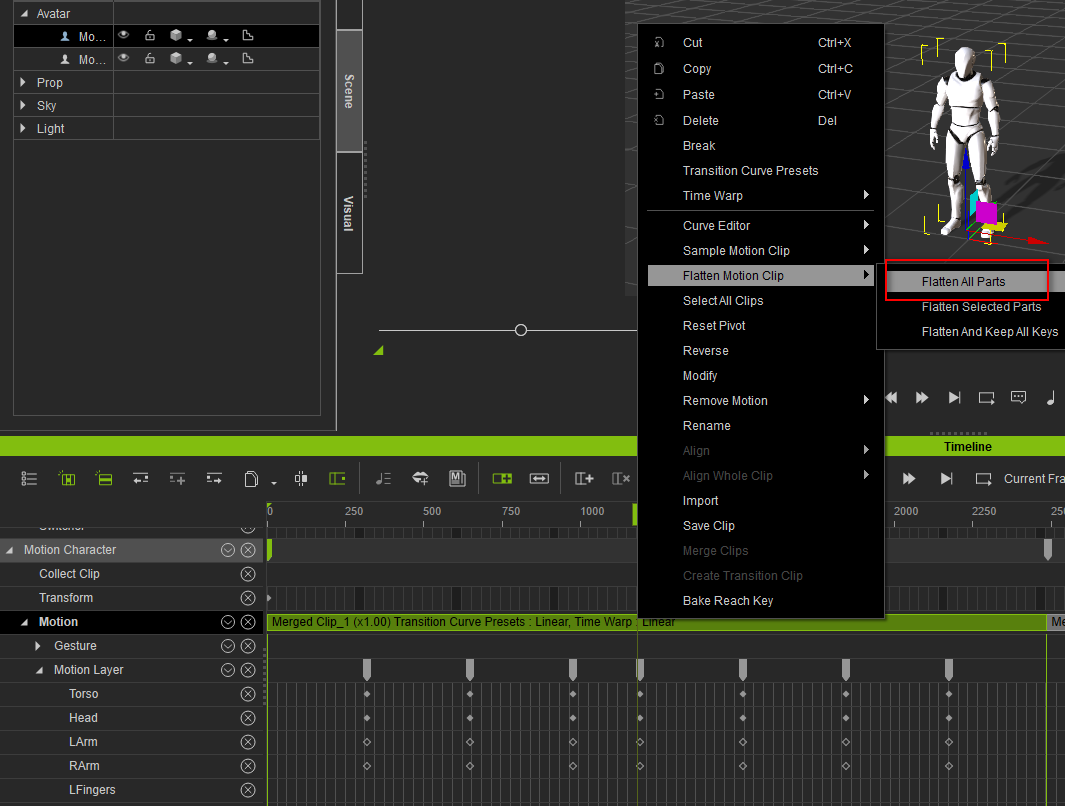
Recent Timeline optimizations cuts down on the wait time for operations such as Merge, Flatten, Sample, and Break.
For example: Applying Flatten to a clip with 2,500 frames with a mid-CPU, such as i5 CPU will took approximately 37 sec for iClone 7.2. The same operation only takes 15 sec. for version 7.21.
Note.
1. Different data will have different results, for example, variations in the Clip's length and whether or not it contains Layer Keys.
2. Timeline operations are under the domain of CPU calculations. Different levels of CPUs will give different results -best results are achievable with Intel i7 and i5.
C. DOF Render Options
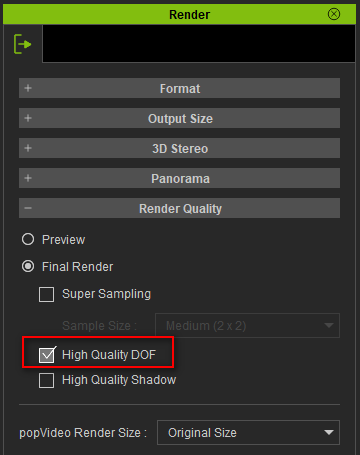
Render > Render Quality > Final Render > High Quality DOF checkbox is now available as an option to speed up the render times.
Design concept: High Quality DOF is always enabled when rendering causing longer delays, however, its purpose is Fixing Sharp Edges for Objects in Blur Region.
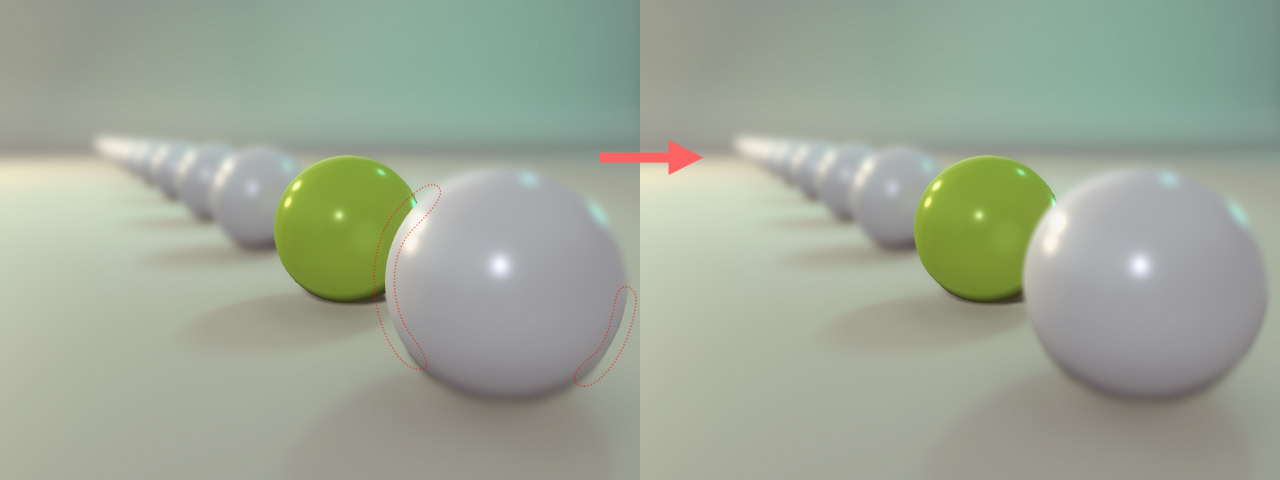
The option to toggle this feature on and off is available now in version 7.21. Sharp edges will not be remedied when disabled but will speed up render times significantly as in the case below where High Quality DOF is not needed.
* High Quality DOF default setting is OFF for faster render times. Turn this feature ON again if sharp edges become a nuisance.
For example:
Rendering 300 frames of a project from the MechREX pack is faster by four-fold when High Quality DOF is disabled.
Since the project's camera DOF settings does not utilize Blur Edge Sample Scale, the render quality for edge anti-aliasing is the same, therefore, High Quality DOF should be disabled to shave off significant portions of the total render time.
a. Render time: ~4 min
(High Quality DOF = OFF, Preference > D.O.F. > Correct Transparency = ON)
b. Render time: ~20 min
(High Quality DOF = ON)
*Disabled Render > High Quality DOF will relinquish control of the DOF to Preference > Real-time Render Options > Depth of Field.
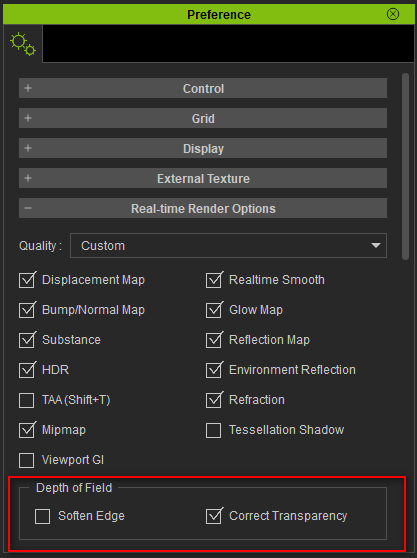
Disabled Correct Transparency setting will cause in focus semi-transparent objects to render incorrectly -object occluded with semi-transparency will lose it's blurriness (see the following video).
* Depth of Field > Correct Transparency default setting is ON.
D. Other Enhancements
1. Hold Ctrl and drag on a path particle to quickly duplicate it, as in the video below:
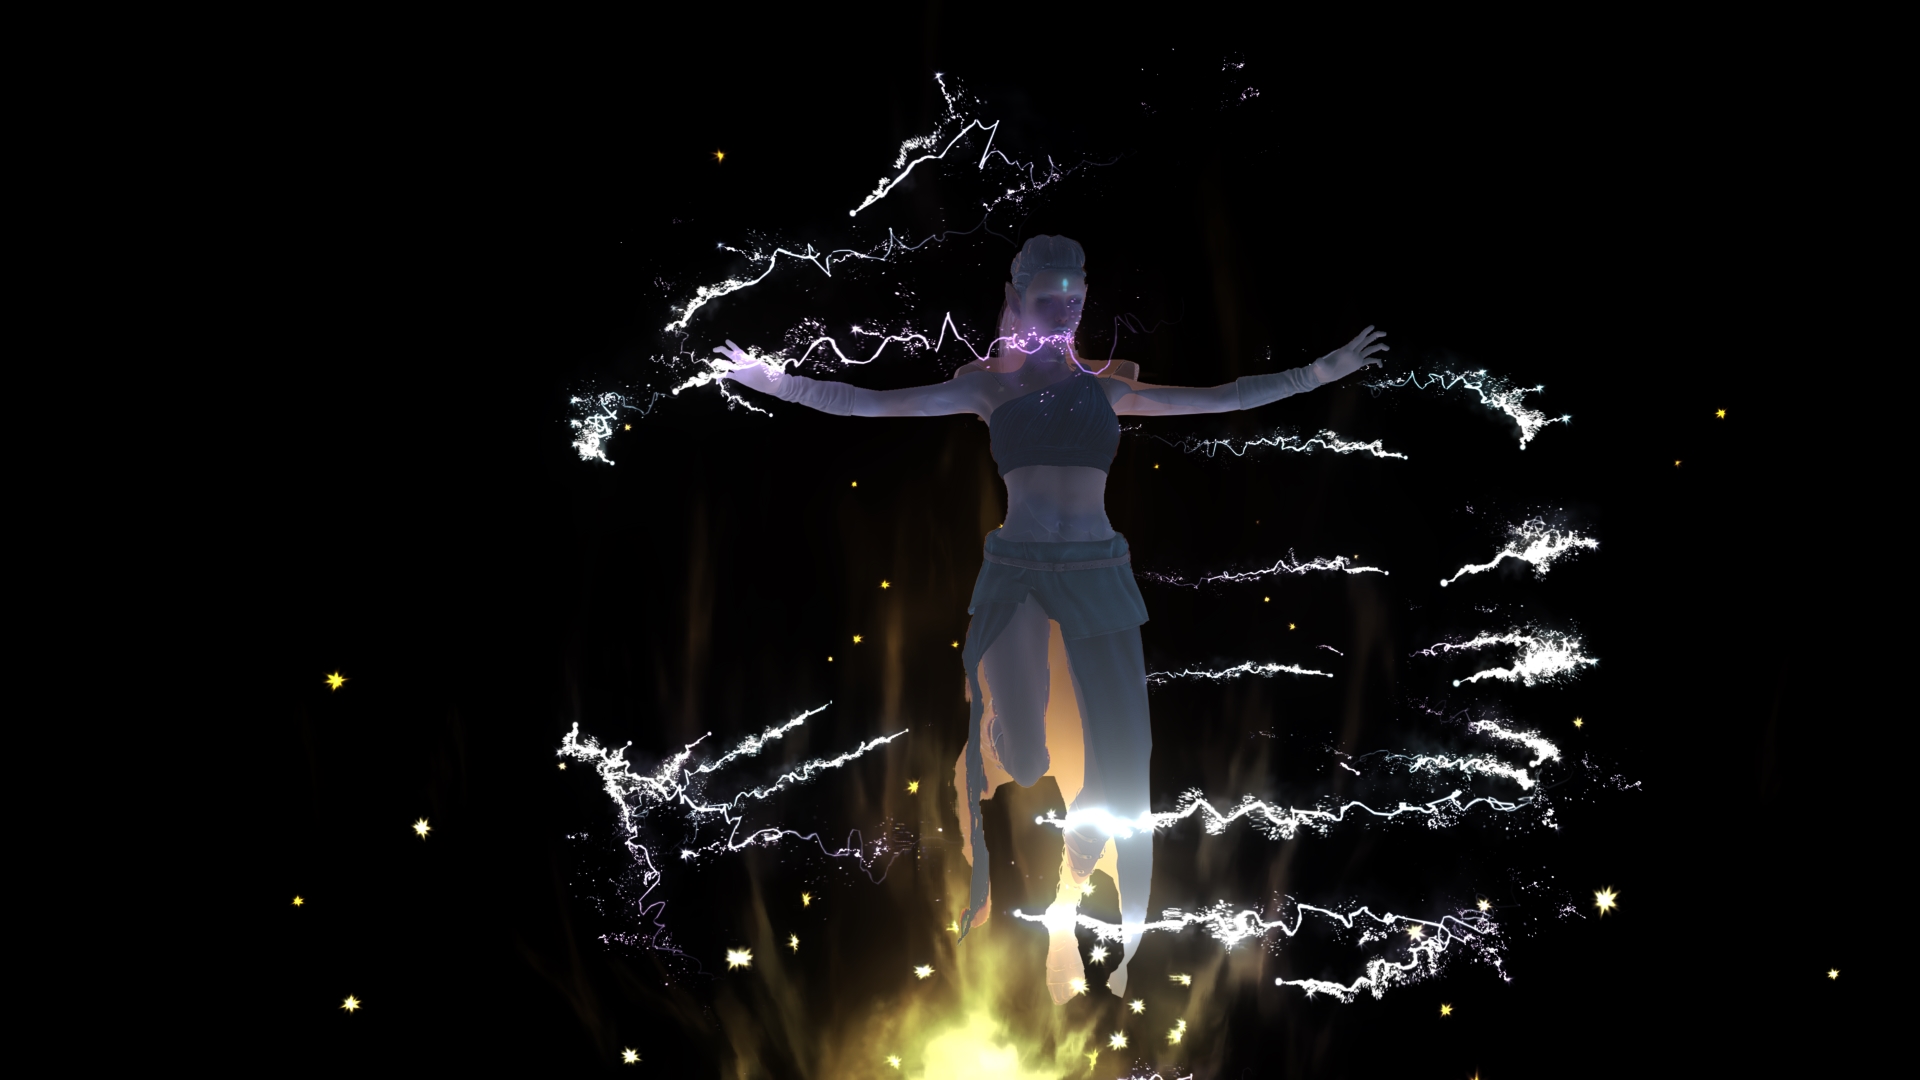
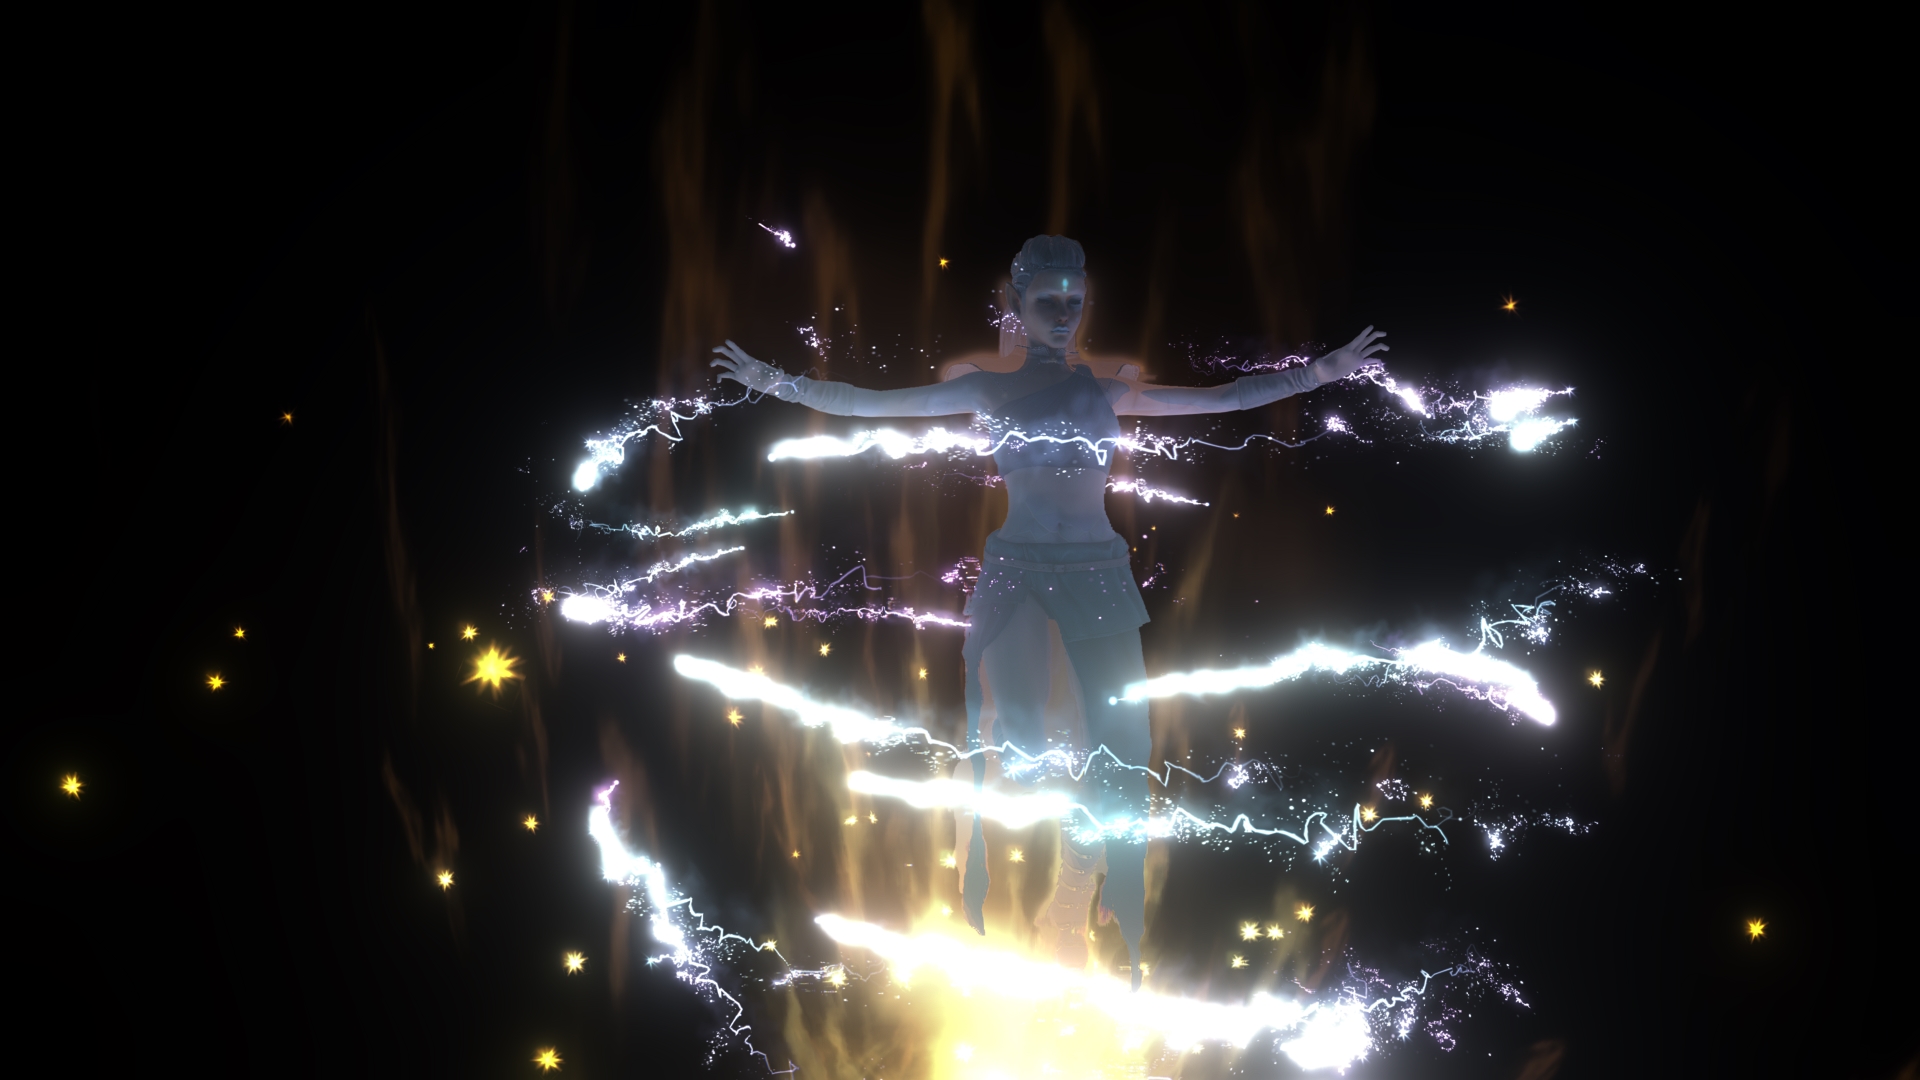
2. Fixed: Bloom effect not present in the exported image (*.png and *.tga).
Sample Case: Before, in version 7.2: the *.png and *.tga renders fail to include bloom effect (use a dark background for a better view ).
After, in version 7.21: Bloom is included in the rendered images.
|
|
By Grace (RL) - 7 Years Ago
|
|
GI Anchor Linkage: Making the GI Effect Around the Target Subject Ever-optimized
New Pick Parent tool for GI Anchor under Modify > Attribute > Linkage.
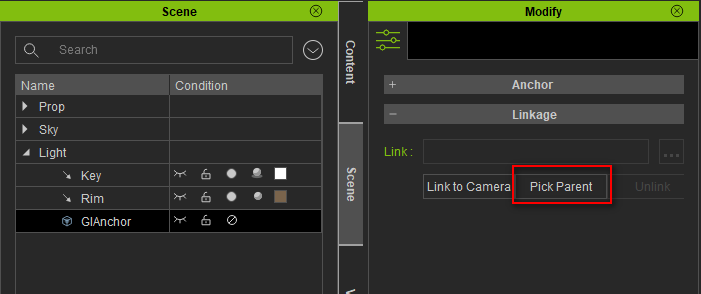
In the past, having only one option to Link to Camera was really limiting for some situations. Now, one can link the GI effect to a target object, letting the anchor tag along. This ensures that the moving object stays within the range of the global illumination. However, be aware that when the camera rotates, the GI anchor does not rotate along with it because it only tracks translations. Therefore, one may notice the lack of G.I. around the viewing sides of the rotated camera.
For more information, see the Online Manual.
|
|
By Grace (RL) - 7 Years Ago
|
Numerous Timeline Enhancements
1. Recent Timeline optimizations have cut down on the wait time for operations such as Merge, Flatten, Sample, and Break.
For example: Applying flatten to a clip with 2,500 frames took approximately 57 sec. for version 7.1- the same operation only takes 15 sec. for version 7.21.
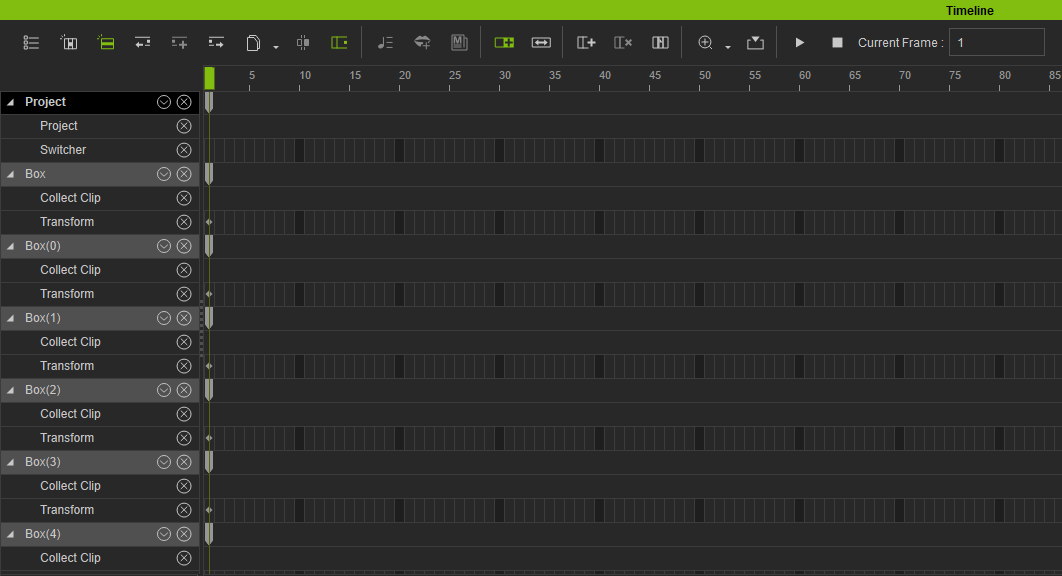
2. Timeline > Main Track has been highlighted with color to mark its significance.
[Before]
[After]
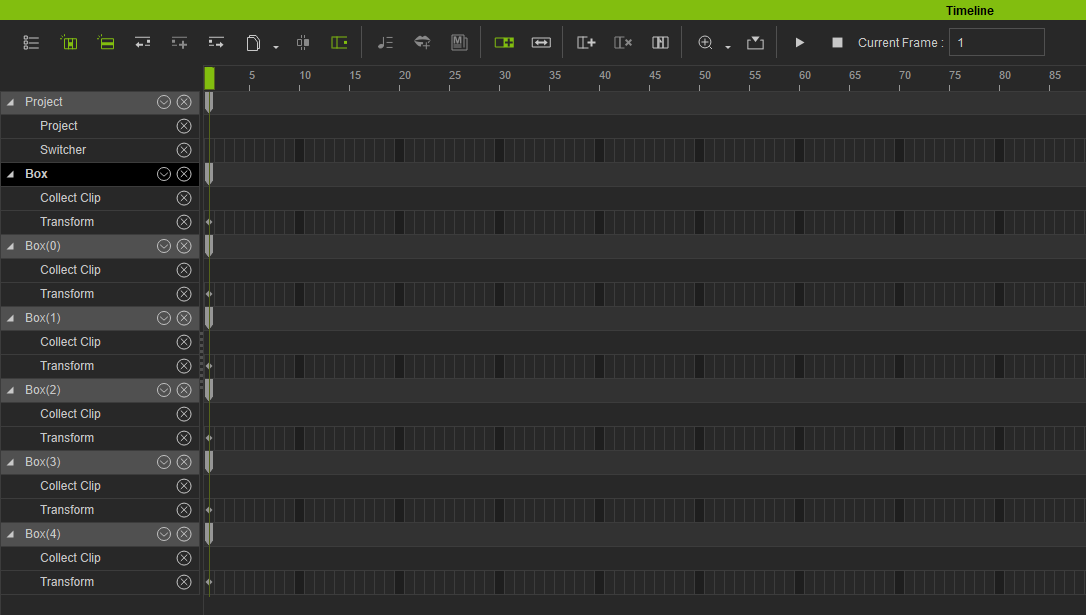
3. Zooming in and out of the Timeline will no longer change the width of the playhead.
[Before]

[After]

4. The Play Bar has now been added into the Timeline tool list, raising overall ease of use (does not include the Stop button as its role is fulfilled with the Start button).
[Before]

[After]

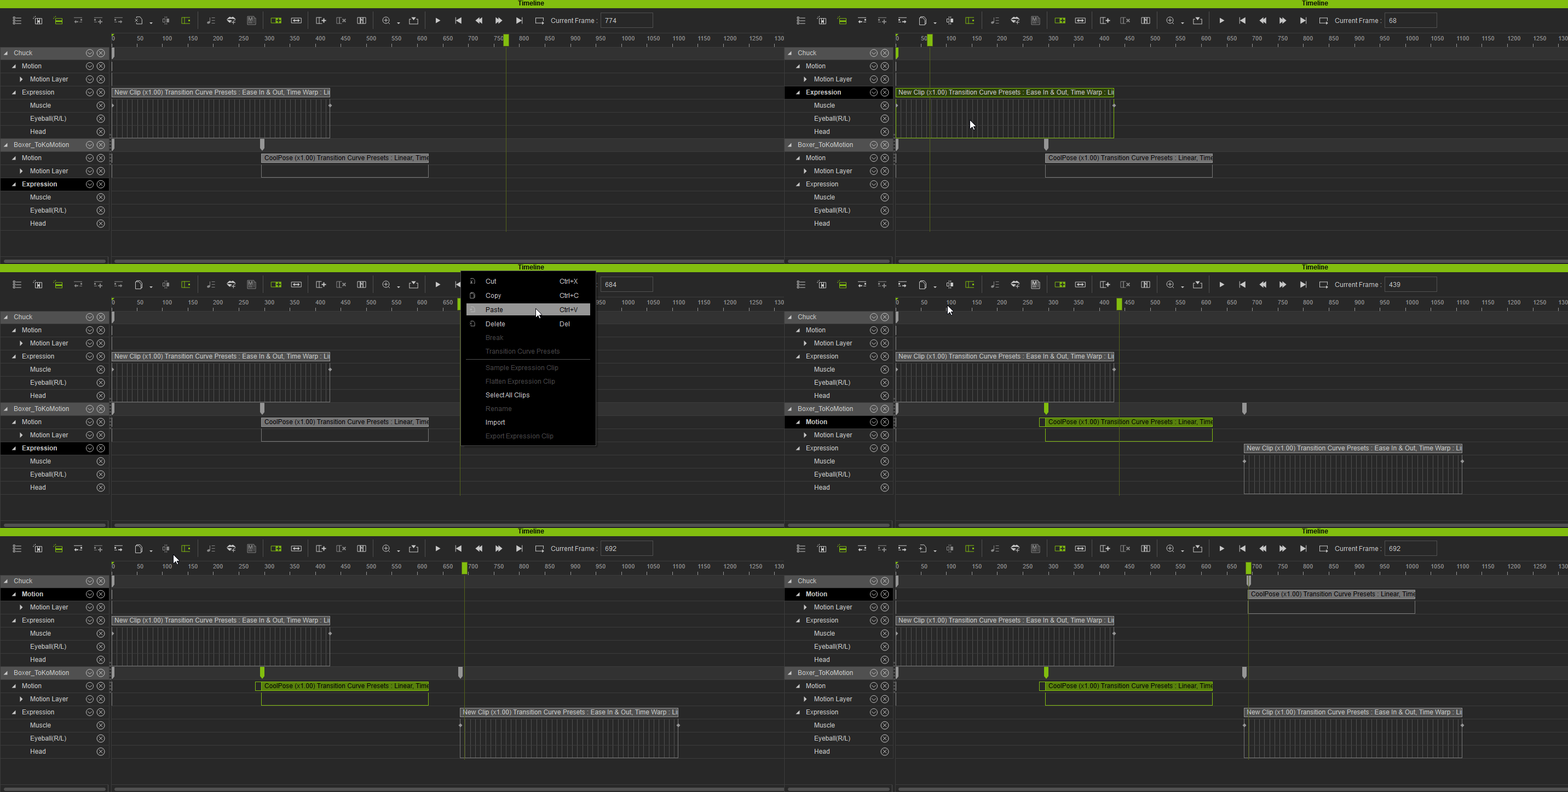
5. Motion and expression clips can now be copy / cut / pasted from one character to another in the Timeline.
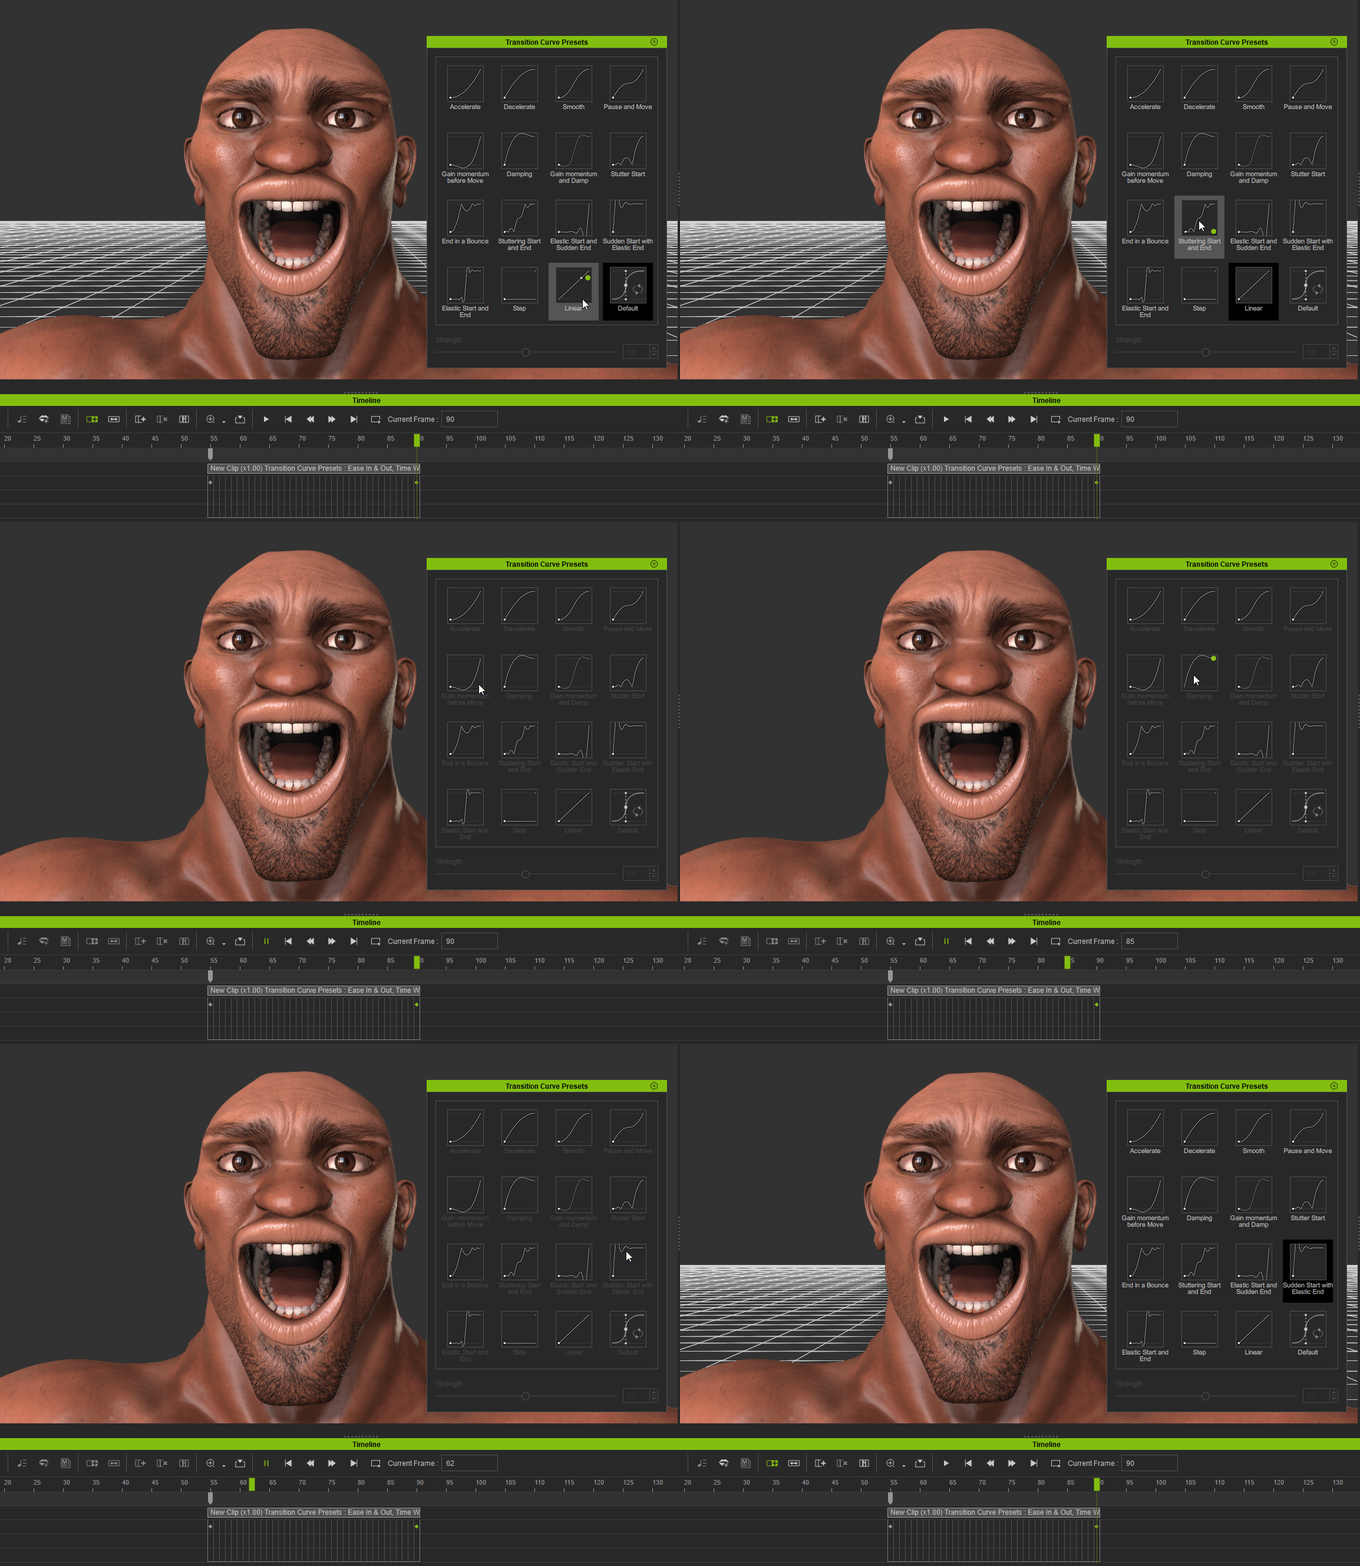
6. Keys for Facial Expression Clip's Muscles, Eyeballs, and Head all support Transition Curve Presets.
7. Sub-tracks now support tab navigation.- Pressing Tab will put the focus on the next sub-track after the selected one.
- Pressing Shift+Tab will put the focus on the previous sub-track prior to the selected one.
8. New [A] hotkey can now be used to add a key to the timeline. If used on the main track, all sub-tracks also receives the key.
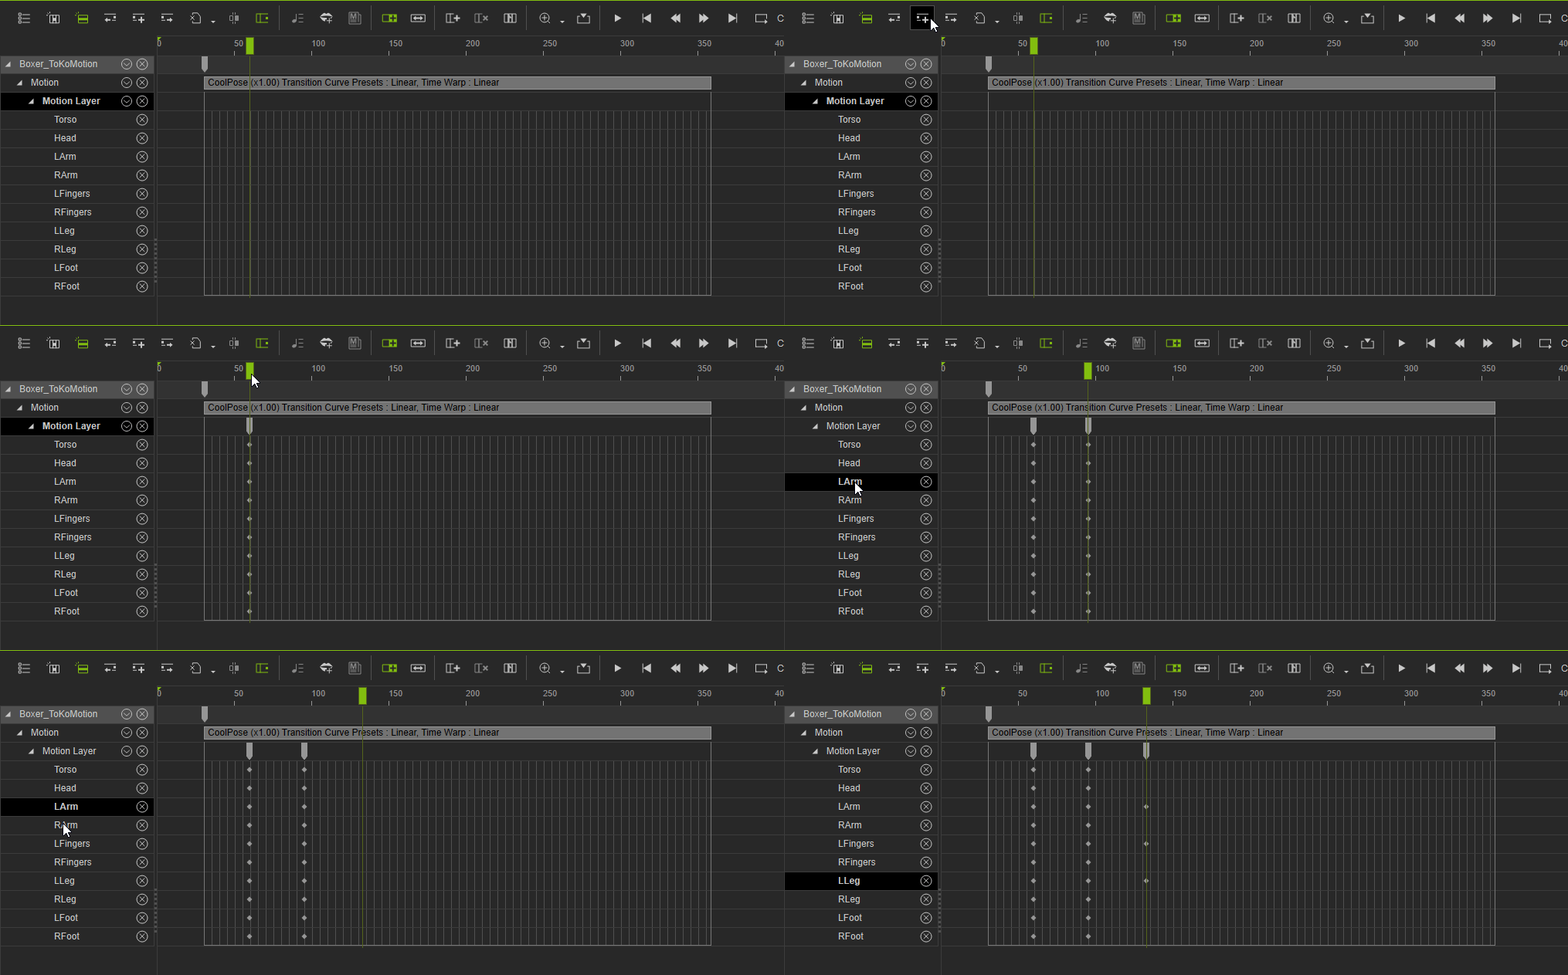
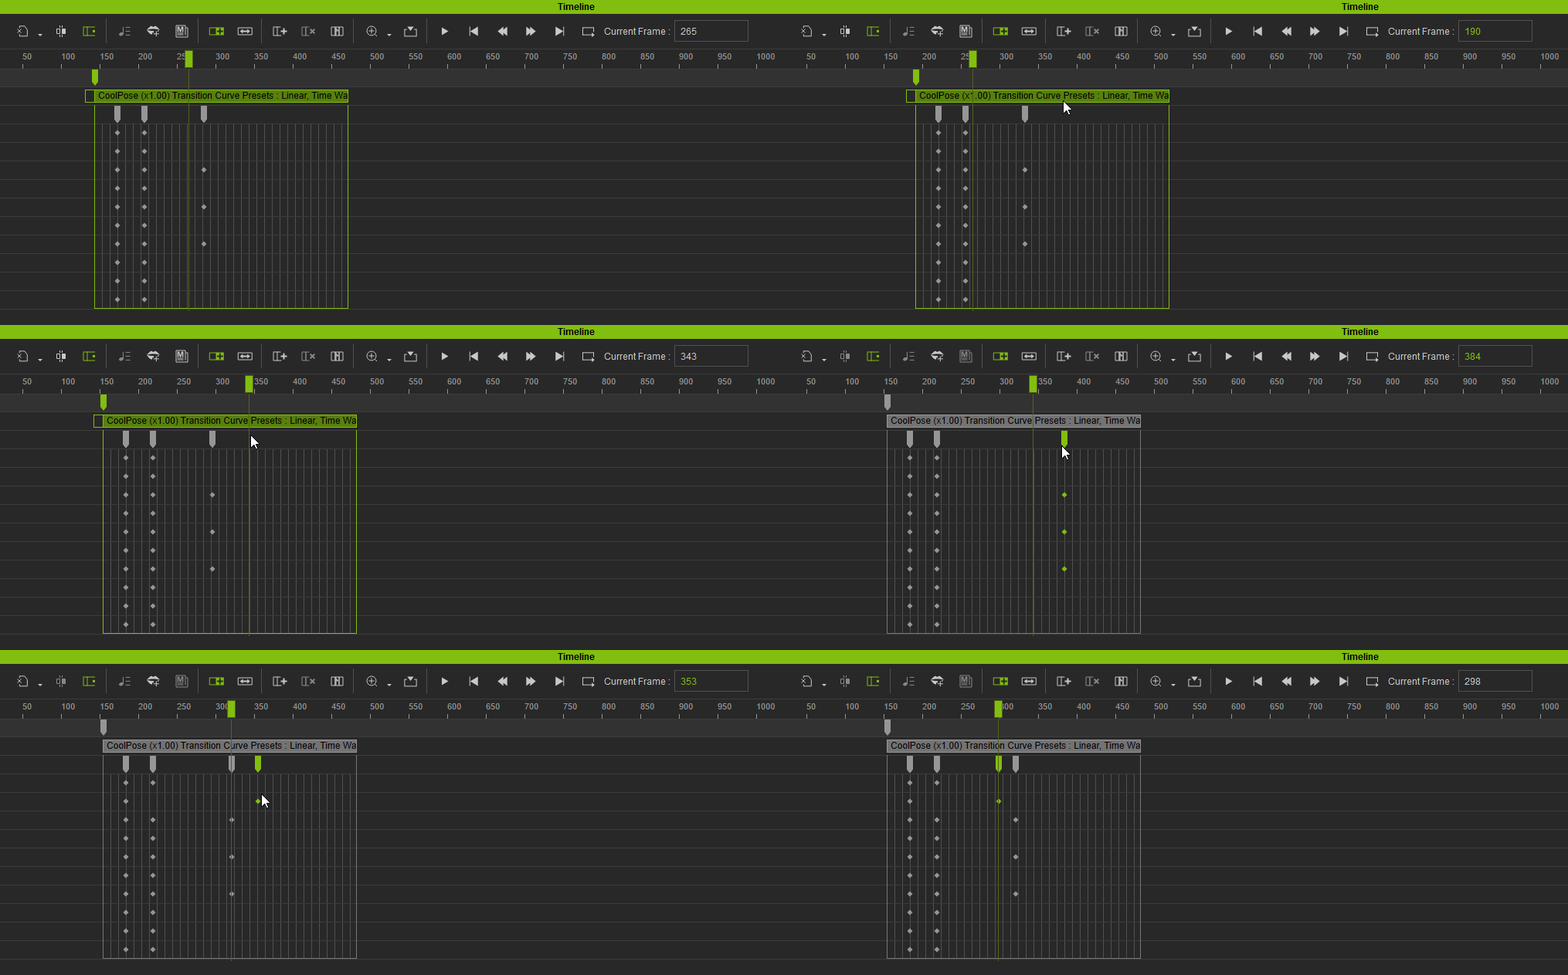
9. Current Frame will now display the time-line positioning of the currently selected Clip, Key, and Clip Transition Range.
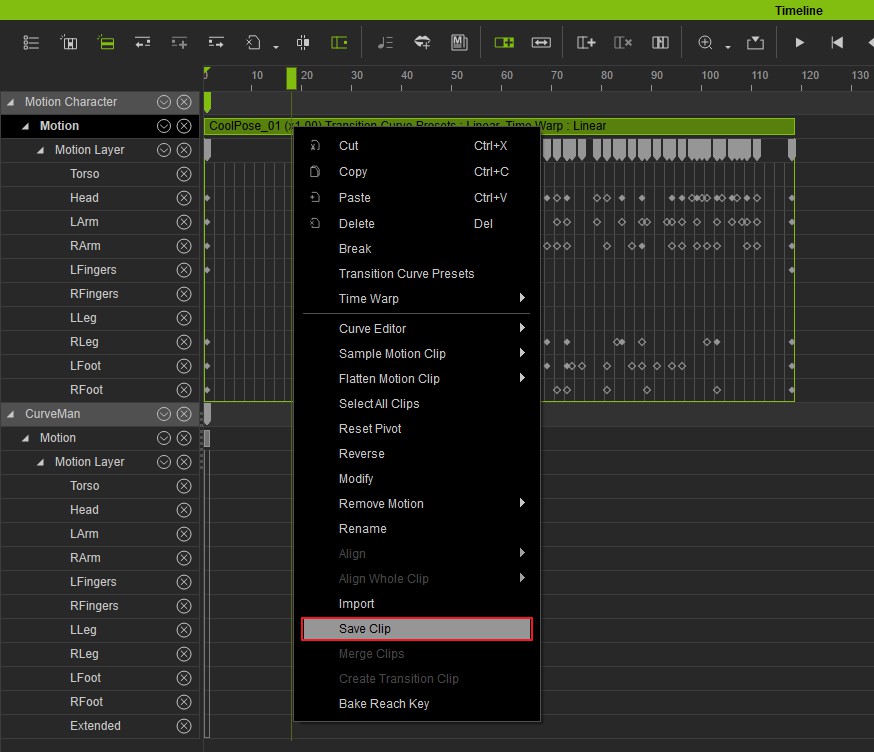
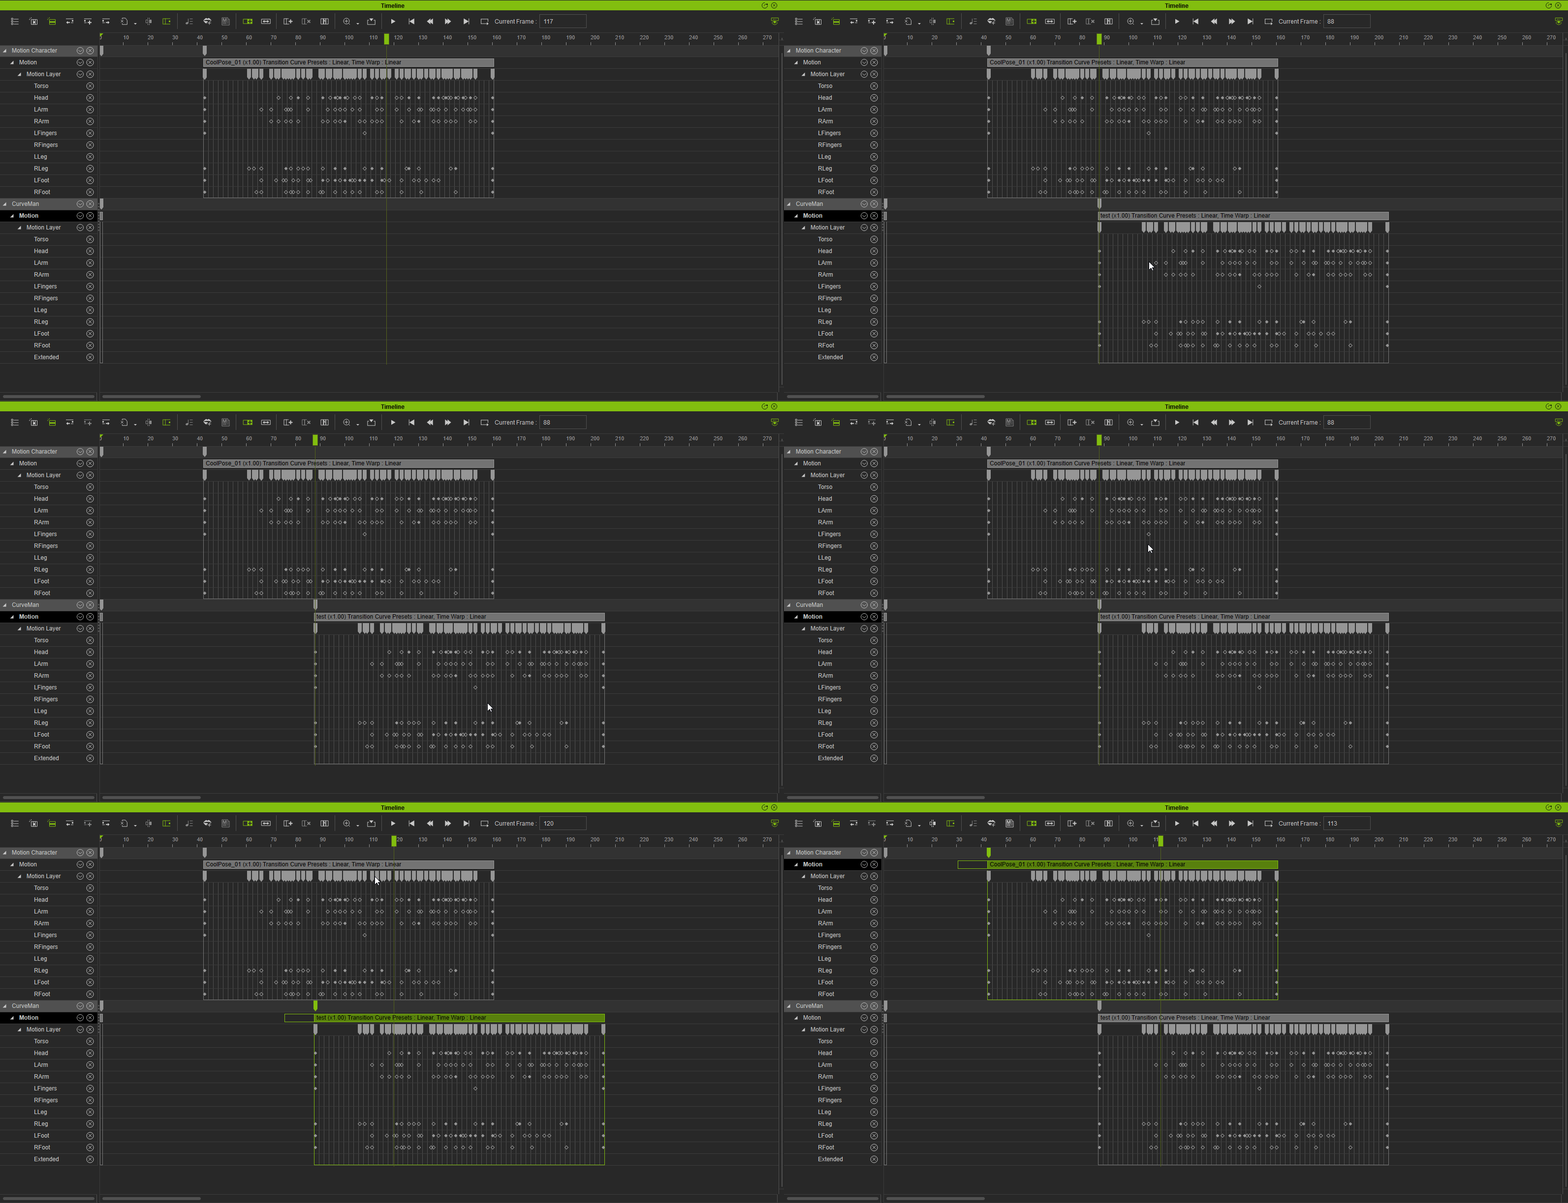
10. Saved Clip from the Timeline > Motion Track will preserve its layer keys instead of flattening the entire clip.
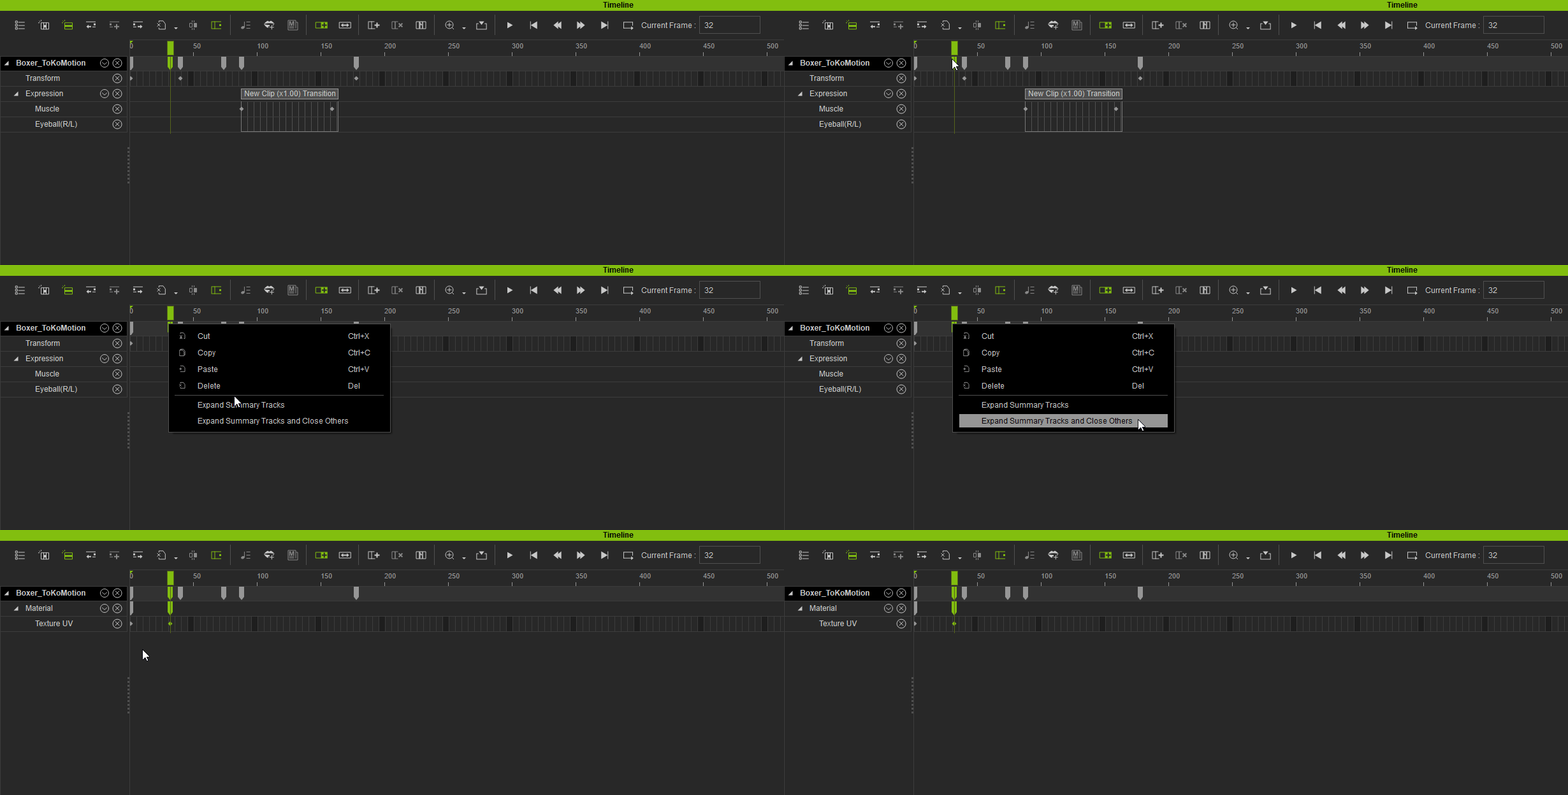
11. Expand Summary Tracks and Expand Summary Tracks and Close Others under the Timeline right-mouse context menu can be used to expose the sub-tracks for the Summary Keys.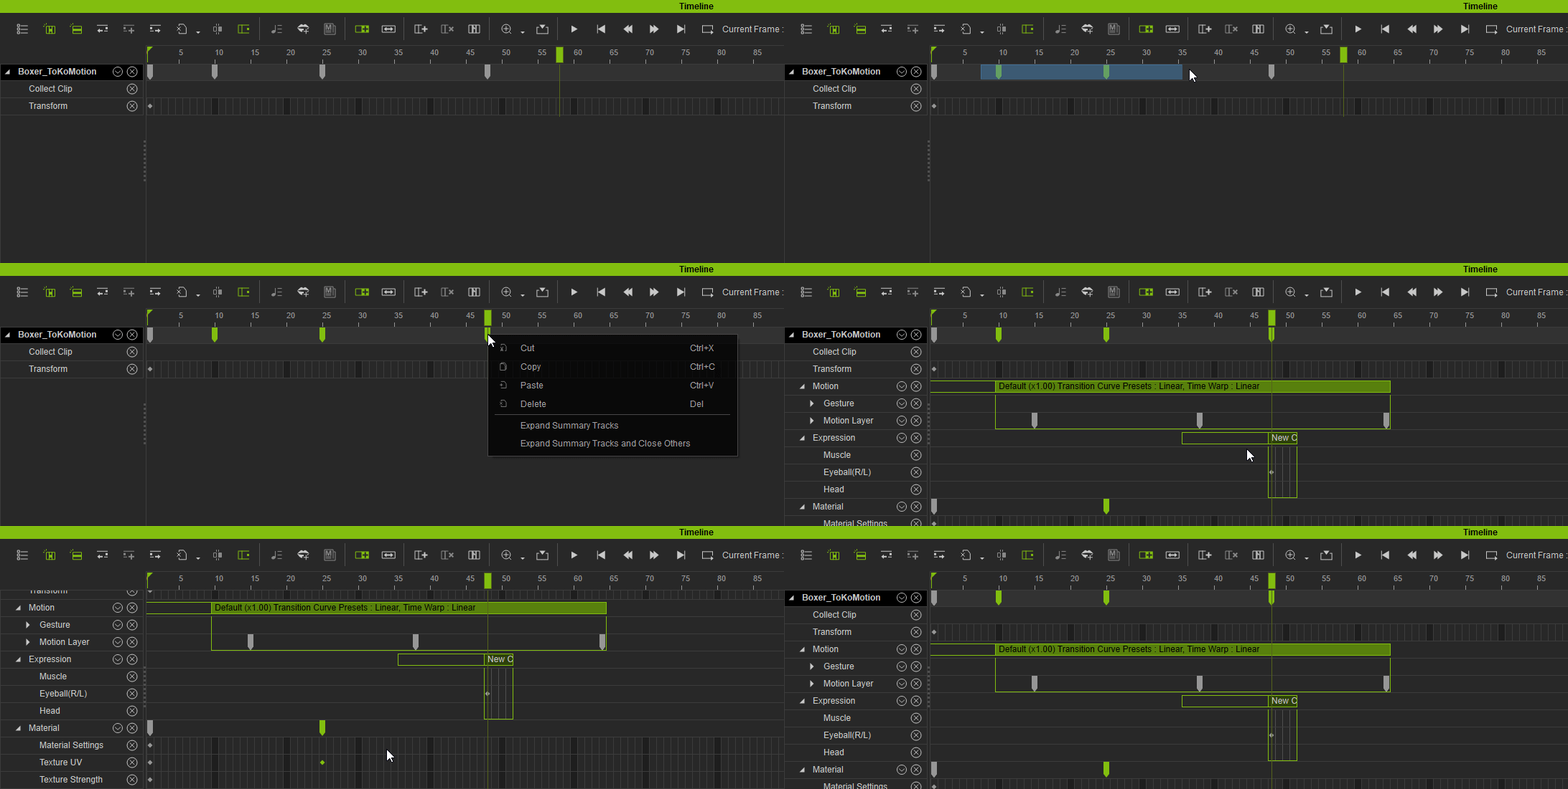
- Expand Summary Tracks and Close Others
|
|
By Grace (RL) - 7 Years Ago
|
Motion Alignment: Reset Motion Rotation
Reset Motion Root Rotation under Animation > Motion Settings Options. See the Online Manual. - Checked ON: aligns the hip direction of subsequently applied motion to the orientation of the character's root.
Further information: What is Root & Hips?- Root : The parent for the entire skeleton hierarchy (green dummy in the video).
- Hips : The bone that is the parent of spine and the legs of your character (blue dummy in the video).
Example 1:
Save the motion of the red dummy figure going in the negative X direction. Then apply the motion onto the white dummy character.
- When Reset Motion Root Rotation is unchecked, the motion applied does not sync the oriention of the hips and the root, causing the character to make a sharp turn toward the negative X direction.
- When Reset Motion Root Rotation is checked, the motion applied syncs the orientation of the hips and root, causing the character to continue on the path in negative Y direction.
Example 2:
Pay special attention to cases where the direction of the motion and the orientation of the hips does not match up. For example, Embed [Hold_Gun_Fast_Forward_Loop.rlMotion] has the hips facing a slanted direction while the root is proceeding in the negative Y direction.- When Reset Motion Root Rotation is unchecked, the motion applied does not sync the orientation of the hips and the root, causing the entire motion to continue in the negative Y direction.
- When Reset Motion Root Rotation is checked, the motion applied will sync the orientation of the hips with the root, causing the enitre motion to veer off to the side.
|
|
By Grace (RL) - 7 Years Ago
|
|
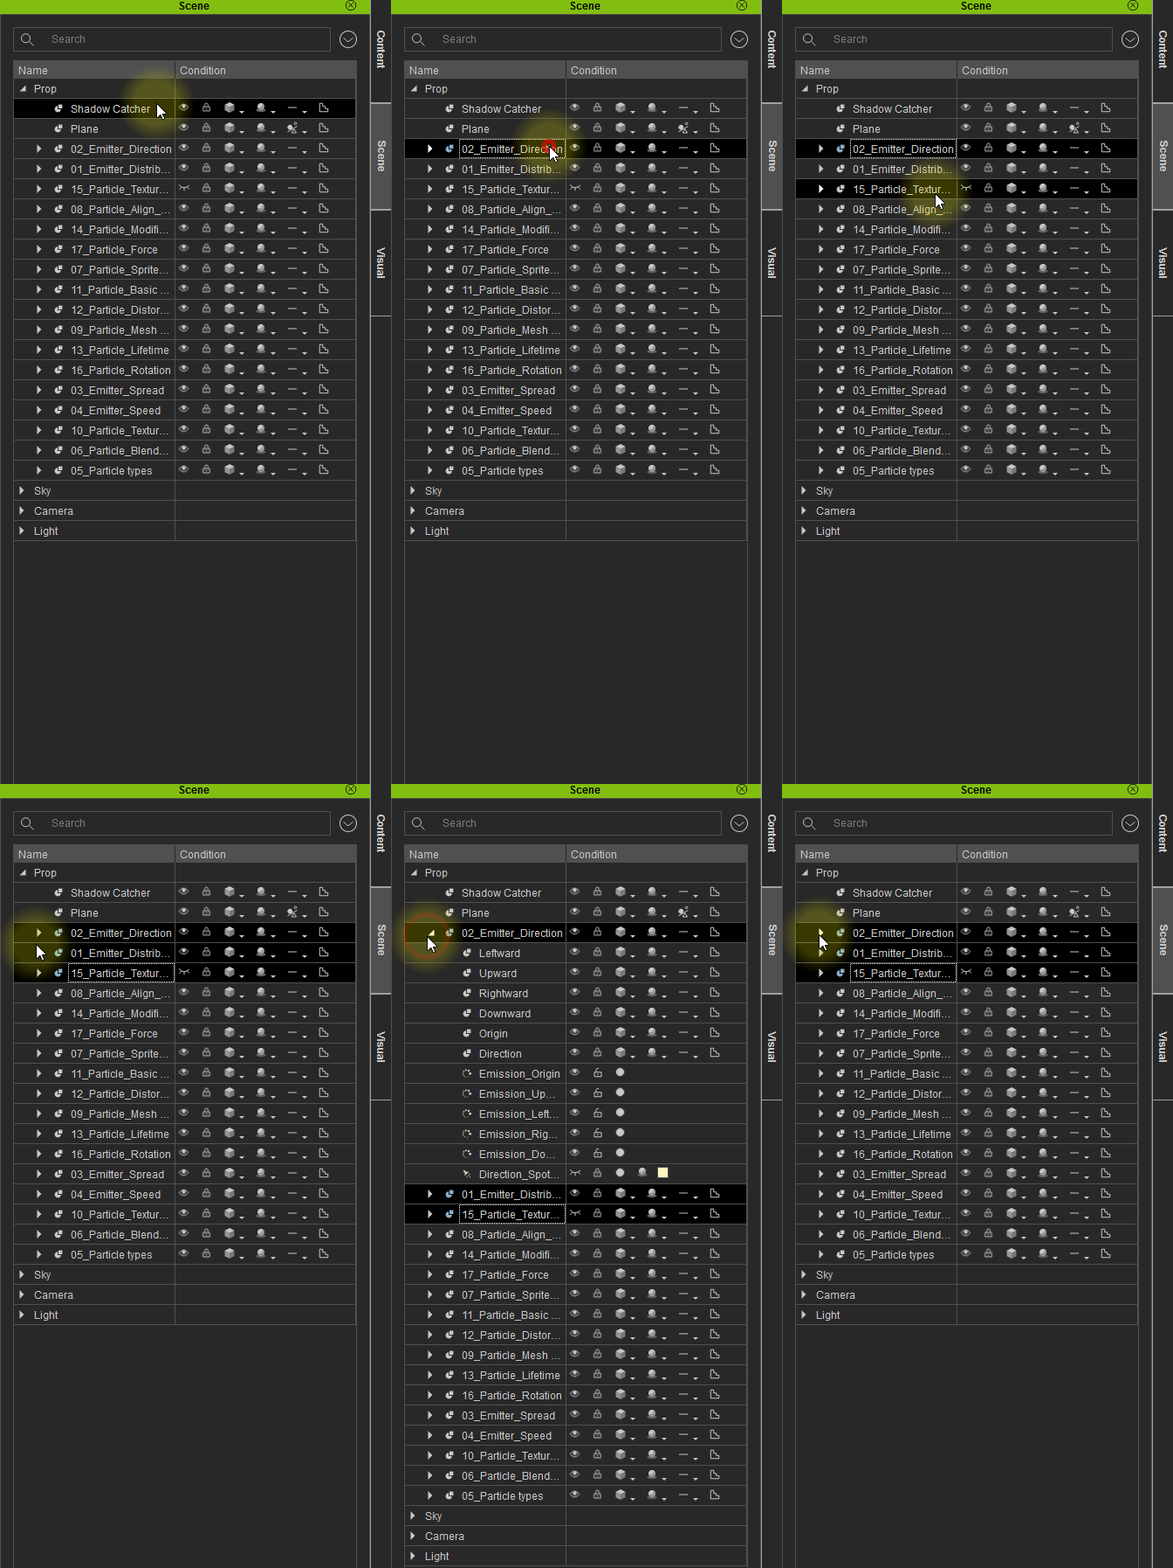
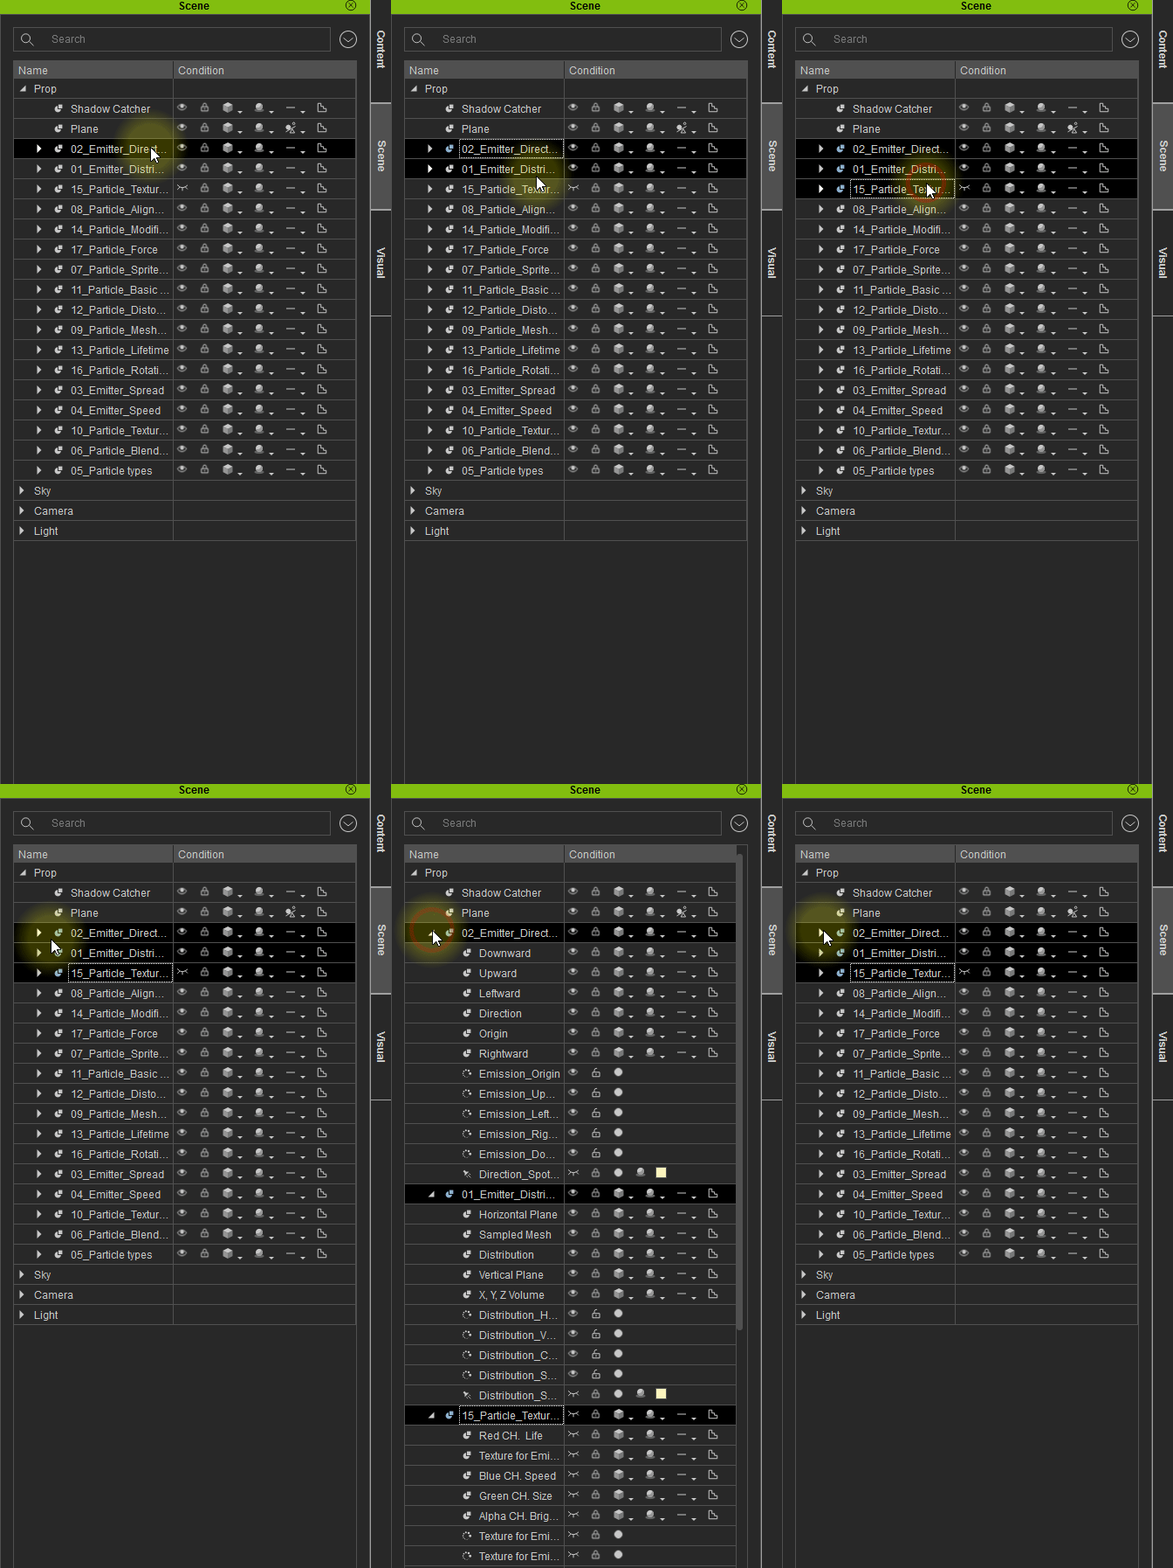
Expand and Contract Multiple Selection in the Scene Manager
Multiple selections in the Scene Manager can now expand and contract together at once.
● iClone 7.2 (Before): Only one of the selections will expand ● iClone 7.21 (After): Now the entire selection expands and contracts together.
|
|
By Grace (RL) - 7 Years Ago
|
|
Enhanced Content Pipeline
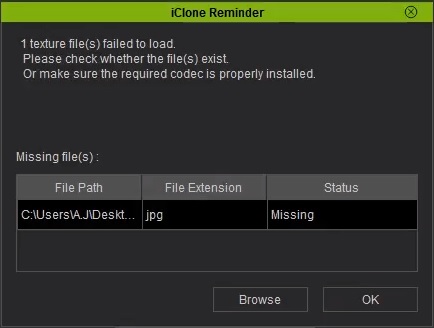
A. Load Missing Textures
A missing file dialog window will now appear if textures are misplaced. Users can then browse for the missing files.
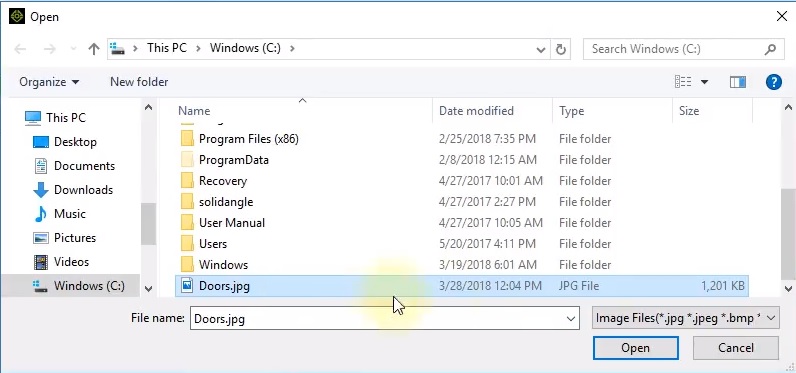
B. Save / Load All Textures for Selected ObjectNew Save/Load All Object/Material Textures in Modify > Material panel allow users to batch load and save all of the applied texture maps.
*There are 3 levels of texture linking: by Object, Material, and Texture Channel.
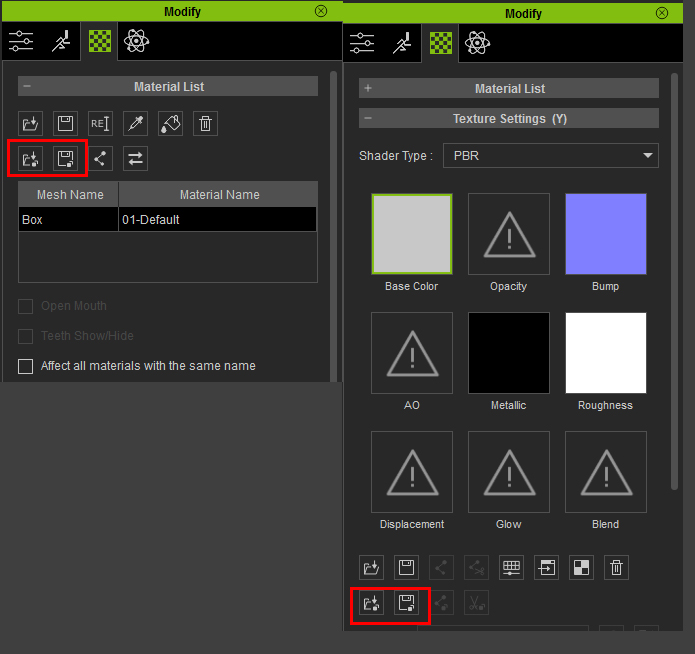
Use case: when batch texture import is needed during content production.
- Object Level - When there are a lot of sub-nodes inside the content structure.
For example: Changing the textures for all of the pillows on the following sofa prop:
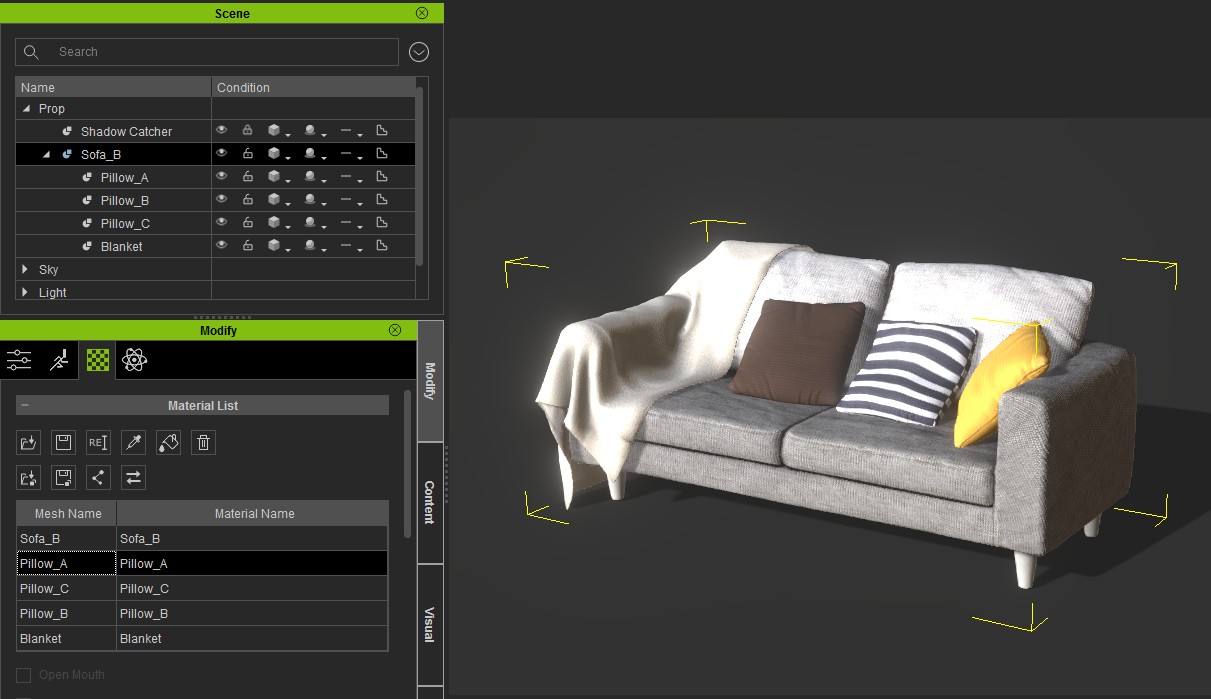
Steps (details in the video):
- Batch export the pillow textures into a file structure.
- Replace the maps you want to change while making sure to follow the proper naming convention.
- Erase the other textures that do not need to be changed.
- Batch import the entire folder to apply the changes.
- Material Level - When batch loading of multiple textures is need for a certain material.
For example: Aging the look of the car below by adjusting the diffuse, metallic, roughness and normal maps.
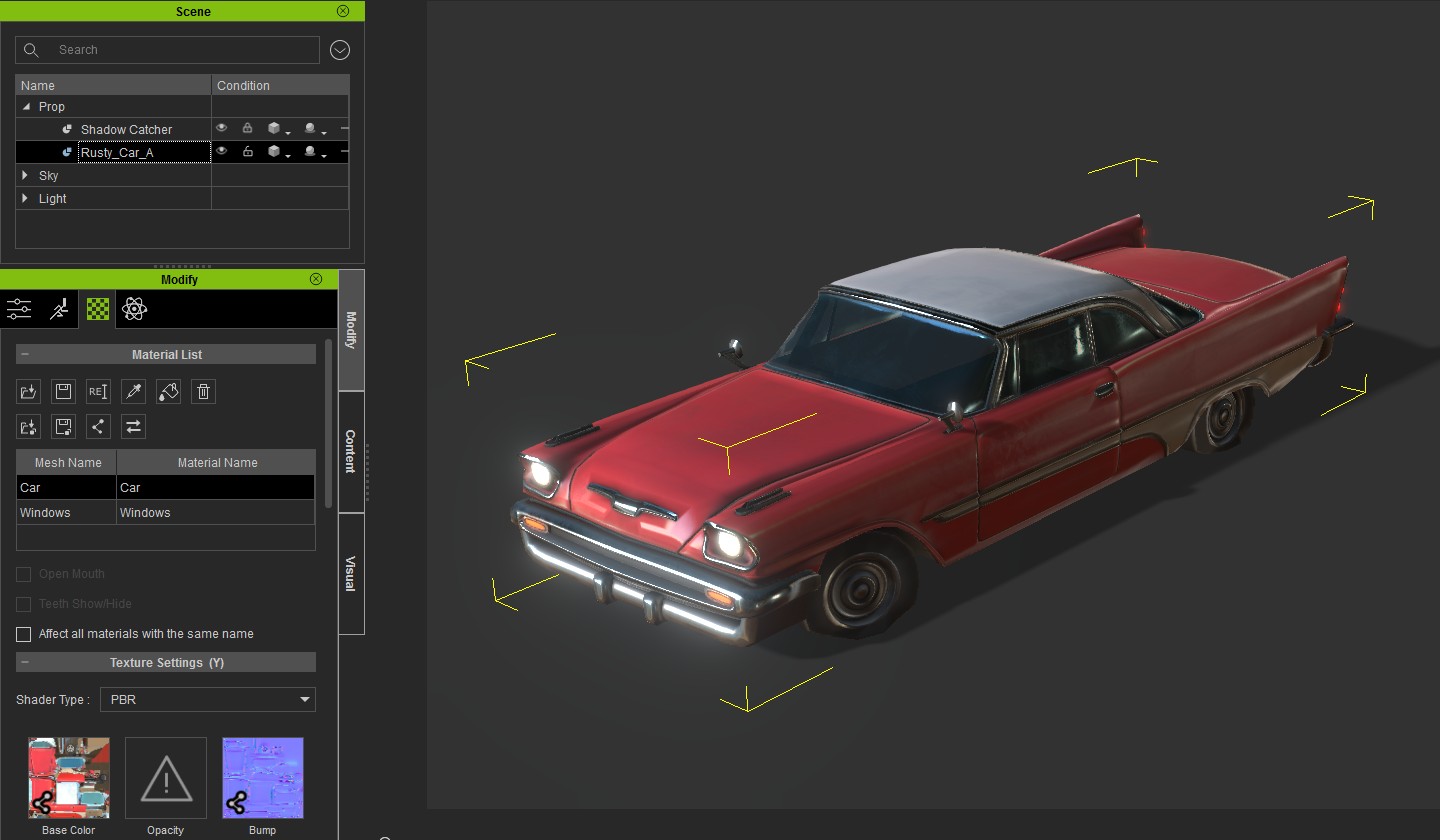
Steps (details in the video):
- Export the source texture files
- Fix the textures according to your needs while making sure to follow the texture channel naming convention.
- Batch load the textures back onto the car.
For compatible folder and texture naming convention, please refer to the Online Manual.
C. Embedded Texture Sharing - Auto Link / Unlink Textures- Auto Link - New Auto-link Textures inside the Modify > Material panel will search for repeat textures and relate them to a common texture resource to decrease the file size of texture embedded assets.
*There are three levels of texture linking: by object, material, and texture channel. 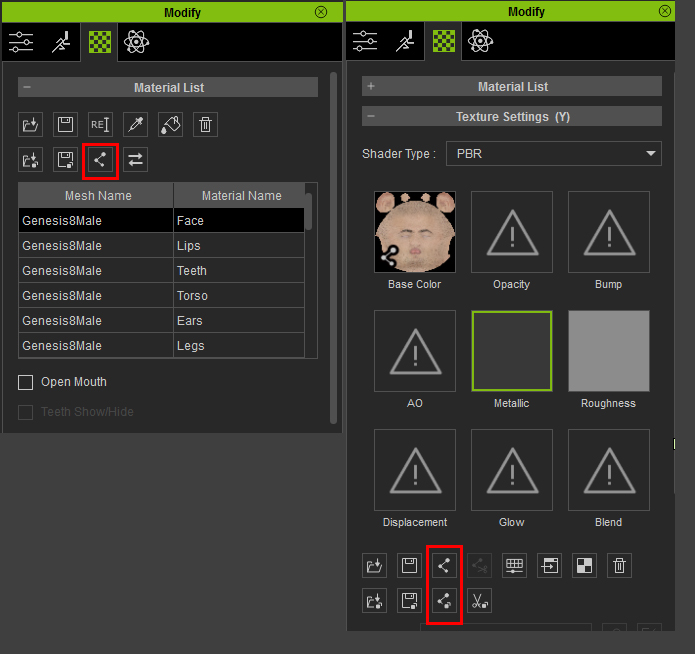
Use case: iClone will search for repeat textures on a channel by channel basis. If found, a shared texture resource will be made.
- Take object level linking as an example: When a content has multiple repeat textures, using auto-link will save a lot of time instead of having to use the Pick and Paint Bucket tool over and over again.
- Take scene level linking as an example: if a scene is made of similar props, it is not likely for all the props to share texture resources. Therefore, it's the perfect situation to use the Auto-Link function which lets iClone search for duplicates and set up an association.
Looking at the video example, the file size before and after texture linking are different by a factor of two:
- Before: 41.7 mb
- After: 19.2 mb
- Unlink Textures - New Unlink Selected Textures and Unlink All Textures inside the Modify > Material panel can be used to disable sharing of common texture resources.
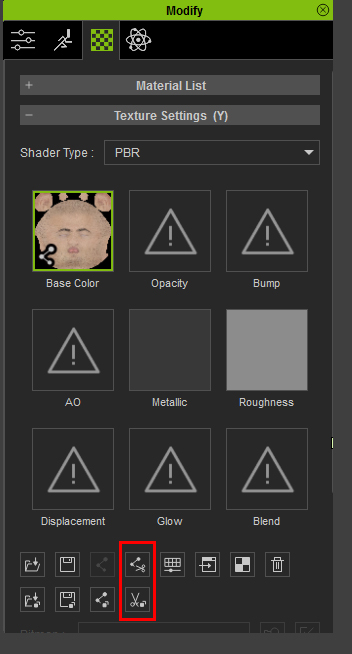
Use case: Changing the fabric material of the bed sheets in this example will also inadvertently change the materials for the pillow cases due to their linked status. Unlink is provided as a way to make a texture channel autonomous -with no relation to others of its sort.
|
|
By Kelleytoons - 7 Years Ago
|
The new resource management tools are much appreciated.
However, I wish I had had at least some input on the beta, as the logical thing would have been to allow hidden resources to be rendered. That is to say you should be able to hide things (thus saving on navigation and animation and such) and then, WITHOUT UNHIDING, be able to render the hidden objects (could have easily been a checkmark -- yes, there might have been a bit or even a lot of "startup" time for the render, but after the render it could have then "re-hidden" the objects to remain in state). It doesn't take a rocket scientist to see that while the hiding of things is now a very useful tool, it will bite more folks on the ass than it will be worth using (IOW, people are going to forget to unhide needed things and redo renders over and over again. Sigh).
|
|
By justaviking - 7 Years Ago
|
@Grace,
Lots of great updates. Thanks for the long and informative post. I look forward to viewing the videos and going through it all in more detail.
The performance improvements are greatly appreciated, and most of them were very significant (e.g. 30%, not 5%). I was really happy to hear that hiding objects now frees up their resources, improving preview performance.
QUESTION - Did this get written backwards, or am I reading it wrong?
Looking at the video example, the file size before and after texture linking are different by a factor of two:
- Before: 19.2 mb
- After: 41.7 mb Shouln't the filesize get smaller after the linking?
@KT - First, I am curious what you think about the new "texture-linking" and similar features. That sounds very interesting and useful, but I haven't fully digested it yet. Second, I'm not convinced yet about your comment about rendering things that have been hidden. If I understood it, you want to (optionally) have almost a reverse-dummy-prop behavior, so hidden things can appear in the render because they will be annoyed when they forget to turn them back on again. I can equally see people being shocked and surprised when "invisible" things appear in their output. I think it's easier to explain (and expect) that what you see gets rendered, and what you do not see does not get rendered.
|
|
By Kelleytoons - 7 Years Ago
|
I just want a checkbox in the Render output to say "Render Hidden Objects" that folks can turn on (and it will stay on if turned on) if they want.
Trust me, Dennis, this WILL happen -- with large scenes and plenty of things to hide to maneuver around folks will get bit on the ass when they forget to unhide that ONE thing they really needed to render. With such a checkbox there is no issue (and it is consistent with all other 3D software I've ever used). Think of it this way -- you aren't hiding things because you DON'T want them to render (or you would just delete them). You are hiding things for system resource issues, which aren't a problem in a render (or shouldn't be). There are exceptions -- sometimes you will want to render in layers, of course, but that's easily handled by the checkbox (and I don't even mind if the default is unchecked, but it MUST be an option).
If you ever used 3D software that worked this way (and I have and been on the beta teams for such software) you'd realize I'm right.
(I don't know about the linking/unlinking/mass move textures -- I need to play with it. My biggest problem with the whole texture thing is the "Change same name textures" doesn't work and there's nothing in this update that tells me that has been fixed. THAT is a biggie).
|
|
By Kelleytoons - 7 Years Ago
|
Oh and note that it shouldn't affect a quick render -- you should still be able to just render what you can see -- but only the "final" render output (which is why it's in the render output box, along with things like supersampling and high quality shadows). Again, these are the things you WOULD need at final render -- you don't want a GOTCHA at that point in time.
Could you go back in and unhide all the things you just hid? Of course, but then you would need to hide them again when working on the scene. I'm speaking from LONG experience in production, this is a real PITA. We always assume hidden things render (or, again, we'd delete them). The alternative (which I admit is MUCH better but would require a ton more work on RL's part) is to have layers. That's the next step in production software (and where Max went). Then you hide/unhide certain layers and then it's not a question of whether you forgot to unhide a tiny object somewhere that needs to render, but rather are all the layers turned on you need to see. But iClone is a LONG way away from that, and in the meantime this option really ought to be available (and I have zero faith it ever will -- but mark my words, we'll hear about it on the boards from folks wondering where their stuff went. Hell, I know all about it and I'm SURE I'll make this mistake many times).
|
|
By sjonesdc - 7 Years Ago
|
What is the method to roll back to the previous update? At one point (don't remember whether it was ver 3, 4 or 5), one could save previous exe, and if the updated exe had too many bugs, one would simply overwrite it with the saved exe. Is this method still viable or is there another method besides doing a backup???
Thanks in advance!
|
|
By justaviking - 7 Years Ago
|
|
Kelleytoons (4/12/2018)
I just want a checkbox in the Render output to say "Render Hidden Objects" that folks can turn on (and it will stay on if turned on) if they want.
(..... My biggest problem with the whole texture thing is the "Change same name textures" doesn't work and there's nothing in this update that tells me that has been fixed. THAT is a biggie).
A) Sorry, I probably read too fast. I was picturing it as an option on each individual hidden object. Putting a "global" option on the RENDER PANEL to render ALL hidden objects sounds fine. To be clear, it would only render "Visibility=Off" items, but would NOT make DUMMY or SHADOW CATCHER objects appear in the render.
B) Yeah, we need to look more into the "Affect all textures" option too. That had some gaps and inconsistencies too.
|
|
By Dr. Nemesis - 7 Years Ago
|
|
Thanks Reallusion. I'm still reading through the changes but the enhancements are VERY welcomed. I expect this will free up a significant amounts of time for me. I'm keeping my fingers crossed that no crazy bugs have been introduced, but in the mean time, Good job!
|
|
By ccl_51 - 7 Years Ago
|
Quick question. Is the space navigator 3d mouse now supported?
Thanks.
|
|
By Peter (RL) - 7 Years Ago
|
|
sjonesdc (4/12/2018)
What is the method to roll back to the previous update? At one point (don't remember whether it was ver 3, 4 or 5), one could save previous exe, and if the updated exe had too many bugs, one would simply overwrite it with the saved exe. Is this method still viable or is there another method besides doing a backup???
Thanks in advance!
It is always wise to download and save the full installers (.exe) but just rename them to add the version number (7.1, 7.2 etc.). Then if you have any major problems you can uninstall your current version and install an older saved build. Generally we always encourage using the latest version for compatibility reasons but when serious problems occur that prevent iClone running correctly, you can revert back and wait for the next update.
|
|
By Peter (RL) - 7 Years Ago
|
|
ccl_51 (4/12/2018)
Quick question. Is the space navigator 3d mouse now supported?
Thanks.
Unfortunately this update does not add support for the Space Navigator 3D mouse.
|
|
By TopOneTone - 7 Years Ago
|
|
Some great time saving features here. Thanks Realusion, much appreciated!
|
|
By sjonesdc - 7 Years Ago
|
Peter (RL) (4/12/2018)
sjonesdc (4/12/2018)
What is the method to roll back to the previous update? At one point (don't remember whether it was ver 3, 4 or 5), one could save previous exe, and if the updated exe had too many bugs, one would simply overwrite it with the saved exe. Is this method still viable or is there another method besides doing a backup???
Thanks in advance!It is always wise to download and save the full installers (.exe) but just rename them to add the version number (7.1, 7.2 etc.). Then if you have any major problems you can uninstall your current version and install an older saved build. Generally we always encourage using the latest version for compatibility reasons but when serious problems occur that prevent iClone running correctly, you can revert back and wait for the next update.
Thanks Peter!
|
|
By 《/^\》 - 7 Years Ago
|
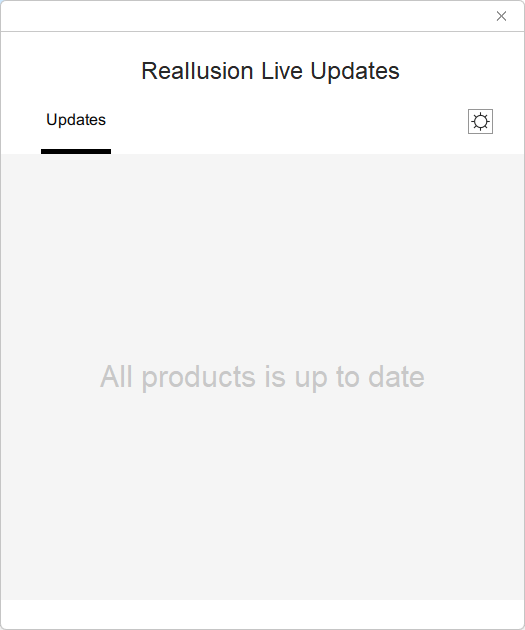
You may want to change the phrase: "All products are up to date" rather than "All products is up to date" unless this is a Southern American sort of feel, "I sure is American!" not that I am, just saying.
|
|
By Am7add9 - 7 Years Ago
|
is there any way to turn the stop button back on?
and why would you change them controls after all these years?
|
|
By mr_vidius - 7 Years Ago
|
《/^\》 (4/13/2018)
You may want to change the phrase: "All products are up to date" rather than "All products is up to date" unless this is a Southern American sort of feel, "I sure is American!" not that I am, just saying. 
excuse me sir, I reckon your making fun of my heritage? now there be more important things for you
to be concerned with, than some thang like how they be phrasing some 'in. I say leave it as it is. looks better.
|
|
By Supergerry - 7 Years Ago
|
....and where is the STOP button in the play bar ????:(
|
|
By Kelleytoons - 7 Years Ago
|
|
Yeah, I miss that too. Apparently they decided that it was redundant, that you could just use the "home/start" key (whatever you want to call that) because it has the same effect (the "Stop" button was more of a "reset to the beginning button" rather than a "pause", which is still there after you press play).
|
|
By Postfrosch - 7 Years Ago
|
|
Press down "," key to stop playing and go back to the first time frame.
|
|
By animagic - 7 Years Ago
|
I saw that we now have a way to reposition the GI anchor by picking a parent. This pleases me, as I suggested this in FT (#2107).
As far as the hidden objects go, for me this is useful because I often have large scenes where the camera can be in different positions, meaning that different objects are visible for different shots. The way I understand this is that I can have a "master" scene and then hide/unhide objects as needed. Until now, I would delete these objects without always knowing what the original configuration was.
A hide in preview, but render everything option would be fine with me, although I don't know if I would use it.
I'm still recovering from my move, so I will have loads to catch up with. On the upside, I have much more space, so it's time to consider Mocap...:unsure:
|
|
By 《/^\》 - 7 Years Ago
|
mr_vidius (4/14/2018)
《/^\》 (4/13/2018)
You may want to change the phrase: "All products are up to date" rather than "All products is up to date" unless this is a Southern American sort of feel, "I sure is American!" not that I am, just saying.  excuse me sir, I reckon your making fun of my heritage? now there be more important things for you to be concerned with, than some thang like how they be phrasing some 'in. I say leave it as it is. looks better.
It's by no means a dig or making mockery of your heritage, I am just making lite of a situation & constantly see the humour in things. I'm Irish & we were the first to think of powdered water, just need to add water 😂😂😂😂😂
We got to laugh otherwise we can get too serious
|
|
By CrimsonSpecter - 7 Years Ago
|
|
It's time to switch "Reallusion Hub", it is great when you updating especially on iClone. :D
|
|
By alemar - 7 Years Ago
|
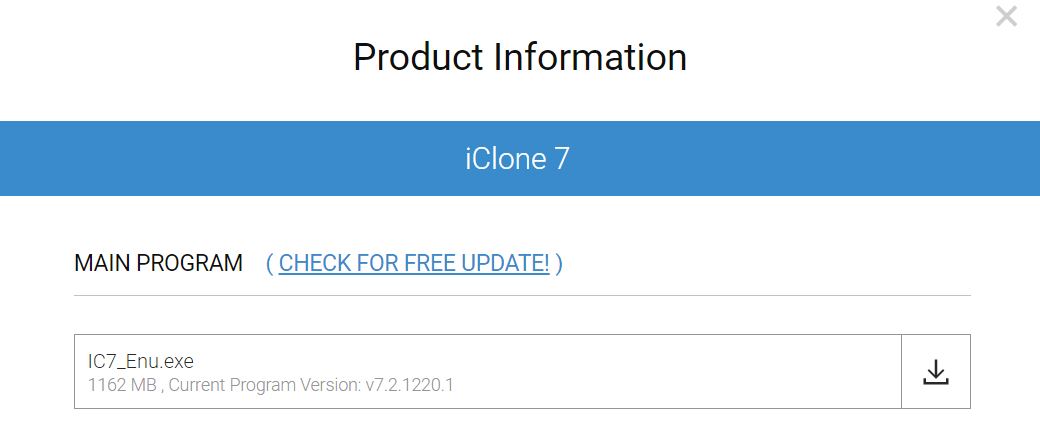
download section just show the old version...
|
|
By toppro77 - 7 Years Ago
|
|
What good is the "A" hot key to add a key frame to a specific body part, because when you move that body part to animate it, the whole motion layer populates with all body parts. This is ridiculous and needs to be fixed. I want to be able to refer back to the timeline to a particular body part that I animated and find it quickly. I can't do that if all body parts populate on the motion layer at the same spot. I have been waiting for this fix for years. It needs to be addressed. What I currently have had to do is to go back to the spot where, lets say I animated the head to move. I then have to delete all other body parts from that spot to know that this is where I made the adjustment to the head. This still presents a problem, because if I find I need to adjust this part again just a tad, it repopulates the whole motion layer in this section again. This is a major pain in the butt. Please fix it!
|
|
By Rampa - 7 Years Ago
|
|
toppro77 (4/28/2018)
What good is the "A" hot key to add a key frame to a specific body part, because when you move that body part to animate it, the whole motion layer populates with all body parts. This is ridiculous and needs to be fixed. I want to be able to refer back to the timeline to a particular body part that I animated and find it quickly. I can't do that if all body parts populate on the motion layer at the same spot. I have been waiting for this fix for years. It needs to be addressed. What I currently have had to do is to go back to the spot where, lets say I animated the head to move. I then have to delete all other body parts from that spot to know that this is where I made the adjustment to the head. This still presents a problem, because if I find I need to adjust this part again just a tad, it repopulates the whole motion layer in this section again. This is a major pain in the butt. Please fix it!
There are two solutions for this:
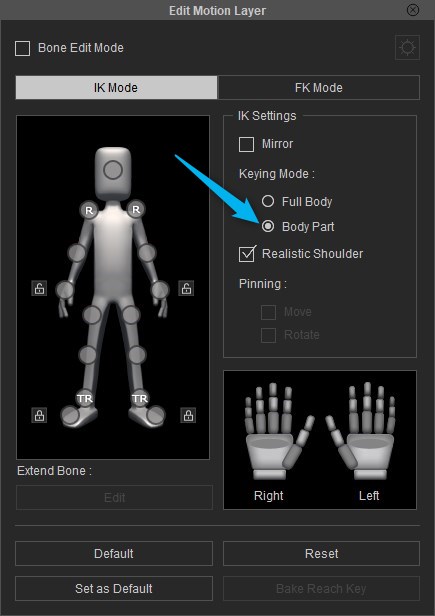
Select "Body Part" will key only the parts(s) that are moved. So if you rotate the head, only it receives a key. If you drag the hand with the translate gizmo, the wrist, elbow, and shoulder will receive keys.
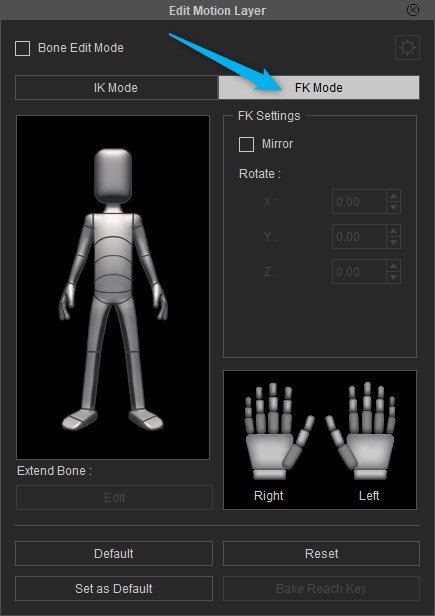
Using the "FK Mode" also sets individual body-part keys. But it is rotation only, so no inverse kinematics of dragging hands around like the above method.
|
|
By TonyDPrime - 7 Years Ago
|
Rampa, man....you are the F1 Help button.
(original thought by Raxel_67)
|
|
By toppro77 - 7 Years Ago
|
|
Thanks Rampa. I didn't know that. I guess you learn something new everyday.
|