|
By Minnie (RL) - 5 Years Ago
|
|
Hi everyone, This is a place for all users to openly share your experience and showcase your work. If you can share high-quality showcases, tutorials, and give some useful suggestions, we will gift you the G3 Actor Dressing Room Content Pack to thank you for your heartfelt contributions. Please also share with us the software(s) you used (besides CTA) when you upload your animation Note: Please don't publish your work / animation project on Youtube or any public platform.
When the update releases, Reallusion would love to promote showcases from users. At the same time, we are looking for high-quality showcases that could demonstrate: 1. a complete animated story that involves post-production in other video editing software (example)
2. character animation/ 2D animation in live action. (example)
3. 2D character in 3D environment (example)
4. animated story with practical use (for example: explainer video, commercials, business promotion, tutorial etc.)
|
|
By ebra studios - 5 Years Ago
|
hi this is first short test , I found it really cool update , i used movavi editor which is not powerful one, as I stopped using pr long time ago, however, the result is nice even though the transaction is not much smooth in the editor , I will come with more video's later on
|
|
By ebra studios - 5 Years Ago
|
and here is the result with ShotCut editor
|
|
By ebra studios - 5 Years Ago
|
here is another test using VSDC editor for the same show
|
|
By ebra studios - 5 Years Ago
|
VSDC editor used in this project
|
|
By ebra studios - 5 Years Ago
|
|
|
|
By ebra studios - 5 Years Ago
|
|
|
|
By ebra studios - 5 Years Ago
|
|
|
|
By kylelee - 5 Years Ago
|
Great testing, thank you for your testing.
If you would like to add the shadow behind the actor, how will you do it in an open souce editor?
|
|
By ebra studios - 5 Years Ago
|
|
Yes that can be as well , but the beta suddenly not opening and a green screen is kind of pain if I would use that method. So this update is really awesome for creators
|
|
By kylelee - 5 Years Ago
|
|
ebra studios (4/12/2021)
Yes that can be as well , but the beta suddenly not opening and a green screen is kind of pain if I would use that method. So this update is really awesome for creators I am sorry to hear about that, could you help me to record a video for me. I will help you to clear this problem.
|
|
By apyorick1 - 5 Years Ago
|
I usually use layered image sequences from CTA when adding effects in HitFilm, so this new update was very exciting! I did a test of a small segment of a scene from one of my films to see how all of the new features work. First I rendered the scene directly out of CTA:
Then I used some of the new features, rendering groups of layers isolated with the new selection tool as .mov files and uploading to HitFilm for post production effects. I LOVE the "Isolate Selection" tool - works great and saves me from clicking/unclicking massive numbers of files. Using the .mov files as opposed to image sequences not only saves HUGELY on storage space (762 MB as opposed to 1.69 GB for the image sequences for this particular project!) but makes it a snap to load them into HitFilm as it's just a matter of selecting all the .mov files and loading them all at the same time. Using image sequences you have to load each sequence separately. There are a few problems, however, which I'll show with the following two videos.
First, here is the version rendered out of HitFilm using the .mov files:
You will notice lots of striation and pixellation on the .mov files, particularly the front hair. This may not be completely visible in these unlisted YouTube versions (they will be when making them fullscreen), but is VERY visible when viewing the original file on my PC and would be unusable for a film destined for festivals or other streaming venues.
When I did the exact same segment and same effects (actually copied/pasted the effects so they are EXACTLY the same) but using image sequences instead I don't get the same problems:
All of these videos were final-rendered with exactly the same settings. I think it's a problem with the quality/size of the .mov files. These were rendered with the highest available settings in CTA. I realize if the quality were increased the size of the files would approach that of image sequences, but the result would still be so much easier to use when loading into an editor that it would be worth it.
|
|
By Garry Pye (RL) - 5 Years Ago
|
That water droplet effect on the camera lens is fantastic!
|
|
By kylelee - 5 Years Ago
|
|
apyorick1 (4/13/2021)
I usually use layered image sequences from CTA when adding effects in HitFilm, so this new update was very exciting! I did a test of a small segment of a scene from one of my films to see how all of the new features work. First I rendered the scene directly out of CTA:
Then I used some of the new features, rendering groups of layers isolated with the new selection tool as .mov files and uploading to HitFilm for post production effects. I LOVE the "Isolate Selection" tool - works great and saves me from clicking/unclicking massive numbers of files. Using the .mov files as opposed to image sequences not only saves HUGELY on storage space (762 MB as opposed to 1.69 GB for the image sequences for this particular project!) but makes it a snap to load them into HitFilm as it's just a matter of selecting all the .mov files and loading them all at the same time. Using image sequences you have to load each sequence separately. There are a few problems, however, which I'll show with the following two videos.
First, here is the version rendered out of HitFilm using the .mov files:
You will notice lots of striation and pixellation on the .mov files, particularly the front hair. This may not be completely visible in these unlisted YouTube versions (they will be when making them fullscreen), but is VERY visible when viewing the original file on my PC and would be unusable for a film destined for festivals or other streaming venues.
When I did the exact same segment and same effects (actually copied/pasted the effects so they are EXACTLY the same) but using image sequences instead I don't get the same problems:
All of these videos were final-rendered with exactly the same settings. I think it's a problem with the quality/size of the .mov files. These were rendered with the highest available settings in CTA. I realize if the quality were increased the size of the files would approach that of image sequences, but the result would still be so much easier to use when loading into an editor that it would be worth it.
Awesome, thank you for your testing. Regarding the issue of the striation and pixelation on the .mov files, Due to .mov will compress the image source, you can try to reduce the export resolution or increase the image source resolution more heigh. The png sequence does not do compress the image source, so you will found the video quality is different. |
|
By ebra studios - 5 Years Ago
|
|
|
By ebra studios - 5 Years Ago
|
and here we go again after problem was fixed another test
and here I added some bluer effects when he flies
|
|
By apyorick1 - 5 Years Ago
|
Did some more tests with the .mov capabilities as this feature will be a game-changer for me. I created a very simple project with four different resolutions of the main feature and simple movement to see how it affects the .mov files.
Here is the original render out of CTA4:
I will change the resolution of the trombone and save as a .mov file to be loaded into HitFilm for effects (the notes were also saved as a .mov file).
(As in my last test, the use of the "Isolate Selection" feature made things a lot easier and faster.)
You will note the pixellation problem in the areas indicated on this still:
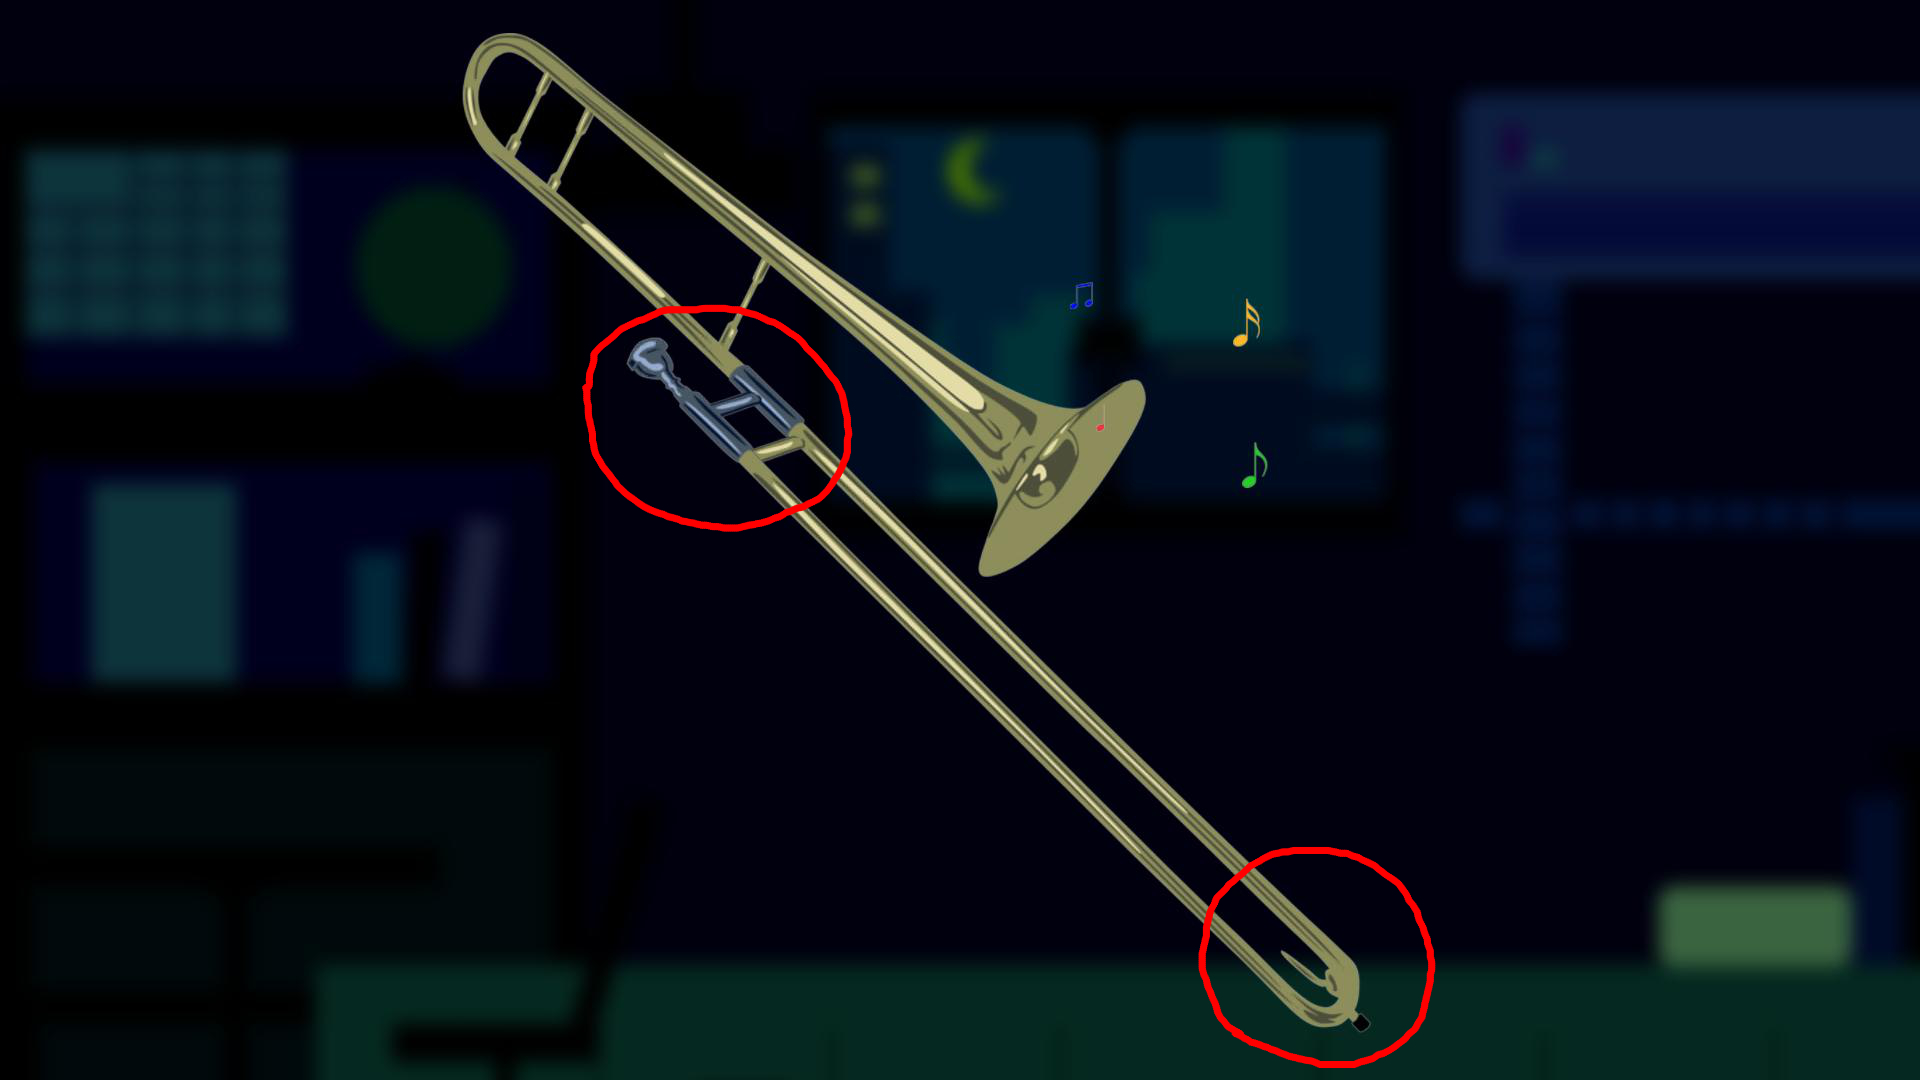
Here is the first render with the trombone at high resolution (2600 x 2863). (All trombone assets will be 300 DPI).
If you look carefully at the areas I indicated, there is still pixellation, even with an asset of this high resolution.
Next, at 1400 x 1542:
900 x 991:
And 500 x 551:
You will notice that the pixellation increases as the resolution of the asset decreases (which is to be expected); but even at the highest resolution (the original resolution of the asset) there is still a problem.
Any suggestions are most welcome!
|
|
By ebra studios - 5 Years Ago
|
here is 5 videos' with 5 different effects
|
|
By kylelee - 5 Years Ago
|
apyorick1 (4/18/2021)
Did some more tests with the .mov capabilities as this feature will be a game-changer for me. I created a very simple project with four different resolutions of the main feature and simple movement to see how it affects the .mov files. Here is the original render out of CTA4:
I will change the resolution of the trombone and save as a .mov file to be loaded into HitFilm for effects (the notes were also saved as a .mov file). (As in my last test, the use of the "Isolate Selection" feature made things a lot easier and faster.) You will note the pixellation problem in the areas indicated on this still: Here is the first render with the trombone at high resolution (2600 x 2863). (All trombone assets will be 300 DPI). If you look carefully at the areas I indicated, there is still pixellation, even with an asset of this high resolution. Next, at 1400 x 1542: 900 x 991: And 500 x 551: You will notice that the pixellation increases as the resolution of the asset decreases (which is to be expected); but even at the highest resolution (the original resolution of the asset) there is still a problem. Any suggestions are most welcome!
Could you provide this project to me? I would like to further investigate.
|
|
By apyorick1 - 5 Years Ago
|
Hi, Kyle!
I can send you the project later today or tomorrow...I've been dealing with a family medical situation (nothing too serious but my attention has been on that) so I haven't been at my studio computer. Will get back to you.
|
|
By rfbindl - 5 Years Ago
|
Working with the new default project setting in 4.5 (this will be helpful for me) and creating transparent background for use in Vegas Pro 18 (something I need occasionally).
|
|
By kylelee - 5 Years Ago
|
|
Thank you, You also can try new features of exporting by objects and isolate selection. Those features will improve your whole scene to Sony Vegas simpler. 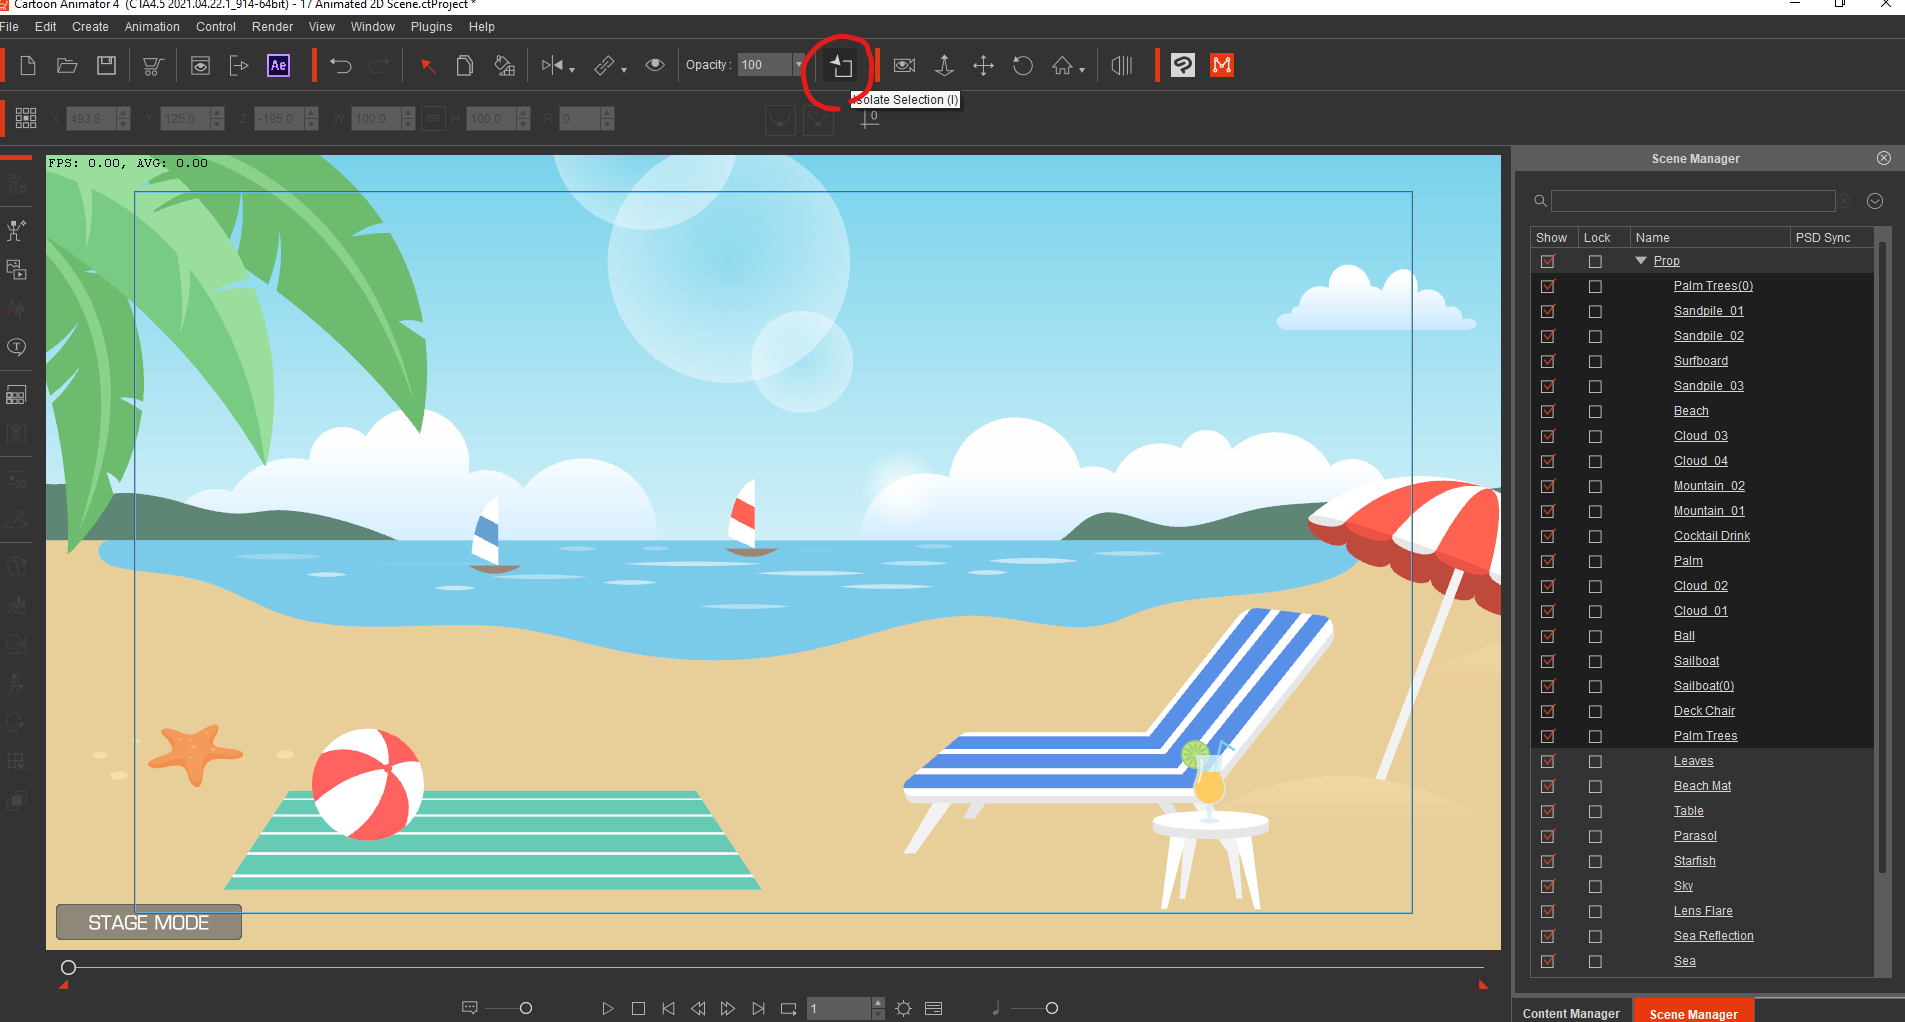 |
|
By vepop - 5 Years Ago
|
Shadow effect on Ruby and T-Quay.
Blur effect on the background.
HitFilm Express is used for the video editing.
.
|
|
By rfbindl - 5 Years Ago
|
Creating Animated Lower 3rd Titles using CTA 4.5 render to MOV with transparent background feature. I've created titles like this before but always had to create PNG sequences for for titles in Vegas Pro video editing, or re-render to transparent background using popVideo. This new feature makes the process more streamlined. This video also goes through some of the process of using alpa channel videos in Vegas Pro 18 and earlier versions where properties for alpha channel had to be set.
|
|
By Garry Pye (RL) - 5 Years Ago
|
As always, I am one of the last of the developers to figure out all the new bells and whistles in CTA updates. As someone who does not use After Effects (due to pricing), I really wanted to find a way to still be able to use MOV files, as my current video editor called Pinnacle, does not handle MOV files well at all. So I tested out Hitfilm and instsantly fell in love. I have a LOT to learn. But saving a CTA animation as a MOV file and importing it in to Hitfilm as a layer, duplicating it, making it black and blurred with a lower opacity, gives a very convincing shadow. And its great that I can work on individual layers for post production effects, like blurring the foreground plant. The only feature missing from the less expensive Hitfilm Express is the 'inner glow', available only in the higher priced Hitfilm Pro. But I may look at that as a future purchase since it is not subscription based. I am now very keen to play with more effects in Hitfilm Express and see what I can do.
|
|
By Garry Pye (RL) - 5 Years Ago
|
I am LOVING what can be done with the lighting effects in Hitfilm with the CTA4.5 MOV files. Having SO much fun. And the more I learn about Hitfil, the more I will be able to do.
|
|
By Garry Pye (RL) - 5 Years Ago
|
Another quick CTA4.5 test. It always bothered me that i couldnt have ghost like, semi transulcent characters moving in CTA. Now with the MOV files, this is totally possible and more!
|
|
By Garry Pye (RL) - 5 Years Ago
|
Having only just discovered post production effects with Hitfilm, I decided to add a projector style film grain. One button click to add it. Im obsessed! And yes, I couldve toned down the film grain effect a bit. I agree.
|
|
By Minnie (RL) - 5 Years Ago
|
These are all awesome! Love seeing your creativity!
|
|
By hebrew777 - 5 Years Ago
|
|
Love it Garry! Well done!
|
|
By hebrew777 - 5 Years Ago
|
NEATO!!! Great beam in sequence!
|
|
By Garry Pye (RL) - 5 Years Ago
|
|
Thanks! I was terrified that this was going to be just too hard to learn and get fast, quality results from. I was totally wrong. Its super fast, super accurate and super smooth.
|
|
By hebrew777 - 5 Years Ago
|
Cyberbeer prop made in CA4, exported into Premiere
https://youtu.be/FzNeRxbjy6Y
|
|
By hebrew777 - 5 Years Ago
|
Cyberbeer model made in AE, imported into CA4, made a prop in CA4, exported the prop video as .mov, Imported in Premiere.
|
|
By hebrew777 - 5 Years Ago
|
This set of pics and videos are about the Beta AE export/import plugin. Did an animated scene with Garry Pye's reef scene and a few animated props I created.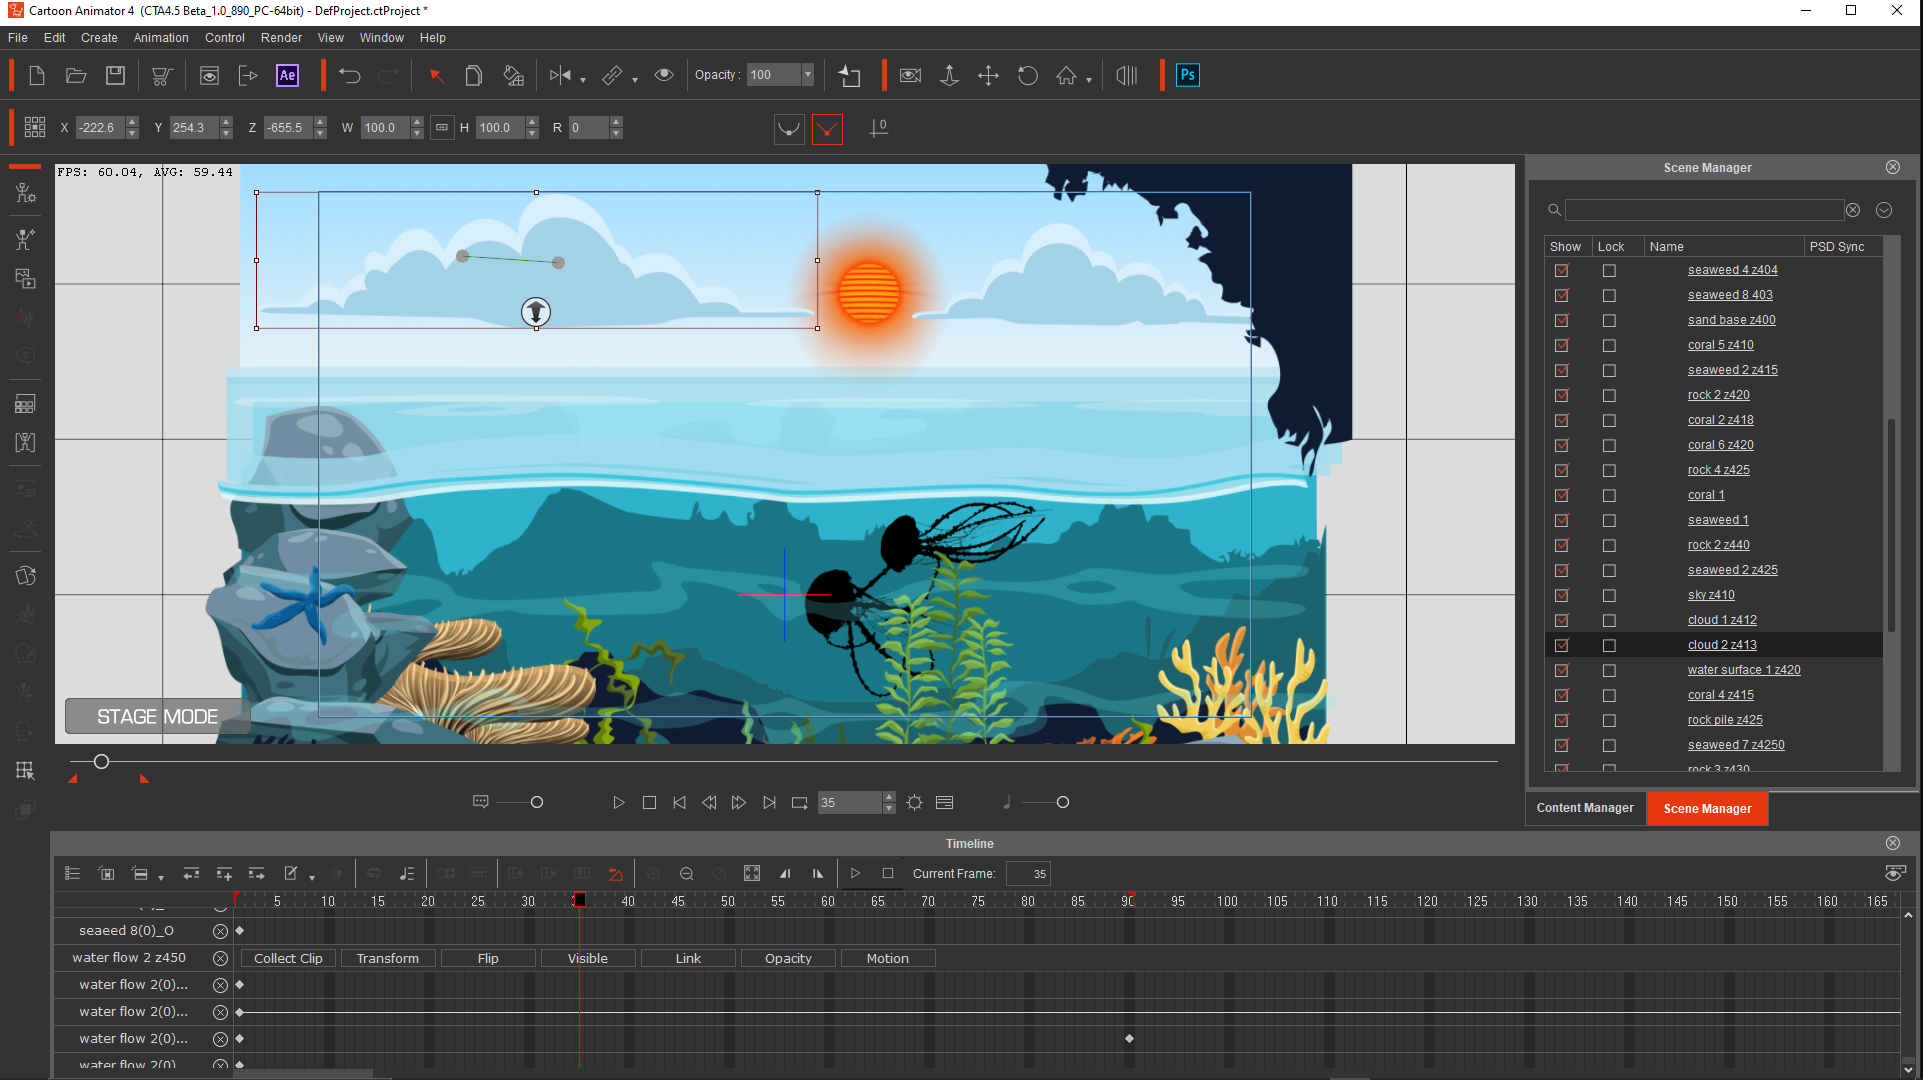
|
|
By hebrew777 - 5 Years Ago
|
The pic is of CA4.5 assembled before export, and this is the rendered file from CA4.5
|
|
By hebrew777 - 5 Years Ago
|
Now exporting to AE, it exported by layer the same as it was in CA4.5
|
|
By vepop - 5 Years Ago
|
Transition Effect on Skeleton.
|
|
By hebrew777 - 5 Years Ago
|
The video rendered in AE reflects the intactness of the export/import and how it retained all motions, colors, layers, etc. Added some glows to certain pieces of the reef scene to see how the scene would react.
|
|
By Minnie (RL) - 5 Years Ago
|
@hebrew777
This looks awesome, I like how you composite all the elements.
@Vepop
The skeleton vanished in an unexpected way, it did add gimmicky vibe to the video :)
|
|
By rfbindl - 5 Years Ago
|
Hey Garry... You got me thinking and realized that these MOV trans alpha clips also work slick in Vegas Pro using a mix of transitions, FX, and masking. I like that most of transitions and FX's only apply to the object so I could apply a mix of them to make objects appear from a center point or area, distort, change colors, shake, etc.
|
|
By ebra studios - 5 Years Ago
|
here is another video VSDC editor used
|
|
By Garry Pye (RL) - 5 Years Ago
|
|
That is a fantastic example because it runs through so many different effects in a row so you can see them all in action. Great work!
|
|
By Garry Pye (RL) - 5 Years Ago
|
|
Here is my latest test. I am absolutely LOVING Hitfil and post production effects. I never thought Id say that!
|
|
By Garry Pye (RL) - 5 Years Ago
|
|
Ebra. I LOVE your hunter in the swamp. I need to work out how to get that nice inner glow in Hitfilm, that gives that nice coloured edge to characters and makes them look more three dimensional. Love it!
|
|
By Garry Pye (RL) - 5 Years Ago
|
I cant stop playing with composite shots from CTA4.5 in Hitfilm! I have never been so excited about animating. And because Im new to Hitfilm and post production effects, EVERYTHING is exciting! I want to do a shot that includes rain, but dont know how? Easy. Watch some Youtube videos and keep mashing buttons! SO GOOD!
In this example, I did a side by side comparison of the original footage versus the final composite shot. The difference is phenomenal!
|
|
By Animaniac - 5 Years Ago
|
|
Hey folks, here is my Happyslug video again, with the transparent MOV loops imported into Adobe Premiere, only this time I treated my sketchy backgrounds with one of the Photoshop Neural Filters to add some extra detail to my backgrounds. it was all done pretty quickly but has a good look to it.
|
|
By Minnie (RL) - 5 Years Ago
|
|
Animaniac (5/6/2021)
Hey folks, here is my Happyslug video again, with the transparent MOV loops imported into Adobe Premiere, only this time I treated my sketchy backgrounds with one of the Photoshop Neural Filters to add some extra detail to my backgrounds. it was all done pretty quickly but has a good look to it.
It looks cool! Kinda get addicted to the Happyslug haha!
|
|
By ebra studios - 5 Years Ago
|
another test using VSDC editor
|
|
By Olga(AWS) - 5 Years Ago
|
A great new feature - rendering with a transparent background opens up new use cases for CTA4. The created characters and effects are easily applied when editing video in an external editor (I have it Cyberlink Power Director 15). Here are just a few examples of use
.
|
|
By vepop - 5 Years Ago
|
Combining green screen and transparent background.
|
|
By hebrew777 - 5 Years Ago
|
|
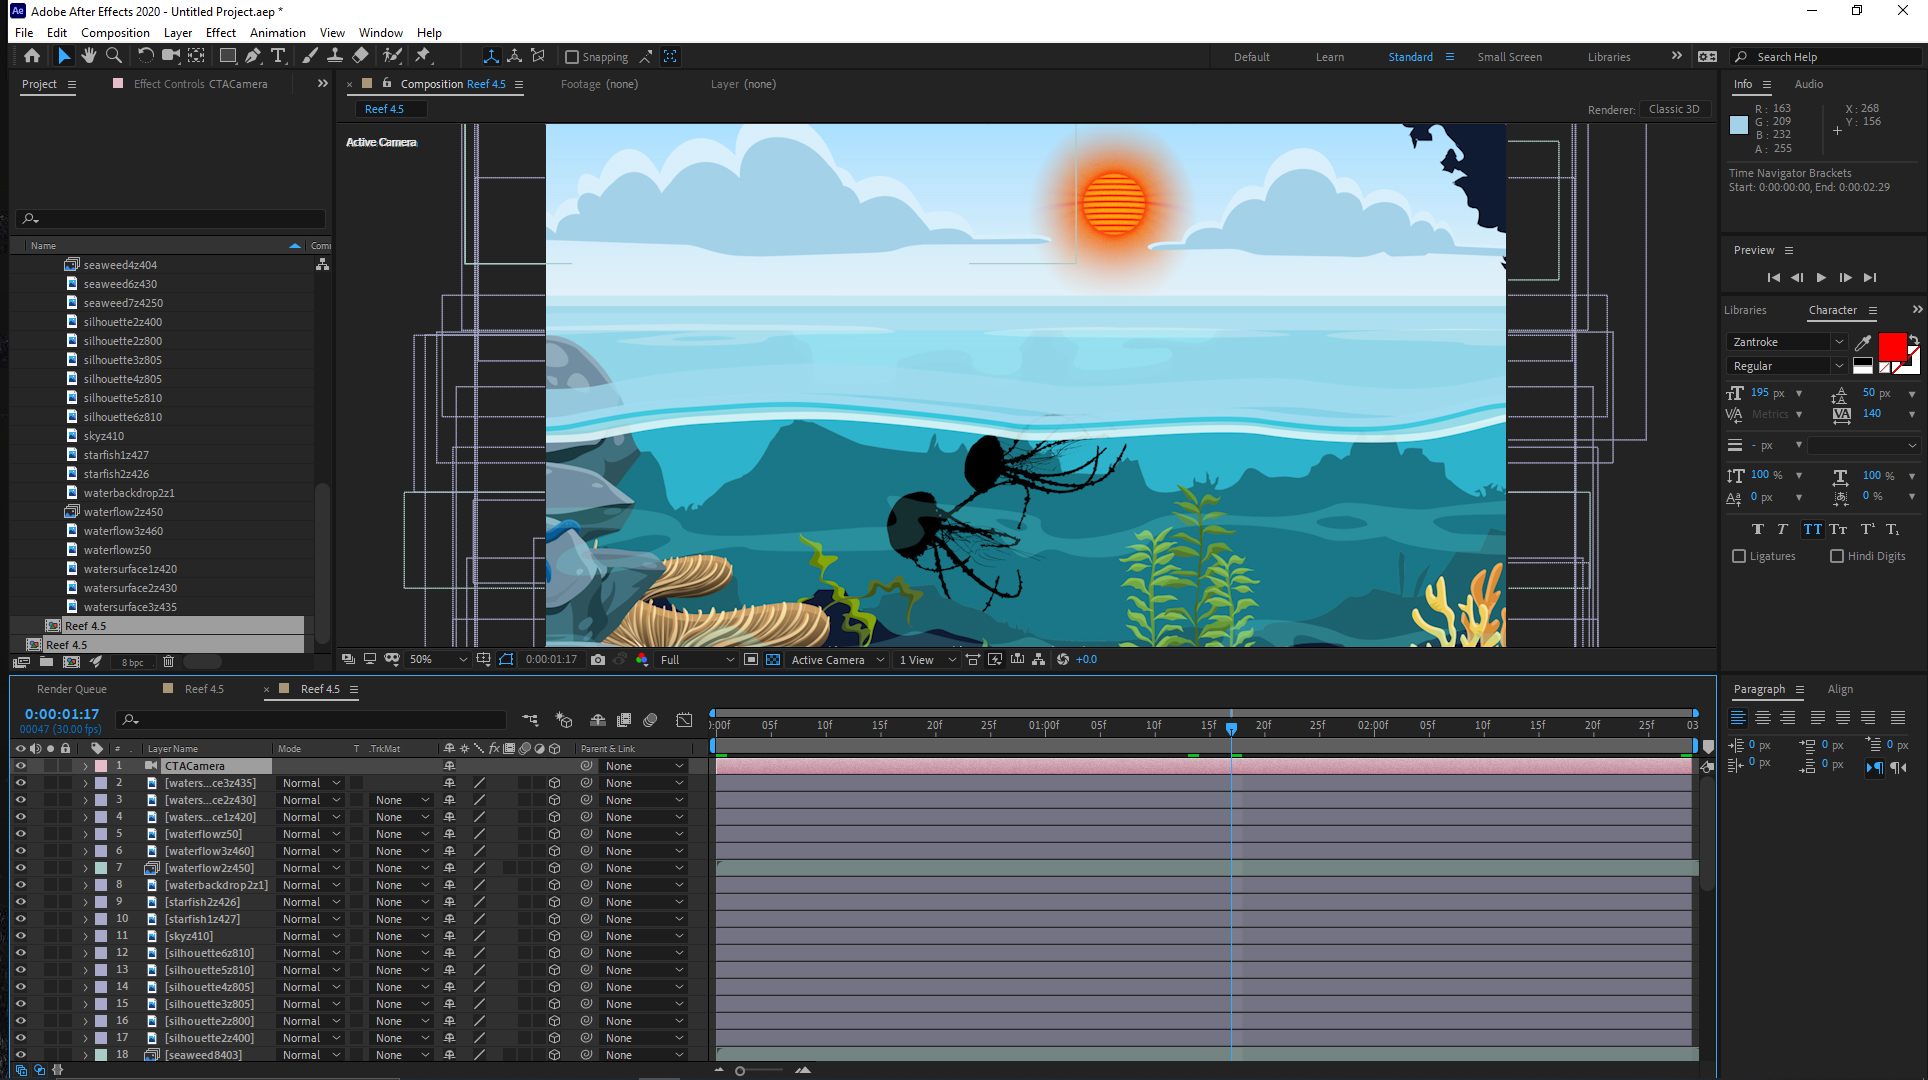
On this Reef CA4.5 to AE import the animation of certain elements was not as smooth as was the animation rendered in CA4.5. Will do another sequence in CA4.5 and export to AE to see if the same jitter/lag shows up again.
|
|
By ebra studios - 5 Years Ago
|
the hunter again with more effects
|
|
By Garry Pye (RL) - 5 Years Ago
|
|
Ebra, what software are you using for Post Production. I use Hitfilm and I cant figure out how to get that nice coloured glow outline around my characters you like have. It makes them look more 3D.
|
|
By Garry Pye (RL) - 5 Years Ago
|
|
This was a short test I did using Hitfilm to see what I could do with shadows. Its a much nicer shadow than the little semi transparent oval I used currently.
|
|
By Garry Pye (RL) - 5 Years Ago
|
This was a test in Hitfilm. Id really like to know how to get the glow off the flame to reflect across the left side of face. Be even nice to get the reflection to dance and flicker like the reflection of fire.
|
|
By Animaniac - 5 Years Ago
|
|
Short example of effects done to .mov in Hitfilm. The fire effect was particularly effective.
|
|
By ebra studios - 5 Years Ago
|
|
I use VSDC editor they have free and paid version I used the free for now
|
|
By ebra studios - 5 Years Ago
|
glow effects usually is a shadow effect that will creates something like light ,when adjusting the shadow the correct way, as far as I know most of editors kind of doing the same way
so use a shadow effect then change its color and adjust its position to be behind or front or side of the character , it will look as a glow effects
|
|
By ebra studios - 5 Years Ago
|
|
|
|
By ebra studios - 5 Years Ago
|
|
|
|
By vepop - 5 Years Ago
|
Applying some effects on the video tracks with transparent background.
|
|
By Garry Pye (RL) - 5 Years Ago
|
|
Ebra, Im really struggling to get an edge glow in Hitfilm. I can use a Glow effect, but not INSIDE the character. Only outside as far as I can tell. There MUST be a way.
|
|
By Garry Pye (RL) - 5 Years Ago
|
Here is a quick test I did in Hitfilm.
Theres more going on here than first appears.
- Vignette applied in Hitfilm
- Glass translucency applied in Hitfilm
- Character warp/distortion to curve in Hitfilm
|
|
By Garry Pye (RL) - 5 Years Ago
|
I learn a LOT doing this CTA4.5 sample in Hitfilm. I really wanted to take my DIY Reff scene and make it look more textured and get a real sense of the water and light. There are a few things I can improve on this, like reducing the white line around a few of the props, but overall it shows real potential.
|
|
By apyorick1 - 5 Years Ago
|
Garry - you can do this by duplicating the element you want the edge glow on. On the "bottom" version, add glow and brighten to taste. On the "upper" version, darken a bit and then use "erode white" effect, adjusting to where you want it to be. Don't know if this is the "official" way to do it, or if this is the effect you're going for, but that's what I came up with noodling around in HF. Here's a quick example:
|
|
By ebra studios - 5 Years Ago
|
Jarry Pye here is how I use glow which is shadow effects in VSDC editor I used to do the same in pr before
|
|
By Olga(AWS) - 5 Years Ago
|
Возможности наслоения практически безграничны. Однако следует отметить, что цветовая гамма немного меняется при выводе в прозрачном формате. Все нововведения супер!
|
|
By hebrew777 - 5 Years Ago
|
This is another test of the export to AE plugin. In CA4.5, I used an MP4 background scene, a few props that I made, and a DexFx whale for a character. As I added more props to the scene in CA4.5, my background disappeared, bit I resubmitted it to the scene and placed it in proper depth. Export creation went fairly quick making sure every asset was exported, then to After Effects and everything loaded from the JSON file in the same manner as it was in CA4.5. I added some glows to certain assets, some opacity keyframing, some scale keyframing, and sent to the render que. All motions, animations, etc., except the whale rendered with smooth animation. Overall the .mov exports in CA4.5 have been flawless in After Effects and Premiere Pro, but a minor issue with the AE export within After Effects.
|
|
By Garry Pye (RL) - 5 Years Ago
|
My latest CTA4.5 test in Hitfilm. This software is incredible. Matched up with the new CTA update and we are going to blow the lid off 2D animation!
HUGE shout to Dirk Baten who helped me achieve the edge lighting on the character. I love this clip because I managed to relight the character, add a glow to his edges, and have him stand both in front of and behind layeres of fire. SO GOOD!
|
|
By Garry Pye (RL) - 5 Years Ago
|
And its official. Im HOOKED on CTA4.5 and Hitfilm! And now that Im getting the hang of Hitfil, I am speeding through these effects shots more confidently.
|
|
By Garry Pye (RL) - 5 Years Ago
|
Today I learnt how to create water effects in Hitfilm and applied it to the water in this clip. Its very subtle, but it is also very easy to change the intensity of the water surface to make it more obvious if you need to.
|
|
By Garry Pye (RL) - 5 Years Ago
|
Then I tested out some film defects, colours and damage to get a vintage feel to the same clip. Very easy to do in Hitfilm.
|
|
By Garry Pye (RL) - 5 Years Ago
|
Still playing around with Hitfilm and CTA4.5. Honestly, Im addicted. The ability to add quality post production effects so easily to scenes means we can elevate the end result and produce animation like never before. I cant wait till people see this update!
Here I added the solar flare, camera vibration, additional colour tones, grain and the heat wave.
|
|
By Garry Pye (RL) - 5 Years Ago
|
This CTA4.5 & Hitfilm test showed something interesting, since I show both the original CTA footage plus the final composite shot made in Hitfilm. In the Hitfilm final composite shot, you can see there is a fine white line around the edge of the character, although that does not appear in the original CTA footage. This often happens with PNGs. If its a static image in Photoshop, I can easily get rid of it using a 1 point Defringe value. But there is no defringe option in Hitfilm (that I can find). If anyone has any solution, Id appreciate it. Otherwise very happy with the results. And today I learnt how to camera track! Go me!
|
|
By Garry Pye (RL) - 5 Years Ago
|
Well here it is. This animated clip, created with CTA4.5 and Hitfilm Express, are the culmination of just over a weeks training with the Hitfilm. Having never used the software before, I was able to learn the process of how to apply post production effects to CTA4.5 MOV files in just over a week. And in only a few hours, I was able to produce this clip today. And I love it!
Theres a LOT going on in this clip, including-
CTA4.5 features-
- 3D motion of character walking to camera
- Bone Hands
- 350 Degree Head
Hitfilm Express Features-
- Camera tracking of light sources
- character edge lighting and shadows
- effects overlay of smaoke and dust particles
- colour gradient changing to get character to blend better with background
- animated light sources
- blurring for depth
|
|
By ebra studios - 5 Years Ago
|
|
WOW one of the best seen
|
|
By hebrew777 - 5 Years Ago
|
|
Garry! Magnificent! Well done! Such a rich and deep scene- watching this quite a many times just to catch all the essence and every aspect- Quite inspiring my friend!
|
|
By Animaniac - 5 Years Ago
|
|
ey all look awesome Garry
|
|
By hebrew777 - 5 Years Ago
|
Another test with all original props. Have not exported yet and did any enhancements
So far I have enjoyed this BETA test and found a few cons to the AE export on certain prop animations, but overall, really like what Reallusion is doing to improve Cartoon Animator. This will open many more creative doors and options for the artists and animators.
|
|
By Garry Pye (RL) - 5 Years Ago
|
Today I started playing around with adding 2D characters to real world footage. This is by no means a ground breaking shot, but it was a good learning curve. I was able to add a rim light to the character which made him look a little less flat. I added the shadow acorss the drawing tablet. I shouldve added a ground shadow benetah his feet as well to match the shadow under the mouse behind him, but forgot. Then I added an LUT effect (thank you Anita Bell) on a Grade layer which gave all the film the same colour, again helping to blend the character with the scene. Interaction is the key making a shot like this believable. If he had stepped over the white cord, pushed an object over, suddenly he becomes part of the scene. That will be for the future. But so far so good!
|
|
By Garry Pye (RL) - 5 Years Ago
|
Another test of mixing real footage with 2D character in Hitfilm.
|
|
By Animaniac - 5 Years Ago
|
|
Here are some post production effects done in Hitfilm. The second one I've posted before but now has a title and improved sound effects.
|
|
By Animaniac - 5 Years Ago
|
|
Here is another Hitfilm test, got some interesting 3d type effects and a drop shadow.
|
|
By hebrew777 - 5 Years Ago
|
Another test with CA4 props (Anita Bell Armada, etc.) and After Effects- Tried 32 bit color depth- not good, so I found out 16 bit looks the best in AE, but could do 8 bit, and 30 frames per second versus 12 frames turned out way smoother for this animation. Still working with it and the multiple layers and effects.
This update will be a winner from my perspective and feel they be a little more tweaks to get it solid
|
|
By hebrew777 - 5 Years Ago
|
|
Garry, really like this concept and it looks like you are doing well with the fore planning and perspectives- Hope to see more!
|
|
By Garry Pye (RL) - 5 Years Ago
|
|
Hi all. The CTA4.5 update is nearing release, and as members of the Beta team, Reallusion are keen for you to upload your best samples of what you have done using the update. So far we have had some great clips uploaded here. So......... who else wants to show off?
|
|
By hebrew777 - 5 Years Ago
|
This is an ongoing test of Cartoon Animator and After Effects to see how layering, effects, and overlays affect the whole- 16 bit color depth (looks best with certain aspects), a lot of keyframing, and using the .mov exports from CA4.5. Mixing it up and testing limitations and so far both parties are holding well.
|
|
By vepop - 5 Years Ago
|
Testing the MOTION BLUR EFFECT in HitFilm Express.
.
|
|
By ebra studios - 5 Years Ago
|
this is my final video VSCD editor used
|
|
By garrypye - 5 Years Ago
|
CTA4.5 is officially launched! Thank you to everyone on the Beta team who helped this update throughout its development and thank you for all the test clips everyone produced. I cant wait to see what everyone produces with this new update. I think we're going to see some amazing projects ahead! Thank you for participating in the Beta.
You can follow the launch here at https://bit.ly/353fbAA
|