|
By Miranda (RL) - 5 Years Ago
|
In order to make use of your existing content more optimally, we would like to share some instructions and tips for applying content towards CC3 Base+ characters.
The introduction includes:
- Morph Slider:
- Update Morph Sliders to CC3 Base+
- Calibrating the Activated Morph Sliders (Reverting to CC3 Shapes)
- Avatar and Morph Preset:
- Apply Existing Avatar Preset Content to CC3 Base+
- Apply CC3+ Avatar Preset to CC3 Character
- Cloth:
- Apply Cloth to CC3 Base+
*Because the CC3 Base+ skin-weights have been significantly readjusted, application of previous generation clothing will launch the transfer utility.
- Motion:
- Apply Motion / Pose to CC3 Base+
*Use Pose Offset Preset to adapt to different character sizes and proportions. >> Know More
|
|
By Miranda (RL) - 5 Years Ago
|
Morph Slider
Update Morph Sliders to CC3+
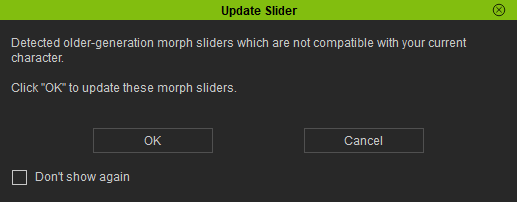
After you launch CC 3.3, you may find that some of the original sliders in the Morph panel are missing. This is because morphs that are not compatible with the current scene character will remain hidden until they are converted for CC3 Base+. You have two options available for conversion:
- Automatic conversion after launching the application.
Upgrading to version 3.3 will conveniently add support for CC3 Base+ for all morph sliders in the Template > Custom folders.
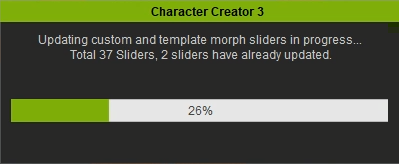
Legacy morph sliders purchased after this upgrade will be detected by the application - in the Template and Custom folders - at which time, a message box will appear requesting for conversion. In which case, pressing the OK button will be sufficient to start the conversion process.
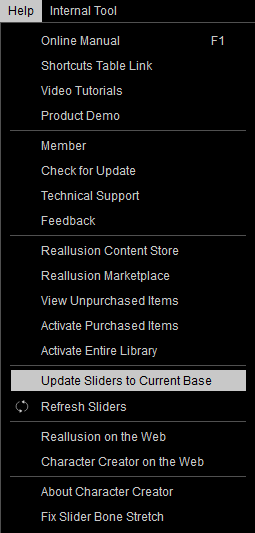
- Manually activate the conversion process by choosing Help > Update Sliders to Current Base after initiating the application.
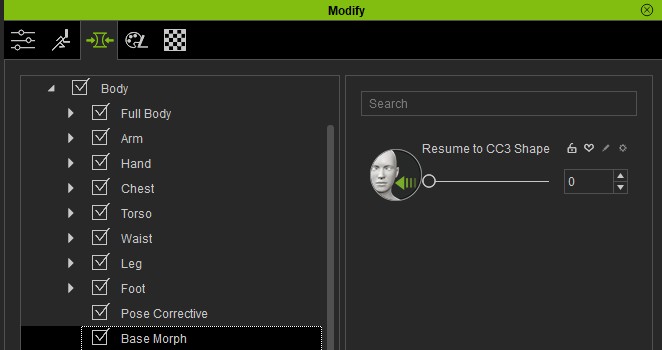
Calibrating the Activated Morph Sliders (Reverting to CC3 Shapes)
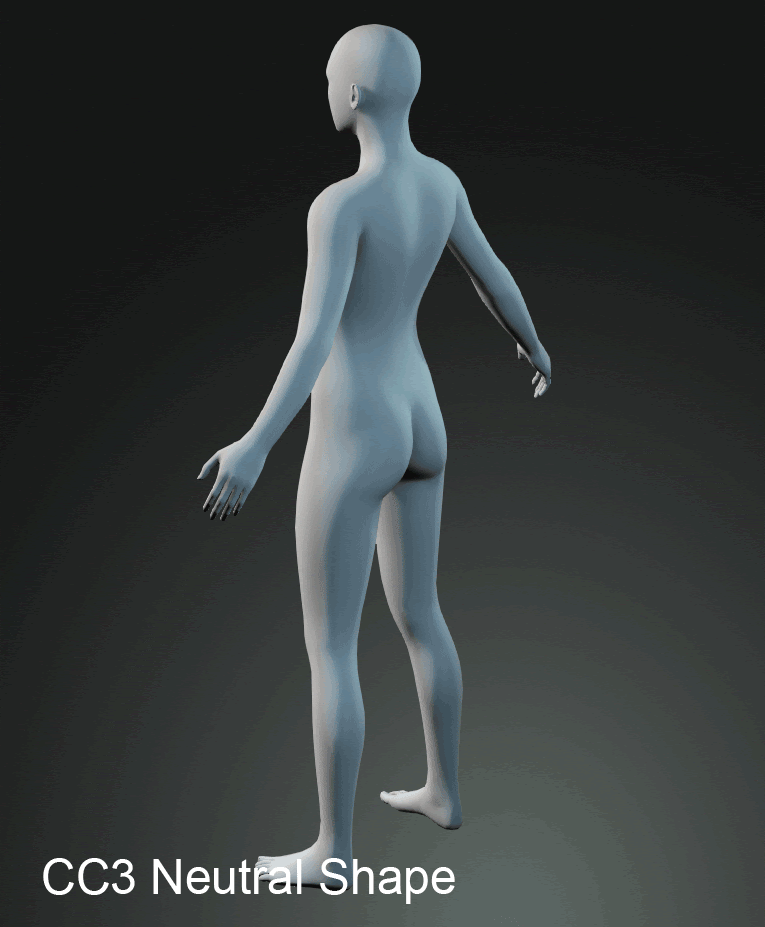
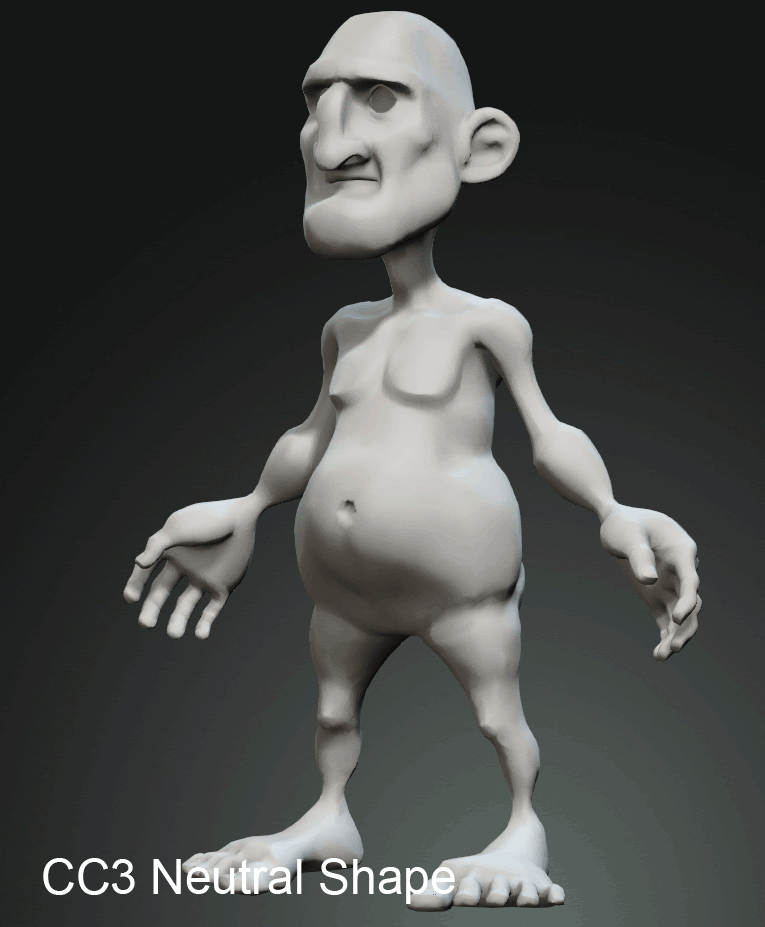
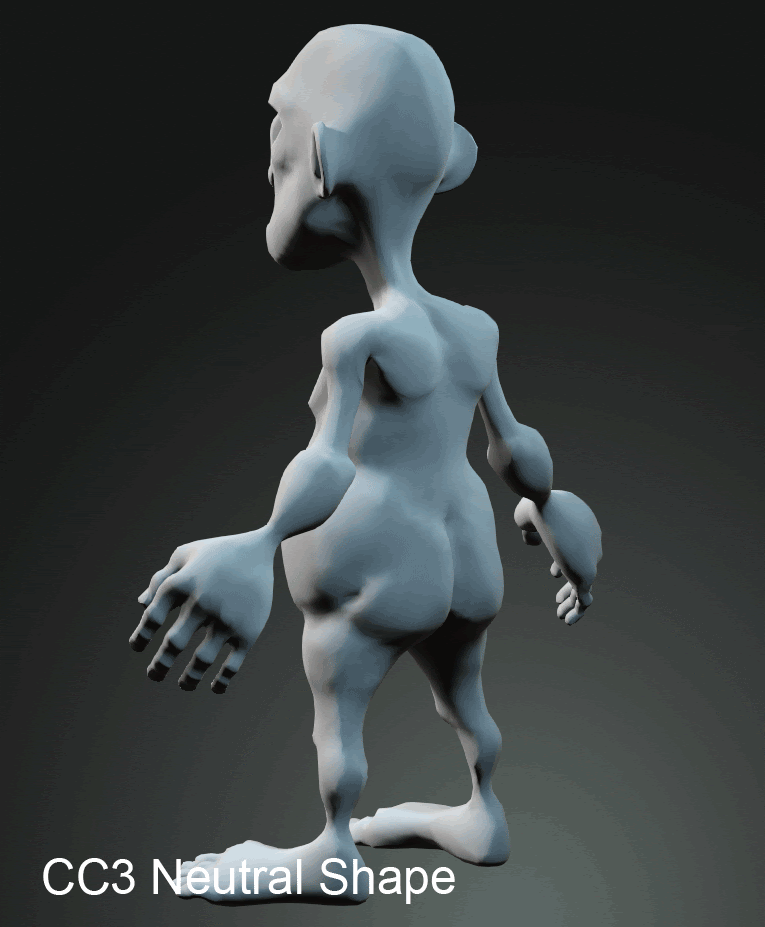
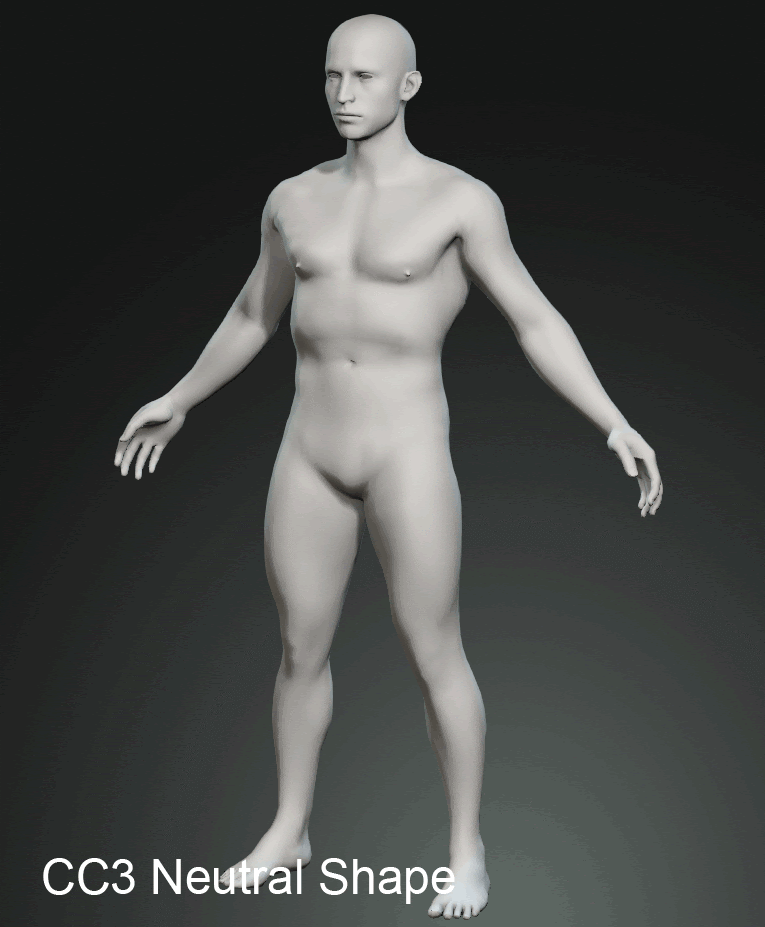
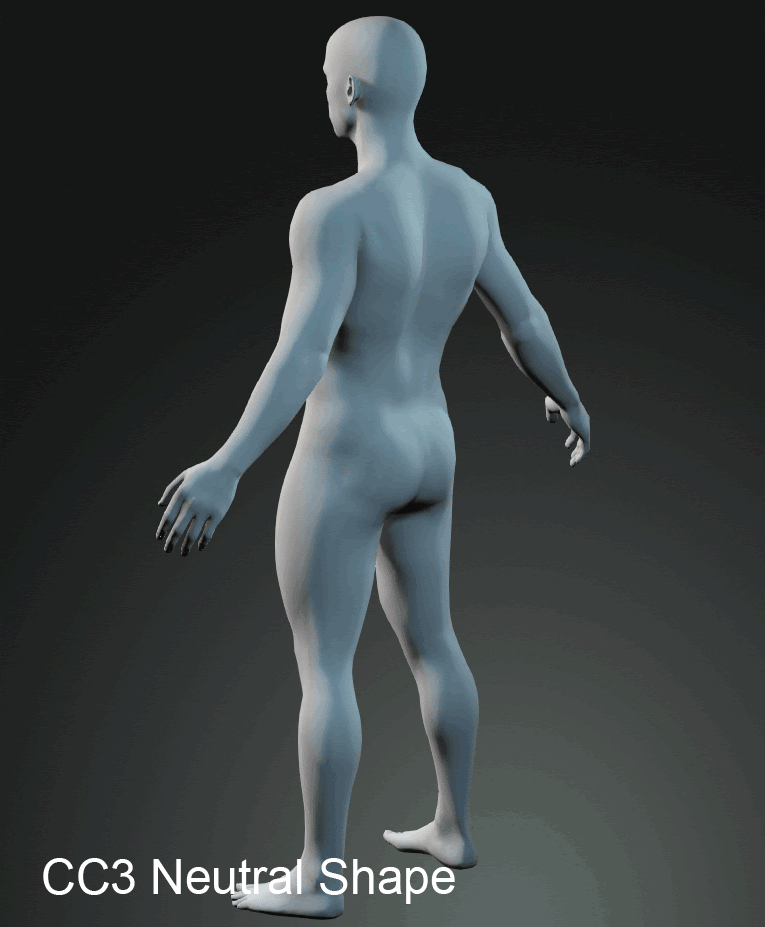
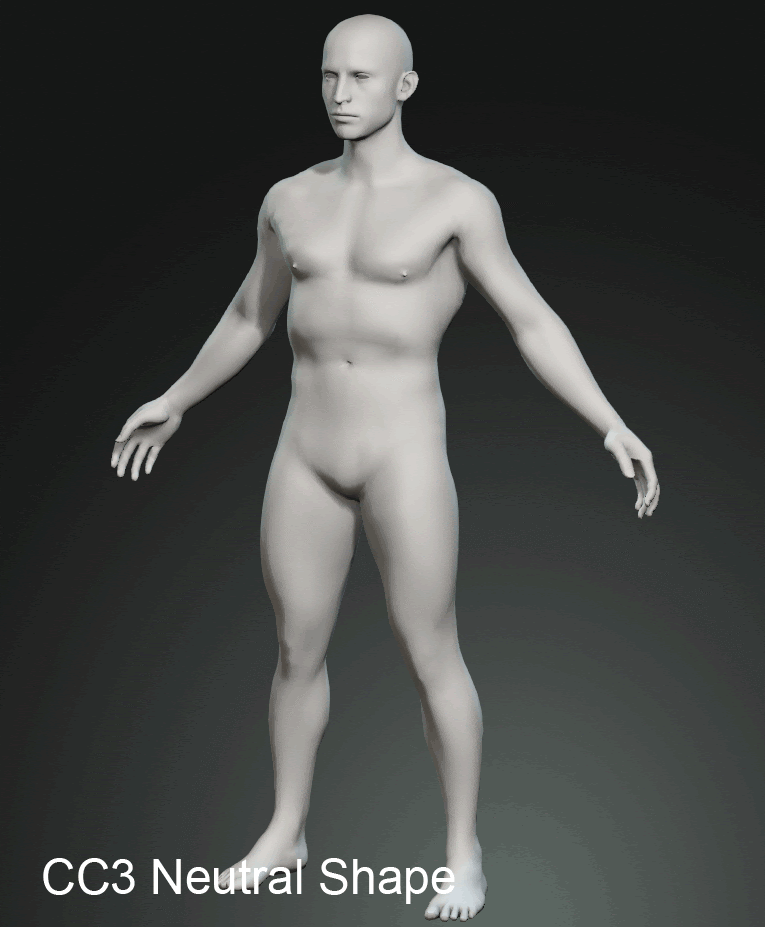
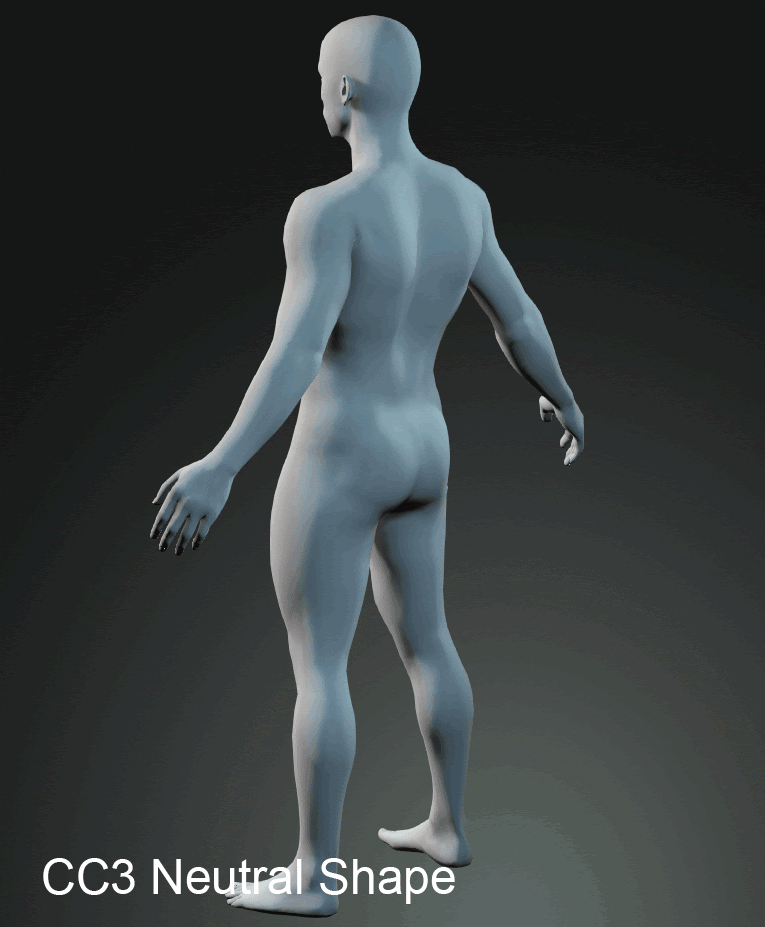
CC3 & CC3+ neutral body shapes have some difference. See the front and back views below:
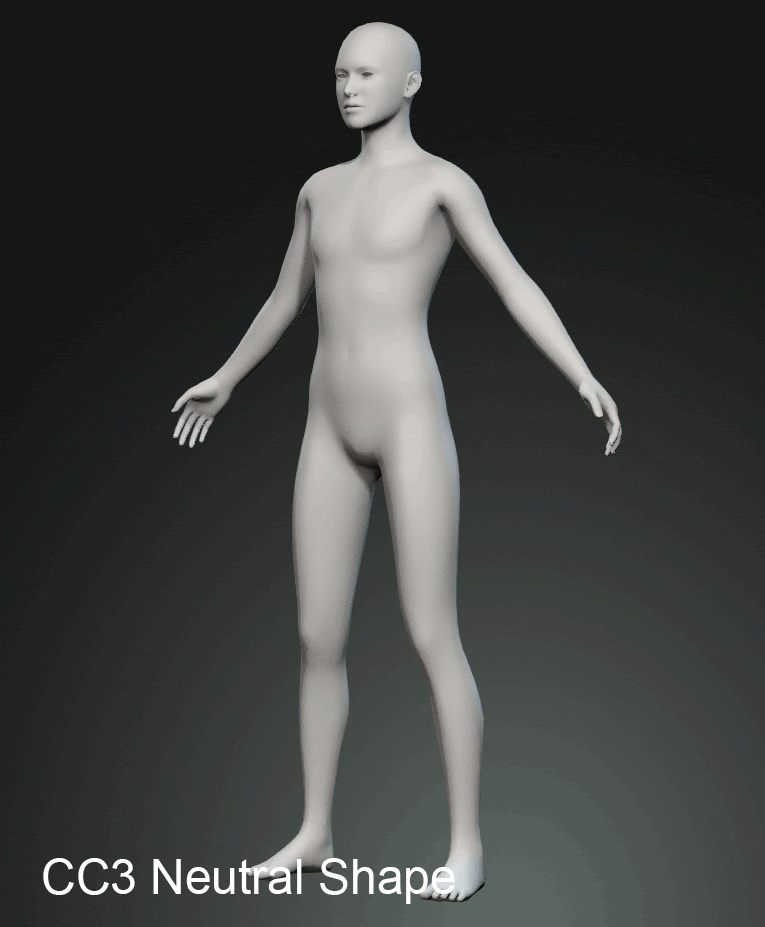 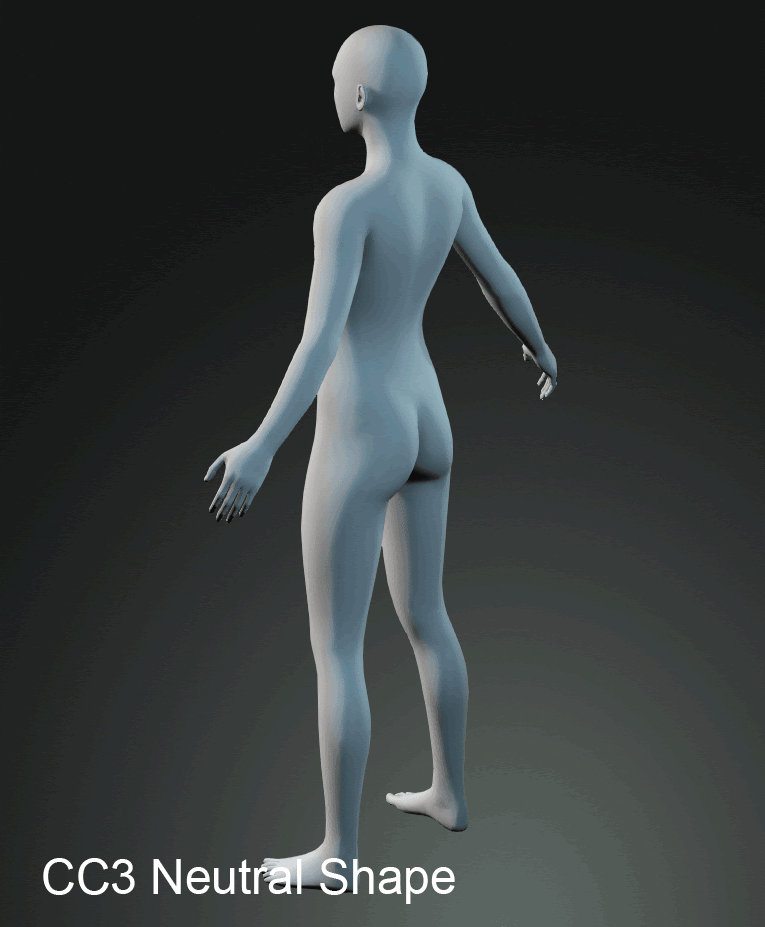
CC 3.3 will provide a calibration morph slider called "Resume to CC3 Shape" to remove the differences between CC3 and CC3+ and return to the original CC3 look.
To restore to the CC3 shape completely, then use the Morph Base > Resume to CC3 Shape morph slider:
After applying this slider, you will see there is almost no difference between "CC3+ Neutral with Resume CC3 Shape Slider applied" and "CC3 Neutral".
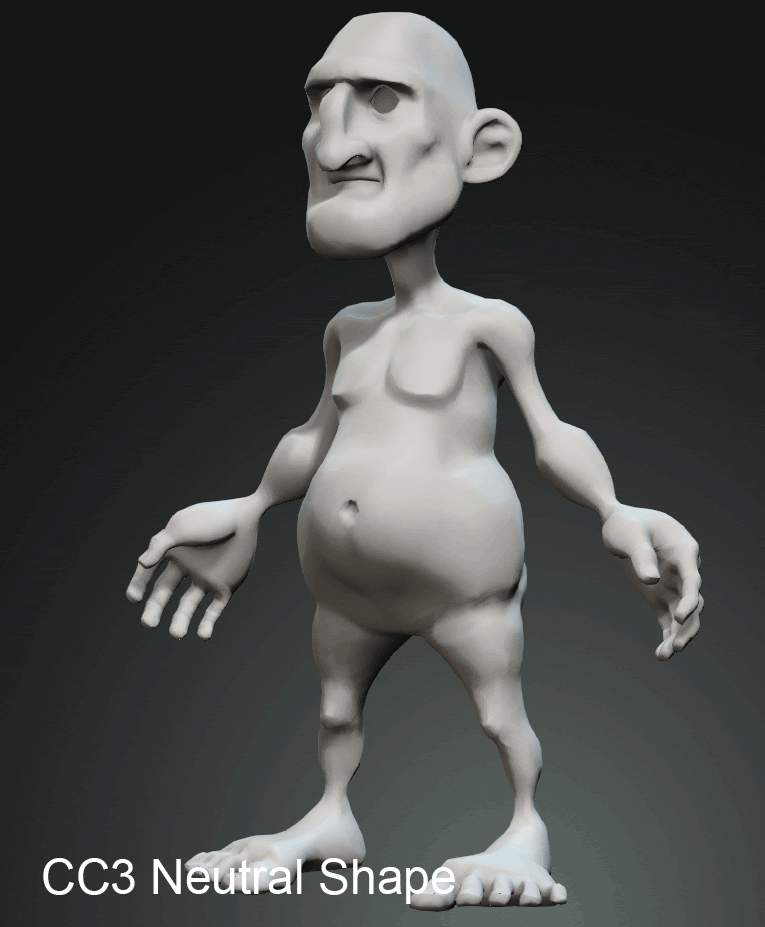
Example: Slacker (embedded content)
If the neutral base shapes are different, then any further application of morph sliders will also look different between the CC3 and CC3+ character.
Before applying "Resume to CC3 Shape“ correction slider:
After applying "Resume to CC3 Shape" correction slider:
Example: Louis

Before applying "Resume to CC3 Shape" correction slider:
After applying "Resume to CC3 Shape" correction slider:
|
|
By Miranda (RL) - 5 Years Ago
|
Avatar and Morph Preset
Applying Existing Avatar Preset Content to CC3 Base+

*(1) Applying CC3 Avatar Preset Head to CC3 Base+ will take time due to the difference of base UV layout. When clicking OK to apply, the system will start to bake textures on the background. (CPU is the key to determine the speed of texture baking) Take i7 PC for example, it takes around 3 minutes to process the flow. Our Dev team is busy finding a solution to accelerate the conversion process.
*(2): Because of the difference between CC3 Neutral and CC3+ Neutral, some morph sliders will be maxed out to make their mesh shapes resemble one-another when an Avatar Morph Preset is saved.
Applying CC3+ Avatar Preset to CC3 Character
Because the UV layouts of the two generations are completely different, all skin related content will not be compatible with the CC3 Base. You'll need to convert the avatar to CC3 Base+ first.

|
|
By Miranda (RL) - 5 Years Ago
|
Cloth
Apply Cloth to CC3 Base+
CC3 Base+ has undergone skin-weight changes that deviate significantly from the previous generations. Due to this, clothing made for CC1 and CC3 generation characters will likely experience skin-weight related issues such as mesh penetration during animation and posing. Therefore, the deployment of cross-generational clothing will launch a dialog window for you to manually pick the method of skin-weight transfer from the body to the cloth.
The skin-weight transfer dialog window:
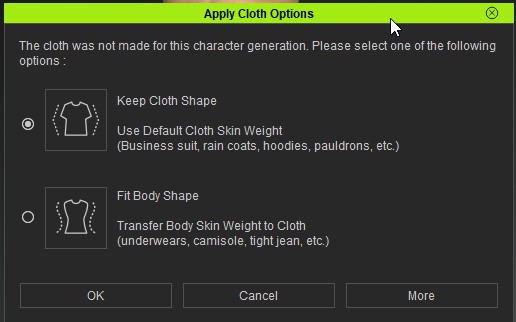
You can select the corresponding option that best fits the style of the clothing. After the cloth is applied and saved to your content library, the application method is stored and subsequent deployment on CC3 Base+ characters will not longer launch this dialog window. Under the hood, this information is saved alongside the data that contains the current base.
*Video has provided with subtitle, click cc button to open it.
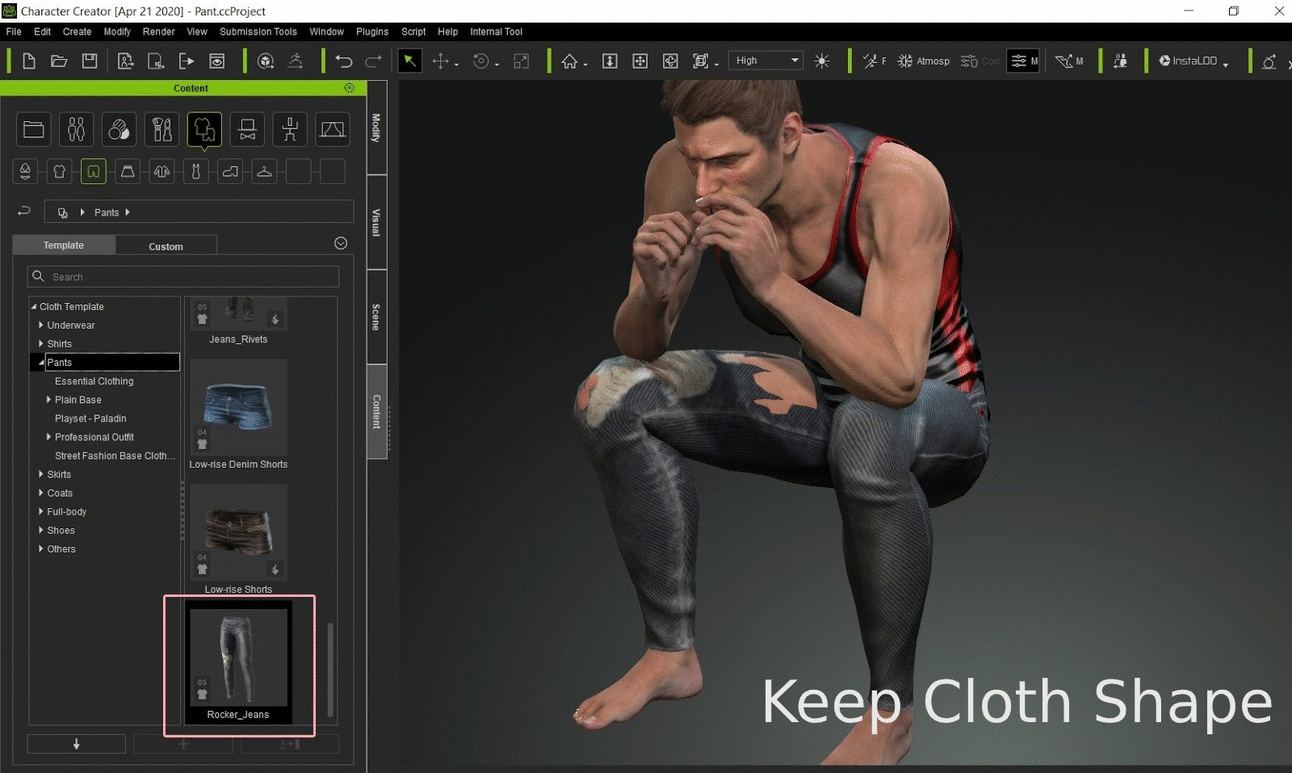
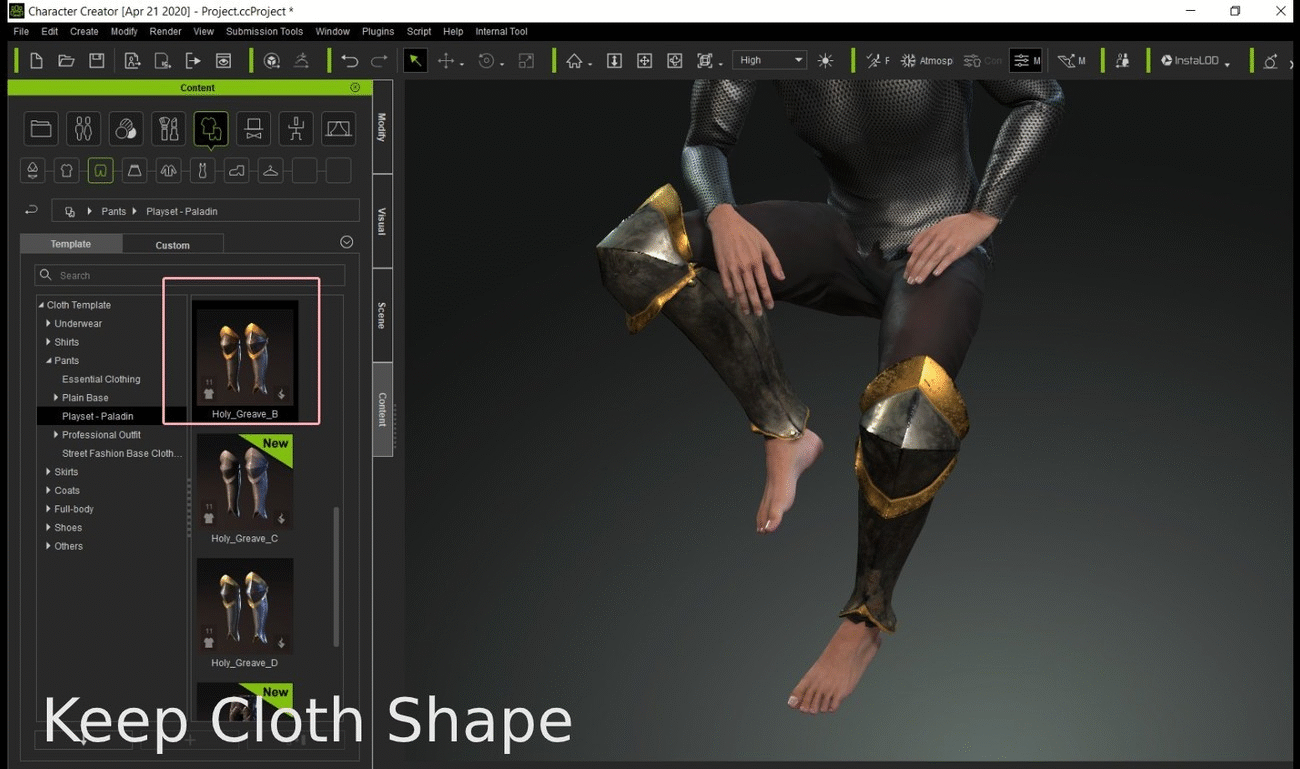
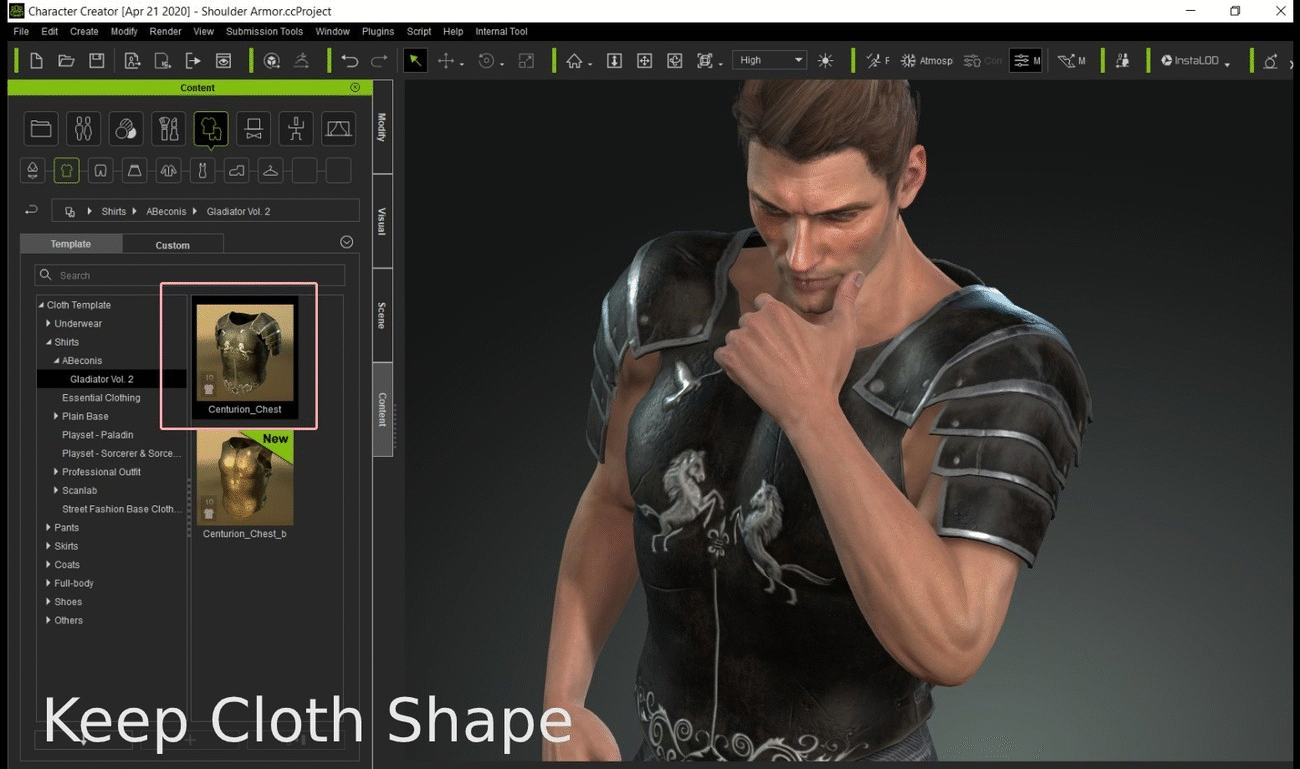
Below are some examples of different styles of clothing applied to CC3+ characters, using the Keep Cloth Shape and Fit Body Shape settings.
Pants (Embedded content): Because the pants hug the body tightly, its skin weight must match those of the body as accurately as possible. Therefore, it is best to select the Fit Body Shape option.
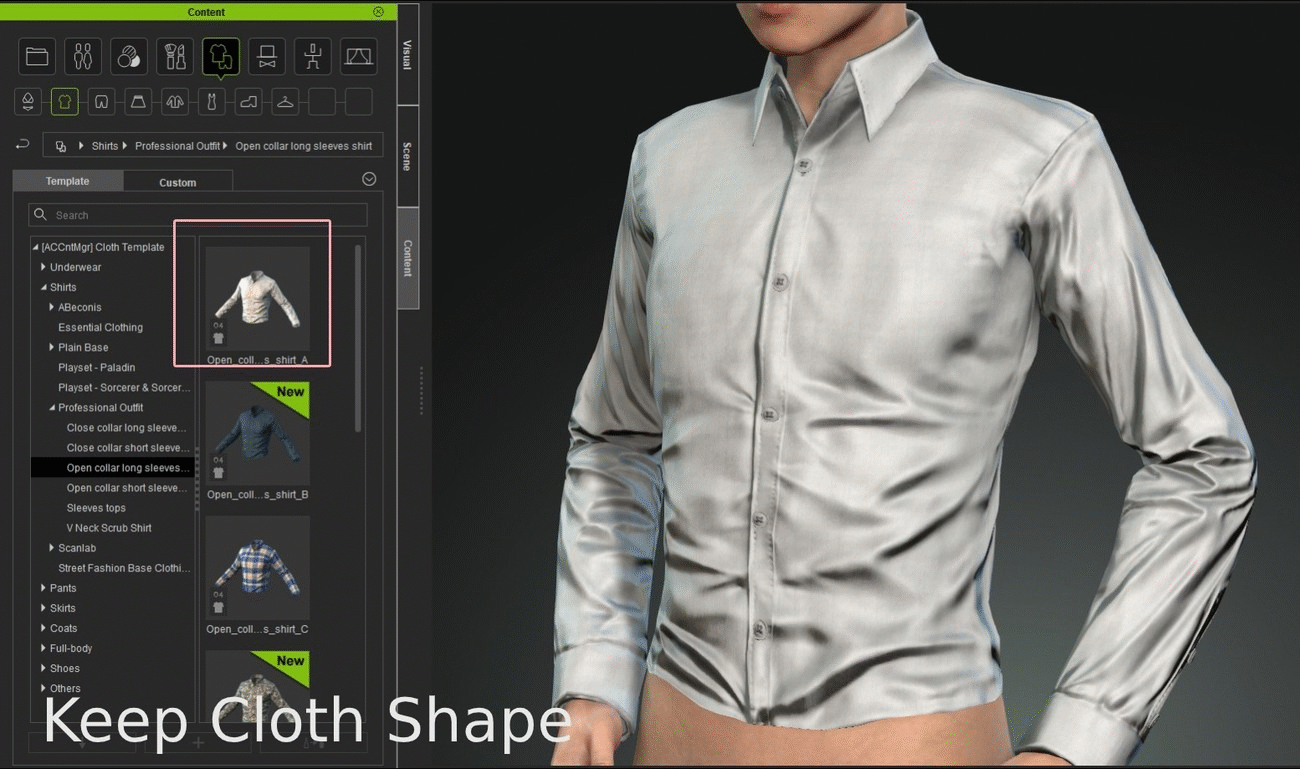
Shirt (Content Pack): Because the shape of the shoulders and collar must be maintained, and the shirt does not hug the body tightly, it is best to apply the Keep Cloth Shape option.
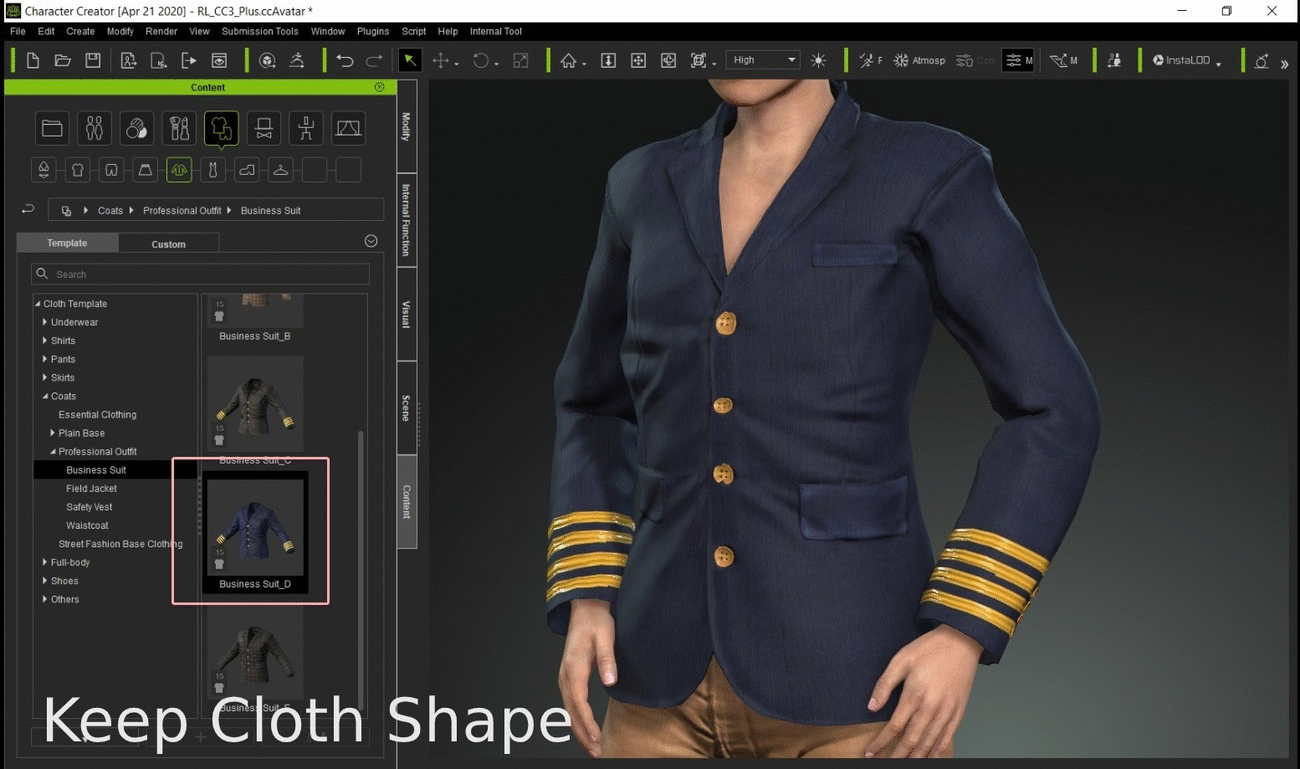
Suit Jacket (Content Pack): The shoulders and the collar must remain stiff and the jacket does not hug the body tightly. Therefore, it is best to apply the Keep Cloth Shape option.
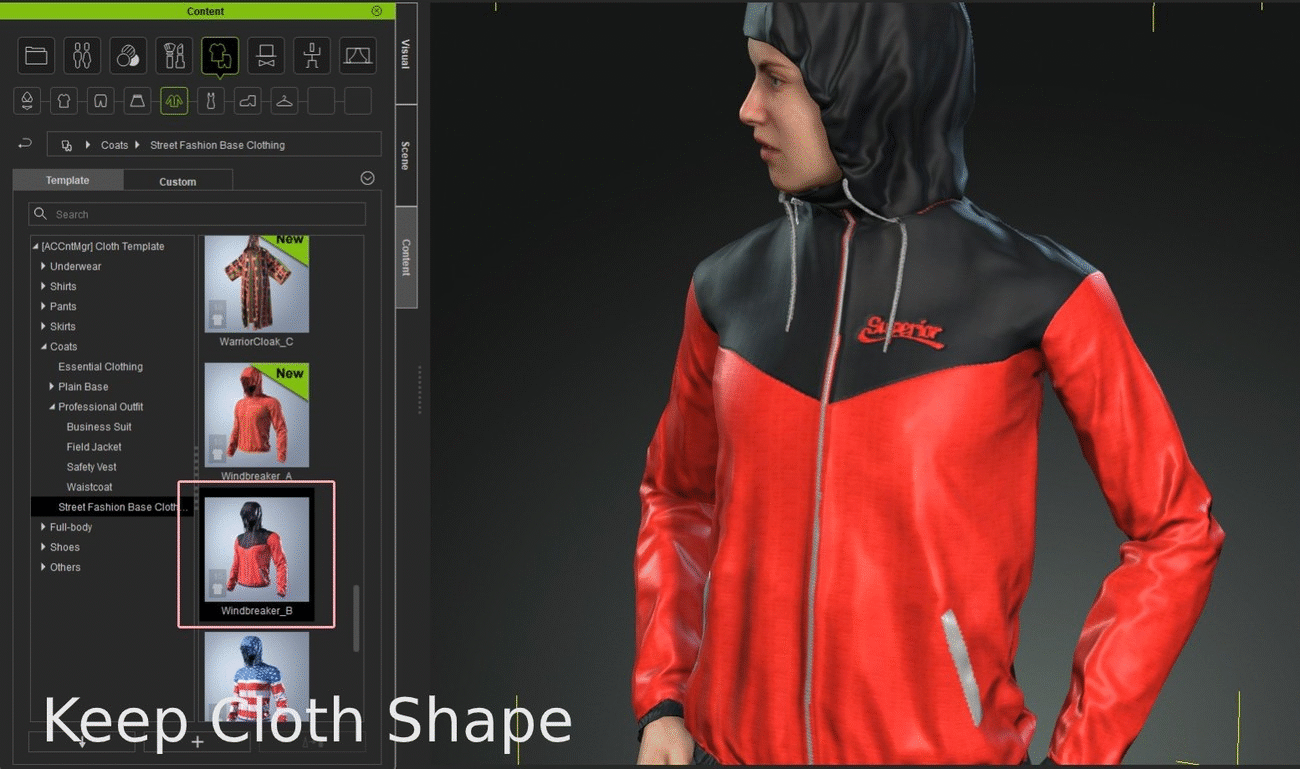
Light Jacket (Content Pack): The shoulders and hoodie must retain their shape. Therefore, it is best to use the Keep Cloth Shape option.
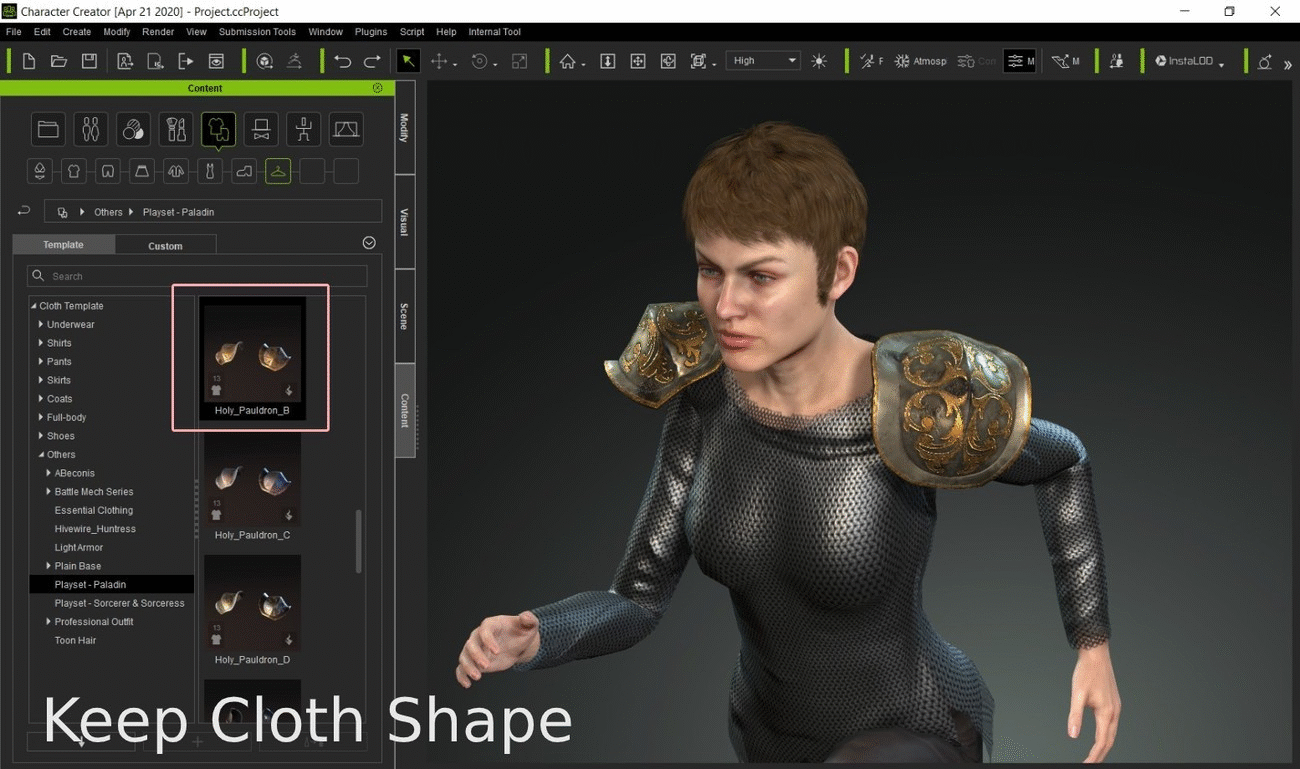
Pauldrons must retain their hard shapes, therefore, Keep Cloth Shape option should be used.
Other armor pieces (for the legs) must keep their form, therefore, it is best to use the Keep Cloth Shape option.
Other armor pieces (top) must keep their hard shapes, therefore, Keep Cloth Shape option should be used.
|
|