|
By sterlingy - 7 Years Ago
|
Hi, I'm trying to figure out if UVs can be adjusted via Maya's UV editor. I see there is a 'Launch UV Reference button here (see pic). Can this somehow link to Maya (or any UV editor)? I am currently creating a base model in CC3 and re-sculpting the mesh in ZBrush. When I bring the resculpted mesh back to CC3, the UV's get stretched, and I would like to 'massage' the UVs to minimize stretching etc.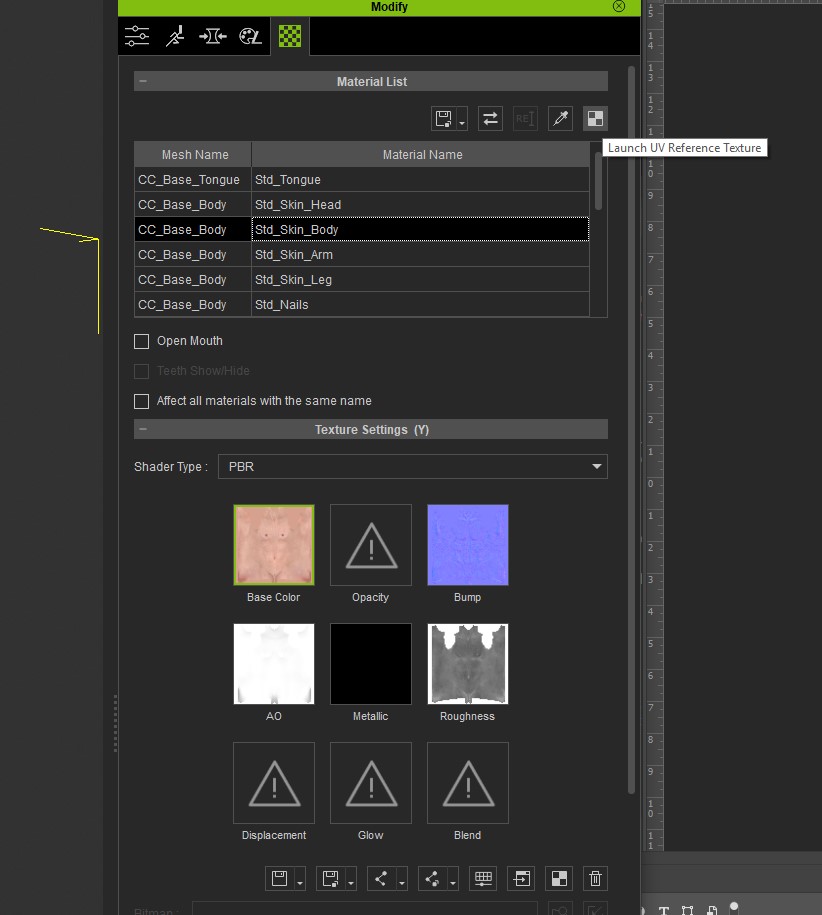
|
|
By illusionLAB - 7 Years Ago
|
|
The "Launch UV Reference" is only a low rez overlay to use as a guide when painting textures. I have had no success with UV maps that have been 'changed' outside of iClone/3DX world - even if it's simply relaxing or smoothing to even out the UV distribution (ie. no changes to island size or placements). In my experience 3DX corrupts the mesh when you 'replace' it after editing the UVs.
|
|
By vidi - 7 Years Ago
|
UV can only changed with the Model , e.g for that you need load the Model in Maya and use the UV Tools
|
|
By sterlingy - 7 Years Ago
|
Thx for the feedback illusionLAB &vidi !
@illusionLAB, great info on 'Launch UV Reference'
@vidi, Yes, I get the model can be loaded in Maya & UVs modified from there. The problem with that, I believe, is that once the UVs are adjusted in Maya's UV editor, this will break the link if I want to migrate back to CC3. My ultimate goal is to output my final models from CC3 taking advantage of its auto-rig/skinning & LOD export features.
My current line of thinking for a clean 'unbroken pipeline:
1. CC3: create base model
'GoZ' to Zbrush
2. Zbrush: Sculpt base model from CC3 & export new hi-res Normal/AO maps (these will be updated again later in Painter)
'GoZ' back to CC3
3. CC3: Apply updated Normal & AO maps to updated sculpt. Make any necessary adjustments to updated mesh as it relates to rig.
***((this is where I would like to make UV adjustments after the Zbrush sculpt may have 'stretched' UVs in certain areas))***
- EXPORT FBX for Substance Painter: (SubD mesh before export for Hi-Res workflow...this is only for texture creation in Painter.)
4. Substance Painter: Create new Hi-Res textures. Export 4K textures (Diffuse/Normal/AO/etc.)
5. CC3: Apply updated maps from Painter. (At this point the model should be finished, Textured and Rigged)
- EXPORT LOD FBX's: LOD-0 through LOD-6
So, you can see my conundrum where I would like to 'adjust UVs'. Is there a way to re-arrange my pipeline somehow to include UV adjustments before painting in Substance?
Any deep thoughts?
|
|
By vidi - 7 Years Ago
|
|
Actually The CC3 Character is already properly UV ing. Modifying not needed. You want transfer the Normal and AO map and I think you run in a problem because Zbrush can not Handle UV sets. There is cumbersome workaround for texture backing in Zbrush for the CC Character . To see in this video...
But if you have 3D coat, it can handle UV sets and baking the Texture in a easier way.
Also for the Term UV think like this a UV map is the 2D flat unwound Projection from the Mesh and it is also the template and is only like a canvas for your textures.
A UV set (groups) are slectet areas (Polygons) from the Mesh store as extra Material ID's, so that parts of the Mesh have now its own map. e.g. seperatly for Face .. Body ... Zbrush overlapping all these maps and handle it not separately ,therefore it needs the trick.
|
|
By sterlingy - 7 Years Ago
|
Thanks vidi!
Its nice to know that CC3 is at least 'assuming' to update the UVs as the mesh is updated.
3D Coat seems to be a nice option for texture baking (not what I'm after in this particular instance though).
One thing I should note, I am well versed in UV editing, with many hours logged over the years.
I guess I am used to modifying my own UVs, and maybe this particular workflow doesn't require it if CC3 can handle it on its own.
Any other deep thoughts welcome ; )
|
|
By vidi - 7 Years Ago
|
|
Why want you create a new UV Layout of the CC Charactermesh ?
|
|
By sterlingy - 7 Years Ago
|
|
vidi (1/5/2019)
Why want you create a new UV Layout of the CC Charactermesh ?
After modifying in Zbrush, polys get moved around and that creates stretching of the UVs, so yes, I want to massage them back into something that will prevent visual artifacts.
|
|
By illusionLAB - 7 Years Ago
|
|
If you alter the UVs, you won't be able to "replace mesh" in 3DX - the mesh gets completely corrupted. I seem to remember having success with an exported FBX model but on import it 3DX considered it a "non-standard" character and I had to retarget the bones. I also think you lose all the face morphs, or the mapping (ie. you need to manually reassign all the face shapes).
|
|
By 4u2ges - 7 Years Ago
|
@Sterlingy I cannot be sure why the link is getting broken after modifying UVs in Maya, since I do not have it.
But I sure can export character out of CC, bring it to Blender,
edit UVs in any way I'd like and successfully bring Character back to CC3.
I do not have anything to fix, so I unfixed it :)
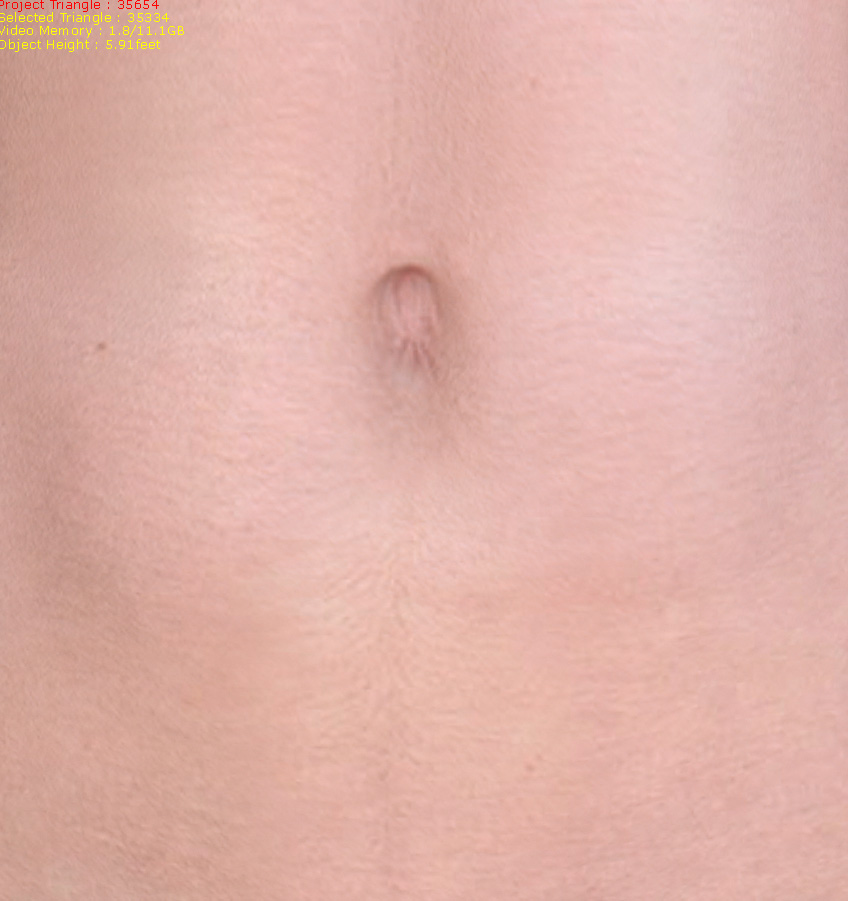
normal navel
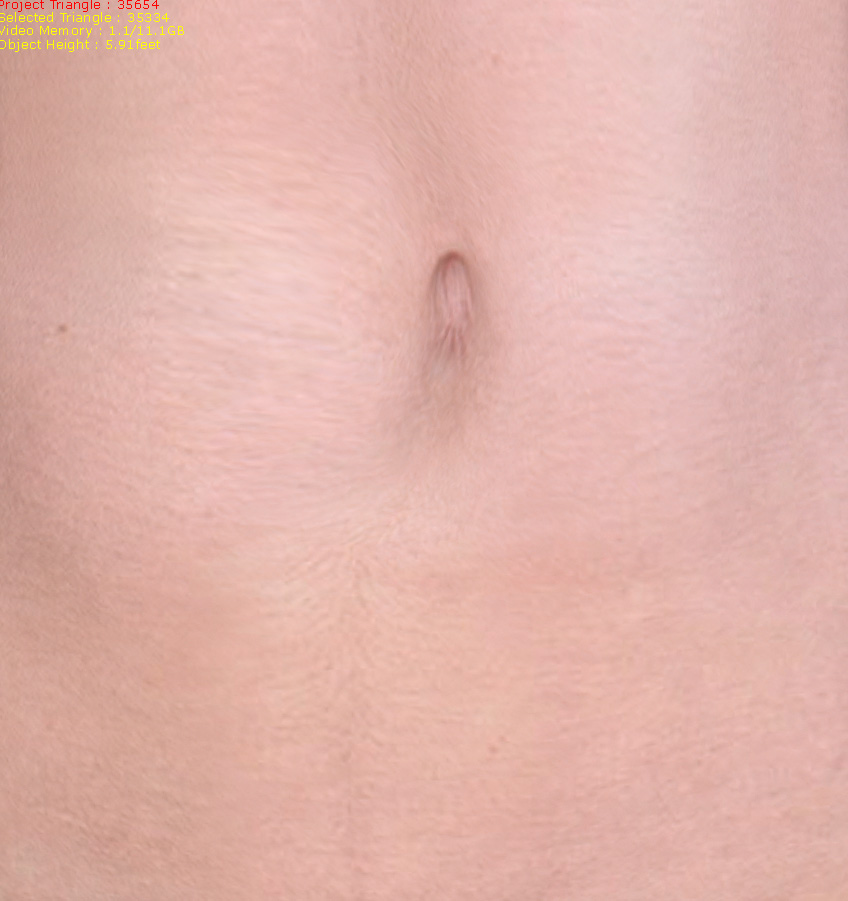
deformed body UV in Blender for navel distortion
|
|
By sterlingy - 7 Years Ago
|
|
thx illusionLAB. good info!
|
|
By sterlingy - 7 Years Ago
|
thx 4u2ges. very interesting about using Blender.
Question: What format (FBX,OBJ, etc) did you export from CC3 for use in Blender and back again? I am curious if there are any settings for the export/import format you used to be made aware of..?
|
|
By illusionLAB - 7 Years Ago
|
|
On that note 4u2ges... what is your step by step workflow? I've had no success with 3D Coat or Blender UV edits on OBJ "mesh" from 3DX (and "replace mesh").
|
|
By 4u2ges - 7 Years Ago
|
Hey guys.
There should probably be some video tut on general Import/Export routine in/out of CC through Blender but it is pretty much straightforward otherwise.
In a nutshell..
1. In CC Export avatar to FBX (Closed Character). You may leave it naked to avoid taking extra mesh (such as hair/cloth) in and out.
At the prompt select "Blender" as a target and uncheck "Include Motion". Again, there is no need to transfer extra bytes, which would be useless in this case.
2. In Blender, import FBX (exported from CC).
3. When finished in Blender just Export avatar as FBX with all the default Blender settings except for one. In "Armatures" section uncheck "Add leaf Bones" as pictured

4. Back to CC: "Create > Cloth, Hair, Acc" from the menu and select FBX file exported from Blender. You would also need to supply an fbxkey generated while avatar was originally exported out of CC.
Notes:
UV editor in Blender may not be the best there is, but it sure has enough tools for basic editing. There are some tutorials available on YouTube for editing UVs in Blender. I recommend checking them out.
Make sure to open Blender fresh before importing FBX into it. Blender has a habit to keep some stuff in session and can break naming convention of newly imported FBX file (which might lead to failed import when avatar is back to CC).
You may edit UV maps in Blender and reshape your avatars' mesh with various tools, but do not add/remove bones/vertices. Do not rename anything in Blender (mesh, materials, bones...). Any of the above would lead to failed import in CC. BTW that is true for any editor - not only Blender.
Expect that when you import avatar back to CC you might loose some maps, opacity for some materials would be reset to 0, strength for all Base Color maps would be reset to 80% (I have a little routine for Blender to prevent that https://forum.reallusion.com/FindPost345329.aspx)
I wish CC has the same as in iClone - Save/Load Materials Plus. But they only offer Load/Save All Object Texture in CC, which I could not make work anyhow (maybe I need to read a manual for once, which I never do :)).
|
|
By sterlingy - 7 Years Ago
|
Wow, that was aces @4u2ges!
I am not a Blender user, but went ahead and downloaded it to test you procedure.
Basically, It all worked!
I messed up a few small things clickety-clacking around in Blender (ie 'learning Blender in 15 min'), but managed to get into the UV editor.
In the editor, I moved a few UVs around hap-hazardly around the lips, just trying to mess it up a bit (so I could see a noticeable result in CC3).
Once finished I exported an FBX from Blender, and imported into CC3.
Here is the original CC3 model, where the lip UVs haven't been touched-up:

And here is the modified Blender model, where the lip UVs have been messed with, and imported back into CC3:

You can see, especially around the bottom lip, the new UVs have changed.
This is obviously not the UV job you would want to do, but in this test it's great = proof of concept.
A few things to note when the updated FBX was imported back into CC3:
1) I had the following 'Asset Error' (I probably messed up exporting the FBX from Blender somehow):

2) The mesh 'scooted' a bit forward on import back into CC3 (I probably accidentally moved the mesh a bit in Blender)
3) The materials (like you had mentioned would happen), imported with different properties.
4) Once in, the mesh was skinned properly, posed fine, mouth opened correctly, and all of the morph sliders were working.
My key takeaway from this, is that it does work = GREAT STUFF @4u2ges!
I think with a little pipeline TLC, this is a viable solution. I need to test this with Maya now, In principle, should work with any 3D program, as long as certain rules are maintained with UV layout throughout.
* Since I don't know Blender's UV tools very well, I didn't know how to isolate overlapping UV islands in the editor (ie. Head/Body/Arms/etc.) to work on them individually.
* When I messed with the UVs in Blender, I just used the 'sculpt' brush to move UVs around roughly where the mouth was, but I could have easily grabbed some UVs from other parts of the body that were stacked in the same 1:1 space.
* I assume this workflow can be achieved in Blender's UV editor without messing up the link to CC3?
|
|
By animagic - 7 Years Ago
|
|
This is an interesting workflow, because doing this with 3DXchange gave major problems. It seemed any change to the UV mapping gave an immediate crash, using the Replace Mesh option.
|
|
By Rampa - 7 Years Ago
|
|
Just don't go replacing the UV's with something else. Adjusting within the UV islands is fine.
|
|
By illusionLAB - 7 Years Ago
|
|
Thanks 4u2ges! I haven't tried it yet, but it seems like a winner! 3DX is a fickle beast at times, so it's good we can bypass it altogether when customizing characters (another clang on the death toll for 3DX I hope... I still don't understand why it hadn't been built into iC pipeline).
|
|
By 4u2ges - 7 Years Ago
|
You are welcome guys. A few notes on Sterlingys' tryout (that was very good BTW for the first time Blender user!)
1. The cube error you are getting is from the default Blender cube which placed on a stage when you start Blender.
You have to delete it I suppose before importing a character (I have a custom workspace and preferences in Blender where there is nothing on the stage when I start it).
2. That mesh forward thing is I think a CC problem. I noticed that while making some morphs for iClone with OBJ.
That could possibly relate. Need to take some time to investigate.
3. Well, materials you know. That is how Blender handles and exports them.
Some more helpful (hopefully) tips/workflow (anyone is welcome to add more).
1. Use Orthogonal mode (hit 5 on numeric pad)
2. Delete the cube (instead of hiding it)
3. Hide a gismo and switch to Material view

4. Enable Lock to Cursor (N key to enable/hide preferences panel). This extremely useful for navigating around.
Place a cursor wherever and instantly zoom/rotate around it (I wish we had something like that in iClone!)

Note: Each layout has its own preferences. So you might need to repeat those 5 steps for "Default" and "UV Editing" Layouts.
Selected preferences could be saved as default in "User Preferences". Alternatively you can just add a UV edit panel to the Default layout.
(You may create unlimited layouts - Blender is extremely flexible).
5. Add a Hemi light (while in Object mode Shift+A > Lamp > Hemi) . You may hide it in Outliner. Hemi light brightens the mesh in the Material view mode.
6. To overcome overlapping UVs, work with one material at a time. I usually hide everything else but the material I work with:
* Hide Armature, Teeth, Eyes and Tongue in Outliner. Select Body and switch to Edit mode
(TAB key switches between Edit/Object modes while mouse cursor is within the stage area)
* While in Edit mode hit an A key couple of times until no vertices are selected.
* In Materials pick a material and click "Select"

* Do Ctrl+I to invert selection and then H key to hide it. The result is - only arms are shown.
(To get everything back hit Atl+H).

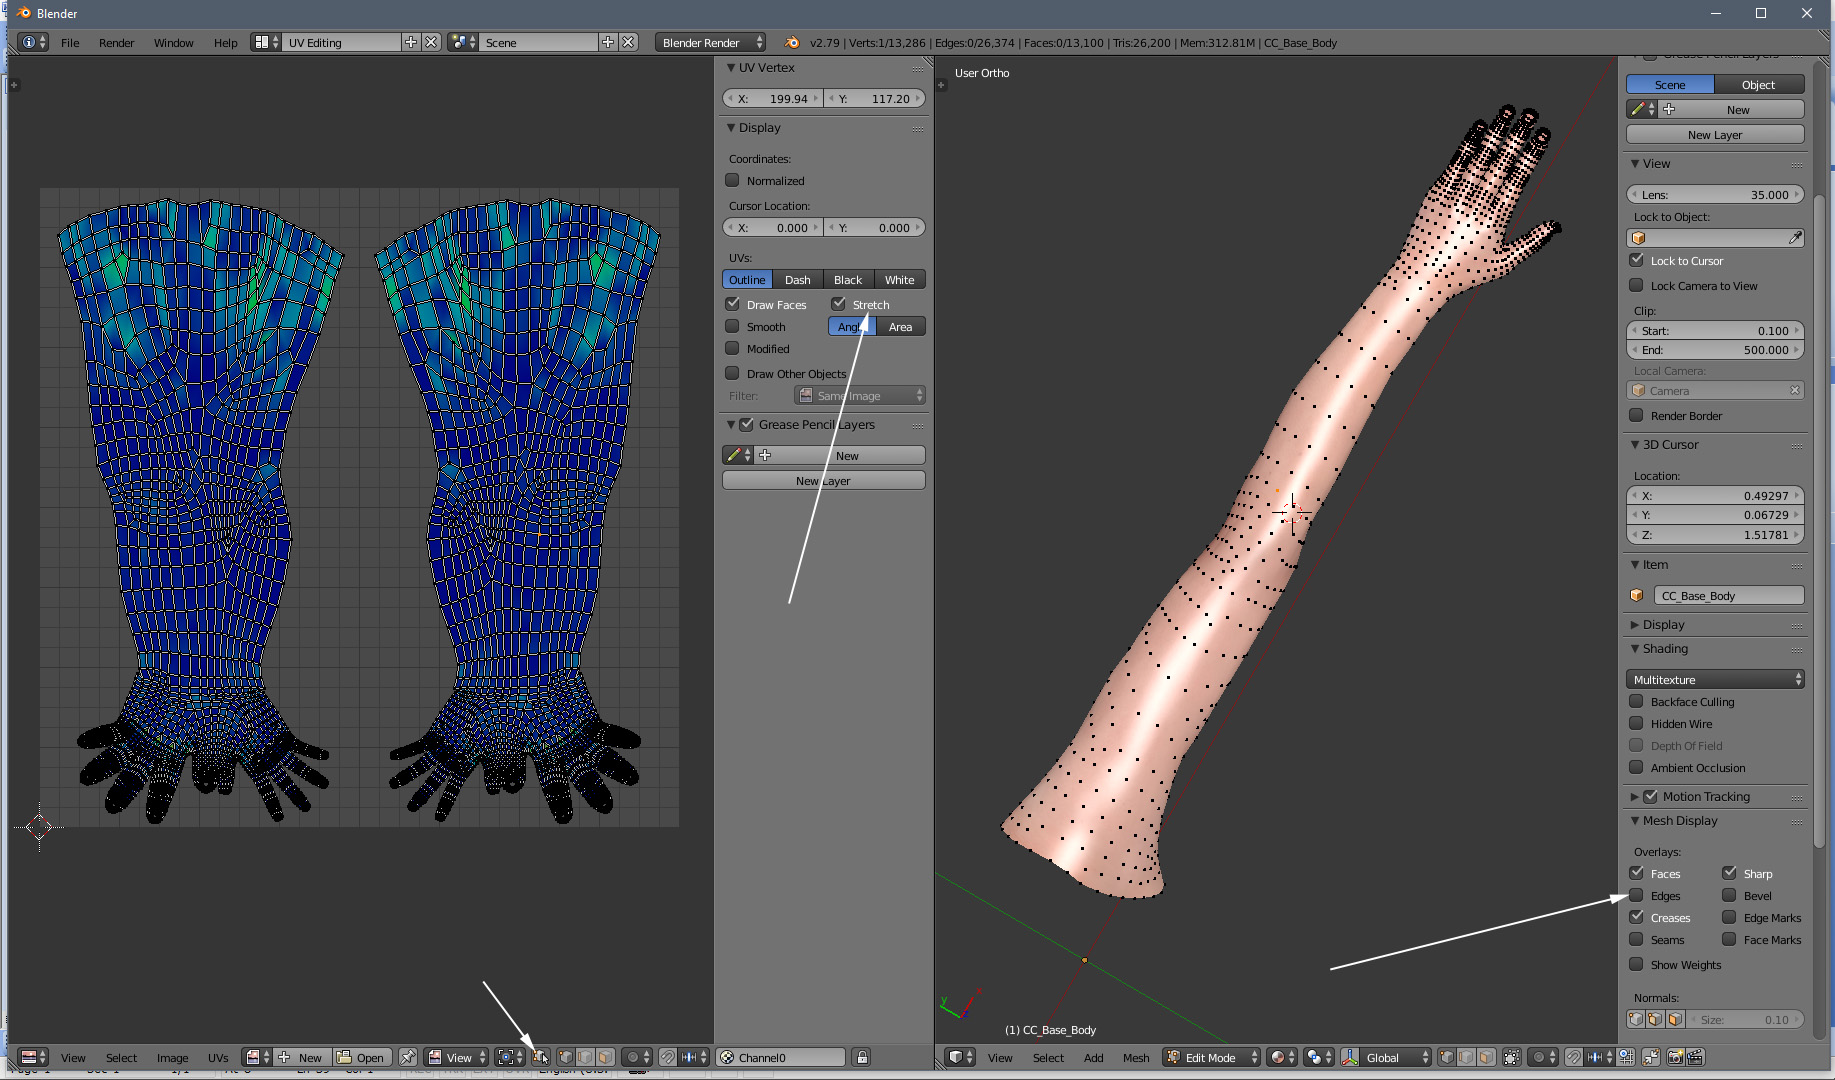
* In UV Editor select whichever UV mode suits you best. Optionally enable Stretch to view the areas of tension (blue - is fully relaxed, green - stretched).
You may also hide Edges on the mesh for viewing material better.
* Explore and try all the available UV editing tools from respective menus
On a side note. Somebody with Maya > CC pipeline experience should come forward and help you with the link problem. I do not believe there should be one.
|
|
By sterlingy - 7 Years Ago
|
@4u2ges. You are a rock star!
* I figured the 'cube' thing was the default Blender box, thx for confirmation!
* Pls. update if you figure out what the 'mesh forward thing' is..
In the meantime, will sit back by the fireplace and dig into your latest 'novel' of helpful tips & workflow, hugely appreciated!
|
|
By illusionLAB - 7 Years Ago
|
Hemi light? Haven't you heard? In v2.80 the Hemi light is "no more"... I've paused on making tutorials with Blender as there have been so many changes/improvements in the past few months - far easier to navigate (for newbies anyway).
|
|
By 4u2ges - 7 Years Ago
|
Good luck Sterlingy!
Mark, I have seen you guys been playing with 2.8 and eevee. Me? I'm kind of slow when it comes to changes.
I am still with 2.79 (I would have still been with 2.78, if not for Mike Kelley, who did not trust it when we were troubleshooting some issues).
But I will sure check the new 2.8.. well sooner or later :)
|
|
By sterlingy - 7 Years Ago
|
@illusionLAB & @4u2ges
I was wondering how to 'brighten' the scene in texture mode. Default is awfully dark.
If the Hemi Light is no more, what is the 'new best way' to brighten things up?
In Maya, there are a myriad of ways to do this, i'd assume Blender has a few too.
|
|
By 4u2ges - 7 Years Ago
|
That is a question to IllusionLAB exclusively. He's been playing with v2.8 beta a lot ;)
Edit: OK downloaded v2.8 - 4 area lights would do fine evenly illuminating the object at strength 0.6-0.8.
But darn! Hiding lights in viewport would turn them OFF as well? No way!
Oh boy! Switching to any view mode resets the view to Perspective from Orthogonal...
No, not for my workflow! No just yet..:Whistling:
|
|
By illusionLAB - 7 Years Ago
|
Quick video to get more light... without more lights! Each window... layout, UV, shading etc. remembers the last view you setup... I haven't done it, but I'm sure you can define your own default "ortho" view for UV or Texture.
|
|
By sterlingy - 7 Years Ago
|
@illusionLAB
Great Video! Fantastic.
|
|
By illusionLAB - 7 Years Ago
|
|
No probs... I'm diving between so many different software packages I've started recording mini tutorials so I don't have to keep learning the same thing over and over! ;-)
|