|
By Peter (RL) - 9 Years Ago
|
Dear iClone Users,
It's that time again when we have another new iClone 7 update and need your continued assistance to help us track down any remaining bugs, glitches or other annoying issues.
iClone 7.2 adds several exciting new features and also comes a number of important fixes and enhancements. It also introduces the arrival of the Popcorn FX plugin.
Important: If you do find any bugs, issues or glitches in the 7.2 update, please can you report them first in the Feedback Tracker. Then feel free to discuss the issues in this thread. However do make use of the Feedback Tracker first to log the issue.
As always it will help us greatly if we can keep all outstanding issue discussion in the one place (this thread). This will help the development team keep track of any problems.
Please do try to provide your full system specifications and a detailed description of the problem when reporting issues. If you can provide steps so we can try and reproduce the problem this will be even better.
Many Thanks. 
|
|
By Cary B - 9 Years Ago
|
|
I'm looking for confirmation on this before I post it in feedback tracker. I am having an issue with the motion layer. I find I cannot copy and paste keyframes for individual bones any longer within the motion layer. I used to be able to use the motion layer to adjust, say the position of the foot, copy that keyframe in the motion layer, and paste it in the foot position further down the timeline. Now The copy command still exists in the right-click menus, but it will not work. I can copy only transform keys for all the bones at once. Are others having this issue?
|
|
By Alien Maniac - 9 Years Ago
|
I was watching the video Tut by RL on Timeline enhanced features. I have IC7.2 running and verifying as I go. Problem is;
(note; I have many character motions (2) including animated hand gestures and an audio file loaded.) NOTHING SHOWS UP in the timeline except the box for motions.
NADA thing. No Keys at all. I can see the body parts but nothing is in the timeline motions.
Is there a secret or did I just miss a step or is this a bug??
| | | | | | | | |
Text-to-speech function is limited to 200 characters |
|
By Cary B - 9 Years Ago
|
|
Never mind, I figured out that the issue I mentioned above is related to the curve editor, and apparently can no longer be done with a simple copy and paste. The process is now much more complex, involving sampling sections of motion clips for particular bones. More possibilities...at a much higher learning curve. I am trying to get my old brain to comprehend at least some of the basics of this tool.
|
|
By TonyDPrime - 9 Years Ago
|
There is an issue with HDR Bloom - Bloom rings
Basically when you add HDR Bloom to a scene, the gradient from light to dark will be separated by dark lines, making it look like rings.
Maybe the program is not able to calculate where the next gradient mark starts on a per-pixel basis, or maybe it thinks it has to add color to bridge a gradient gap, but it is inserting the wrong color.
Anyway, it exists no matter what resolution, blur, or super-sampling is applied.
And, the more pronounced the contrast the more pronounced the issue

The issue also shows in this demonstration video by RL:
I wrote some finding detail here
https://forum.reallusion.com/351123/iClone-72-Glow-HDR-Bloom-Enhancements
so am listing issue here as a 7.2'er.
|
|
By mtakerkart - 9 Years Ago
|
I have a render issue like we had on the beta 7.0 test. Depending on the preview size window the glow amount change.
Same problem if the super sampling render is enable.
|
|
By rogwen - 8 Years Ago
|
I cannot use 7.2 patch.
Direct puppet is the tool I have used most. Now its useless. The following happens on my Laptop AND stationary PC (wich is brand new and has just Iclone installed)
So this is clearly not a PC issue.
When I record a clip with direct puppet the first time everythings ok. but when I try to animate other limbs on same clip with more recordings,the strangest things happens. You can see it here: https://youtu.be/TDqsNVuNRHc
|
|
By rogwen - 8 Years Ago
|
|
I have posted this issue in feedback tracker. But whats the point when no one cares about answering?
|
|
By mark - 8 Years Ago
|
Glad you did report it because I just tried and it's a bit wonky for sure!
|
|
By animagic - 8 Years Ago
|
|
@rogwen: It is the weekend now in Taiwan were development is situated. Also, you never get an immediate response anyway as things need to be investigated. But it does get looked at and your entry allows other users to confirm the issue.
|
|
By Rampa - 8 Years Ago
|
rogwen (1/5/2018)
I cannot use 7.2 patch. Direct puppet is the tool I have used most. Now its useless. The following happens on my Laptop AND stationary PC (wich is brand new and has just Iclone installed) So this is clearly not a PC issue. When I record a clip with direct puppet the first time everythings ok. but when I try to animate other limbs on same clip with more recordings,the strangest things happens. You can see it here: https://youtu.be/TDqsNVuNRHc
Are you using identical mouse movements for each arm? Moving the mouse vertically rotates one axis, and horizontally another. When I move my mouse vertically for each arm, I am getting what I expect. When I move the mouse horizontally for one arm, it looks like your video example.
|
|
By rogwen - 8 Years Ago
|
The movement is not the issue.First two recordings work as expected. Then the problem occur. It wont show my next recording.Not before I record another one. Then maybe the previous will show. But not the new one. Sometimes it mirrored...A real mess. Does not matter If I unlock feet . This must be a bug. It did not happen in 7.0
|
|
By mark - 8 Years Ago
|
That's what seems to be happening to me, it was by the third recording ...
P.S. and the avatar even jumps to another location...very weird
|
|
By TonyDPrime - 8 Years Ago
|
Here is another issue:
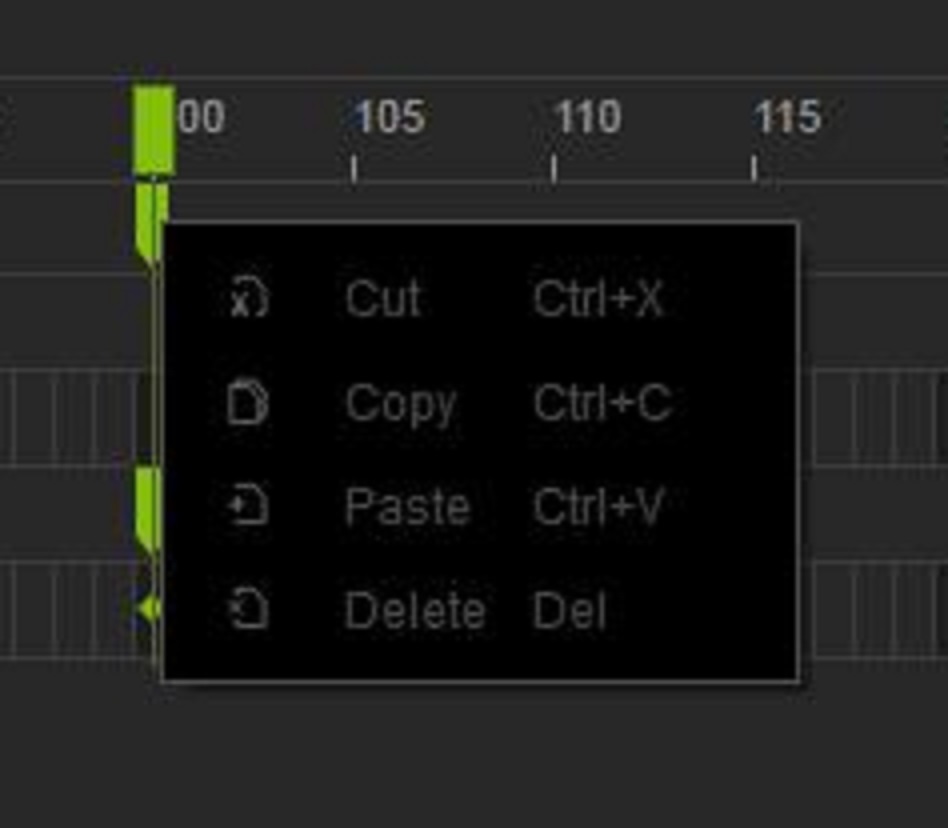
When adding Post Effect (Visual > Post Effect), such as an LUT, the resulting key(s) created in timeline can not be deleted from timeline.
Right Click is grayed-out.
|
|
By Rockoloco666 - 8 Years Ago
|
|
Does it work if you hit delete on the keyboard?
|
|
By toystorylab - 8 Years Ago
|
|
TonyDPrime (1/8/2018)
Here is another issue:
When adding Post Effect (Visual > Post Effect), such as an LUT, the resulting key(s) created in timeline can not be deleted from timeline.
Right Click is grayed-out.
Confirmed...
And NO, you can't delete it by hitting delete on the keyboard...
Only "undo" works, but that's no help if you decide not to use it after doing a lot of work.
|
|
By Rogue Anime - 8 Years Ago
|
|
TonyDPrime (1/8/2018)
Here is another issue: When adding Post Effect (Visual > Post Effect), such as an LUT, the resulting key(s) created in timeline can not be deleted from timeline. Right Click is grayed-out.
Friends - I have not run into this YET... Although I have noticed a few iClone 7 bugs, this isn't one I have had a problem with. I was editing HDR effects on my timeline this morning. Select & delete/moving HDR animation sliders are no problem here... Hmmm not certain what the problem could be there. ~V~
|
|
By yossigolan - 8 Years Ago
|
Yet another issue:
When adding a .POPVIDEO plane that contains sound to a new empty project then:
1. the popvideo clip is working fine in iclone itself, and it is played well and you can hear the sound of the clip.
2. when trying to render the file you get a MP4 or AVI that is missing the popvideo clip sound.
Thus playing the file you can't hear the sound of the popvideo clip.
I even tried to render the audio only (WAV) but still i get a muted WAV file.
I've allready installed K-Lite package but that didn't solved it.
I have an intel i7-7700 cpu 3.6Hgz 16GB ram and nvidia 1060 with 6GB memory.
I've also tried this procedure on a different computer and have the exact same issue.
My project is based on .popvideo clips that contain sound and this issue is preventing me
from rendering my project...
Your help will be very appreciated.
|
|
By wires - 8 Years Ago
|
|
TonyDPrime (1/8/2018)
Here is another issue:
When adding Post Effect (Visual > Post Effect), such as an LUT, the resulting key(s) created in timeline can not be deleted from timeline.
Right Click is grayed-out.
Confirmed.
No key frames set on the Post Effects track can be deleted/copied/cut or whatever using the right mouse button.
Key frames set on any other track can be deleted as expected.
|
|
By wires - 8 Years Ago
|
A note on my post above.
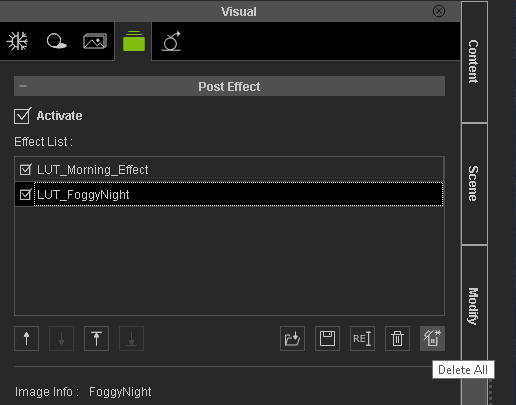
All of the post effects can be deleted simply by selecting them in the Effects list panel and then clicking on the "Delete" icon.
There are 2 Delete options - Delete
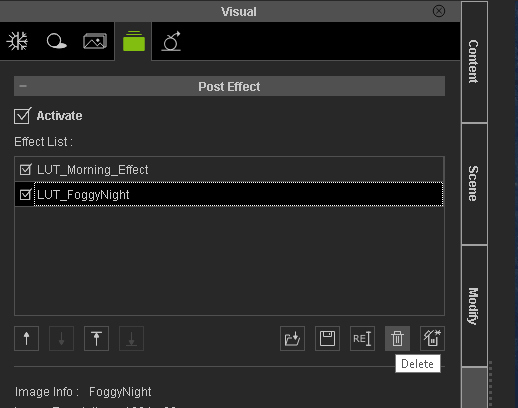
and Delete All if there are several effects in the list.
|
|
By TonyDPrime - 8 Years Ago
|
wires (1/8/2018)
A note on my post above. All of the post effects can be deleted simply by selecting them in the Effects list panel and then clicking on the "Delete" icon. There are 2 Delete options - Delete and Delete All if there are several effects in the list.
NICE...This is a good workaround, thanks for this!
I could imagine, as ToystoryLab pointed out, if I had multiple keyed instances it will be quite cumbersome to rely on the workaround, it optimally should be delete-able on the timeline itself.
ie- if you have several instances, you shouldn't be forced to delete all instances because you want to take away one instance.
Although, an additional workaround could then be to add an independent instance in the Post Effect list, for each time-lined instance. That way, if you had 5 instances, and if you wanted to delete #3, you just delete the 3rd instance in the list, thus preserving the other 4. But, this agreeably will be unnecessarily complex and problematic.
|
|
By TonyDPrime - 8 Years Ago
|
Rogue Anime (1/8/2018)
TonyDPrime (1/8/2018)
Here is another issue: When adding Post Effect (Visual > Post Effect), such as an LUT, the resulting key(s) created in timeline can not be deleted from timeline. Right Click is grayed-out.
Friends - I have not run into this YET... Although I have noticed a few iClone 7 bugs, this isn't one I have had a problem with. I was editing HDR effects on my timeline this morning. Select & delete/moving HDR animation sliders are no problem here... Hmmm not certain what the problem could be there. ~V~
To your thought, it indeed seems the HDR slider stuff (ie- IBL strength, Exposure, etc) is in fact deletable on the timeline.
But when you add an actual Post Effect it cannot be deleted.
So, yes, you can modify the HDR settings, ie - set Bloom amount on frame 100 to max, and then go and later delete that key on frame 100.
But if you add a Post Effect LUT, and then say change the amount of this LUT on frame 100, you cannot delete that key on the timeline, it is greyed out. You are stuck with it, unless deleted from the Post Effect list as Wires pointed out
Keys in timeline from here CAN be deleted
Keys in timeline from here can NOT be deleted

Regards!
TonyD
|
|
By 4u2ges - 8 Years Ago
|
Another workaround, is to simply override the key you are trying to delete. Drag the very first frame key over the key you are trying to delete. And then, when key is overridden, drag that key back to frame one - Done!
|
|
By Rogue Anime - 8 Years Ago
|
|
wires (1/8/2018)
All of the post effects can be deleted simply by selecting them in the Effects list panel and then clicking on the "Delete" icon.
I have always simply moved the LUT/HDR keyframes using the mouse where I want to on the timeline, or just hit the 'delete' key to remove them, so I have had no issues here having not opposite clicked on the mouse to delete keyframes. ~V~
|
|
By 4u2ges - 8 Years Ago
|
Rogue Anime (1/9/2018)
wires (1/8/2018)
All of the post effects can be deleted simply by selecting them in the Effects list panel and then clicking on the "Delete" icon.
I have always simply moved the LUT/HDR keyframes using the mouse where I want to on the timeline, or just hit the 'delete' key to remove them, so I have had no issues here having not opposite clicked on the mouse to delete keyframes. ~V~
HDR - Yes
LUT - No
Anything under "Effect" cannot be deleted regardless (after last update I think). Not with right mouse click nor with delete keyboard key as Tony discovered. Did you try it lately on IC 7.2?
And no Curve Presets are available either for Effects...
Here is a quick video on Effect keys with override option
|
|
By TonyDPrime - 8 Years Ago
|
At minimum it would be more intuitive if you would right-click and you could delete it, because otherwise it makes the user wonder if there's some functional reason why it shouldn't be able to be deleted.
Thinking out loud, perhaps this is connected to the earlier notes by Shadoesword in this thread about copying and pasting keys for individual bones, and how the introduction of the curve editor changed some of the workings.
@4u2ges - in the 7.1 issues thread, you brought up that we no longer had the ability to set curve presets from the key root.
Does that issue still remain, or did you find a workflow that works okay? Just was remembering that.
|
|
By 4u2ges - 8 Years Ago
|
|
TonyDPrime (1/9/2018)
At minimum it would be more intuitive if you would right-click and you could delete it, because otherwise it makes the user wonder if there's some functional reason why it shouldn't be able to be deleted.
Thinking out loud, perhaps this is connected to the earlier notes by Shadoesword in this thread about copying and pasting keys for individual bones, and how the introduction of the curve editor changed some of the workings.
@4u2ges - in the 7.1 issues thread, you brought up that we no longer had the ability to set curve presets from the key root.
Does that issue still remain, or did you find a workflow that works okay? Just was remembering that.
No Tony, the problem still remains. Nobody entered this particular one into FT. But I kind of used to it... Geee, all I do is get used TO...
But I found out how to really delete the Effect keys with keyboard "delete". Whatever you do, do NOT right mouse click on that key. If you click on it once and grayed out menu showed up, "Delete" key would stop working. BUT, if you just right mouse click on ANY other working key (like HDR) after that, then you may delete an Effect key with the "Delete" keyboard key... Now just get used to that :)
|
|
By Rogue Anime - 8 Years Ago
|
|
4u2ges (1/9/2018)
[quote]HDR - Yes LUT - No Anything under "Effect" cannot be deleted regardless (after last update I think). Not with right mouse click nor with delete keyboard key as Tony discovered. Did you try it lately on IC 7.2?
4u2ges - I have no problems deleting effect keyframes on my timeline in 7.2 simply using the 'delete' key - Here is a quick video of me doing this on my timeline to show that it works for me.. ~V~
|
|
By 4u2ges - 8 Years Ago
|
Right Val, and I found the source of the problem later on with "delete" key (post above). If you do right mouse on effect key once, the "delete" would stop working, until you do right mouse click again on some key other than effect... weird!
|
|
By TonyDPrime - 8 Years Ago
|
Rogue Anime (1/9/2018)
wires (1/8/2018)
All of the post effects can be deleted simply by selecting them in the Effects list panel and then clicking on the "Delete" icon.
I have always simply moved the LUT/HDR keyframes using the mouse where I want to on the timeline, or just hit the 'delete' key to remove them, so I have had no issues here having not opposite clicked on the mouse to delete keyframes. ~V~
Ahhh...
Now having read what 4u2ges just posted, you were never right-clicking the mouse button, and thus, you encountered no issue....
Whereas, I was always right-clicking to try to get this to work, and then even if I would next attempt a keyboard-delete, I would find it didn't work.
Okay great, like you show in your video, and like 4u2ges described, a workaround is if you DO NOT use the right mouse button, you are good to go. I can as well also delete now if not having right-clicked.
ISSUE - A right-click on a Post-Effect timeline key locks out that post effect key from being able to be deleted.
Workaround involves using any other means to delete the post effect, including keyboard delete key, without ever using a mouse-button right-click on that key.
In a way, the right mouse button winds up being the wrong mouse button to press.
Think about that for a moment....
.
|
|
By Rogue Anime - 8 Years Ago
|
|
4u2ges (1/9/2018)
Right Val, and I found the source of the problem later on with "delete" key (post above). If you do right mouse on effect key once, the "delete" would stop working, until you do right mouse click again on some key other than effect... weird!
4U - Always the NEXT issue, OTW! Thanks for your reply. The oddest thing is, since I had no issues & it works fine for ME, I had no idea others were having the issue until I read-the-thread! Wonder what ELSE I'm getting right... lol ~V~:laugh:
|
|
By Rogue Anime - 8 Years Ago
|
|
TonyDPrime (1/9/2018)
Ahhh...In a way, the right mouse button winds up being the wrong mouse button to press.
Think about that for a moment....
And for a dyslexic left-handed person w/a left-hand mouse, that was a real brain-bleeder! ~V~ ;)
|
|
By TonyDPrime - 8 Years Ago
|
Rogue Anime (1/9/2018)
TonyDPrime (1/9/2018)
Ahhh...In a way, the right mouse button winds up being the wrong mouse button to press.
Think about that for a moment....
And for a dyslexic left-handed person w/a left-hand mouse, that was a real brain-bleeder! ~V~ ;)
Whoa! :laugh:
|
|
By TonyDPrime - 8 Years Ago
|
Well, I just re-discovered that Speedtree still conflicts with MixMoves...
Same Workaround - iCLONE TEMPLATE > MOGRAPHCLASSIFIED> "00 Female (CC)" folder....change folder name to something else (ie - "00 Female (CC) 1) temporarily before loading iClone.
If you change the name, then Speedtrees appear normally, otherwise, they are invisible. Note that Mix Moves then becomes unavailable.
MixMoves and SpeedTree...
I thought they were going to try and make it work...I didn't realize they were still separated, dating other parts of iClone...weren't they going to therapy or something? What have they been saying?
In other words....GOSSIP TIME!!! :rolleyes:
|
|
By Rogue Anime - 8 Years Ago
|
|
TonyDPrime (1/13/2018)
MixMoves and SpeedTree... I thought they were going to try and make it work...I didn't realize they were still separated, dating other parts of iClone...weren't they going to therapy or something? What have they been saying? In other words....GOSSIP TIME!!! :rolleyes:
Too funny! :laugh: ~V~
|
|
By 4u2ges - 8 Years Ago
|
Not particularly for v7.2, but there should be a better memory management in iClone IMO. Most of the the freezing and crashing problems in applications come from poor memory management and leaks. I did not extensively investigated/tested this. I understand some stuff needs to be cached for fast access. But nowadays with SSDs it should not be that much of a problem.
Just a fact. Today I opened some intense scene (textures vise). It was initially saved in "quick mode" so I can animate without a hassle. Took about 900 Mb in RAM. I did not switch the mode, did not add any new props. Only animation on a timeline and a few motion clips (deleted and added number of times) and a few saves. 2 hours later RAM taken by iClone was above 5 GB. Why keep that much stuff no longer needed in memory?
I am not even mentioning Indigo. Almost nothing is getting released once you open and close your scene in Indigo. It is not that critical with simple scenes. But my RAM used to get maxed out on some complex scenes after just a few tries. Always have to close and restart iClone fresh.
Just thoughts...
|
|
By 4u2ges - 8 Years Ago
|
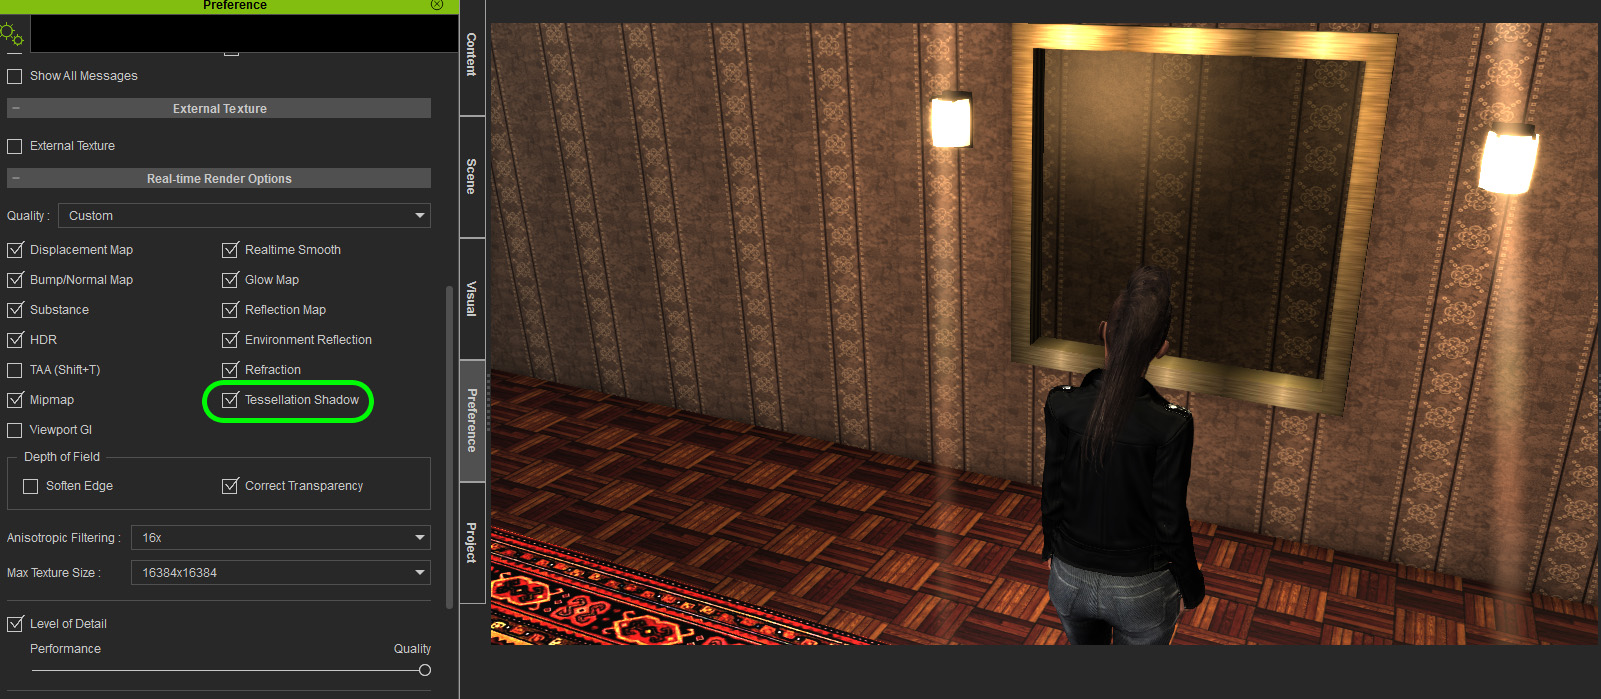
Found another one. This time it's a Tessellation Shadow and it's messing with the mirror prop made from water. Although there is no tessellation turned on for any prop in the scene, an artificial shadow (cannot even call it a shadow) from props behind mirror would mask it. So nothing can be placed behind a water anymore. Annoying!
Tessellation Shadow is OFF
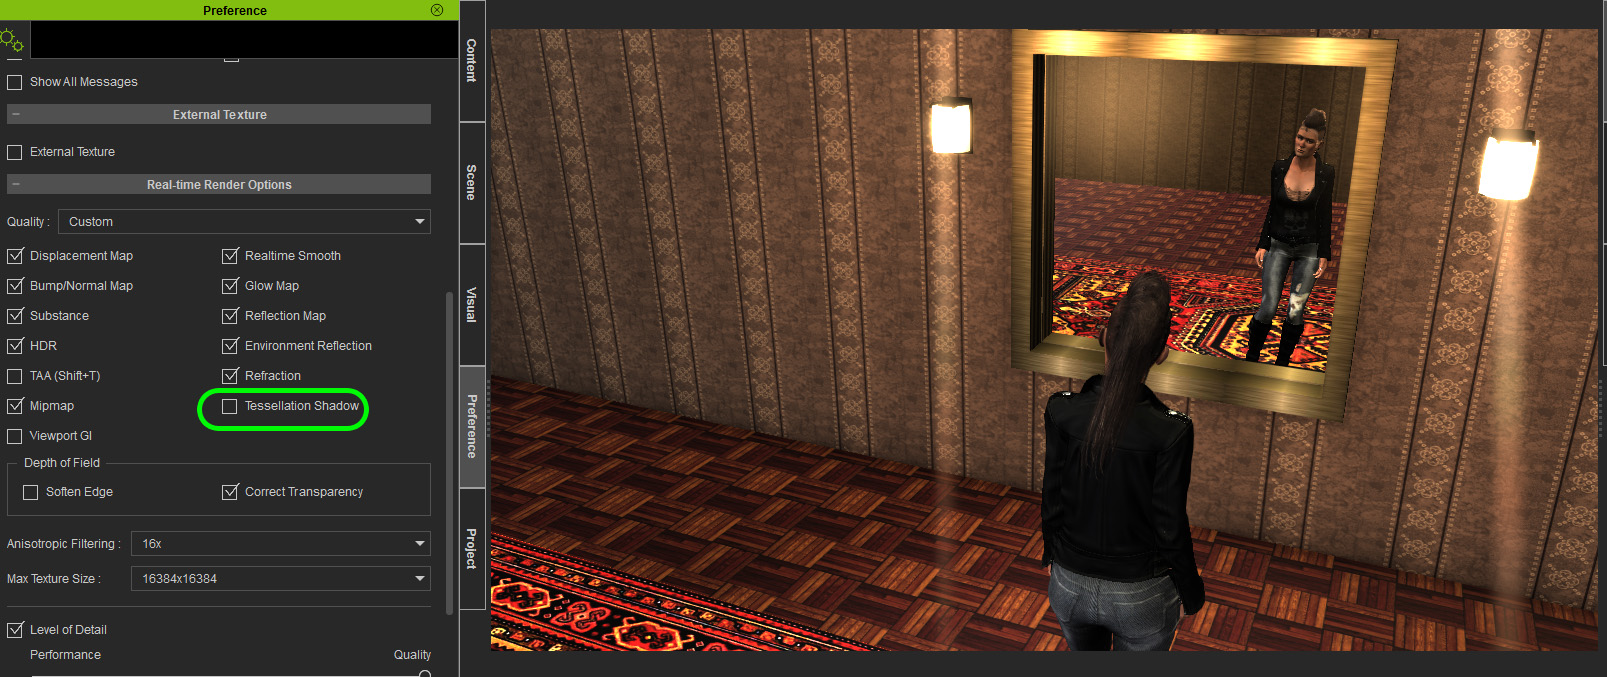
Tessellation Shadow is ON
|
|
By Rogue Anime - 8 Years Ago
|
|
4u2ges (1/13/2018)
an artificial shadow (cannot even call it a shadow) from props behind mirror would mask it.
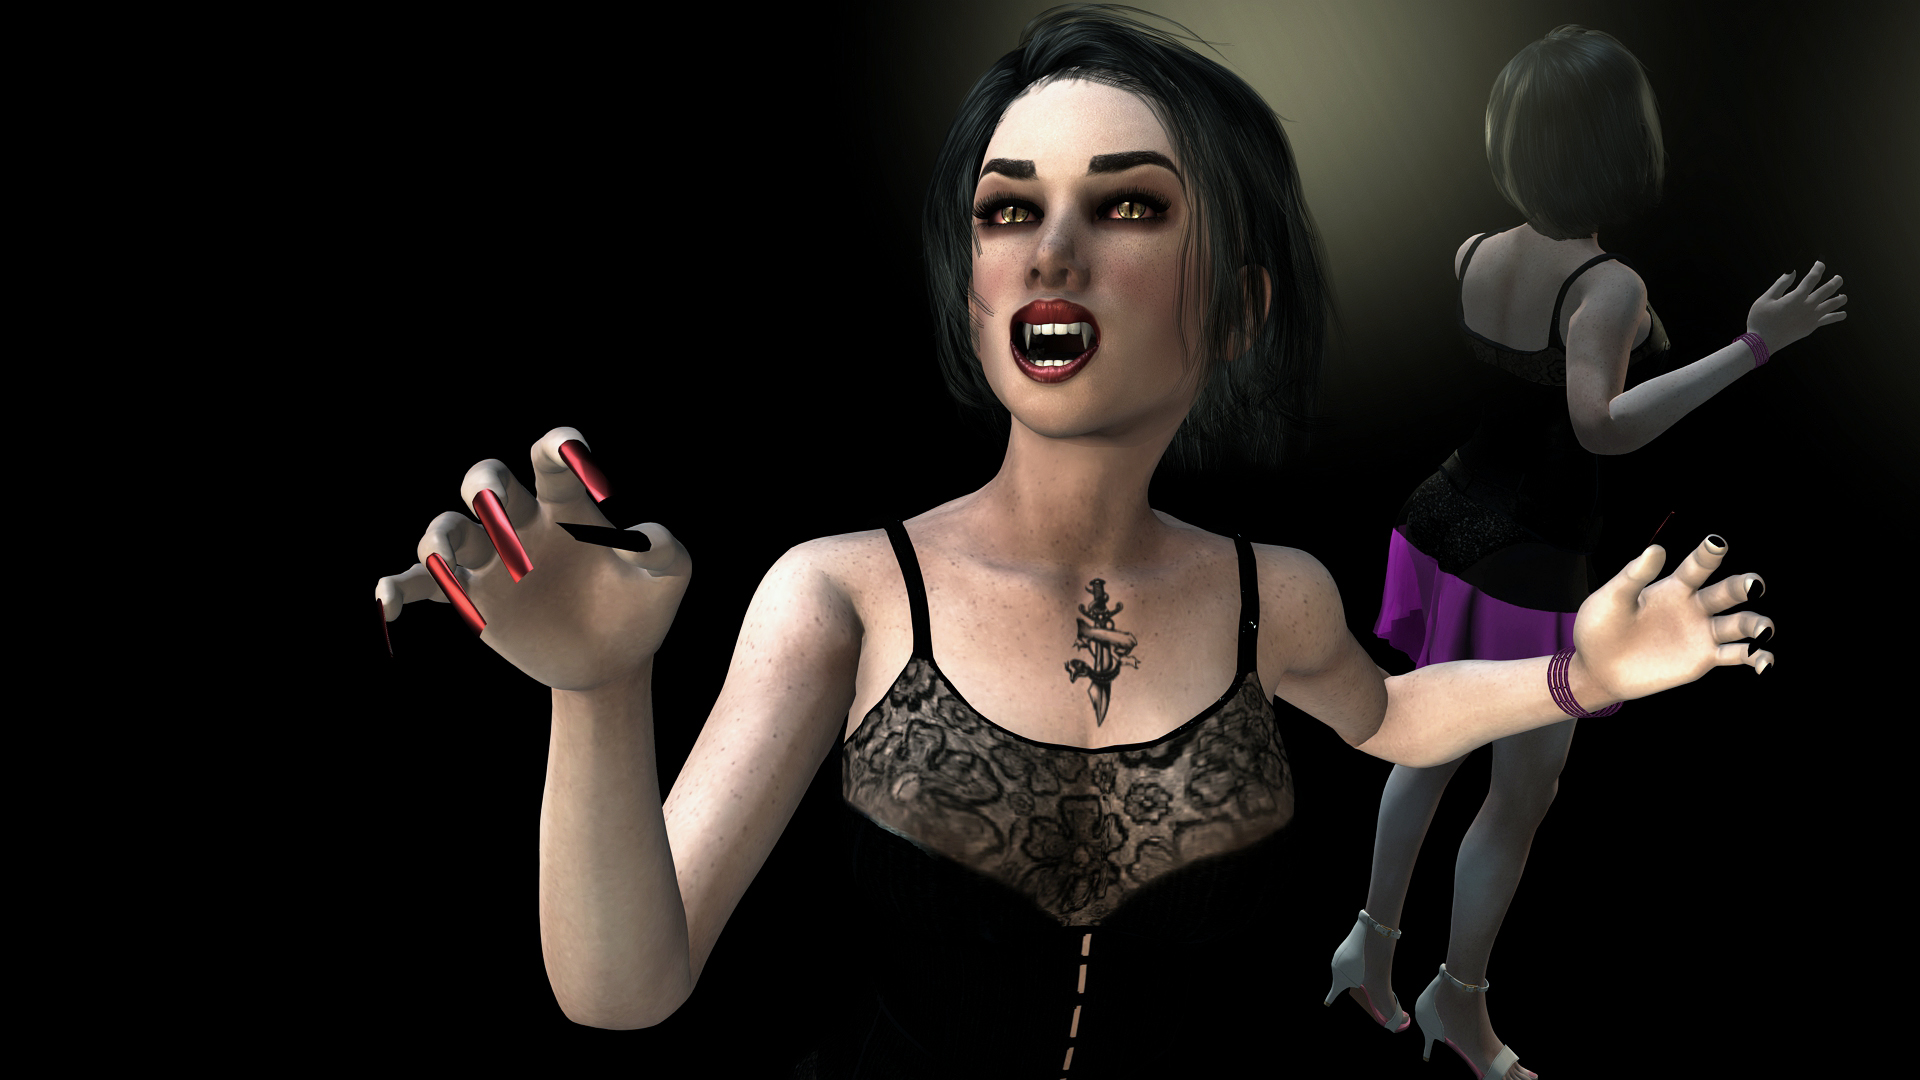
Annoying, but REALLY handy in a vampire story... :crazy: ~V~
|
|
By 4u2ges - 8 Years Ago
|
Rogue Anime (1/14/2018)
4u2ges (1/13/2018)
an artificial shadow (cannot even call it a shadow) from props behind mirror would mask it.
Annoying, but REALLY handy in a vampire story... :crazy: ~V~
Speaking of vampires. That is how I feel right now. Mesh emitters do not go well with Super Sampling. Keeps crashing and rebooting my computer during render :alien:
|
|
By mr_vidius - 8 Years Ago
|
4u2ges (1/13/2018)
Found another one. This time it's a Tessellation Shadow and it's messing with the mirror prop made from water. Although there is no tessellation turned on for any prop in the scene, an artificial shadow (cannot even call it a shadow) from props behind mirror would mask it. So nothing can be placed behind a water anymore. Annoying! Tessellation Shadow is OFF Tessellation Shadow is ON
what I would like to know.. how did you make the mirror? I want to make mirrors too!
vidius
|
|
By 4u2ges - 8 Years Ago
|
mr_vidius (1/15/2018)
4u2ges (1/13/2018)
Found another one. This time it's a Tessellation Shadow and it's messing with the mirror prop made from water. Although there is no tessellation turned on for any prop in the scene, an artificial shadow (cannot even call it a shadow) from props behind mirror would mask it. So nothing can be placed behind a water anymore. Annoying!
what I would like to know.. how did you make the mirror? I want to make mirrors too! vidius
Sort of figured out how to deal with inappropriate "Tessellation shadow". Disabling a Real-Time Smooth on props behind mirror fixed the problem (just keep solving puzzles :Whistling:)
Mr_Vidius, there are couple of ways to make a mirror in iClone and many threads explaining how to make it. In IC5 there was a trick with directX I believe, but I never had that version installed.
Starting with IC6, no matter which way you go, it is a hassle to make a mirror and control/animate the scene.
If I need to make a scene with a mirror, I prefer the one with 90 degrees twisted scene and I have a demo project which may get you started.
It was created in IC6, so to make it work properly in IC7 some tweaking would require (including the one I have just discovered above).
I have reported one other issue with reflection in IC7 FT3726 and it has already been assigned. So hopefully it'll be fixed in the next update.
What left, is a hope that someday RL would finally come up with "real" mirror prop, saving us a hassle to deal with water reflection (Sigh... there I said it... 1001st time).
|
|
By animagic - 8 Years Ago
|
@4u2ges: Thanks for the demo project! I'll check it out, as I will be in need of a mirror at some point...
I made an FT request for a mirror in iClone 6 and repeated it for iClone 7, but the need predates iClone 5. I feel we've been talking about mirrors forever...:crazy:
Anyway, for those who want a mirror, haven't voted yet, and can spare a vote: it's issue #3371.
|
|
By thedirector1974 - 8 Years Ago
|
I have an issue with the viseme track. I load a mp3 file into the timeline. On the viseme track I can see all those letters. Double click on them and a windows with all possible combinations shows up. There is a expression slider in that window. No matter what I choose, the expression doesn't change at all. Can anyone confiem this?
|
|
By Kelleytoons - 8 Years Ago
|
|
The slider controls how MUCH viseme track is applied -- and it works for me (although it's not exactly interactive -- you will need to scrub the timeline once you change it to see how it really works. Try setting to zero and then you'll see that no viseme is applied at all).
|
|
By jarmoh - 8 Years Ago
|
Hi
After update to 7.2 version, screen is not scaled right in 4k screen ( first picture). Character creator (second picture) and 3DXchange looks sharp. Screen looks like scaled up from 1k screen. I can't find way to fix it. Is there way to fix it?

Jarmo
|
|
By thedirector1974 - 8 Years Ago
|
Really? But it was possible in previous versions of iClone! I worked with that tool and I am pretty sure it was showing the results instantly. Otherwise it will be a pain in the a... to work like that ...
|
|
By TonyDPrime - 8 Years Ago
|
Rampa (1/5/2018)
rogwen (1/5/2018)
I cannot use 7.2 patch. Direct puppet is the tool I have used most. Now its useless. The following happens on my Laptop AND stationary PC (wich is brand new and has just Iclone installed) So this is clearly not a PC issue. When I record a clip with direct puppet the first time everythings ok. but when I try to animate other limbs on same clip with more recordings,the strangest things happens. You can see it here: https://youtu.be/TDqsNVuNRHc Are you using identical mouse movements for each arm? Moving the mouse vertically rotates one axis, and horizontally another. When I move my mouse vertically for each arm, I am getting what I expect. When I move the mouse horizontally for one arm, it looks like your video example.
I will confirm what rogwen and mark reported in this thread.
I am experiencing that if I use more than 1 direction puppet movement on a character, the character then 'jumps' to another location in the scene, and the original recorded, or 1st, direction puppet movement is gone!
This is a really bad one. I agree with rogwen's sentiment here...It makes direction puppet unusable, UNLESS you only use one movement.
I tried closing down scene and reloading to see if I could add another, but no luck.
Tried linking to a dummy prop to 'lock' character location in scene - no luck
Will attempt further workaround tests.
This one SUUUUUUUXXXXXXXX.:(
|
|
By TonyDPrime - 8 Years Ago
|
Update -
Direction Puppet issue can be reproduced with any avatar. Limit # is 3 before issue arises. So, you can safely record 2 as it turns out.
TEST:
Create scene, add avatar.
Use direction puppet, starting from 0 for each recording.
Record 3 separate direction puppet movements. (ie 3 limbs)...can be any time length.
RESULT:
After 3rd movement recording is stopped, avatar will 'jump' position, and some of recorded direction puppet is gone.
Use preview cam with some distance to view the behavior.
*NOTE - iClone 'remembers' how many that you have used, so you can only safely record 2, that's it.
No matter what you do, you cannot add a 3rd. As no workaround has been identified....
YET! :smooooth:
|
|
By thedirector1974 - 8 Years Ago
|
Just noticed, that the DOF mask is corrupted again, after updateing from 7.1 to 7.2. Look at this ...
Sigh ... I will stop any work on my movie until this is fixed, sorry ...
Direx
|
|
By TonyDPrime - 8 Years Ago
|
thedirector1974 (1/21/2018)
Just noticed, that the DOF mask is corrupted again, after updateing from 7.1 to 7.2. Look at this ... Sigh ... I will stop any work on my movie until this is fixed, sorry ... Direx
Just a wild guess, wondering if this is a conflict involving the new HDR Bloom/Glow.
If you turn all Bloom effect down on this frame, any change?
|
|
By thedirector1974 - 8 Years Ago
|
I already tried that - same result ... :(
|
|
By TonyDPrime - 8 Years Ago
|
Man, that sucks.
I know...It's like I feel like my hands are tied with these
|
|
By Matt GH - 8 Years Ago
|
jarmoh (1/17/2018)
Hi After update to 7.2 version, screen is not scaled right in 4k screen ( first picture). Character creator (second picture) and 3DXchange looks sharp. Screen looks like scaled up from 1k screen. I can't find way to fix it. Is there way to fix it? Jarmo
Same here! CC and 3DXC are fine at 4K res, while IC7.2 seems zoomed from a 1080p, resulting in very large blurred buttons and very unconfortable environment to work with.
|
|
By 4u2ges - 8 Years Ago
|
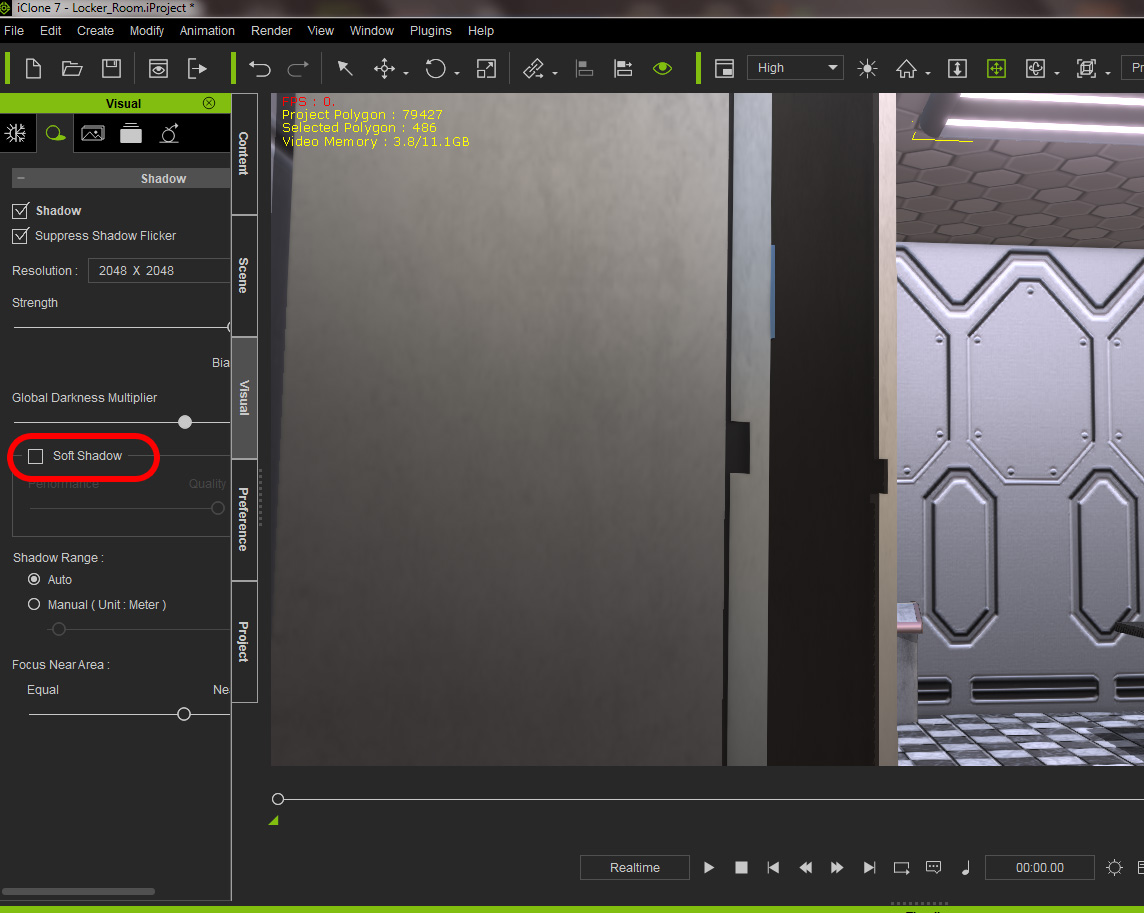
This one is real ugly. Soft shadow is making a "parquet floor" out of plain flat surface.
I just took a screenshot, but it is rendered the same way with any combination of settings (super-sampling, high quality shadow)
Soft shadow is ON
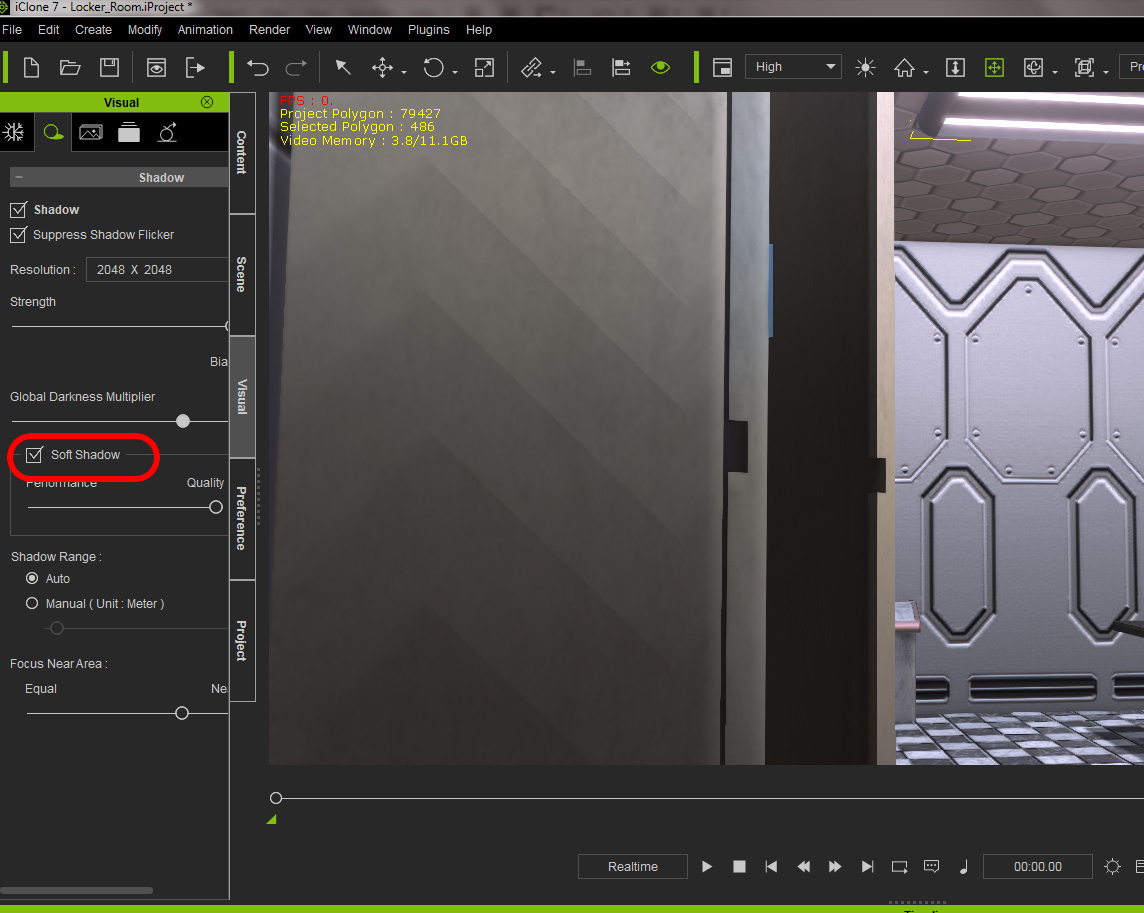
Soft shadow is OFF
|
|
By Rampa - 8 Years Ago
|
4u2ges (1/26/2018)
This one is real ugly. Soft shadow is making a "parquet floor" out of plain flat surface. I just took a screenshot, but it is rendered the same way with any combination of settings (super-sampling, high quality shadow) Soft shadow is ON Soft shadow is OFF
See if adjusting the shadow bias takes care of that.
|
|
By 4u2ges - 8 Years Ago
|
Not within the reasonable values. I mean Bias value of -150 took care of it.. but then shadow is way off as you can imagine.
|
|
By 4u2ges - 8 Years Ago
|
I did work it around by setting "to cast shadow" only for that corner cabinet. Luckily, this cabinet does not need to receive shadow from other objects... this time.
Well, until next time, when I have something that needs to cast and receive :ermm:
|
|
By thedirector1974 - 8 Years Ago
|
Reducing the angle helps with this problem ...
|
|
By 4u2ges - 8 Years Ago
|
|
thedirector1974 (1/26/2018)
Reducing the angle helps with this problem ...
Not exactly. What it does (and this goes to rotating caster itself or changing beam falloff or angle) is changing stripes pattern (angle, direction, width).
But it never takes it completely off. Moreover the shadow is getting offset in relation the light source and obviously fall into the wrong direction.
It's like, hey pal, you can't have me here, or else, I'll cause you that much trouble.
It should be fixed.
|
|
By mr_vidius - 8 Years Ago
|
been wondering if anyone else is having issues with the time line? I seem to can't copy, or paste anything on the time line.
llike motions for example. and when adding a audio file.. either in the sound track, or character voice track.
the auto play does not work.
vidius
|
|
By Rockoloco666 - 8 Years Ago
|
|
Undo is not working again in 7.2
|
|
By Jfrog - 8 Years Ago
|
Can't export to custom size such as 4096x2048 . This is a very frequently format use for VR. It used to work in Iclone 6 but it was broke somewhere in 7.2 or earlier version of 7.
|
|
By Kelleytoons - 8 Years Ago
|
|
Works for me (just tried a PNG export, which is the only export anyone should be using anyway).
|
|
By TonyDPrime - 8 Years Ago
|
Never really played with DOF until now, and it seems kind of weak on closeups. In Daz or Octane, for example, you can bring a significant blur vs sharpness in a very small geographic space via an aperture /F-Stop control.
But iClone's seems to only gradually spread it out over a larger geographic space. I find that no matter what camera type, lens size, mm...whatever, and no matter what slider settings for DOF I use, it doesn't matter.
You can only spread a DOF blur so much, and it's not very much at all. Just a touch of blur difference for smaller spaces.
Anyone else notice this? Like the Blur between the colored DOF regions should be able to be greater. Like a REALLY heavy focus and then STRONG blur, in a few inches, let's say, if the objects were real world...
I'll just throw it in Feedback Tracker as a request, but just figured I'd see thoughts on this first.
|
|
By thedirector1974 - 8 Years Ago
|
The sliders are not the limit. You can put any value you want in the boxes where the numbers are. Sorry for my bad english. Hope you understand, what I want to say ... :)
|
|
By TonyDPrime - 8 Years Ago
|
|
thedirector1974 (2/8/2018)
The sliders are not the limit. You can put any value you want in the boxes where the numbers are. Sorry for my bad english. Hope you understand, what I want to say ... :)
Thanks Direx. I tried again and the sliders are the min-max. I tried inputting different #s in all of the sliders, but it won't go beyond the slider max values. Does it work for you?
I know in Faceware and CC2 there are parameters with sliders that you can type in a number greater or less than the slider min-max, but in this case with DOF, the sliders seem to in fact be the min-max you can type in...Oh well....
(PS - as a native English speaker I would say your written English is excellent!...)
|
|
By justaviking - 8 Years Ago
|
|
raxel_67 (2/7/2018)
Undo is not working again in 7.2
I noticed that to, but I think it was a corrupted session. It worked again after restarting iClone.
Are you seeing that, too? Or is it 100% broken for you?
(Still should be fixed, but might be difficult for them to find the root cause.)
|
|
By thedirector1974 - 8 Years Ago
|
TonyDPrime (2/9/2018)
thedirector1974 (2/8/2018)
The sliders are not the limit. You can put any value you want in the boxes where the numbers are. Sorry for my bad english. Hope you understand, what I want to say ... :)
Thanks Direx. I tried again and the sliders are the min-max. I tried inputting different #s in all of the sliders, but it won't go beyond the slider max values. Does it work for you? I know in Faceware and CC2 there are parameters with sliders that you can type in a number greater or less than the slider min-max, but in this case with DOF, the sliders seem to in fact be the min-max you can type in...Oh well....
I'll look into it as soon as get back home ... (Monday)
Direx
|
|
By TonyDPrime - 8 Years Ago
|
I am investigating an issue with Dan Genesis Hair that comes in as multiple pieces.
I was assuming disappearing and flickering hair pieces was due to camera clipping, but now am finding that if individualized there is no issue with the camera focusing on it at any zoom level.
Seems to be a combination of overlapping textures with transparent alpha-opacity channels that iClone has trouble with...
Will update on findings.
|
|
By TonyDPrime - 8 Years Ago
|
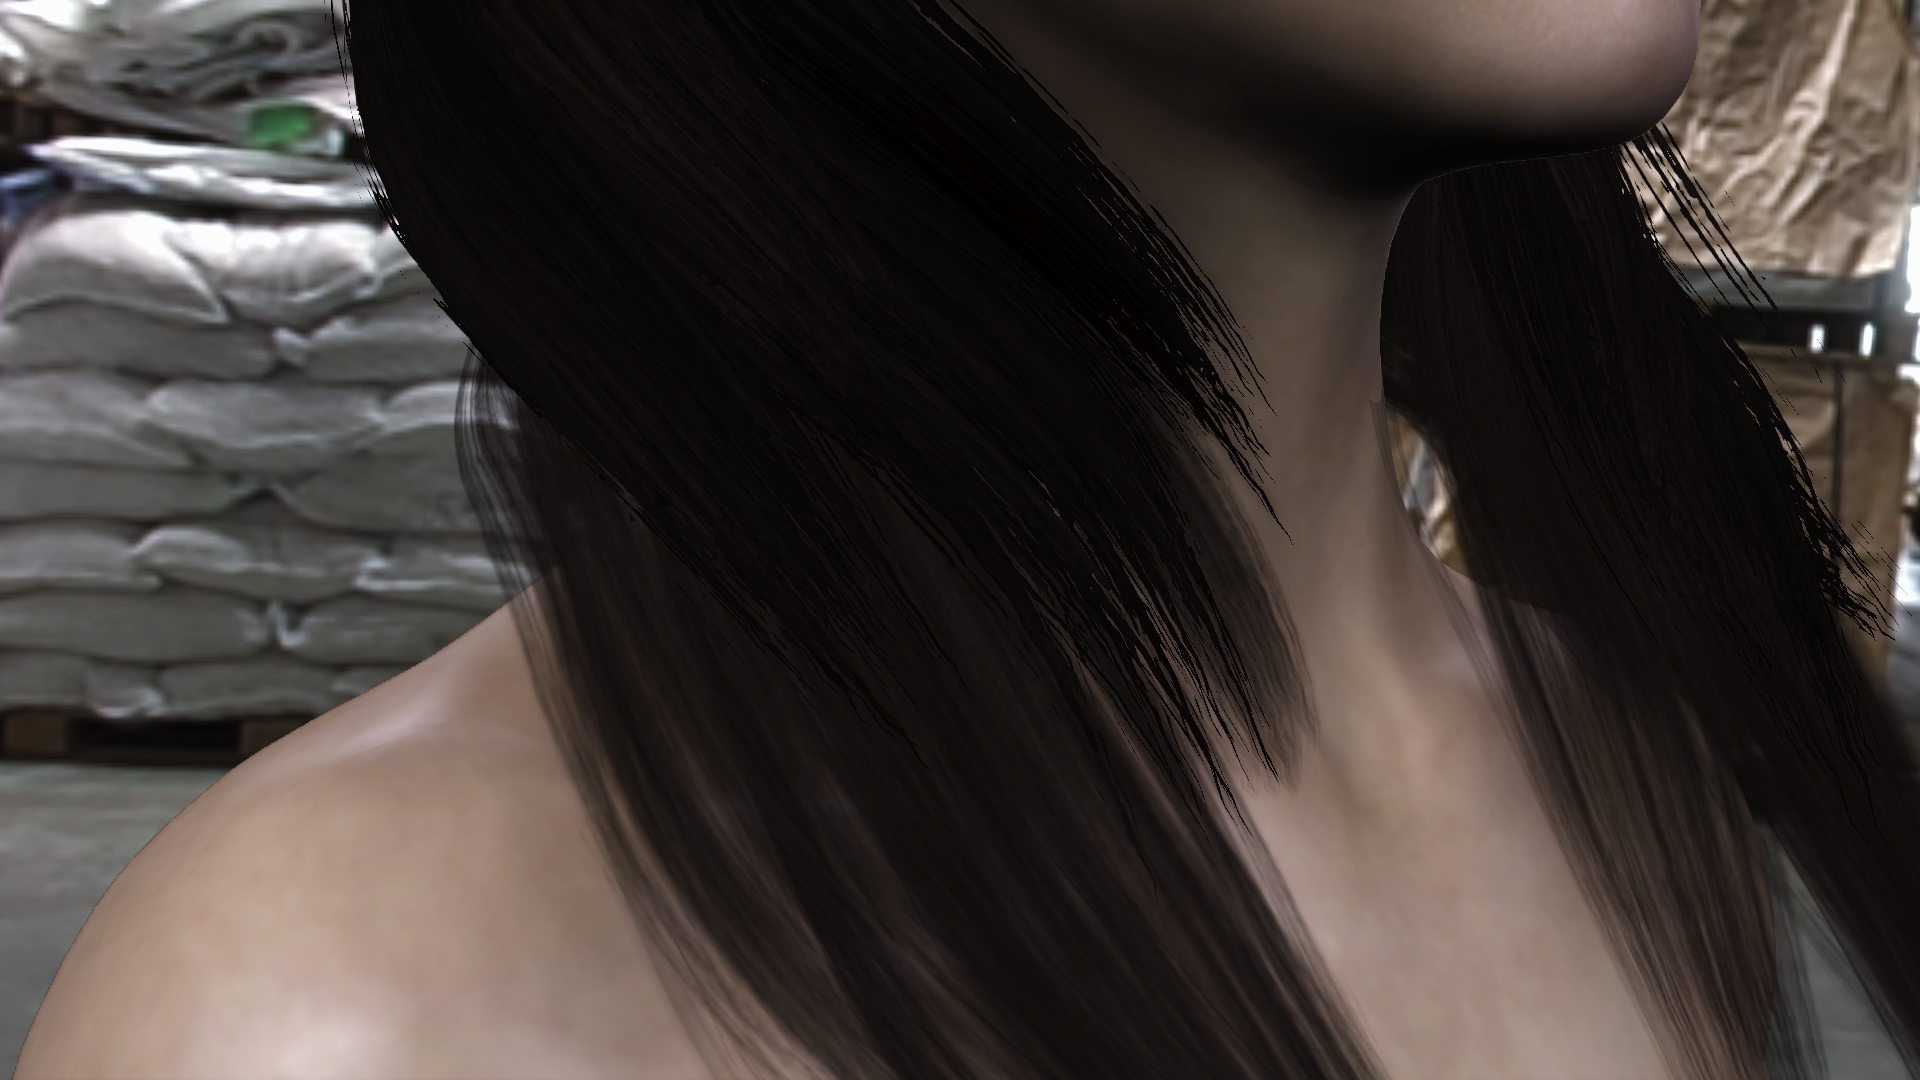
This is a follow up on my earlier post regarding overlapping textures with opacity masking out. In this case a Daz Genesis hair brought in through 3DXchange...
iClone 7 has a hard time showing what is behind one piece of hair shaped by an opacity map when there is another piece of hair shaped by an opacity map behind it.
It has difficulty reconciling the overlap of 2 or more "alpha/opacity/masked/transparency" textures.
Here is 1 piece:
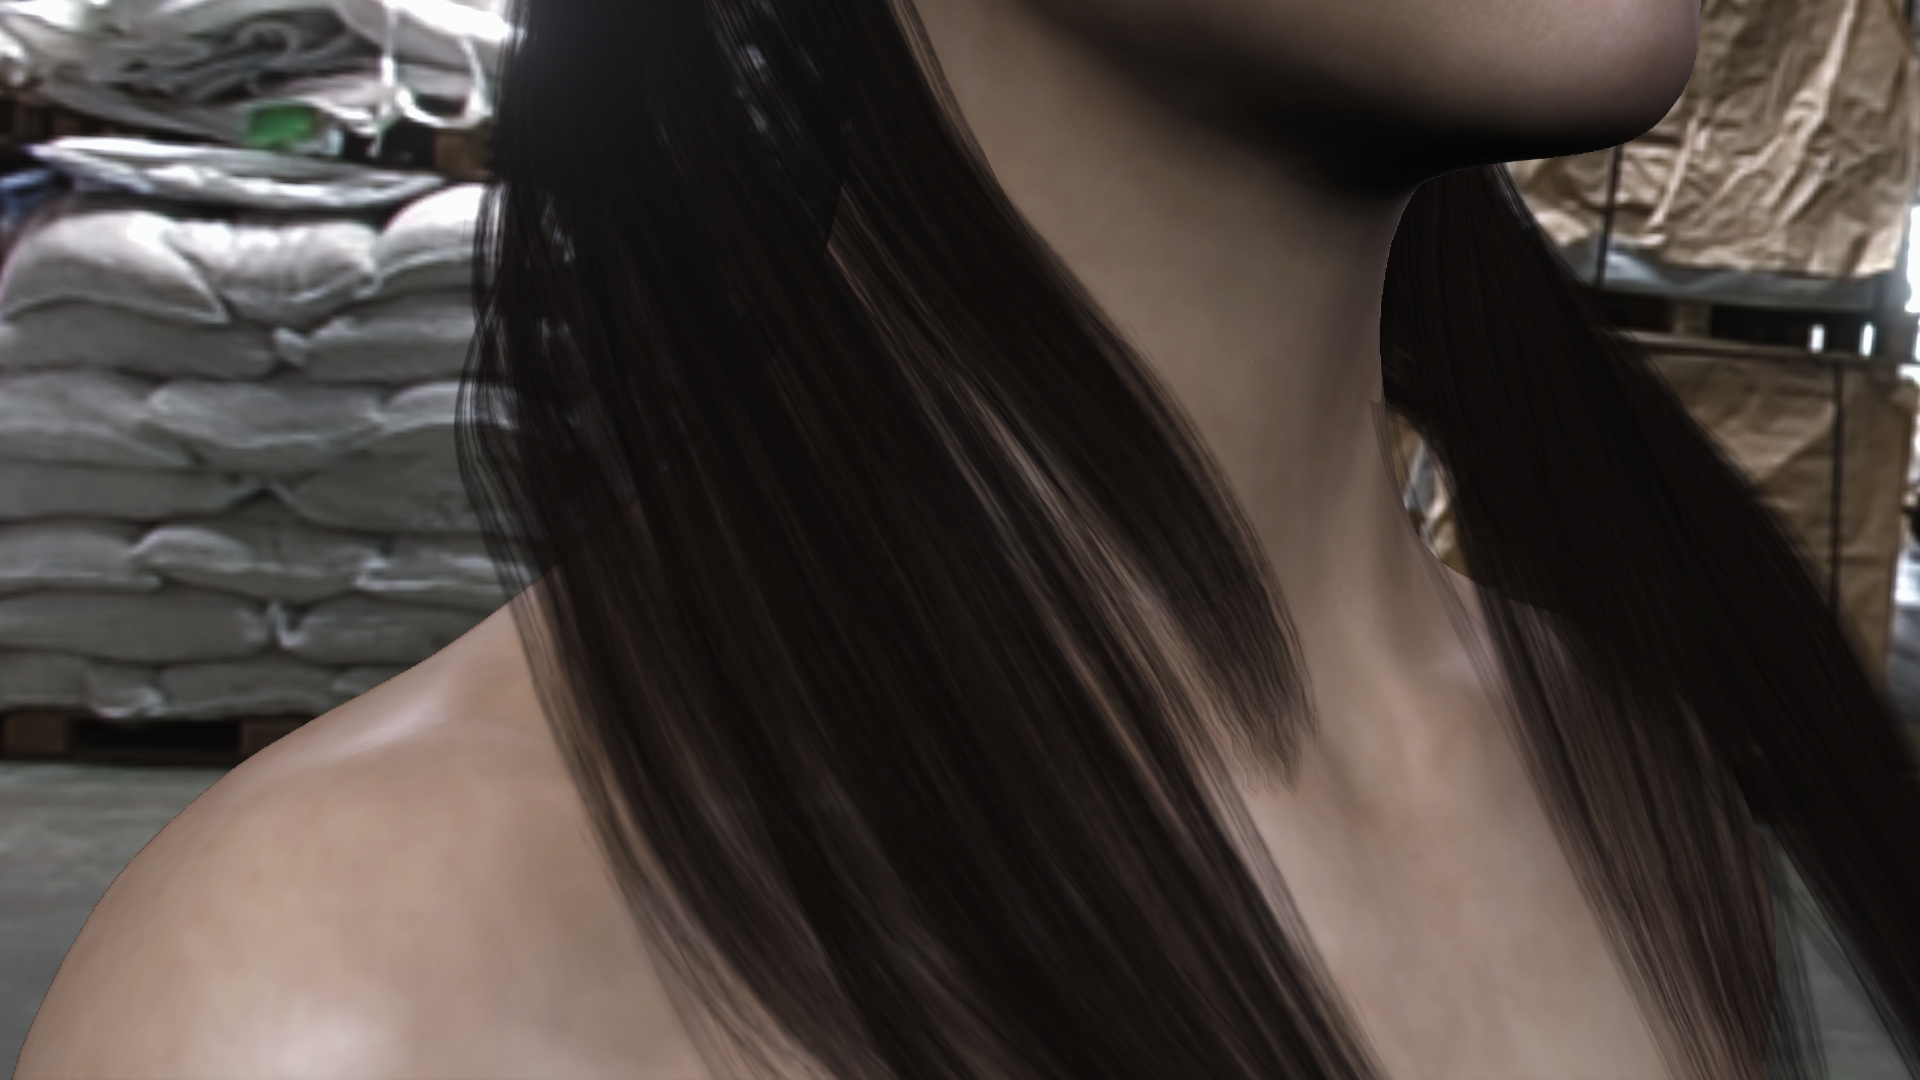
Now, I add a 2nd piece of the hair, so there are 2 pieces of hair stacked, both having an opacity map giving it shape.
On Viewport there is a moving flicker where iClone is trying to reconcile:

Here is a 'Preview' render:
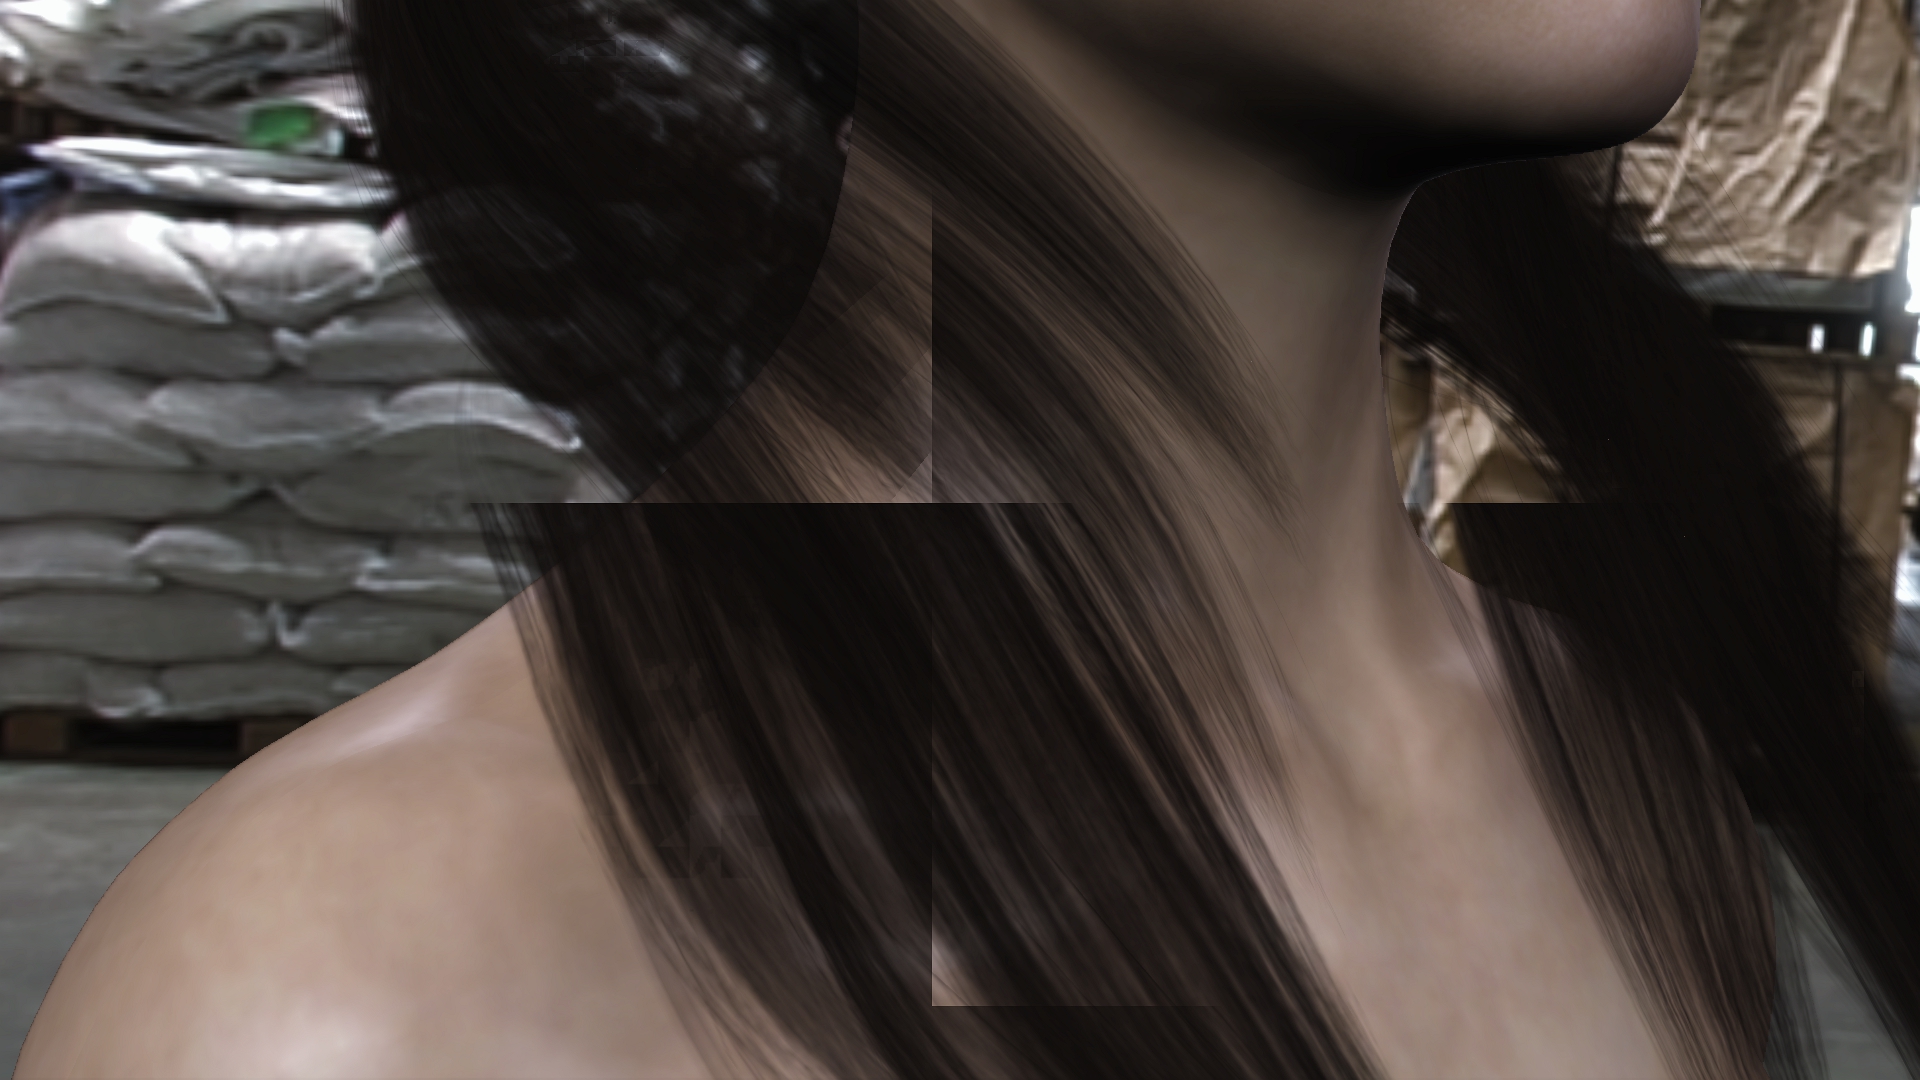
A Final Render @ 1080p looks the same as a Preview at 1080p.
Then one at UHD, 2160p
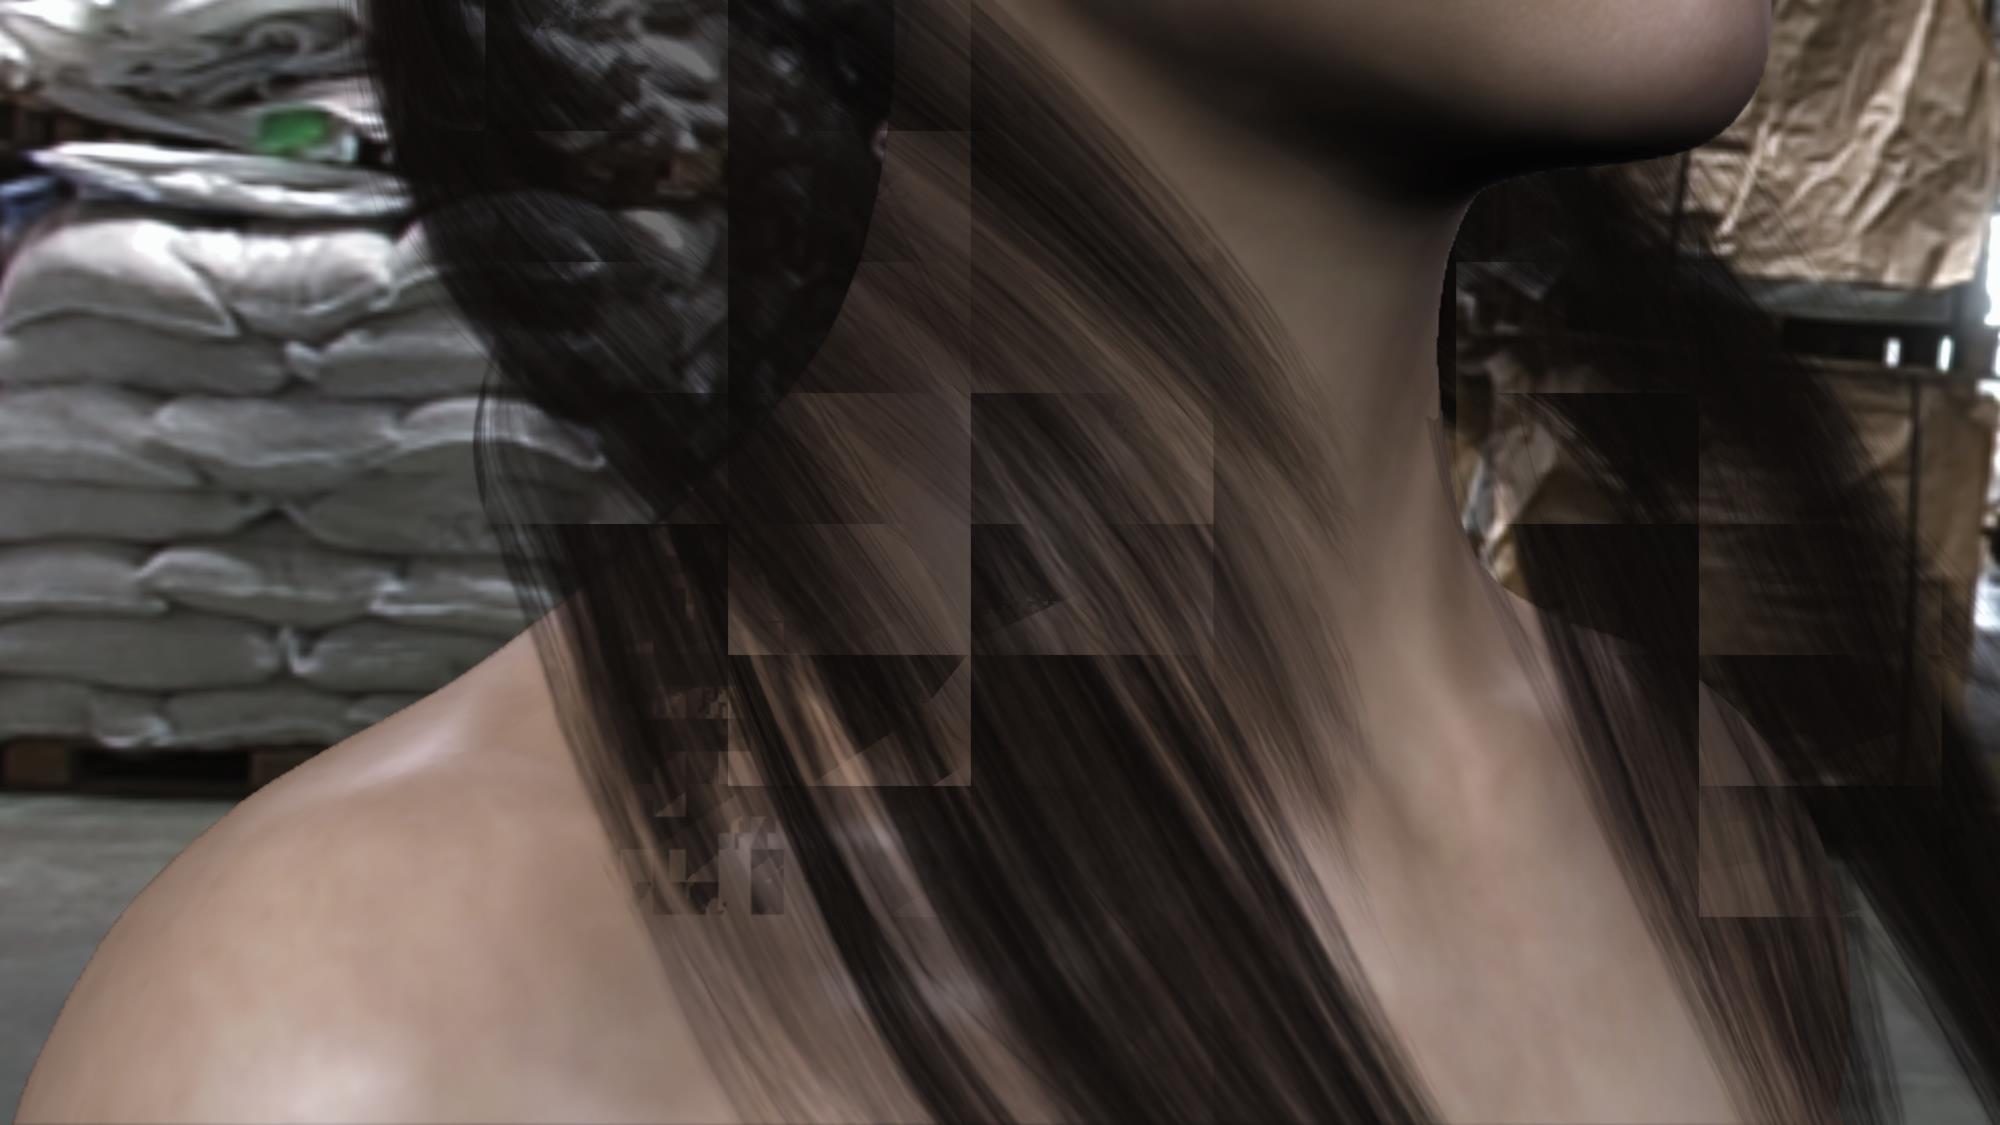
You can use the "Alpha Threshold" slider in Material Settings for each texture to try and 'fix' the issue, but it then makes the hair look blocky and pixelated itself, so it looks bad :crying:
|
|
By 4u2ges - 8 Years Ago
|
|
TonyDPrime (2/9/2018)
This is a follow up on my earlier post regarding overlapping textures with opacity masking out. In this case a Daz Genesis hair brought in through 3DXchange...
iClone 7 has a hard time showing what is behind one piece of hair shaped by an opacity map when there is another piece of hair shaped by an opacity map behind it.
It has difficulty reconciling the overlap of 2 or more "alpha/opacity/masked/transparency" textures.
Try minimizing viewport to smallest possible size and render. Is the result the same?
|
|
By TonyDPrime - 8 Years Ago
|
4u2ges (2/9/2018)
TonyDPrime (2/9/2018)
This is a follow up on my earlier post regarding overlapping textures with opacity masking out. In this case a Daz Genesis hair brought in through 3DXchange...
iClone 7 has a hard time showing what is behind one piece of hair shaped by an opacity map when there is another piece of hair shaped by an opacity map behind it.
It has difficulty reconciling the overlap of 2 or more "alpha/opacity/masked/transparency" textures.
Try minimizing viewport to smallest possible size and render. Is the result the same?
HOLY SHYYYYYYYYYYYYYYYYYYYYYYYYYYYYYYYYYYYYYYYYYYYYYYYYYYYYYYYYYYYYYYYYYYYYYYYYYYYX!!!!!!!!!!!!!!!!!!!!!!!!!!!!!!!!!!!!!!!!!!!!!!!!!!!
That actually made a difference!
OMG - The ol' resize the screen maneuver strikes again.
THANK YOU 4U2GES!!!!
It didn't actually eliminate the problem, but it does drastically minimize it. Some of the hair looks darker and pixelated, but not too noticeable.
Fascinating....almost like, if you can 'hide' the pixelation from the screen, then iClone can't see it and won't render it.
And you can hide it by making the viewport smaller through pulling the timeline towards the top of the screen.
So weird, but really amazing that it works this way. Wondering if this is actually a NVidia driver issue revealed through iClone.
Well, developers can take note of the fact that viewport size adjustment does impact how iClone renders pixelation occurring with overlapping opacity masked textures (ie Daz hair with multiple overlapping textured pieces).
Really appreciate that help, 4U2ges!
|
|
By 4u2ges - 8 Years Ago
|
I was not really sure if that would work, because you had monstrous artifacts there. But I am glad it almost did. For animation though it would take helluva lot of time to render with viewport size that small regardless of setup.
And the idea actually came from your thread about DOF dependency on the viewport size. I was afraid after fixing it (according to your FT entry), opacity artifacts would not go away anymore by varying viewport size. But apparently a workaround routine is still valid.
See the original thread: https://forum.reallusion.com/339948/Opacity-Artifacts?PageIndex=1
|
|
By TonyDPrime - 8 Years Ago
|
Playing around some more with the artifacting hair due to overlapping opacity-masked textures:
-hair with shine roughness cranked up (to 'black') gives more artifacting than the same hair with roughness lower (to 'white')
-resizing screen will eliminate large artifacting, but will not eliminate small artifacting
-workaround is to lower roughness on artifacting areas/pieces, or pull them out by reducing opacity. Then resize screen prior to render (resizing results can vary depending on resize and artifacting amount you start with.)
Some other engines have this problem, including Unity. I saw in another thread for a different software (Godot) a user is speaking with another user about flickering trees on a mountain top, and the assisting user refers to "back face culling" and "z-depth sorting" as possibly causing the issue. Assisting user ultimately had no solution for the other user.
|
|
By Jfrog - 8 Years Ago
|
|
Works for me (just tried a PNG export, which is the only export anyone should be using anyway).
Really strange! I can confirm that the custom export to 4096x2048 is working fine now. I tried it several times before posting this...
Thanks Kellytoons.
|
|
By TonyDPrime - 8 Years Ago
|
|
TonyDPrime (2/8/2018)
Never really played with DOF until now, and it seems kind of weak on closeups. In Daz or Octane, for example, you can bring a significant blur vs sharpness in a very small geographic space via an aperture /F-Stop control.
But iClone's seems to only gradually spread it out over a larger geographic space. I find that no matter what camera type, lens size, mm...whatever, and no matter what slider settings for DOF I use, it doesn't matter.
You can only spread a DOF blur so much, and it's not very much at all. Just a touch of blur difference for smaller spaces.
Anyone else notice this? Like the Blur between the colored DOF regions should be able to be greater. Like a REALLY heavy focus and then STRONG blur, in a few inches, let's say, if the objects were real world...
I'll just throw it in Feedback Tracker as a request, but just figured I'd see thoughts on this first.
Well, I have been playing with this DOF stuff in another scene and it all of the sudden I found it was giving me exactly what I wanted. A very strong Blur to very sharp over a short distance.
I took the settings and moved them to my other scene, and Voila, I had what I wanted.
I just wasn't arranging the sliders properly to get the effect I wanted, but I found it is possible. It was made a lot easier by using the DOF color-viewer. That really shows you what you have depth wise.
Such a fantastic tool it is!
|
|
By Rampa - 8 Years Ago
|
TonyDPrime (2/13/2018)
TonyDPrime (2/8/2018)
Never really played with DOF until now, and it seems kind of weak on closeups. In Daz or Octane, for example, you can bring a significant blur vs sharpness in a very small geographic space via an aperture /F-Stop control.
But iClone's seems to only gradually spread it out over a larger geographic space. I find that no matter what camera type, lens size, mm...whatever, and no matter what slider settings for DOF I use, it doesn't matter.
You can only spread a DOF blur so much, and it's not very much at all. Just a touch of blur difference for smaller spaces.
Anyone else notice this? Like the Blur between the colored DOF regions should be able to be greater. Like a REALLY heavy focus and then STRONG blur, in a few inches, let's say, if the objects were real world...
I'll just throw it in Feedback Tracker as a request, but just figured I'd see thoughts on this first. Well, I have been playing with this DOF stuff in another scene and it all of the sudden I found it was giving me exactly what I wanted. A very strong Blur to very sharp over a short distance. I took the settings and moved them to my other scene, and Voila, I had what I wanted. I just wasn't arranging the sliders properly to get the effect I wanted, but I found it is possible. It was made a lot easier by using the DOF color-viewer. That really shows you what you have depth wise. Such a fantastic tool it is!
Setting the bokeh to various shapes has a dramatic effect in DOF level as well. The circle bokeh type will really increase the blur amount. That's how I like it! :)
|
|
By Rockoloco666 - 8 Years Ago
|
ijustaviking (2/9/2018)
raxel_67 (2/7/2018)
Undo is not working again in 7.2I noticed that to, but I think it was a corrupted session. It worked again after restarting iClone. Are you seeing that, too? Or is it 100% broken for you? (Still should be fixed, but might be difficult for them to find the root cause.)
nope, i can create a new scene and have undo but as soon as i save it and open it again it is gone
|
|
By wires - 8 Years Ago
|
|
raxel_67 (2/15/2018)
nope, i can create a new scene and have undo but as soon as i save it and open it again it is gone
Undo is only available for the open, active, Project. As soon as you close a Project and reopen it the undo information is gone. This is normal as undo information is not saved with the Project.
|
|
By Rockoloco666 - 8 Years Ago
|
wires (2/15/2018)
raxel_67 (2/15/2018)
nope, i can create a new scene and have undo but as soon as i save it and open it again it is gone
Undo is only available for the open, active, Project. As soon as you close a Project and reopen it the undo information is gone. This is normal as undo information is not saved with the Project.
that is not what i meant, what i meant was that once i save a project and open it again will cause undo to stop working, if i make any change to the project i can't undo it, happens everytime
|
|
By justaviking - 8 Years Ago
|
Yeah, I definetly enountered broken undo, but not consistently.
I only noticed it once or twice (probably because I make so few mistakes and rarely need to use it :P ).
|
|
By inash - 8 Years Ago
|
|
If I open a window to import an asset, open a project, save a project, render, etc. if I right click to do anything like create a new folder or to change the view mode of the window...it crashes. :(
|
|
By GOETZIWOOD STUDIOS - 8 Years Ago
|
|
ilyas.hosea (2/20/2018)
If I open a window to import an asset, open a project, save a project, render, etc. if I right click to do anything like create a new folder or to change the view mode of the window...it crashes. :(
Yes, I have that too. I don't remember if a FT issue has been opened about that.
|
|
By WillFl - 8 Years Ago
|
I am unable to scale Non-Human characters in iClone 7.. I can move them and rotate them, but scaling is unavailable
has anyone tried to achieve that and have you had any success?
|
|
By WillFl - 8 Years Ago
|
|
ilyas.hosea (2/20/2018)
If I open a window to import an asset, open a project, save a project, render, etc. if I right click to do anything like create a new folder or to change the view mode of the window...it crashes. :(
+1 on that ... iClone 7 crashes during the process of saving a project and you navigate to a folder and then try to create a new folder so you can save the project in that new folder...
|
|
By Clark - 8 Years Ago
|
You should be able to scale your non-human character using avatar proportions in the modify panel.
|
|
By Rockoloco666 - 8 Years Ago
|
|
I seriously need my undo to work again... Being perfect all the time is exhausting :)
|
|
By Kelleytoons - 8 Years Ago
|
|
raxel_67 (2/28/2018)
I seriously need my undo to work again... Being perfect all the time is exhausting :)
Nobody's prefect (including Reallusion <g>)
|
|
By Jfrog - 8 Years Ago
|
I hope this is the right place to post.
When using the edit motion layer panel in 7.2, it works for 10 or 15 minutes then it doesn't anymore. It just creates a single transform key frame that does not hold his value after the keyed frame.
I was wondering if this is a known issue.
Thanks
|
|
By jenjon - 8 Years Ago
|
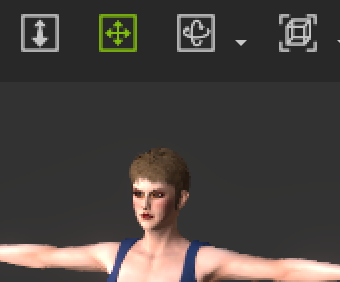
When I have a character selected and then click on the Edit Reach Target button its panel does not open up ( I checked instructions described in the manual. )
Instead of the panel opening, the move, rotate and link icons on the top of the screen become greyed out instead. Clicking the Edit Reach Target button a second time restores the move, rotate, link icons. No panel appears regardless of how many times Edit Reach Target is clicked.
I have uninstalled the program, downloaded it again and reinstalled it, but Edit Reach Target panel still does not open up as it should.
|
|
By TonyDPrime - 8 Years Ago
|
Discovered some info on the Daz Hair Opacity Front. So, in iC7 we have an issue that was not in iC6, where Opacity gets weird on Daz hairs. They render with pixelation and bald spots, depending on zoom and position.
And, depending on how large you set the viewport, you can render with less/more opacity issues, thus hiding the issue as a workaround. Only, this resizing of the viewport can compromise the rest of the rendered image.
What I have found is that some hairs from Daz have the issue, while others don't.
I have found after repeated test it is related to the number of texture slots the hair has.
What I am finding is that if a hair has say 2, or 3, texture slots, like a CC hair, then there is no issue with multiple overlapping opacity textures.
But, if you have a more complex Daz hair, with say 6, 7, 8 texture slots, then you encounter the issue.
However, you can zero the amount of the opacity channel for texture slots until the remainder 'work', but then the hair then looks like Atari graphics.
And we want Intellivision graphics, or Coleco Vision. Wait, Coleco was better than Intellivision, right?
Anyway...
In a nutshell - The more texture slots with opacity maps, the more severe the issue.
*Note - issue is not simply not solved by setting an Alpha threshold amount as it destroys the finer detail of the hair.
And, the thing is, the more texture slots in a hair, iClone then tries to work things out and then will also stop opacity on other textures as well. And not just opacity maps, but textures where you lowered the opacity itself.
So, seems iC7 has an overall opacity issue, stemming from multiple opacity textures overlapping simultaneously.
Well, I hope I have made myself 'clear'.
Get it?!!! Opacity....Clear...
GET IT ???!!!!
|
|
By Kelleytoons - 8 Years Ago
|
|
I assume you filed a bug report on this -- update your findings in that.
|
|
By TonyDPrime - 8 Years Ago
|
|
Kelleytoons (3/16/2018)
I assume you filed a bug report on this -- update your findings in that.
HA!
I am a Member of the iClone Premium Plus Gold A+++ Enterprise Excelsior Group, we are not required to file things using Feedback Tracker.
Just one post in the forum is all that is required.
First Class VIP service, 24-7, 365...No waiting.
I am awaiting my Complimentary Python-Scripting Automated Helper App as we speak, and I have a ticket requesting my attendance at the Forum VIP Preferred Customer Conference, later this month in Opa City.
So...we clear on that?
Opa-City....Opacity....
Clear....
GET IT???!!!
|
|
By mr_vidius - 8 Years Ago
|
well now.. this is what happens. when you want iclone to do everything you want. you get issues. but hey, next week, you guys will
want iclone to cook you dinner, clean your house.. and maybe provide pleasurable acts on you while your in front of your computer. huh?
well, maybe by version 25. when all the bugs are worked out in 7 thru 24. LOL
V
|
|
By TonyDPrime - 8 Years Ago
|
|
mr_vidius (3/17/2018)
well now.. this is what happens. when you want iclone to do everything you want. you get issues. but hey, next week, you guys will
want iclone to cook you dinner, clean your house.. and maybe provide pleasurable acts on you while your in front of your computer. huh?
well, maybe by version 25. when all the bugs are worked out in 7 thru 24. LOL
V
YEEEEEEESSSSSSSSSSSSSS!!!!! Now you're talking!...
PS - this is all included in the Platinum Members Deluxe Senior Expanded Priority Plus Package.
|
|
By CtrlZ - 8 Years Ago
|
Is anyone else having problems with Substance PBR 200 materials?
They have stooped showing in my view port but are showing in the materials panel and final render? :pinch:
This is a snapshot of the view port:
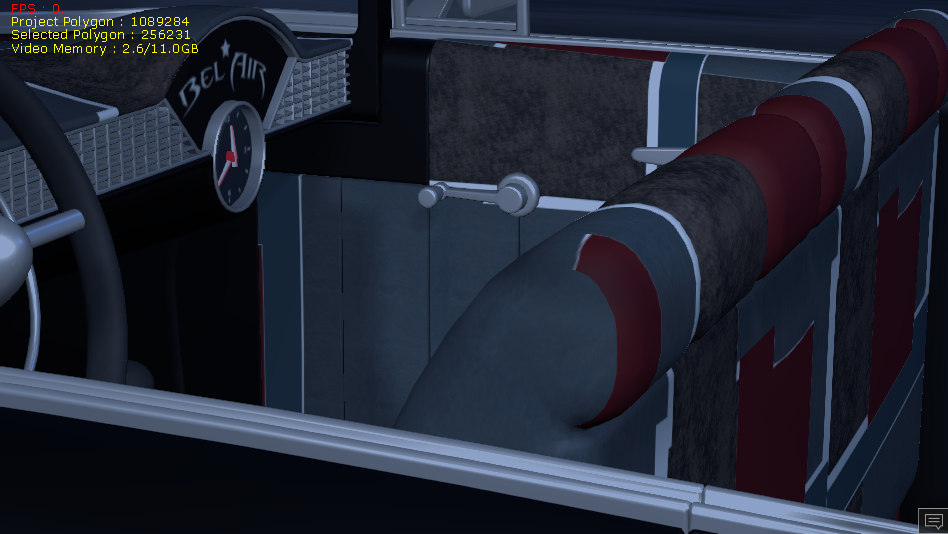
And here is the same view after rendering:
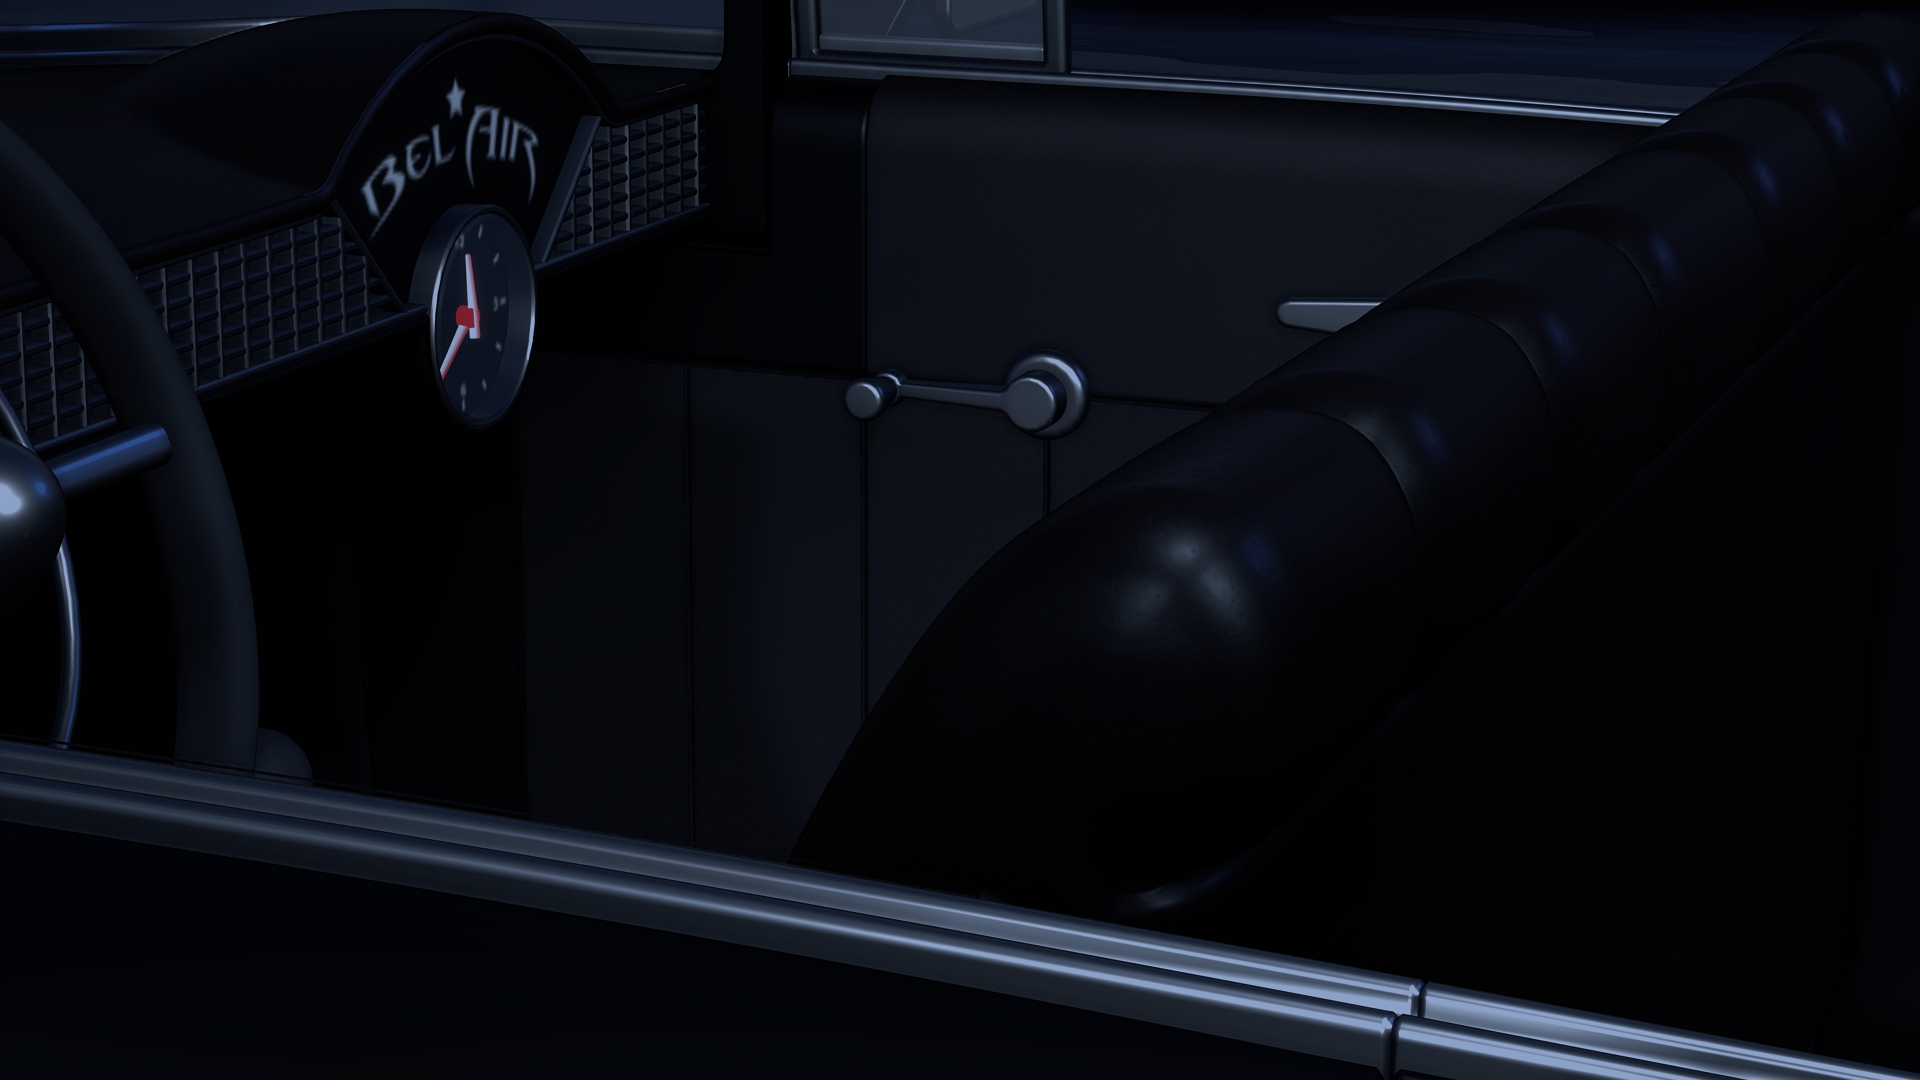
Is this an issue I have missed, a new problem or something else on my end?
|
|
By Kelleytoons - 8 Years Ago
|
|
What are your display settings? Do you have them on High or something else? (And check the individual ones).
|
|
By CtrlZ - 8 Years Ago
|
|
Kelleytoons (3/20/2018)
What are your display settings? Do you have them on High or something else? (And check the individual ones).
Thanks Mike for your quick reply!
Some how all my custom settings were removed ;)
I kinda thought it was something on my end :D
Thanks again!
Gary
|
|
By TonyDPrime - 8 Years Ago
|
7.21 around the corner- Hoping for these bug fixes:
1) Opacity flickering/screen resizing quagmire
2) >2 or 3 puppet motion causing avatar to 'jump' in worldspace quagmire
|
|
By elliespotter - 8 Years Ago
|
I have just got the hang of the new concept of linking versus embedding maps for created characters and I can, kind of, see the logic behind it.
Except it doesn't work properly when it comes to weight maps. I can't get a weight map to stick to some created hair I made this weekend. The link is not saved and the option to embed it is not available either. Very frustrating.
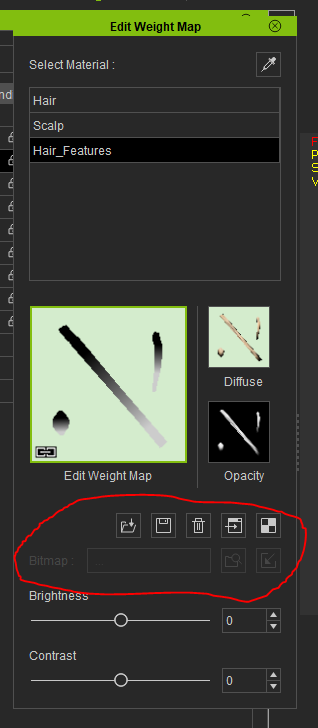
I have raised a post on the Feedback Tracker but post here in case somebody else knows what is occurring and can help.
|
|
By Kelleytoons - 8 Years Ago
|
I don't think that link symbol really means anything when it comes to weight maps. I create the maps, put them in my downloads directory and load them in, and then delete them from the directory and CC and iClone still know they are there even though they show the "link" symbol (unless they are stored somewhere else -- now THAT I don't know and if they are stored somewhere I have no idea where it is).
Wait -- let me look for a second...
Nah, I can't find those maps anywhere, so I have to assume they are stored in the file for the item itself. Only RL knows for sure, of course, but I do know that if you send some clothes to someone else with ONLY the clothes files they still have weight maps attached to them, even with that link symbol there. So they are embedded with no choice otherwise.
|