|
By Grace (RL) - 7 Years Ago
|
HDR - Bloom Effect
Enhancements to the HDR (High Dynamic Range) Bloom Effect

The HDR Bloom effect has been vastly improved for iClone 7.2. From this point forward, old projects can revel in better accumulative bloom effect without sacrificing the finer details.
User Interface Changes

The newly added Advanced Bloom Settings under the HDR visual configuration provides minute level control for the base area bloom along with a slew of encompassing ranges to fit the needs of any project.
The newly implemented method for calculating the HDR bloom effect is similar to the new glow technique. The only difference is that HDR bloom affects points of over-exposure in the scene, otherwise known as glare, whereas, glow settings only effect luminous textures and materials.
The layer by layer stacking technique of the HDR bloom effect.
Sample Case


In the following video, the global HDR bloom melds the glare effect of both the feathers for the wings and the loose feathers falling to the ground. By keying the HDR bloom effect, a greater emphasis can be placed on the angel's divinity and majesty.
|
|
By Grace (RL) - 7 Years Ago
|
Glow Effect
Glow Effect Enhancements
Previously, the glow effect was created by blurring the onscreen pixels of the glow texture channel. This technique is limited when it comes to adjusting the range of the glow effect. Therefore, the glow does not retain the sharpness of the luminescent texture, and the lack of details become quite severe when the camera is pulled away or zoomed out.
iClone 7.2 has adopted a new hierarchical adjustment technique to improve upon the glow effect. This new technique eradicates the severe smearing that happens when the glow is viewed from a great distance.


UI Changes

Besides being able to adjust the base glow strength in iClone 7.2, the new user interface offers a slew of layer by layer strength adjustments. The additive aspect of each glow range layer forms a meticulous accumulation of luminescence.
The following video illustrates the layer by layer additive method of the glow effect.
Sample Cases
By tweaking the Adjust Color parameter for the gradient glow texture, a spectrum of neon color lighting can be achieved:

Keying the Glow Strength parameter for the character's glow texture accentuates his potent energies:

|
|
By justaviking - 7 Years Ago
|
Looks very nice. 
|
|
By mtakerkart - 7 Years Ago
|
You can't imagine how this Glow feature is the main feature for render today. You make the same as UDK 4 !!! sooo cool.
|
|
By BOLPHUNGA - 7 Years Ago
|
yeah!
i can now use all them emissive textures i leave out.
|
|
By rogyru - 7 Years Ago
|
Thanks for the breakdown Look forward to testing the updates out they look great
|
|
By animagic - 7 Years Ago
|
|
This is also great for all kinds of displays or lights for example where things to be illuminated are part of a larger texture, so self illumination can not be used.
|
|
By alemar - 7 Years Ago
|
|
wow! Downloading now!!!
|
|
By 4u2ges - 7 Years Ago
|
The more you get the more you want. Now I wish to have those Global Glow settings to be available on per object base (not necessary on a timeline).
|
|
By TonyDPrime - 7 Years Ago
|
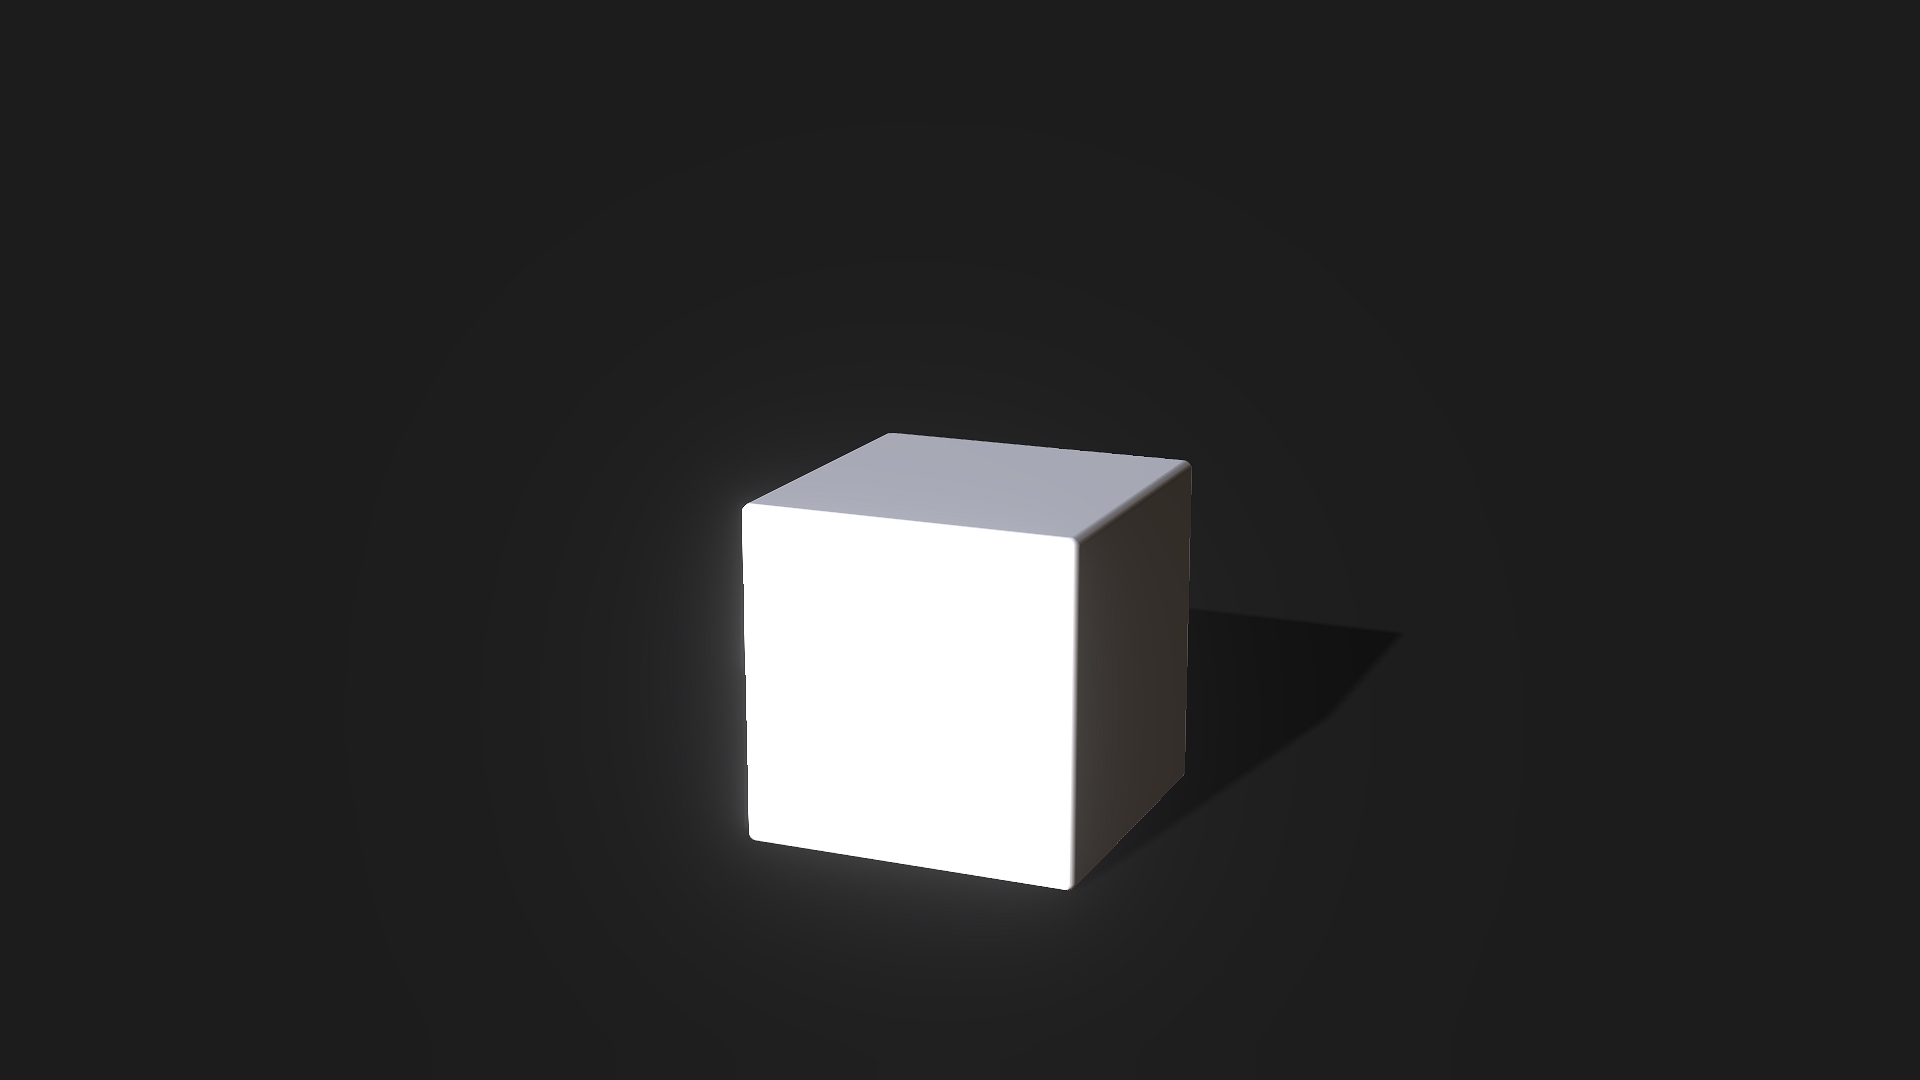
It is easy to produce an issue I am seeing where non-smooth light to dark blending occurs:
1) Open new scene
2) Create primitive cube
DONE
Look at blending between light and dark. There are visible rings. This was not there in previous iteration of the Bloom effect.

More pronounced with Tone Map' checked (On)
Here is a portion of the image zoomed in for clearer view of the "bloom rings".
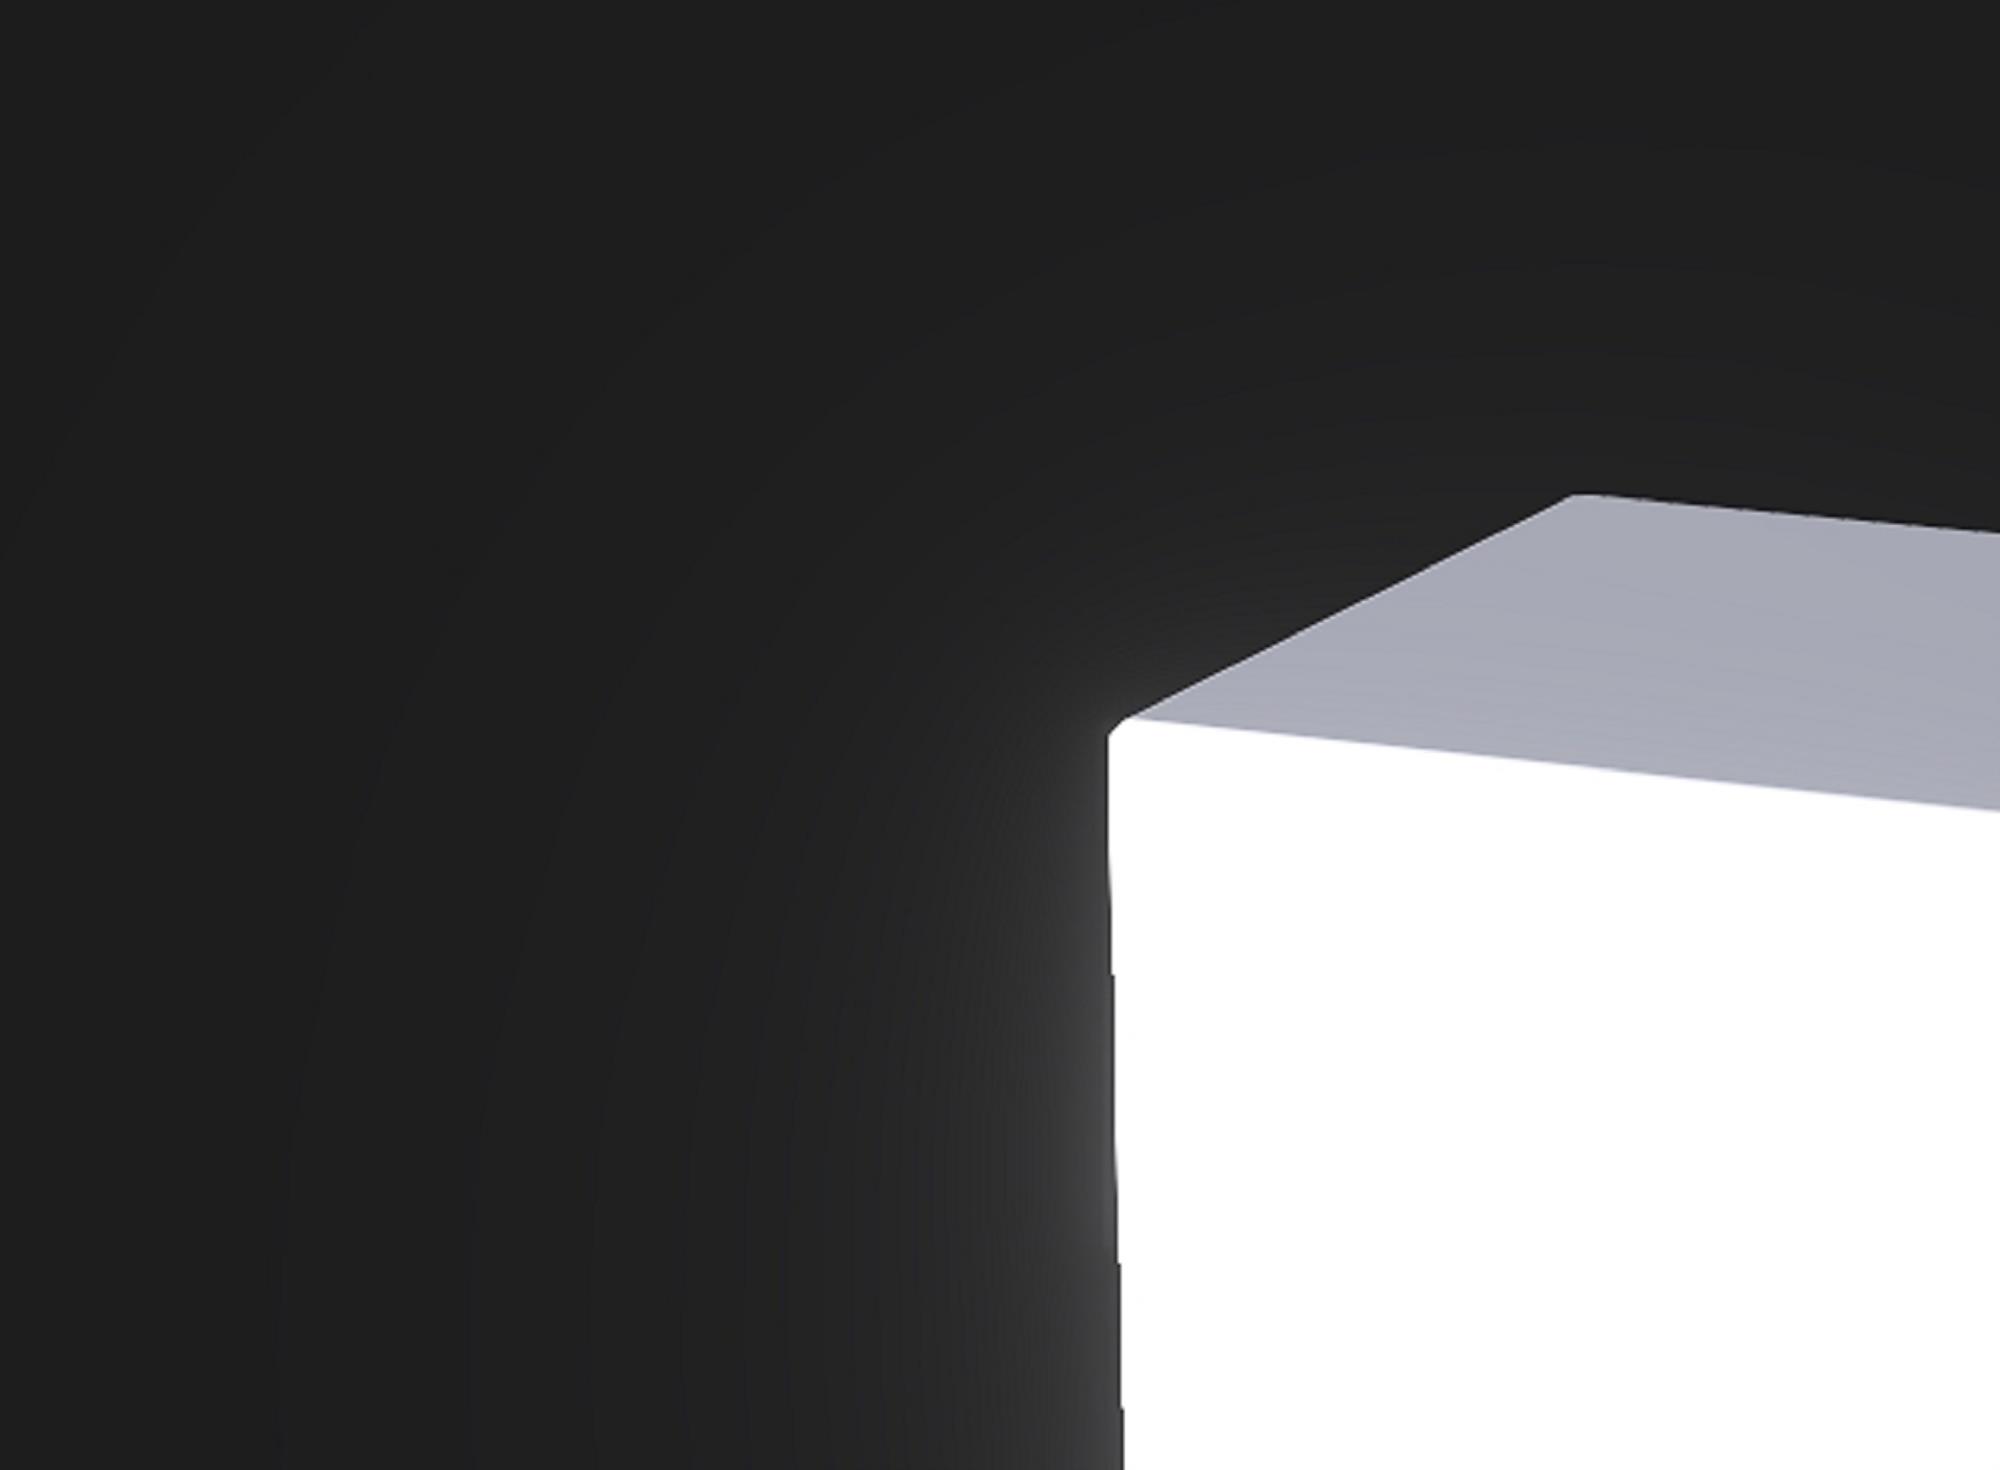
Here is an even further zoom. For some reason there are dark lines separating the gradient light.
If they weren't there, the effect would be less visible!

These bloom rings are visible during this entire video :
NEW MISSION-
Get rid of those dark lines.
Snoke said it best:
"Darkness rises...and Light to meet it..."
May the force be with us all

|
|
By TonyDPrime - 6 Years Ago
|
In online threads about Photoshop, the phenomenon is known as "banding".
one such way to disguise is to add a noise-filter, which can wholesale 'buff' out the gradient transition issue.
If there was a grain/noise filter that could be optionally applied to the bloom, say in the ADVANCED settings, it could perhaps give us better gradient blending for the HDR Bloom when used against a monochrome background, such as black. If there were an option to control the degree of noise (either darkness, resolution, etc.) This would be very interesting as it could artistically be used for simulating dust, say in a lighted bloom area.
Here are 2 examples, a before and after:
.iClone 7.2 Render - Bloom Rings visible

Photoshop noise filter added - Bloom Rings are 'buffed' out. If I added more I could likewise buff out further.
Incoming message alert:
-ADD A NOISE FILTER OPTION TO THE NEW HDR BLOOM ADVANCED SETTINGS....
-NOW
|
|
By TonyDPrime - 6 Years Ago
|
PS -
100 iClone Coins to the party that gets this done.
|
|
By Rogue Anime - 6 Years Ago
|
|
Tony - Very nice - The artifacting in the glow is clearly eliminated. Nice job, thanks, keep those cards & letters coming! ~V~
|