Profile Picture

2021 iClone Lip-Sync Animation Contest WIP - Tiger in the Ring

Posted By russellmidfield 3 Years Ago
You don't have permission to rate!

2021 iClone Lip-Sync Animation Contest WIP - Tiger in the Ring

Author
Message
russellmidfield
General.png
russellmidfield
Posted 3 Years Ago
View Quick Profile
New Member

New Member (58 reputation)New Member (58 reputation)New Member (58 reputation)New Member (58 reputation)New Member (58 reputation)New Member (58 reputation)New Member (58 reputation)New Member (58 reputation)New Member (58 reputation)

Group: Forum Members
Last Active: 2 Years Ago
Posts: 8, Visits: 79
Hey everyone, here's a breakdown of my workflow so far for the contest. I ended up making a character that is more or less Sagat from Street Fighter. Not a perfect replication by any means but heavily inspired! I have been using Blender a lot the last couple of years so I wanted to try and integrate it with the Reallusion software suite.

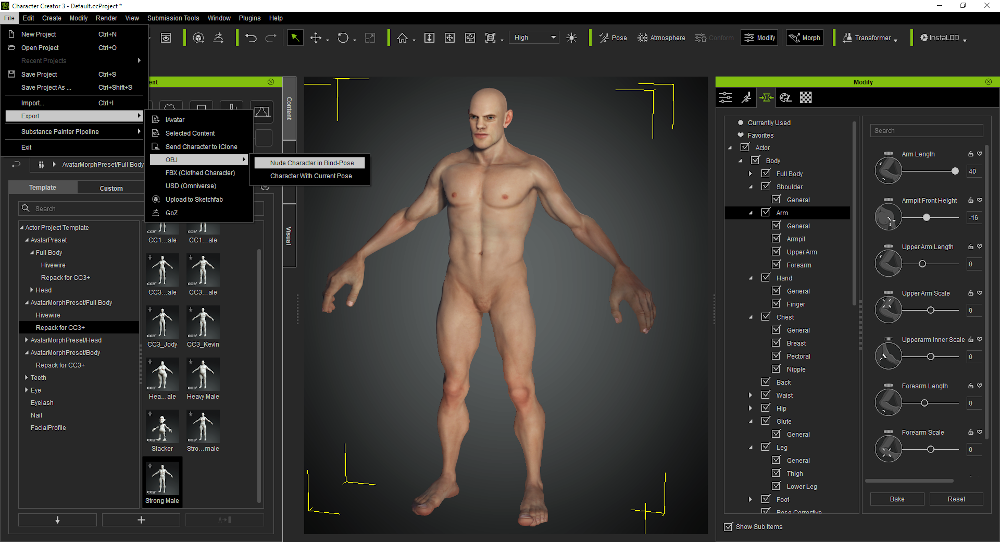
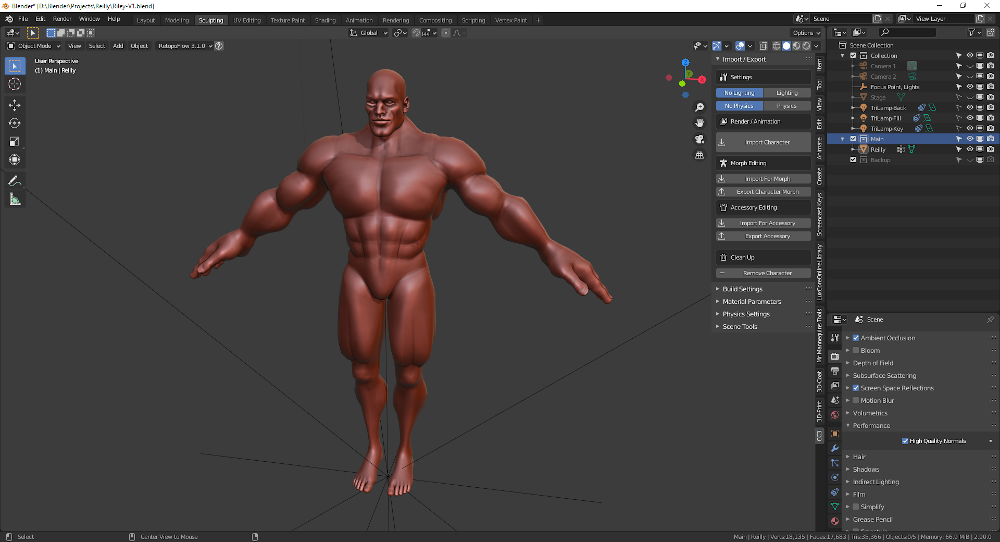
I started out in CC3 with one of the default male characters. I thought I would do something a little more on the stylized side so I played around with the sliders to exaggerate the arms, hands, and feet a little bit, as well as some of the facial features. When I was reasonably happy with the shape I exported to OBJ to the Nude Character in Bind Pose.
https://forum.reallusion.com/uploads/images/d83d96ea-e397-4024-8bbc-6a8e.png

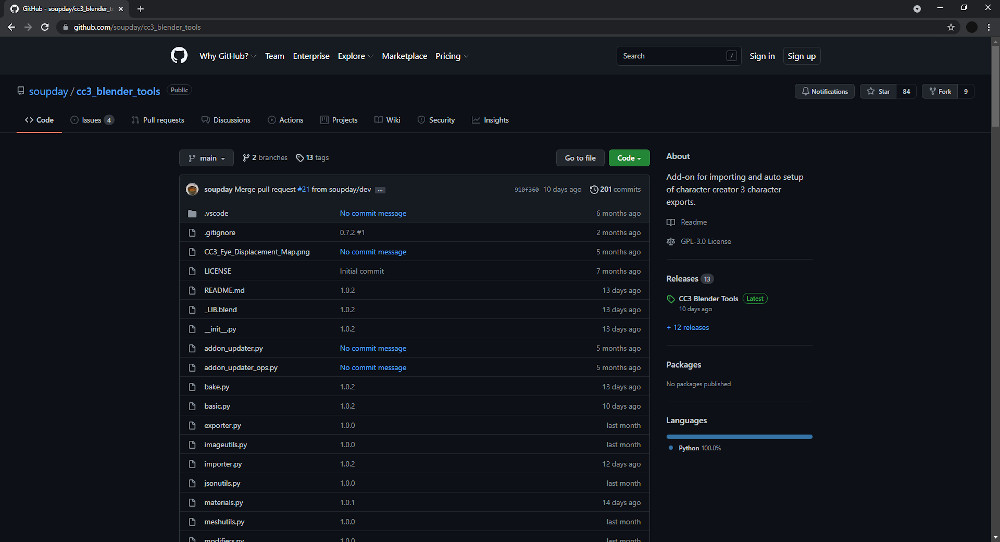
Then I downloaded the CC3 Blender Auto Setup addon from Github. This helps in importing and exporting models, textures, and animations between CC3, iClone, and Blender a little easier.
https://forum.reallusion.com/uploads/images/65538adb-e79a-434f-938e-8f9e.jpg

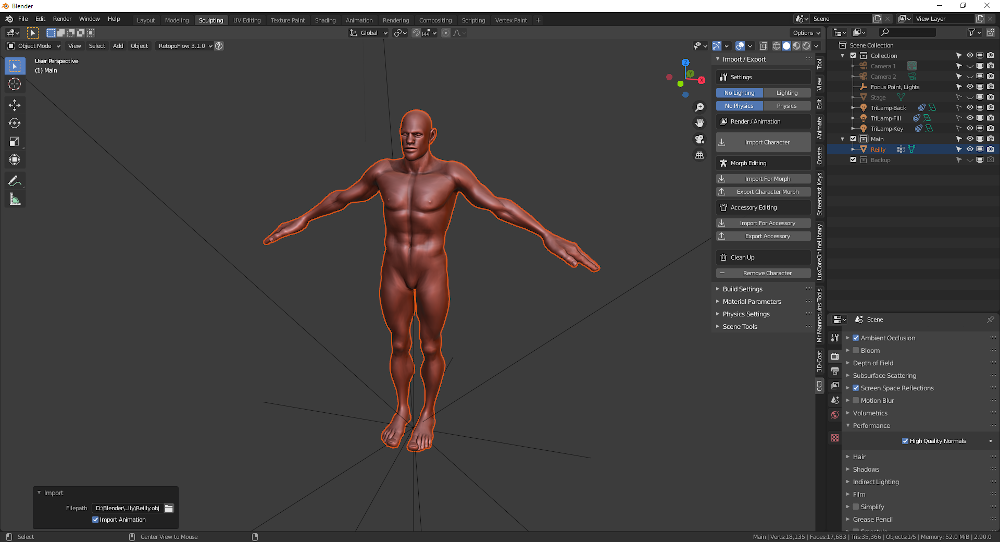
In Blender, I was then able to use the addon to import the OBJ using the Import for Morph button and retain the vertex groups of the CC3 character. This allows you to reimport whatever you edit here in Blender, back into CC3 and still be able to use the Morph Slider Editor if you want and make really unique character shapes.
https://forum.reallusion.com/uploads/images/0e911135-ed8f-45dd-abc3-c160.png

I then used the sculpting tools in Blender to reshape this model to something even more stylized. I have a tendency to always do big bulky muscular dudes with huge hands and this was no different haha. 
https://forum.reallusion.com/uploads/images/d0431f00-03b9-49a3-92e7-bb1d.png

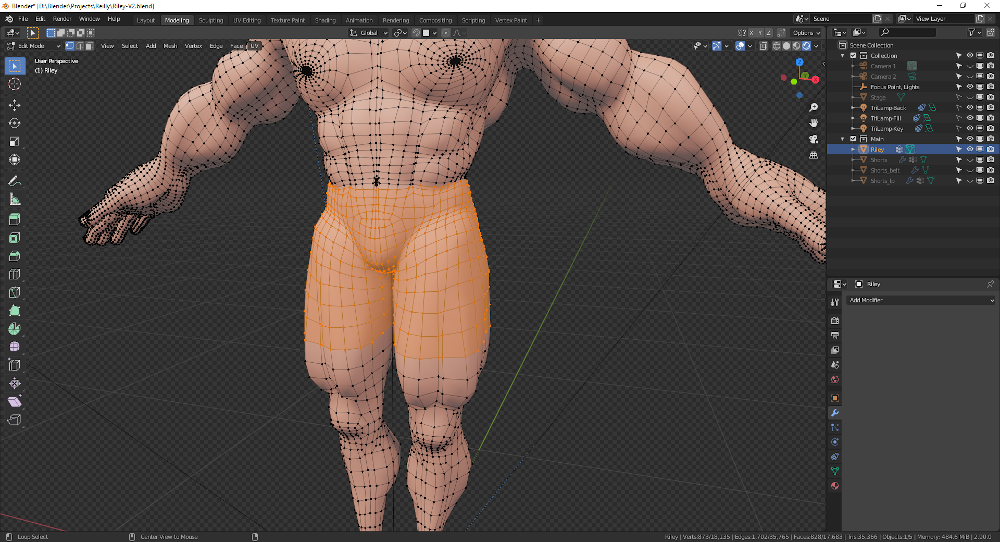
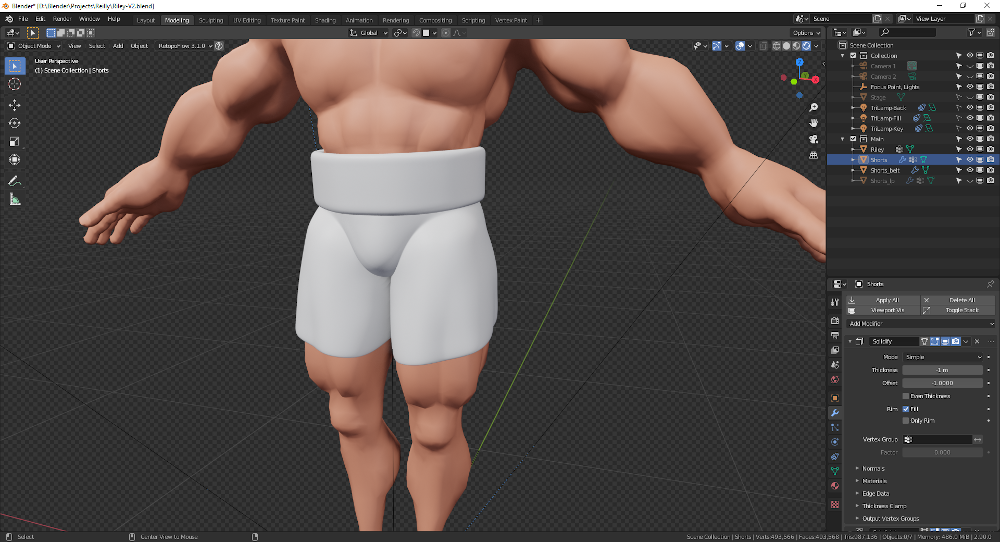
Next I moved on to making some simple clothing. For the boxing shorts, I duplicated and separated the part of the CC3 model around the waist, and then added and applied a Solidify modifier to give it some thickness. I also added a simple ring around the top of the shorts for the large waistband.
https://forum.reallusion.com/uploads/images/5e073564-fdf6-4312-ae1a-3b24.png

https://forum.reallusion.com/uploads/images/e6786601-acfe-46d3-9d3b-c34c.png

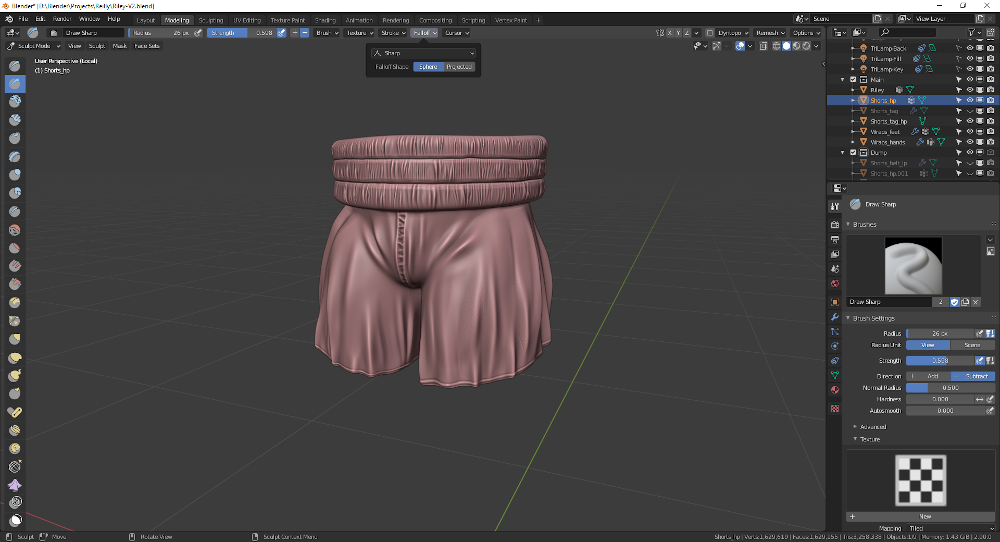
Next I joined these two objects and then used the Voxel Remesh in Blender to make them all the same sculpting resolution. Then I sculpted in some wrinkles and seams. 
https://forum.reallusion.com/uploads/images/81a27672-7549-4fc1-a9b9-1ee9.png

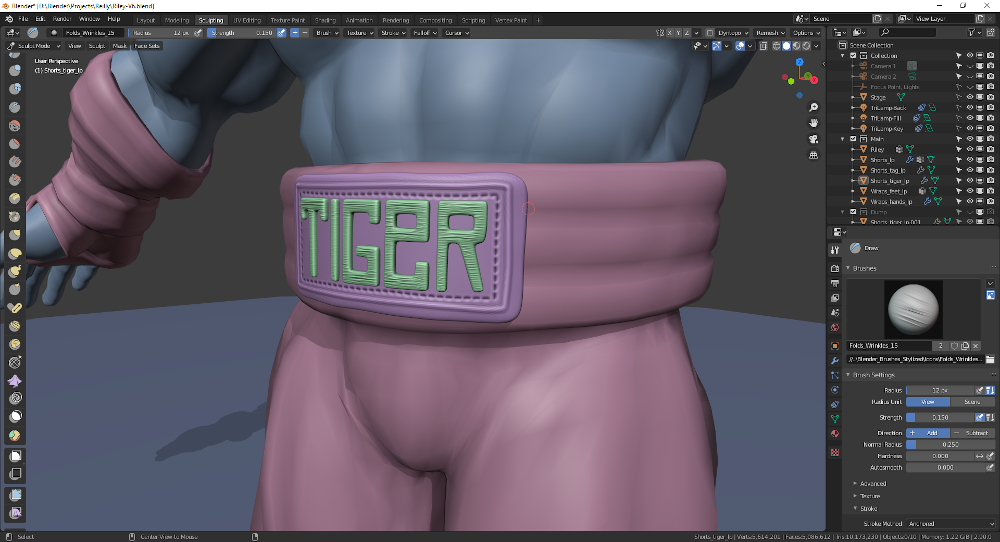
I added in a simple rectangular shape as the base for the large Tiger logo on the shorts, then traced out the letters of the logo just using a single vertex extruded around.
https://forum.reallusion.com/uploads/images/f5bda448-c8dd-4861-8da2-917b.png

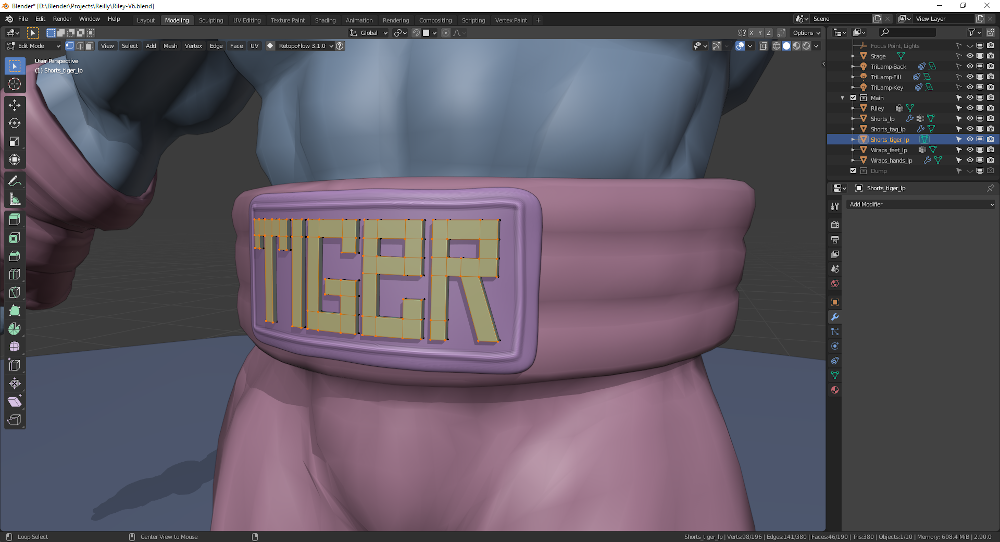
Once I had the base shapes in Edit mode, I switched to Sculpt mode and sculpted in some more wrinkles and seams. I tried to go for an embroidered look on the letters but it didn't turn out quite like I wanted. The Stabilize Stroke feature, along with an increased Dash on the sculpting brush made doing the dotted seam around the edge really easy!
https://forum.reallusion.com/uploads/images/d53f4b1f-3a5c-4f2a-869b-be6d.png

WIP
russellmidfield
russellmidfield
Posted 3 Years Ago
View Quick Profile
New Member

New Member (58 reputation)New Member (58 reputation)New Member (58 reputation)New Member (58 reputation)New Member (58 reputation)New Member (58 reputation)New Member (58 reputation)New Member (58 reputation)New Member (58 reputation)

Group: Forum Members
Last Active: 2 Years Ago
Posts: 8, Visits: 79
Next I moved onto the hand and feet wraps that the character has. Similar to the shorts, I duplicated and separated parts of the CC3 model, then added and applied a Solidify modifier to give some thickness for sculpting. Then I further extruded from this base to give better definition of the material wrapping around and over itself. Then I switched to Sculpting mode and sculpted in some subtle wrinkles and accentuated the folds a bit more.
https://forum.reallusion.com/uploads/images/f1c15f3d-d19a-491d-afd5-ed52.png
https://forum.reallusion.com/uploads/images/a920da22-77bd-4033-b504-9788.pnghttps://forum.reallusion.com/uploads/images/514614e1-f723-4342-b0d6-31c4.png

Repeated the process for the feet as well.
https://forum.reallusion.com/uploads/images/523306a2-0424-42ec-879d-48c2.png

Once I had everything sculpted, it was time to retopologize these high-poly models to make them more usable for the animation portion. For the shorts, I used the Scaled by Normals function in Blender to affectively expand the original CC3 topology around the high-poly sculpt. Then I used the Shrinkwrap modifier and Snap-to-Face function to move the topology of the low-poly model right to the surface of the high-poly one.
https://forum.reallusion.com/uploads/images/43bee91d-e4ae-4380-a347-818e.png

For the hand and feet wraps, I ended up just manually retopologizing by hand from scratch. Both the shorts and the wraps were pretty time-consuming. In hindsight, I maybe wouldn't have sculpted to this level of detail and just relied on baking this detail in. 
https://forum.reallusion.com/uploads/images/15d13a29-987c-4b3f-9cc6-7f41.png

russellmidfield
russellmidfield
Posted 3 Years Ago
View Quick Profile
New Member

New Member (58 reputation)New Member (58 reputation)New Member (58 reputation)New Member (58 reputation)New Member (58 reputation)New Member (58 reputation)New Member (58 reputation)New Member (58 reputation)New Member (58 reputation)

Group: Forum Members
Last Active: 2 Years Ago
Posts: 8, Visits: 79
Once I finished with the retopology, I UV unwrapped everything, then baked AO and Normal maps using Blender's Cycles engine.
https://forum.reallusion.com/uploads/images/a1eb6c5f-aad5-4022-8b5c-251d.png

CC3 models use UDIM textures, which Blender can now work with which is nice. So here I have setup each individual UDIM tile in Blender to match the UDIMs of the CC3 model: Face (1001), Torso (.1002), Arms (.1003), Legs (.1004), Nails (.1005), and Eyelashes (.1006). I also setup a separate UVMap group over on the right side panel for baking in the next step. Each one is numbered between 1001 and 1006, which corresponds to each section of the body.
https://forum.reallusion.com/uploads/images/7fe2b62f-96a6-44d0-97ef-ced3.jpg

To bake UDIMs in Blender you can utilize the UVMap and Image Texture nodes, in conjunction with the UVMap Groups over on the right. Because of the shorts and the wraps, and headband (comes later), I wanted to rebake the AO so it picked up the new objects I made.
https://forum.reallusion.com/uploads/images/e2b7c0d4-00a2-4072-8d33-489a.jpg

The character Sagat has a large scare across his chest. To try and emulate this look, I first tried to sculpt something on top of the skin but it looked terrible, so I made a copy of the CC3 base mesh model, added a Multi-resolution modifier, then used a custom Alpha Map to sculpt the scar. Then, I used the Bake from Multi-resolution function in Blender's baking engine to bake a custom normal.
https://forum.reallusion.com/uploads/images/255e49af-4cad-4c0a-b9f7-4426.jpg
russellmidfield
russellmidfield
Posted 3 Years Ago
View Quick Profile
New Member

New Member (58 reputation)New Member (58 reputation)New Member (58 reputation)New Member (58 reputation)New Member (58 reputation)New Member (58 reputation)New Member (58 reputation)New Member (58 reputation)New Member (58 reputation)

Group: Forum Members
Last Active: 2 Years Ago
Posts: 8, Visits: 79
Once I had most of the maps prepared, I moved onto painting in some color.

In Blender's texture painting mode, I was able to add a new image texture for the diffuse map. I used a MixRGB node to lay the AO map temporarily over the diffuse to get a better idea of the final look. I made use of the Gradient feature in texture paint mode to lay the base colors and make them play a little bit more off of the AO.
https://forum.reallusion.com/uploads/images/4c73c3f4-2500-47f8-a302-105a.png

Then I painted in a design on the shorts by just painting directly in 3d on the right side viewport.
https://forum.reallusion.com/uploads/images/fcaf2642-7f39-4c04-940f-e07d.png

Tried to get real detailed and paint in the seams on the shorts. Up close it looks pretty rough, I'll try and not do too many close-ups around here haha.
https://forum.reallusion.com/uploads/images/00452704-30a8-4fec-9b77-b9e6.png

To add in a little bit more detail I changed the brush Blend type to Multiply and tried to paint in some grime/AO around the Tiger letters. Pretty rough here too so I'll probably keep the camera pretty far away from this part haha.
https://forum.reallusion.com/uploads/images/56d1b471-4666-4d56-a21a-d364.png

Same workflow for the wraps on the hands and feet. I used a Gradient from brownish-yellow to white, starting form the bottom of the feet to the top, to emulate some dirt being kicked-up. Then I painted in some grime around the edges using a Multiply brush.
https://forum.reallusion.com/uploads/images/a364351f-de2d-4f80-9210-c853.png
russellmidfield
russellmidfield
Posted 3 Years Ago
View Quick Profile
New Member

New Member (58 reputation)New Member (58 reputation)New Member (58 reputation)New Member (58 reputation)New Member (58 reputation)New Member (58 reputation)New Member (58 reputation)New Member (58 reputation)New Member (58 reputation)

Group: Forum Members
Last Active: 2 Years Ago
Posts: 8, Visits: 79
I wanted to do some custom hair for this character, even though the original character doesn't have any, to tap into the CC3 software a little bit more. I ended up scrapping this idea since I didn't like how it looked in the end, but I thought i would show it just in case someone wanted to try and do something similar.

First I imported a default male model I had exported from CC3 earlier, which had clothes and hair attached to it.
https://forum.reallusion.com/uploads/images/281ddfbe-e91b-4b8d-b7b7-58de.png

I then used the Clear Parent & Keep Transformation feature in Blender to detach the hair from the CC3 armature. This way I could edit it more freely.
https://forum.reallusion.com/uploads/images/e33e2820-bb34-411b-a6f9-bd78.jpg

I made use of the CC3 Blender Auto Setup addon again here to modify the material settings of the CC3 hair model so that it looked better in Blender. Then I was able to use the Select Linked function in Blender to select individual or multiple hair cards of the CC3 hair, and duplicate, move, and rotate hairs and construct my own custom hair shapes. Here I'm making the moustache and beard more full. 
https://forum.reallusion.com/uploads/images/42d77348-93b0-4877-9a52-a8ae.jpg

The Proportional Editing function also allowed me to select hair cards and move groups of them easily, while still retaining their general shape.
https://forum.reallusion.com/uploads/images/c9b84064-6ba4-496b-b1c9-9e86.jpg

More Proportional Editing here to softly change the swoop on the back hair here. I ended up not really liking this look though so I scrapped it all. It was a good experiment though, something I may use at some point going forward.
https://forum.reallusion.com/uploads/images/e65260e0-9892-44e8-aa84-b07a.jpg
russellmidfield
russellmidfield
Posted 3 Years Ago
View Quick Profile
New Member

New Member (58 reputation)New Member (58 reputation)New Member (58 reputation)New Member (58 reputation)New Member (58 reputation)New Member (58 reputation)New Member (58 reputation)New Member (58 reputation)New Member (58 reputation)

Group: Forum Members
Last Active: 2 Years Ago
Posts: 8, Visits: 79
At this point I had modeled all of the accessories, baked all of the maps, and colored the colors, so I figured I would move on to the next step: reimporting back to CC3. Here I use the Morph Slider Editor to affectively lay my muscular model in Blender over the default model in CC3. 
https://forum.reallusion.com/uploads/images/bb1c3c5d-d9b7-4713-b1b0-6c2d.jpg

Then I used the Create -> Accessory menu item to import the shorts and wraps. I put the model into the default T-pose, then did some minor adjusting to the placement of the wraps so that they lined up better over the hands and feet.
https://forum.reallusion.com/uploads/images/0172a565-ec81-444c-af2f-c328.jpg

Then I used the Transfer Skin Weights for each piece of the clothing. The shorts were very close together in between the crotch so I needed to do some small manual adjustments using the Skin Weights function. Very responsive, really liked it. I learned after this that there is a really handy feature called Lateral Partitoning that is specifically for this sort of weight painting issue since it's so common. Would have made this even easier.
https://forum.reallusion.com/uploads/images/9c539f39-a725-49d8-9e9b-d1dd.jpg
https://forum.reallusion.com/uploads/images/b8cf0f5f-7f88-4542-98d4-76aa.jpg

I also made use of the Hide Mesh feature in CC3, that enables use to select parts of the model that are covered by clothing, and hide them from view, which reduces any chance of clipping. I did this for the forearms and waist area. On import back into Blender for the render portion, you can even select these to not be included in the FBX which is handy as well.
https://forum.reallusion.com/uploads/images/df07d125-5011-479e-bc0f-9c9f.jpg
russellmidfield
russellmidfield
Posted 3 Years Ago
View Quick Profile
New Member

New Member (58 reputation)New Member (58 reputation)New Member (58 reputation)New Member (58 reputation)New Member (58 reputation)New Member (58 reputation)New Member (58 reputation)New Member (58 reputation)New Member (58 reputation)

Group: Forum Members
Last Active: 2 Years Ago
Posts: 8, Visits: 79
Ok with the character more or less setup, it was time to finally move onto the animation and lip-synce part. I exported from CC3 directly to iClone.

I wrote a small voice-script based off of the Story Mode in Street Fighter V for Sagat, as well as a line from the anime from a while back, and recorded myself just using the default Voice Recorded in Windows 10. The character in the game and anime has an incredibly low voice, and mine sounds more like a mouse, so I used Hitfilm Express to drop it a pitch and then exported it to a .WAV file.
https://forum.reallusion.com/uploads/images/db258f2c-bf1f-44cf-ad22-83c6.jpg

Then I used the Create Script function, selected AccuLips as the method, and then loaded in my voice recording. The initial line-up of the Visemes and whatnot was really well-done which was awesome.
https://forum.reallusion.com/uploads/images/4eae032d-6bea-4ae4-b911-1fed.jpg

There is a portion of the script that I wanted a little bit more emphasis on so I used the Talking Style Editor to change it to Enunciating.
https://forum.reallusion.com/uploads/images/138b1fb2-b8c4-4ba8-8089-1bf0.jpg

My favorite part though was actually the small little "sounds" of the Lip Editor that can be found along the bottom of the timeline, right at the bottom of the screen. I went through each one and made small micro-adjustments to the placement of each, as well as making changes to the Expressiveness slider.
https://forum.reallusion.com/uploads/images/027f80dc-e763-4a65-aa2e-0f86.jpg

Once I had the lips down, I moved onto blocking out the body's animations. I used the Motion Puppet feature, and played with the sliders to tailor the look of each.
https://forum.reallusion.com/uploads/images/b436c723-c685-4a57-8023-b88c.jpg

With the body animations down, I layered in some facial gestures to give him some more expression to line up with the script.
https://forum.reallusion.com/uploads/images/9060b3b2-2a83-434e-98a9-325c.jpg

Then added in another layer with the Face Puppet feature. I used the Stylized Face Animation Profile and made some micro movements. Less was definitely more here as I found it was really easy to make the movements look unnatural.
https://forum.reallusion.com/uploads/images/2f435772-d47c-458c-a12e-9ab8.jpg

Then finally, I added in some hand gestures to further customize the movement and poses a bit more.
https://forum.reallusion.com/uploads/images/a0fe7c8a-e9c8-4d3d-a712-bfee.jpg
russellmidfield
russellmidfield
Posted 3 Years Ago
View Quick Profile
New Member

New Member (58 reputation)New Member (58 reputation)New Member (58 reputation)New Member (58 reputation)New Member (58 reputation)New Member (58 reputation)New Member (58 reputation)New Member (58 reputation)New Member (58 reputation)

Group: Forum Members
Last Active: 2 Years Ago
Posts: 8, Visits: 79
With the animations and lip-sync done, it was time to move back to Blender for rendering and compositing.

I used the CC3 Blender Auto Setup add-on once again to import my character and the animations into Blender. I also loaded in the .WAV file from iClone as well.
https://forum.reallusion.com/uploads/images/3d0a1dad-c999-4ad4-9eaf-d4bd.jpg

I didn't show it earlier, but I also modeled a traditional Muay Thai headband, as the character is a Muay Thai fighter. The back part is usually a bundle of strings that hang loosely off of the back of the headband, so I added a Softbody simulation system to the back part of the headband, and gave it a gradual gradient weighting. This gave the effect of a sort of loose material hanging down. I also used the Collision system in Blender on the character's back so that it didn't clip through, but I found it really slowed my computer down quite a bit so I thought I would cut it, given the back of the character won't be seen too much.
https://forum.reallusion.com/uploads/images/37f2bbf0-8afb-4169-ae8a-bf99.jpg

To make the Softbody/cloth simulation a little bit more interesting, I also made use of Blender's Force Fields. I added in a Wind and Turbulence force field so that the cloth looked like it was kind of gently moving in the wind.
https://forum.reallusion.com/uploads/images/b7a7eaa5-8632-44f5-93c6-9ba1.jpg


Reading This Topic