Profile Picture

How do you achieve symmetry in a headshot import?

Posted By delebash 4 Years Ago
You don't have permission to rate!
Author
Message
delebash
delebash
Posted 4 Years Ago
View Quick Profile
Distinguished Member

Distinguished Member (1.2K reputation)Distinguished Member (1.2K reputation)Distinguished Member (1.2K reputation)Distinguished Member (1.2K reputation)Distinguished Member (1.2K reputation)Distinguished Member (1.2K reputation)Distinguished Member (1.2K reputation)Distinguished Member (1.2K reputation)Distinguished Member (1.2K reputation)

Group: Forum Members
Last Active: Last Month
Posts: 41, Visits: 448
I am trying to complete the penny-wise tutorial by Mythcons

First let me explain the things I have tried

Below is a picture modified in Photoshop where I copied half of the face and flipped it to create symmetry in the import photo

https://forum.reallusion.com/uploads/images/8fdcffc1-23c0-4874-bc27-7613.png

After importing via headshot pro with male clean and rough settings  I get the picture below.  I have circled the area of the mesh that is the problem.
I have tried Edit Mesh > Mirror Copy to get symmetry but the problem remains.  I have also tried manually editing the mesh via smooth brush but I can't get the mesh corrected.

https://forum.reallusion.com/uploads/images/da434095-a3e2-4e44-bdd1-7fc3.png


Below is a link to download my initial import project file if needed.
penny-wise

Thanks for any help.
Dan
4u2ges
This post has been flagged as an answer
4u2ges
Posted 4 Years Ago
View Quick Profile
Distinguished Member

Distinguished Member (20.6K reputation)Distinguished Member (20.6K reputation)Distinguished Member (20.6K reputation)Distinguished Member (20.6K reputation)Distinguished Member (20.6K reputation)Distinguished Member (20.6K reputation)Distinguished Member (20.6K reputation)Distinguished Member (20.6K reputation)Distinguished Member (20.6K reputation)

Group: Forum Members
Last Active: 18 minutes ago
Posts: 5.0K, Visits: 15.9K
The geometry is fine - to human eye (mine in particular).
Those couple of blemishes on one side is just a result of head-shot image blending/composing with the CC texture, which usually happens.
If you are looking for absolute perfection, you can symmetrize a Diffuse map in headshot (you should notice the asymmetry there).
Just slash canvas in half, trim, restore original canvas, duplicate layer, mirror it and move it in place (left or right - whichever you slashed).
Or you could symmetrize the head material textures at the end when you are done with head-shot skin settings and then use symmetry tool in Edit Mesh just in case.

(Switch to Orthogonal camera for better evaluation)


Edited
4 Years Ago by 4u2ges
delebash
delebash
Posted 4 Years Ago
View Quick Profile
Distinguished Member

Distinguished Member (1.2K reputation)Distinguished Member (1.2K reputation)Distinguished Member (1.2K reputation)Distinguished Member (1.2K reputation)Distinguished Member (1.2K reputation)Distinguished Member (1.2K reputation)Distinguished Member (1.2K reputation)Distinguished Member (1.2K reputation)Distinguished Member (1.2K reputation)

Group: Forum Members
Last Active: Last Month
Posts: 41, Visits: 448
Thank you.  I am not looking for perfection but in this case those blemishes end up as a sharp angle distortions in the mesh after I re-project.  So assuming both sides of the head had this problem is there a way to fix this using CC3 or is the proper way to edit the mesh?

Thanks for your help!

Here are some new images demonstrating before and after re-project.  If I am correct in understanding you then the below images are not showing a mesh defect but a texture issue?  I am following the tutorial by Mythcons and he doesn't seem to have the same problem so I was trying to figure out what I was doing wrong.

Before

https://forum.reallusion.com/uploads/images/5ea365cc-7a7f-4fe3-b2e8-7044.png

After Front Right and Left

https://forum.reallusion.com/uploads/images/137ff96e-a13a-435f-a630-a698.png
https://forum.reallusion.com/uploads/images/f2e8a3be-3eb5-4aba-9840-02db.pnghttps://forum.reallusion.com/uploads/images/9aead0c3-9ae9-41dd-8308-95af.png
Edited
4 Years Ago by delebash
4u2ges
This post has been flagged as an answer
4u2ges
Posted 4 Years Ago
View Quick Profile
Distinguished Member

Distinguished Member (20.6K reputation)Distinguished Member (20.6K reputation)Distinguished Member (20.6K reputation)Distinguished Member (20.6K reputation)Distinguished Member (20.6K reputation)Distinguished Member (20.6K reputation)Distinguished Member (20.6K reputation)Distinguished Member (20.6K reputation)Distinguished Member (20.6K reputation)

Group: Forum Members
Last Active: 18 minutes ago
Posts: 5.0K, Visits: 15.9K
Again, this is not the mesh issue. Do not try to fix it with mesh editing tools. Work with texture.

I looked at the Mythcons tut. Your base image is way too narrow to compare. It got narrow when you mirrored it I suppose. Try to widen it, make it lighter.
Now look at the generated Diffuse map - scroll all the way to the bottom and check Photo Diffuse - it is asymmetrical. You may edit and mirror it as well, as I suggested in my first reply.
But first, work with base image. It should improve generated Photo Diffuse map.

Also make sure to set the Skin Color lighter in Skin Type settings. It has to match the face color.
You may sample the color from Photoshop and then paste hex value into Skin Color picker, or match it manually.
That should help to do a seamless blending when you re-project.


Edited
4 Years Ago by 4u2ges
delebash
delebash
Posted 4 Years Ago
View Quick Profile
Distinguished Member

Distinguished Member (1.2K reputation)Distinguished Member (1.2K reputation)Distinguished Member (1.2K reputation)Distinguished Member (1.2K reputation)Distinguished Member (1.2K reputation)Distinguished Member (1.2K reputation)Distinguished Member (1.2K reputation)Distinguished Member (1.2K reputation)Distinguished Member (1.2K reputation)

Group: Forum Members
Last Active: Last Month
Posts: 41, Visits: 448
Awesome thank you for the information!
Mythcons
This post has been flagged as an answer
Mythcons
Posted 4 Years Ago
View Quick Profile
Distinguished Member

Distinguished Member (6.7K reputation)Distinguished Member (6.7K reputation)Distinguished Member (6.7K reputation)Distinguished Member (6.7K reputation)Distinguished Member (6.7K reputation)Distinguished Member (6.7K reputation)Distinguished Member (6.7K reputation)Distinguished Member (6.7K reputation)Distinguished Member (6.7K reputation)

Group: Forum Members
Last Active: 2 Weeks Ago
Posts: 448, Visits: 3.2K
Hi there. Sorry, I did not see this thread.

In addition to what 4u2ges said, there is a way to achieve symmetry within Character Creator, but I would only recommend doing it after you're happy with your projected texture. Because once you use it, you'll no longer be able to re-project your texture.

1) Pick a side of the model you want to make symmetrical. Some photos make this difficult, the model's head will be tilted, making this procedure a bit more work. You don't want to make the head too thin or thick.

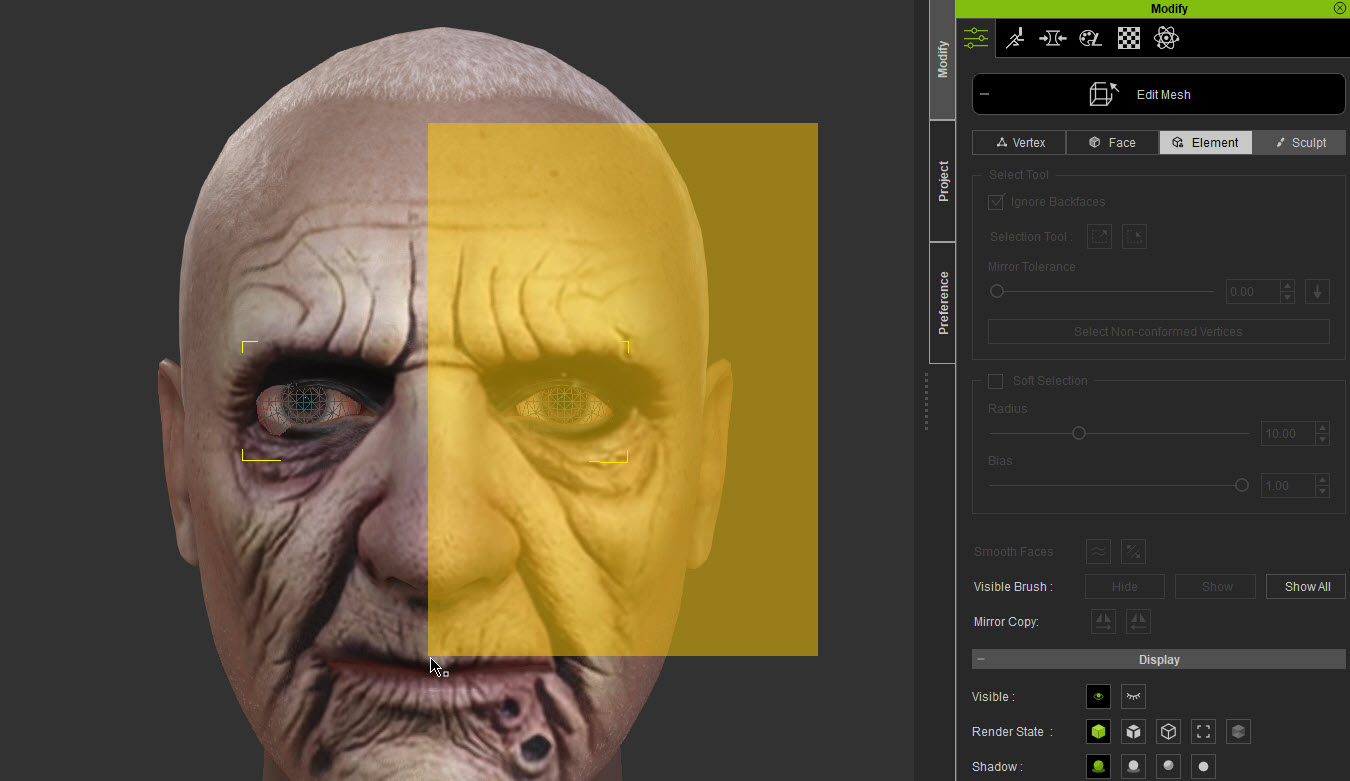
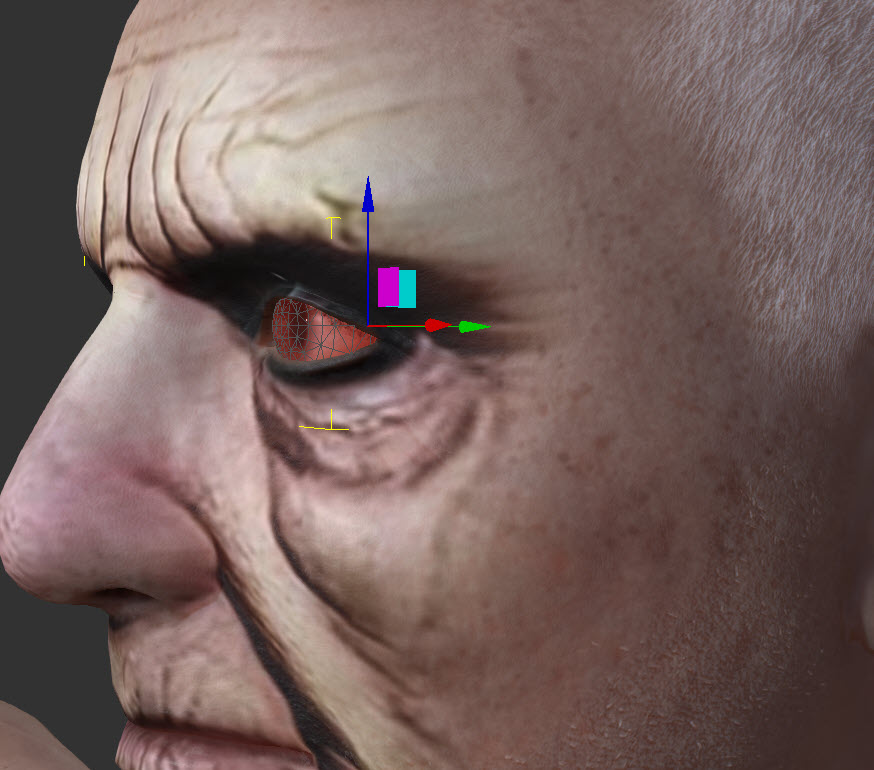
2) Adjust one of the eyes so that its in the center of one of the eye sockets (e.g. position left eye in left eye socket). I used the 'Element' mode in the Edit Mesh menu, and then use the movement tool.

https://forum.reallusion.com/uploads/images/2c62f7a5-eb68-4e45-9fc0-ccce.jpg
https://forum.reallusion.com/uploads/images/e6cdb609-0a08-4884-b2b9-ca5e.jpg

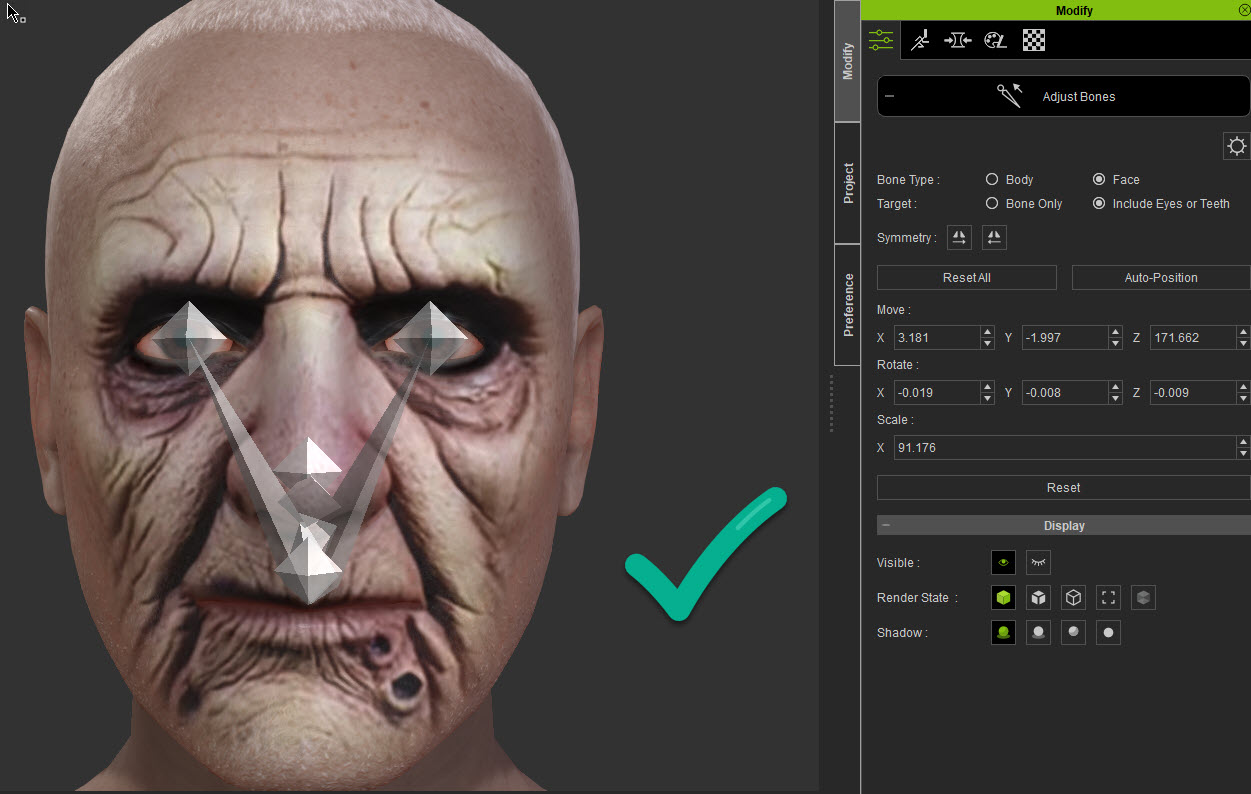
3) Adjust rigging to include face and eyes. This will line up the bones in the eye socket.

https://forum.reallusion.com/uploads/images/69df2b37-7d6f-44c5-b038-acdd.jpg

4) Mirror the bones on the side with the correct placement of the eye. This will move the eye other eye into the correct place.

https://forum.reallusion.com/uploads/images/8d106353-12fd-485c-aa2a-0e80.jpg

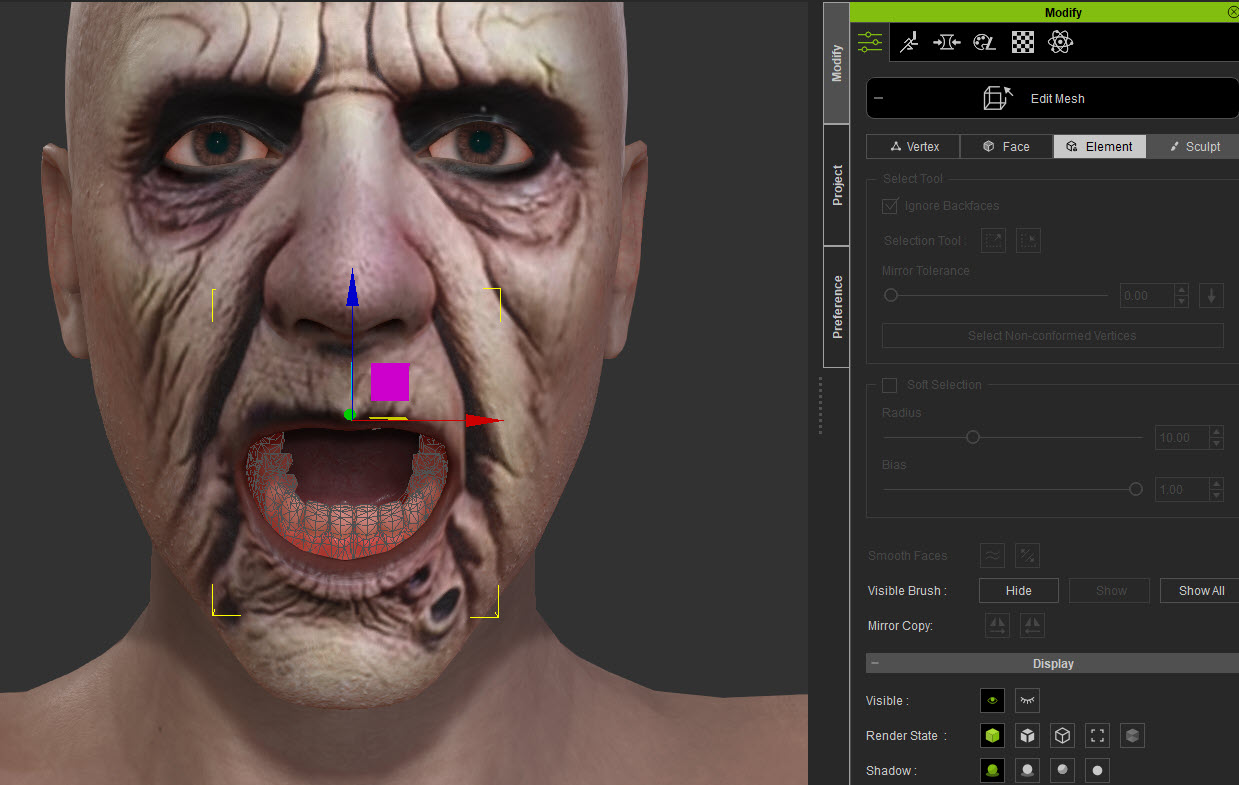
5) If the teeth are out of alignment, you can Edit the mesh, use the 'Element mode' and selected all the meshes (teeth, gums) and then move them into the center with the Move tool (which has visual centering arrows). Then readjust the bones.

https://forum.reallusion.com/uploads/images/e667042d-e528-4608-8015-934c.jpg


Reading This Topic