Profile Picture

Blender FBX crashes 3dXchange

Posted By dogscooby007 4 Years Ago
You don't have permission to rate!
Author
Message
dogscooby007
dogscooby007
Posted 4 Years Ago
View Quick Profile
Senior Member

Senior Member (441 reputation)Senior Member (441 reputation)Senior Member (441 reputation)Senior Member (441 reputation)Senior Member (441 reputation)Senior Member (441 reputation)Senior Member (441 reputation)Senior Member (441 reputation)Senior Member (441 reputation)

Group: Forum Members
Last Active: 4 Years Ago
Posts: 18, Visits: 132
Oh ok. 


File Extensions

So I allowed "show file extensions" in windows explorer:

https://forum.reallusion.com/uploads/images/7d81695c-1cf9-44f8-8596-8fae.jpg

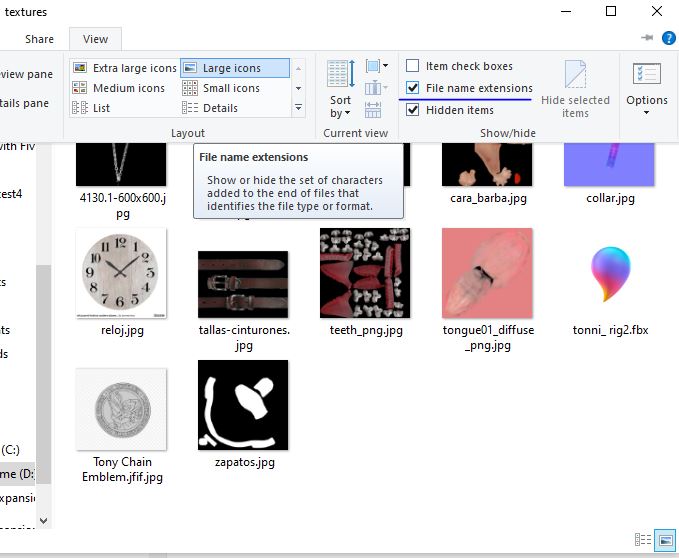
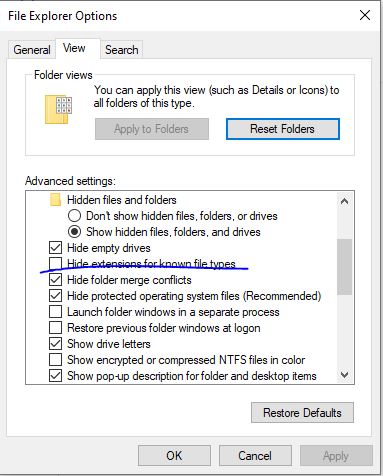
And unchecked hide extensions for known file types:

https://forum.reallusion.com/uploads/images/43212448-3792-44ca-9c7b-808a.jpg

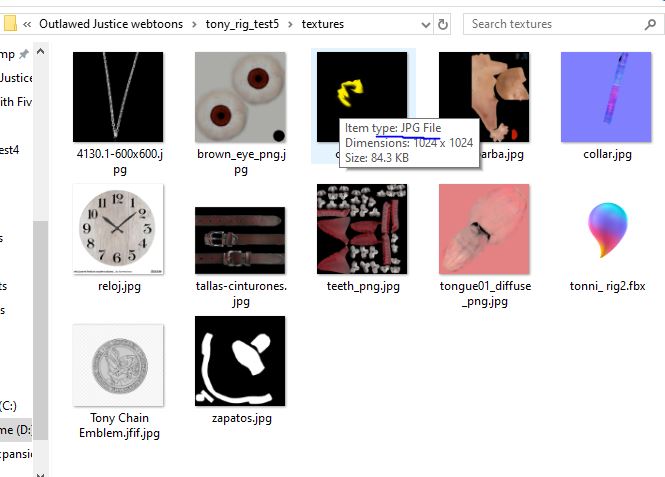
But the highlights still show as a jpeg, am I doing something incorrectly??:
https://forum.reallusion.com/uploads/images/924bde57-d604-458e-8830-12ed.jpg

Hair

I changed the highlights to a .png - and added it to the texture settings in iClone:

https://forum.reallusion.com/uploads/images/4b680e5b-024b-48f8-95c7-5012.jpg

https://forum.reallusion.com/uploads/images/910d3d63-c907-4d39-98f7-712e.jpg

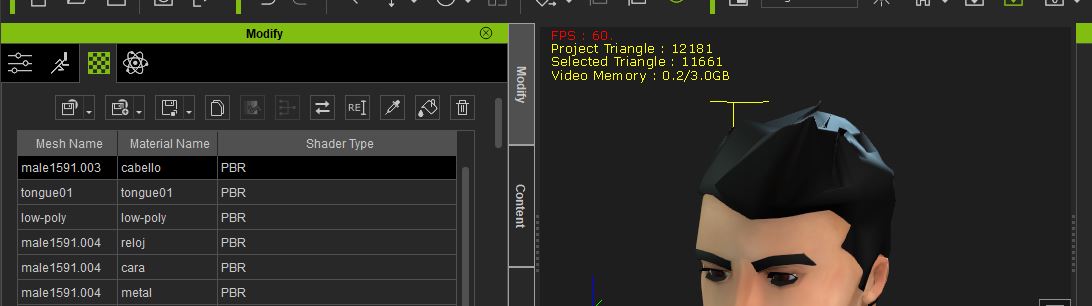
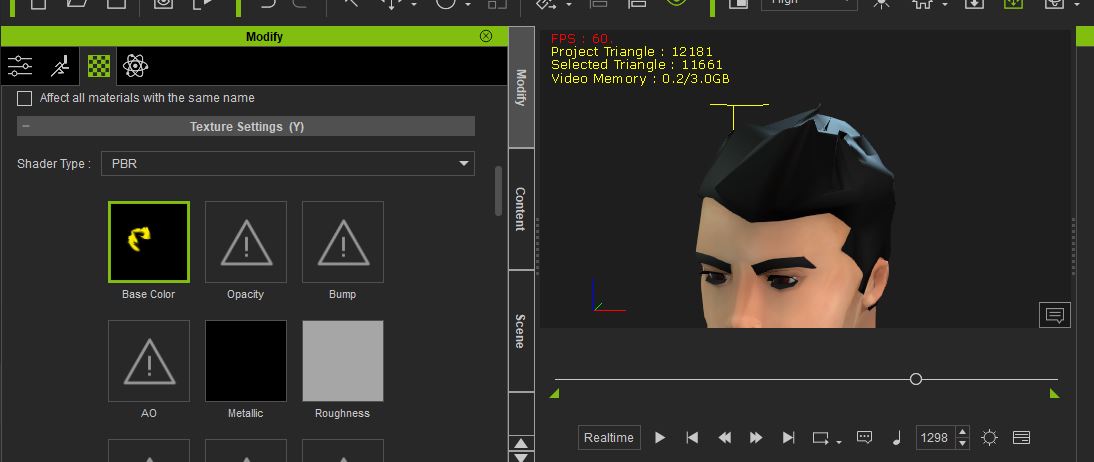
But it didn't seem to add the highlights. Can you let me know what I'm missing?
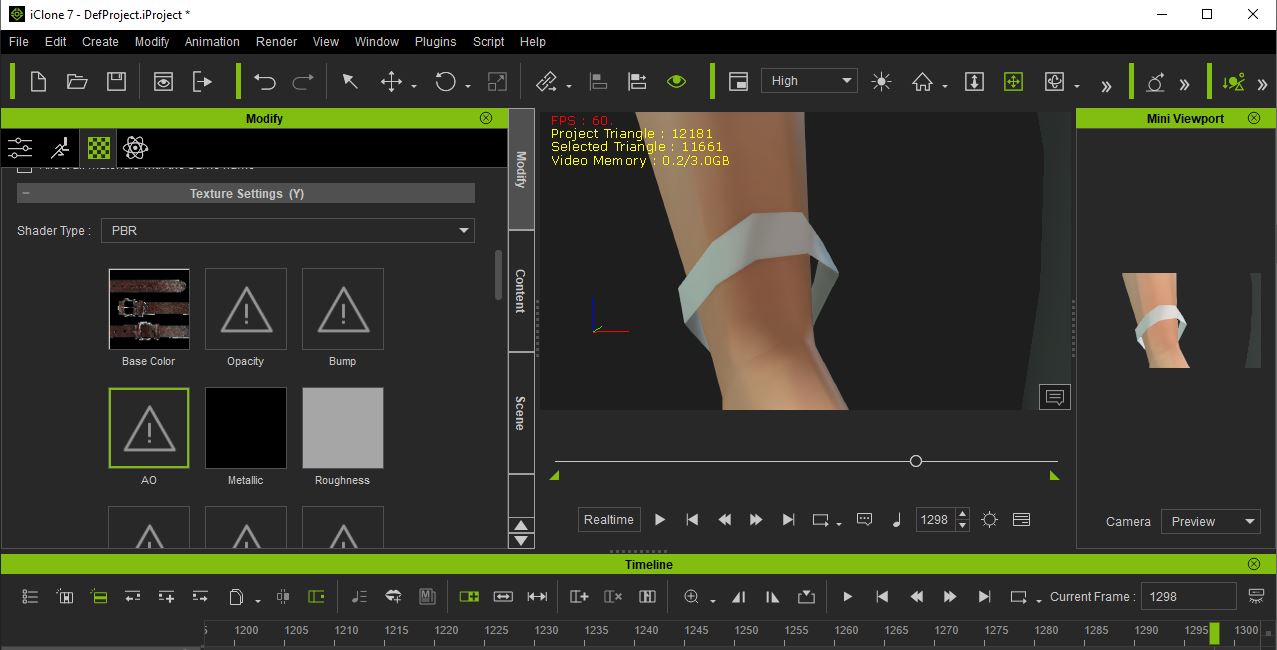
Bracelet


I dragged the bracelet to the AO and got a faint version of the texture:
https://forum.reallusion.com/uploads/images/3e4ece49-d97c-40e5-a521-2840.jpg

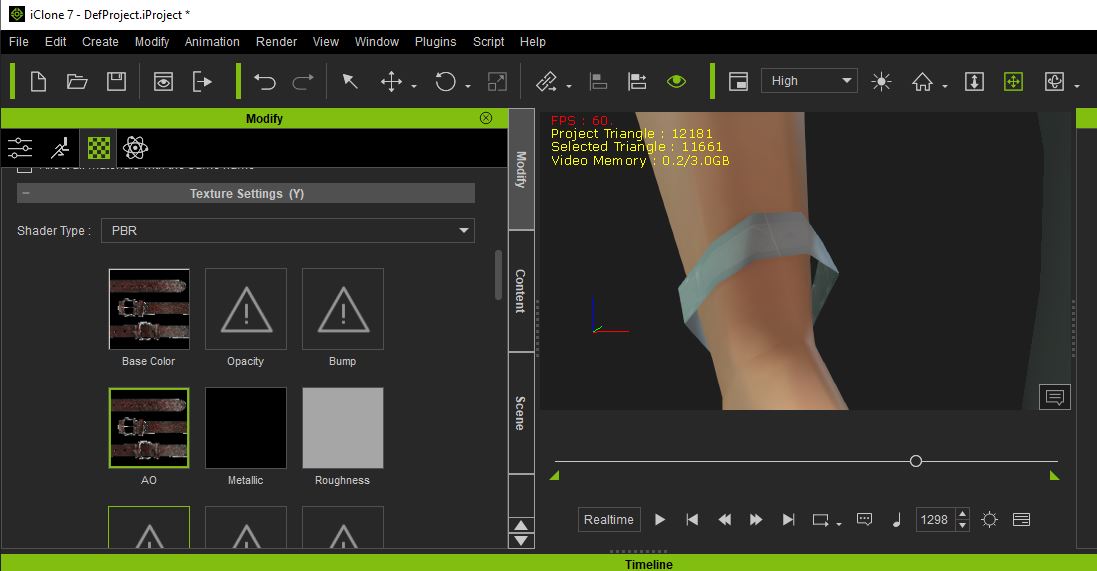
But when I removed it from AO it disappeared:

https://forum.reallusion.com/uploads/images/3d42c097-6224-4ea2-bcb4-62ef.jpg


Emblem


I changed the emblem to a jpeg and placed the emblem in the material.001 for it and it appears faint as well:

https://forum.reallusion.com/uploads/images/a870e8b2-1413-42ff-8b90-65ac.jpg

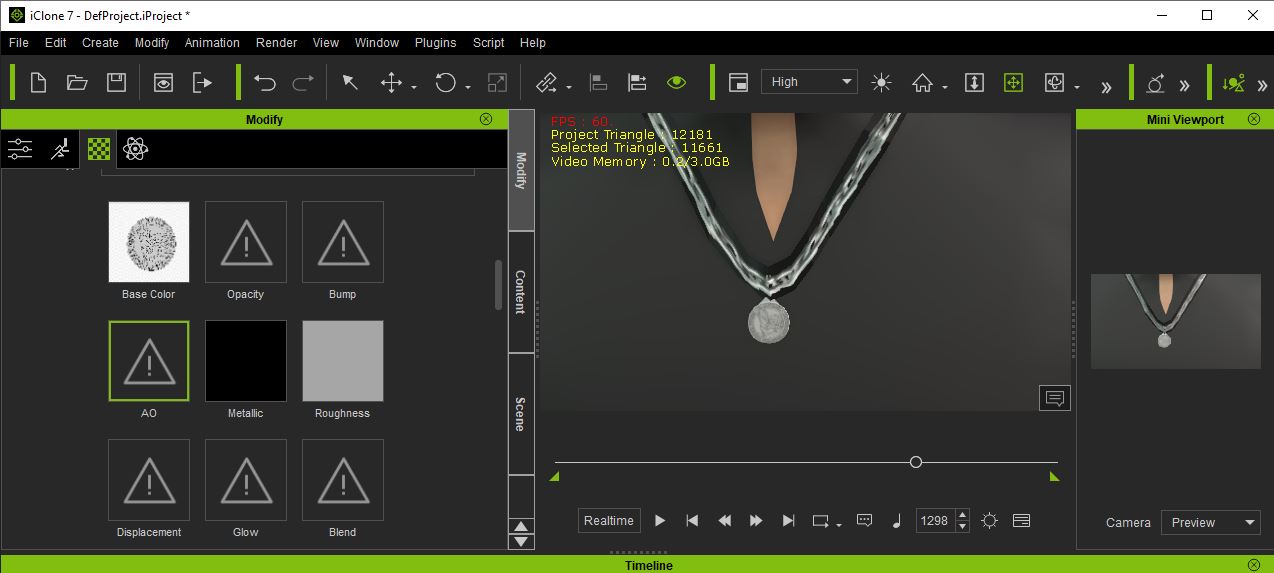
When I place it in the AO as well it appears slightly darker:

https://forum.reallusion.com/uploads/images/98da97f2-d95f-47b0-b521-13e3.jpg

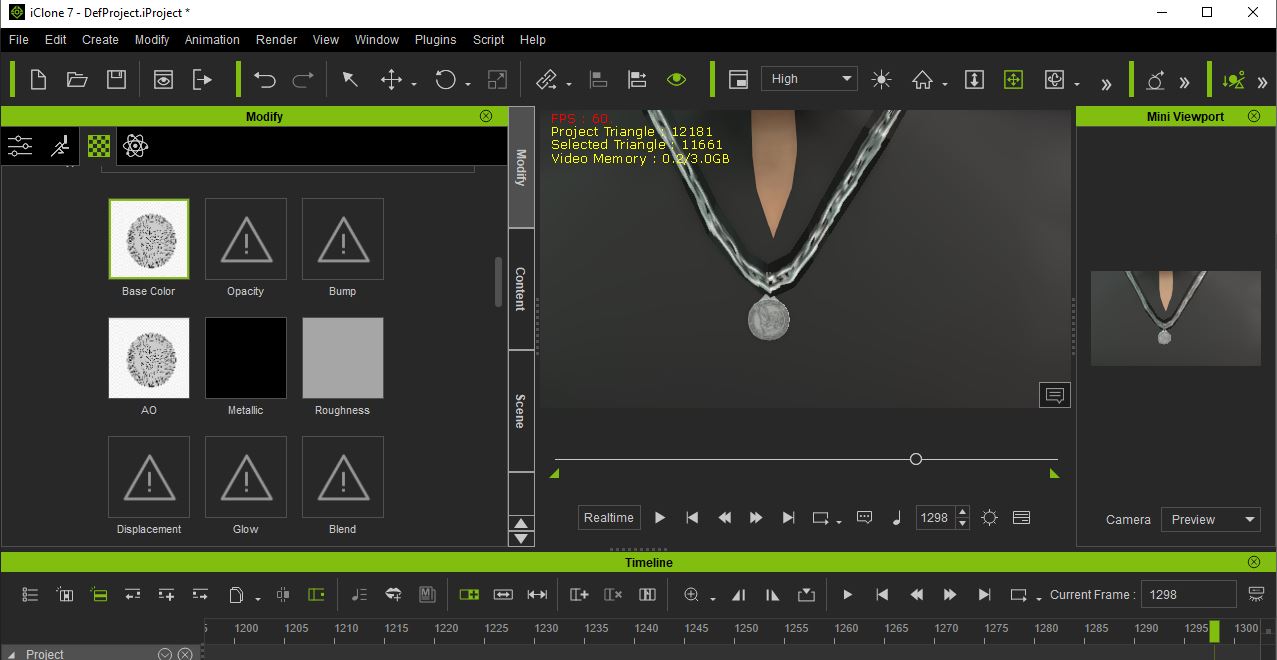
But when I remove it from AO it stays faint.

Questions Summary

How do I know that the hair is supposed to be a PNG instead of a Jpeg? Did I select the correct options to show extensions because it still showed as a jpeg when I selected the option?

Is there something other than adding the highlights to the base color that I have to do for it to appear on the character?

Is there something more I have to do for the bracelet and emblem as they appear too faint?

Thank you again for all your help! Hoping all this will help me grow and learn so I can avoid these issues in the future Smile

4u2ges
4u2ges
Posted 4 Years Ago
View Quick Profile
Distinguished Member

Distinguished Member (20.7K reputation)Distinguished Member (20.7K reputation)Distinguished Member (20.7K reputation)Distinguished Member (20.7K reputation)Distinguished Member (20.7K reputation)Distinguished Member (20.7K reputation)Distinguished Member (20.7K reputation)Distinguished Member (20.7K reputation)Distinguished Member (20.7K reputation)

Group: Forum Members
Last Active: Yesterday
Posts: 5.0K, Visits: 15.9K
When I suspect that the binary file type does not correspond to the given file extension, I open it in text editor (notepad, notepad++,.. etc) and look at the first couple of lines.
In most of the cases it pretty much gives an idea of what file it is.

https://forum.reallusion.com/uploads/images/f5c6143c-d784-4466-a0b4-ddaa.jpg

In the workflow fixing the 32 bit PNG, you missed one step. That is before deleting AO map, you had to drag it back from AO to the Base Color (overriding it).
Doing so would place it into the opacity map slot as well (note, this is only for 32 bit PNG).
But that would not work well anyway because there was a UV>mesh inconsistency.

I have enclosed fixed version of blend file as well as .Avatar (with my choice of materials assignment). I also through in some additional normal maps for the watch and emblem in iClone.

https://www.dropbox.com/s/sxe0q3cby4jms7n/TONY.zip?dl=1


Rampa
Rampa
Posted 4 Years Ago
View Quick Profile
Distinguished Member

Distinguished Member (35.8K reputation)Distinguished Member (35.8K reputation)Distinguished Member (35.8K reputation)Distinguished Member (35.8K reputation)Distinguished Member (35.8K reputation)Distinguished Member (35.8K reputation)Distinguished Member (35.8K reputation)Distinguished Member (35.8K reputation)Distinguished Member (35.8K reputation)

Group: Forum Members
Last Active: 12 minutes ago
Posts: 8.1K, Visits: 60.6K
Are the various parts of your model correctly UV mapped? If there is no UV, no texture will display, only the material color.

Also Blender textures always import at 80 percent strength, giving a washed-out look. Select the diffuse texture square, and make sure the strength slider is at 100 percent.
4u2ges
4u2ges
Posted 4 Years Ago
View Quick Profile
Distinguished Member

Distinguished Member (20.7K reputation)Distinguished Member (20.7K reputation)Distinguished Member (20.7K reputation)Distinguished Member (20.7K reputation)Distinguished Member (20.7K reputation)Distinguished Member (20.7K reputation)Distinguished Member (20.7K reputation)Distinguished Member (20.7K reputation)Distinguished Member (20.7K reputation)

Group: Forum Members
Last Active: Yesterday
Posts: 5.0K, Visits: 15.9K
Rampa (2/1/2020)

Also Blender textures always import at 80 percent strength, giving a washed-out look. Select the diffuse texture square, and make sure the strength slider is at 100 percent.

Fortunately, starting with Blender 2.8 that is no longer a problem.


I did not like the watch band texture and updated it..
https://www.dropbox.com/s/sxe0q3cby4jms7n/TONY.zip?dl=1


dogscooby007
dogscooby007
Posted 4 Years Ago
View Quick Profile
Senior Member

Senior Member (441 reputation)Senior Member (441 reputation)Senior Member (441 reputation)Senior Member (441 reputation)Senior Member (441 reputation)Senior Member (441 reputation)Senior Member (441 reputation)Senior Member (441 reputation)Senior Member (441 reputation)

Group: Forum Members
Last Active: 4 Years Ago
Posts: 18, Visits: 132
Wow! 

Thanks so much, 4u2ges! You're super knowledgeable and have a great eye for design. The new band and chain texture look awesome!

And thanks, Rampa for your help as well!

This character is based of this original design I made:
https://forum.reallusion.com/uploads/images/8c7efed1-53ab-4e2e-8988-7bb4.jpg

https://forum.reallusion.com/uploads/images/01ef0c4b-f998-4c69-8a92-a5fb.jpg

https://forum.reallusion.com/uploads/images/976ad354-e946-45df-8cb4-0b1b.jpg

The intention is to use these character models to create an online comic on webtoons (and eventually perhaps expand into mobile games using the models) - so I really appreciate the help!

I'm currently using a designer from fiverr who thankfully was nice enough to continue trying to fix his issues even after the job was finished. I would like to figure out what I should tell him to avoid these issues in the future as I'll definitely need more characters and his price is very good for a character with a rig.

What would be the best way to explain to him how to avoid the texture and mesh issues? And how did you discover the eyebrow mesh issue that caused the crashing? 

I'd also like the characters to have face mapping so I can control and use expressions with iClone presets. I understand that this can be done in 3dxchange also, but the character needs face bones for it to work. 

The original bone structure that my designer gave me included face bones, but he removed them after we had the original issue (instead opting for mixamo-like bone structure) which, Rampa - I believe I was working with you on in the support ticket. 

What specific bones do I need to have on the character to allow face mapping to work as well as they can?
Rampa
Rampa
Posted 4 Years Ago
View Quick Profile
Distinguished Member

Distinguished Member (35.8K reputation)Distinguished Member (35.8K reputation)Distinguished Member (35.8K reputation)Distinguished Member (35.8K reputation)Distinguished Member (35.8K reputation)Distinguished Member (35.8K reputation)Distinguished Member (35.8K reputation)Distinguished Member (35.8K reputation)Distinguished Member (35.8K reputation)

Group: Forum Members
Last Active: 12 minutes ago
Posts: 8.1K, Visits: 60.6K
You will likely save yourself a lot of headache just creating the characters in CC3 Pipeline. That way it already would have all the blendshapes for facial animation, and you could just have the clothing made in OBJ by your artist. Then you can auto-rig the clothing right in CC3 Pipeline. Hair too!

Like this:


But you can use the Expression Editor in 3DXchange to setup your facial rig, either with blendshapes, or bone movement.


Edited
4 Years Ago by Rampa
4u2ges
4u2ges
Posted 4 Years Ago
View Quick Profile
Distinguished Member

Distinguished Member (20.7K reputation)Distinguished Member (20.7K reputation)Distinguished Member (20.7K reputation)Distinguished Member (20.7K reputation)Distinguished Member (20.7K reputation)Distinguished Member (20.7K reputation)Distinguished Member (20.7K reputation)Distinguished Member (20.7K reputation)Distinguished Member (20.7K reputation)

Group: Forum Members
Last Active: Yesterday
Posts: 5.0K, Visits: 15.9K
Very nice job with character design I must say. Good luck with your project.

Now for the future I'd recommend to have the least possible objects in the rig. IMO, only those need to be set as an accessory (detachable) should be a separate objects.
The rest should be consolidated as a single mesh (separated by UV/Materials only). Eyebrows seems to be a simple, clean mesh. And I still have no idea why it was causing a problem.
I found it was a problem by stripping portions of mesh in Blend file and exporting to FBX until I narrowed it down to eyebrows as a cause of the problem.
Now the face rig is a whole different story. You probably need to get back to the original blend file with face bones. In that file try to merge parts of the body including eyebrows and see if that works well with export.
Number of bones for the face would be commented with face expression requirements. It could be as simple as opening/closing eye and mouth to as complex as visemes and extensive face muscle movements.
And mind the texture file types, now that you know Smile


dogscooby007
dogscooby007
Posted 4 Years Ago
View Quick Profile
Senior Member

Senior Member (441 reputation)Senior Member (441 reputation)Senior Member (441 reputation)Senior Member (441 reputation)Senior Member (441 reputation)Senior Member (441 reputation)Senior Member (441 reputation)Senior Member (441 reputation)Senior Member (441 reputation)

Group: Forum Members
Last Active: 4 Years Ago
Posts: 18, Visits: 132
4u2ges, if I had my designer start off with the blender file you fixed and sent me would that be a good starting point to add the facial bones?

Rampa, it'd be much easier to make the character myself with Character Creator (which I do own as well), but I had trouble making the characters in the cartoony style I'm using.  Do you know of any way to get it close to the designs I have?
4u2ges
4u2ges
Posted 4 Years Ago
View Quick Profile
Distinguished Member

Distinguished Member (20.7K reputation)Distinguished Member (20.7K reputation)Distinguished Member (20.7K reputation)Distinguished Member (20.7K reputation)Distinguished Member (20.7K reputation)Distinguished Member (20.7K reputation)Distinguished Member (20.7K reputation)Distinguished Member (20.7K reputation)Distinguished Member (20.7K reputation)

Group: Forum Members
Last Active: Yesterday
Posts: 5.0K, Visits: 15.9K
I am not sure how your designer has done it in the first place. Whether they used template rig and just sculpted a character, or has made it from the scratch. Better ask them.
But to make a CC character (which is the method I would also preferred), the designer needs to be familiar with CC and have an access to it.
For skilled artist there is not much work to sculpt an OBJ exported from a standard CC body mesh and then import it back to CC as a morph. And then texture work.
Character tight cloth is even easier - body mesh extract and slight trim. Accessories, shoes, hair you already have - just need to be fit.


Edited
4 Years Ago by 4u2ges
Rampa
Rampa
Posted 4 Years Ago
View Quick Profile
Distinguished Member

Distinguished Member (35.8K reputation)Distinguished Member (35.8K reputation)Distinguished Member (35.8K reputation)Distinguished Member (35.8K reputation)Distinguished Member (35.8K reputation)Distinguished Member (35.8K reputation)Distinguished Member (35.8K reputation)Distinguished Member (35.8K reputation)Distinguished Member (35.8K reputation)

Group: Forum Members
Last Active: 12 minutes ago
Posts: 8.1K, Visits: 60.6K
You can send your texture to an external editor, or use the internal color adjuster. See these two help pages.
https://manual.reallusion.com/Character_Creator_3/ENU/3/Content/Character_Creator_3/3/15_Multiple_Channel_Texture_Mapping/Modifying_Texture_Settings_Basic.htm
https://manual.reallusion.com/Character_Creator_3/ENU/3/Content/Character_Creator_3/3/15_Multiple_Channel_Texture_Mapping/Using_Adjust_Color_Panel.htm

Same procedure for body skin materials. Double-clicking a texture square also lets you load a new texture.

You right-click drag an image into your scene to create an image plane. Scale and position it to use for modelling morphing/modelling your character. Or you GOZ it to Zbrush, or export an OBJ to sculpt in some other software for re-import as a morph, as 4u2ges mentioned.

Edited
4 Years Ago by Rampa


Reading This Topic