Once again I don't have time to write the guide I intended to write, so I am just going to dump notes here for you to try to piece together because it's better than waiting a month and getting nothing, right?
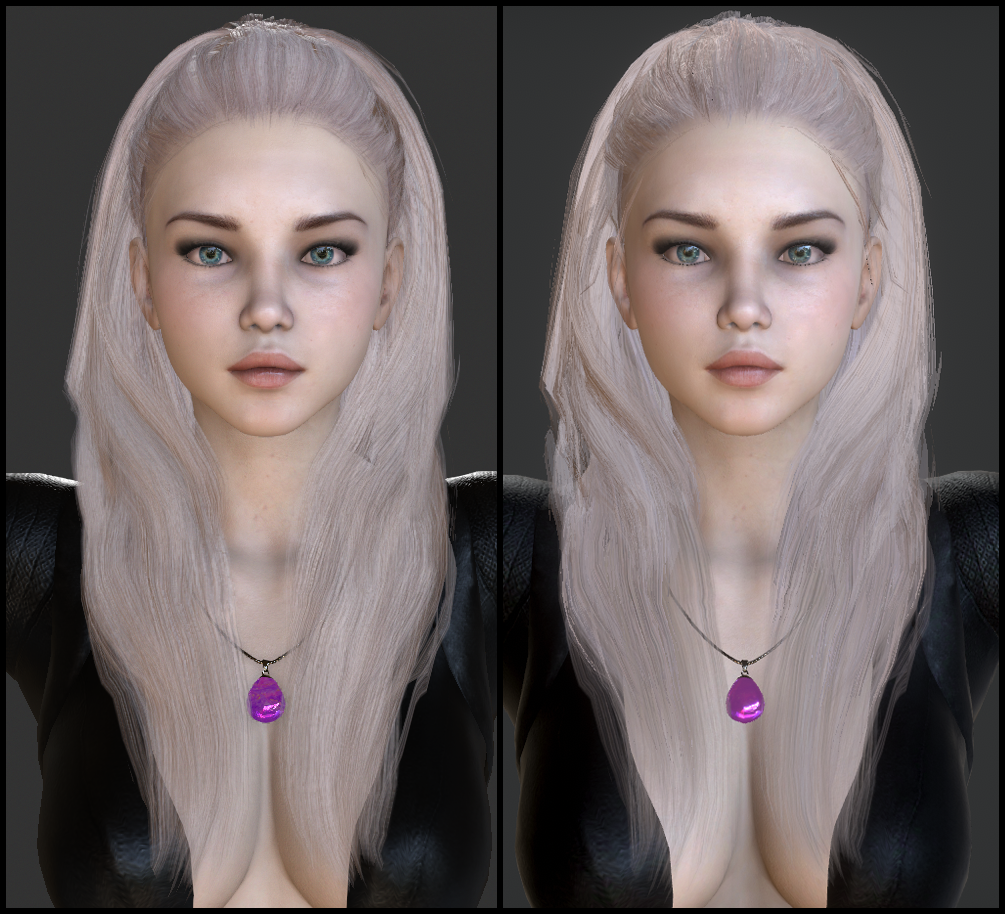
This image is CC3 on the left and Unity on the right. RRFREELANCE's Hair Shader 2.0 (non-HDRP version) was used for everything but the thin wisps at the bottom — Taecg's shader is used there. Notice there is a bald spot in the upper left, near the temple; that is something I didn't notice when I did Polygon Reduction so watch out and inspect your hair very closely when you reduce polycounts.
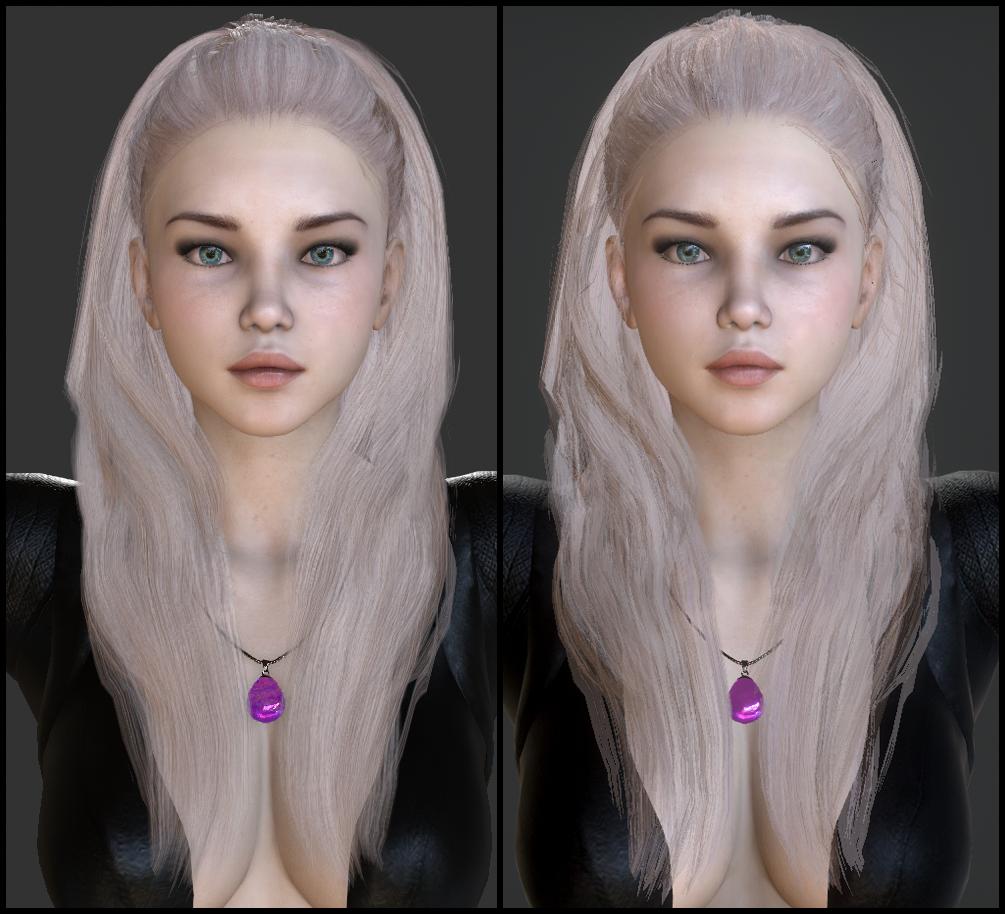
Again, CC3 on the left. This image uses RRFREELANCE's shader for everything. Notice the wisps look worse, but the bald spot looks better — that is because the wisps and that spot happen to use the same material, and RRFREELANCE's shader has a means of thickening hair to take care of those type of problems.
So, here's a mess of notes...have fun!
CC3...Polygon Reduction causes mesh to deflate due to lost verts/polys...
After Polygon Reduction try Modify > Conform > Increase Size 0.10, or manually Scale with Edit Mesh > Element to restore general shape
The scalp will often sink into the skull. If you can get to it with Edit Mesh > Element, select a vertex with maximum Radius/Bias to see the outline of where the other points are in order to drag the scalp away from the skull...
Sometimes you will want to edit the scalp Opacity map to increase underlying hair thickness. And easy way to do it in Photoshop is to duplicate the layer and drag half of the new top layer like shown in the image...
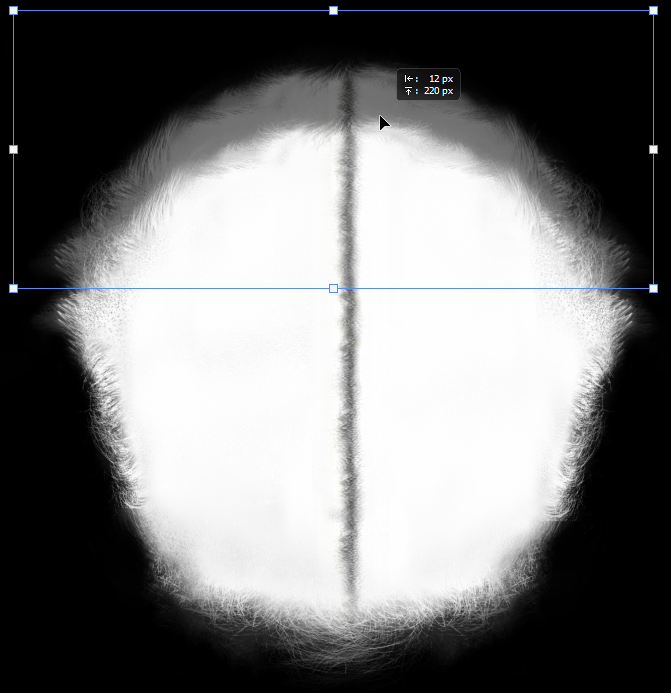
Follow up with Clone Stamp as needed. If you used Launch Texture from CC3 and you have a PNG file that won't degrade from re-saving, you can tweak and save a lot and it will update immediately in CC3 (flatten layer before saving and then undo if more tweaks are needed).
Link textures before export. Consider merging materials for the insignificant layers of your hair if it has many layers — going from 10 layers to 7 would be good for performance, for example.
Unity...
Texture Import (can multi-select for all hair textures): Trilinear (better mip maps when zoomed out), Aniso at 2 (better quality at angles — higher values often have no gain), check Alpha is Transparency (for a minor positive effect on transparency blending — CC3 by default merged Opacity to Diffuse (Albedo) alpha).
If your hair has a Grayscale Bump Map instead of a Normal, select Create from Grayscale (0.008 to 0.016), but be aware that Unity causes white artifacts when converting Bump Maps — consider using Photoshop > Filter > 3D > Generate Normal Map instead: Blur: 0 | Detail Scale 100%
Arrange, Select and edit multiple Materials — Separate hair materials to their own folder so you can easily select all at once. Copy & Paste Component Values to quickly set basic values for hair with many layers
Multiple Inspector windows can help (lock on Inspector on your material window)
Negative X/Y offsets ~ 0.05 can effectively clip/blend hair base & hide stray hairs that look bad — can also gain you some hair thickness | Decreasing tiling can sometimes add to the effect
CC3 hair shader does good with 1024 textures, but Unity may need 2K textures to match it (
as is the case in the pictures! Fortunately, the Opacity & Diffuse are merged as just one 2K texture so the performance impact is lessened)
Soften hair by decreasing Normal map strength
Thicken hair by using Photoshop's Blur Tool on your Diffuse/Alebdo (technique not used in the above images)
Leave the Scalp/Cap layer set to Standard shader Fade — hair shaders won't help with this layer, only Photoshop helpsTaecg PBR Metallic...Cap/Scalp & hairbands/accessories — no hair shader
Plug in your Normals & Drop grey 64x64 Metallic into MetallicTex (R)
Start off by increasing Cutoff .35 to 1 and work your way down
Set your main hair layer to Geometry (Render Queue) for shadows
Increasing Emiss from .3 to .5 has a good effect
Default Render Queue setting of 2450 can conflict with Skybox in Game iew and you will not notice if only looking at Scene view — try 2501 (or switch between Geometry/Transparency/Alpha Test) to correct
Fake shadows by lowering Value/Emiss on under layers
This shader works in Forward and Deferred mode, but poorly reacts to light
RRFREELANCE VRTC...Put your Albedo in the VRTC slot. The shader is designed to be used wth a hair strand designer that enables you to control the root, main, and tip colors, and without it the VariantColor, Rootcolor, TipColor, in combination with VRTC_Bias & Scale operate in an insane manner. In fact, this hair shader was designed by a mad scientist who disappeared after promising an update 6 months ago. Some say he went mad. Maybe you will too, but you won't get better results in Unity with any other shader...
PushHairs setting at ~0.005 - 0.015 is amazing for adding thickness to scalp, crown, and anything that needs it
Hair shadows will be automatically enabled if not using Mask Clip, alpha, or PushHairs —otherwise set Render Queue to Geometry if shadows are wanted (typically for main hair layer only)
Light_Bias, Light_Scale, LightScatter, BaseIllumination, SSS become active when all sliders are pushed to max — then work backwards to tune
NoisePower is non-functional
ExtraCutting uses a greyscale texture (black/white/or grey—toss one of your 64x64 roughness maps here to test) and could have been used to fix the bottom wisps while leaving the temple area intact in the previous images
CC3 & Daz Tricks | CC3 to Unity workflow
Edited
5 Years Ago by
Scyra