MAKING BEARDS
Ok here is one way to start creating a beard using a plane. I think I prefer to use a cube but decided to show this way. Its all very similar anyway
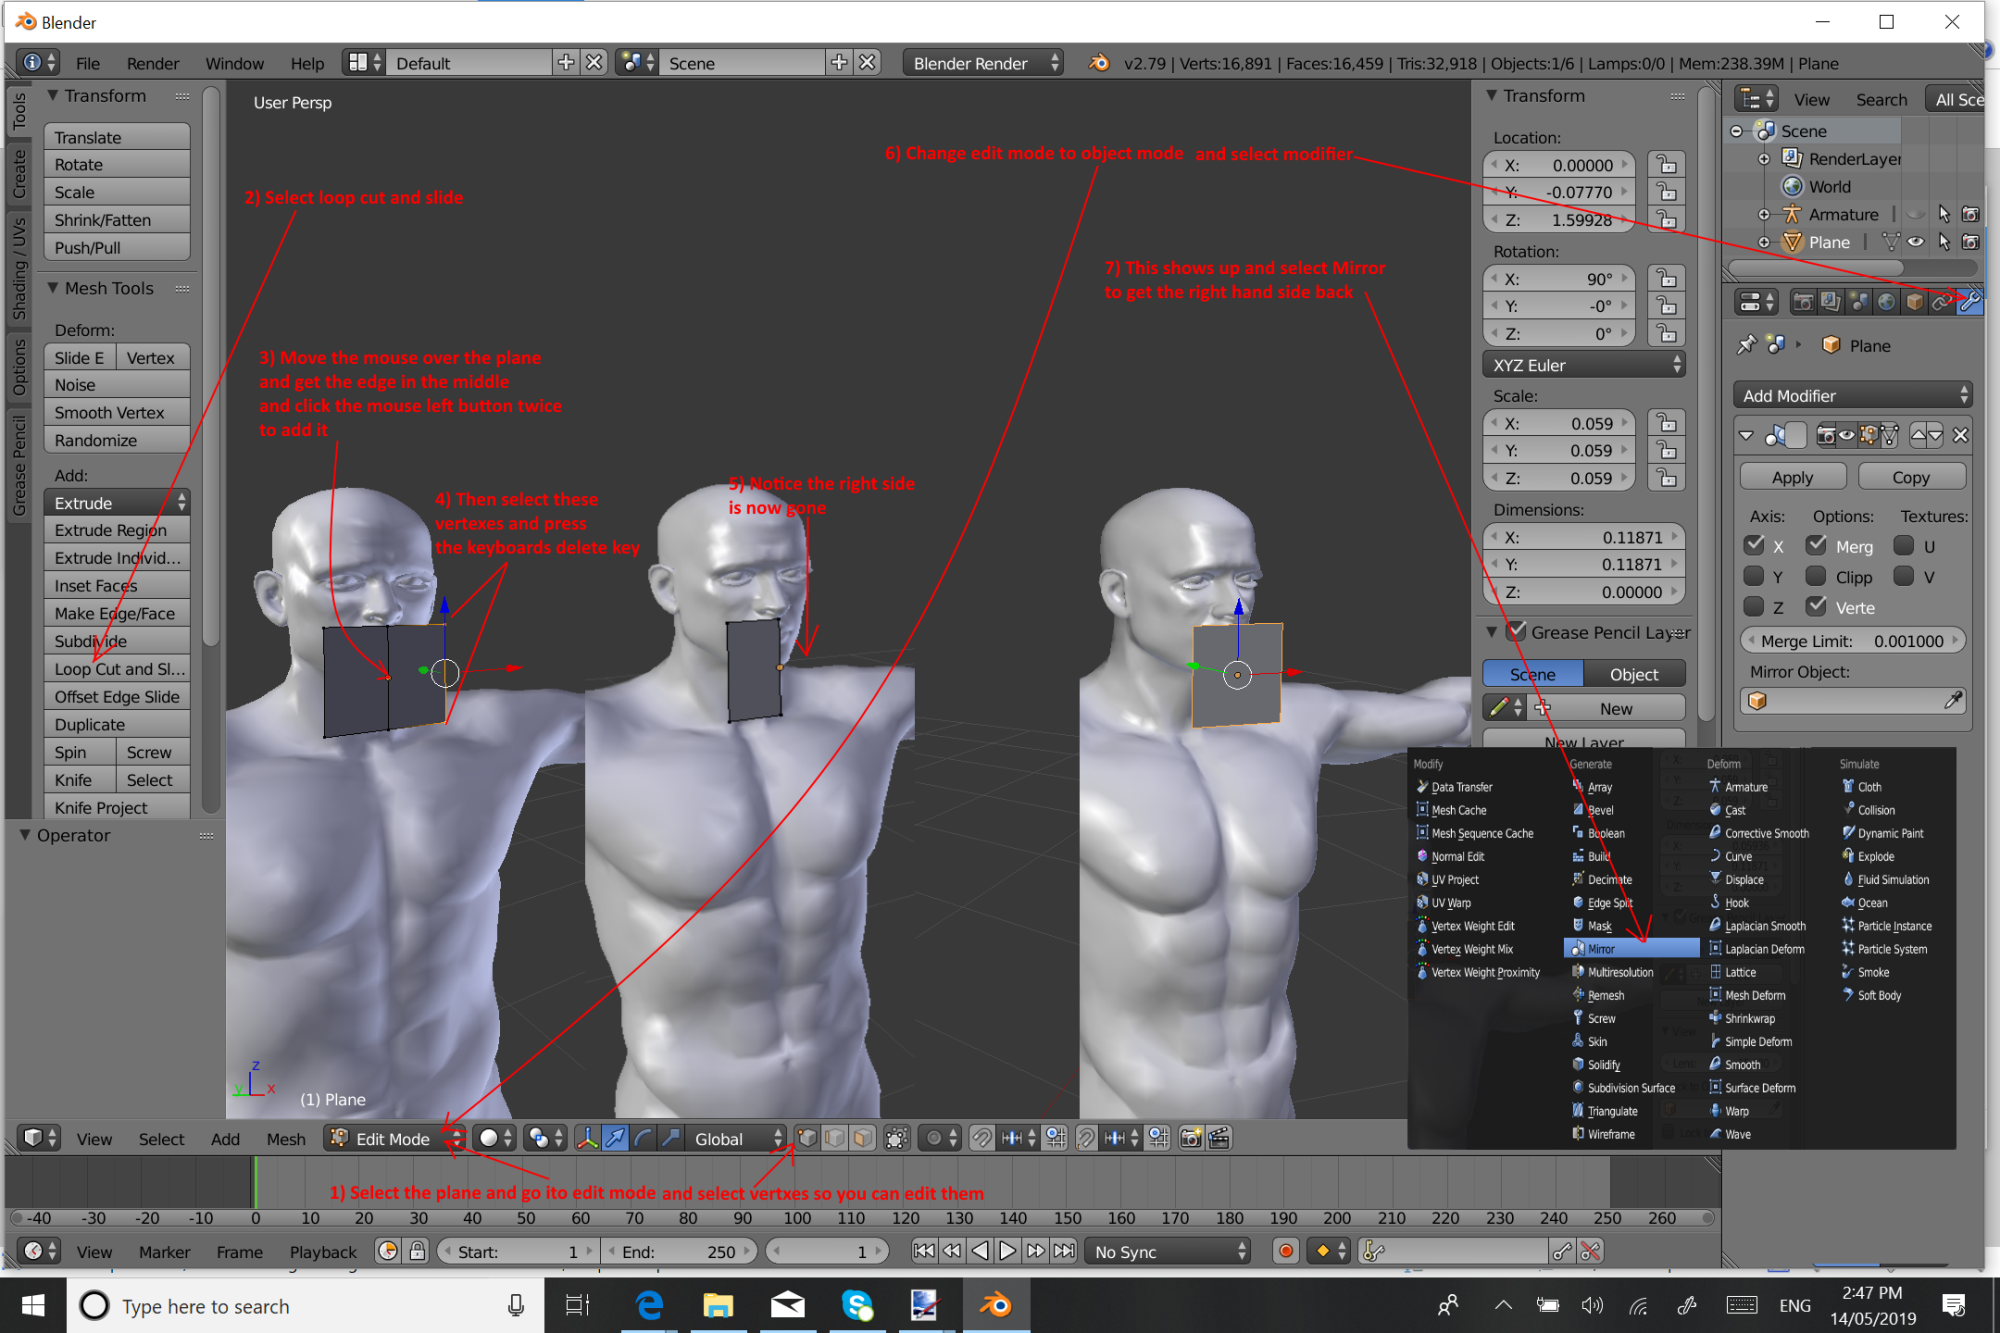
 First Important Modifier To Learn
This was also shown in the creating clothes but decided to specify it here too. It is a huge thing that saves me a lot of work because I only need to model the beard on one side of the face and the other side automatically follows it. Once I have the basic shape of what I am creating I may then click apply on the mirror modifier to complete and remove it. Then I can start working on each side separately to make them slightly different to each other. Mirror makes both sides exactly the same and cuts my work in half. Then apply it to start adding slight differences. A very common process for me.
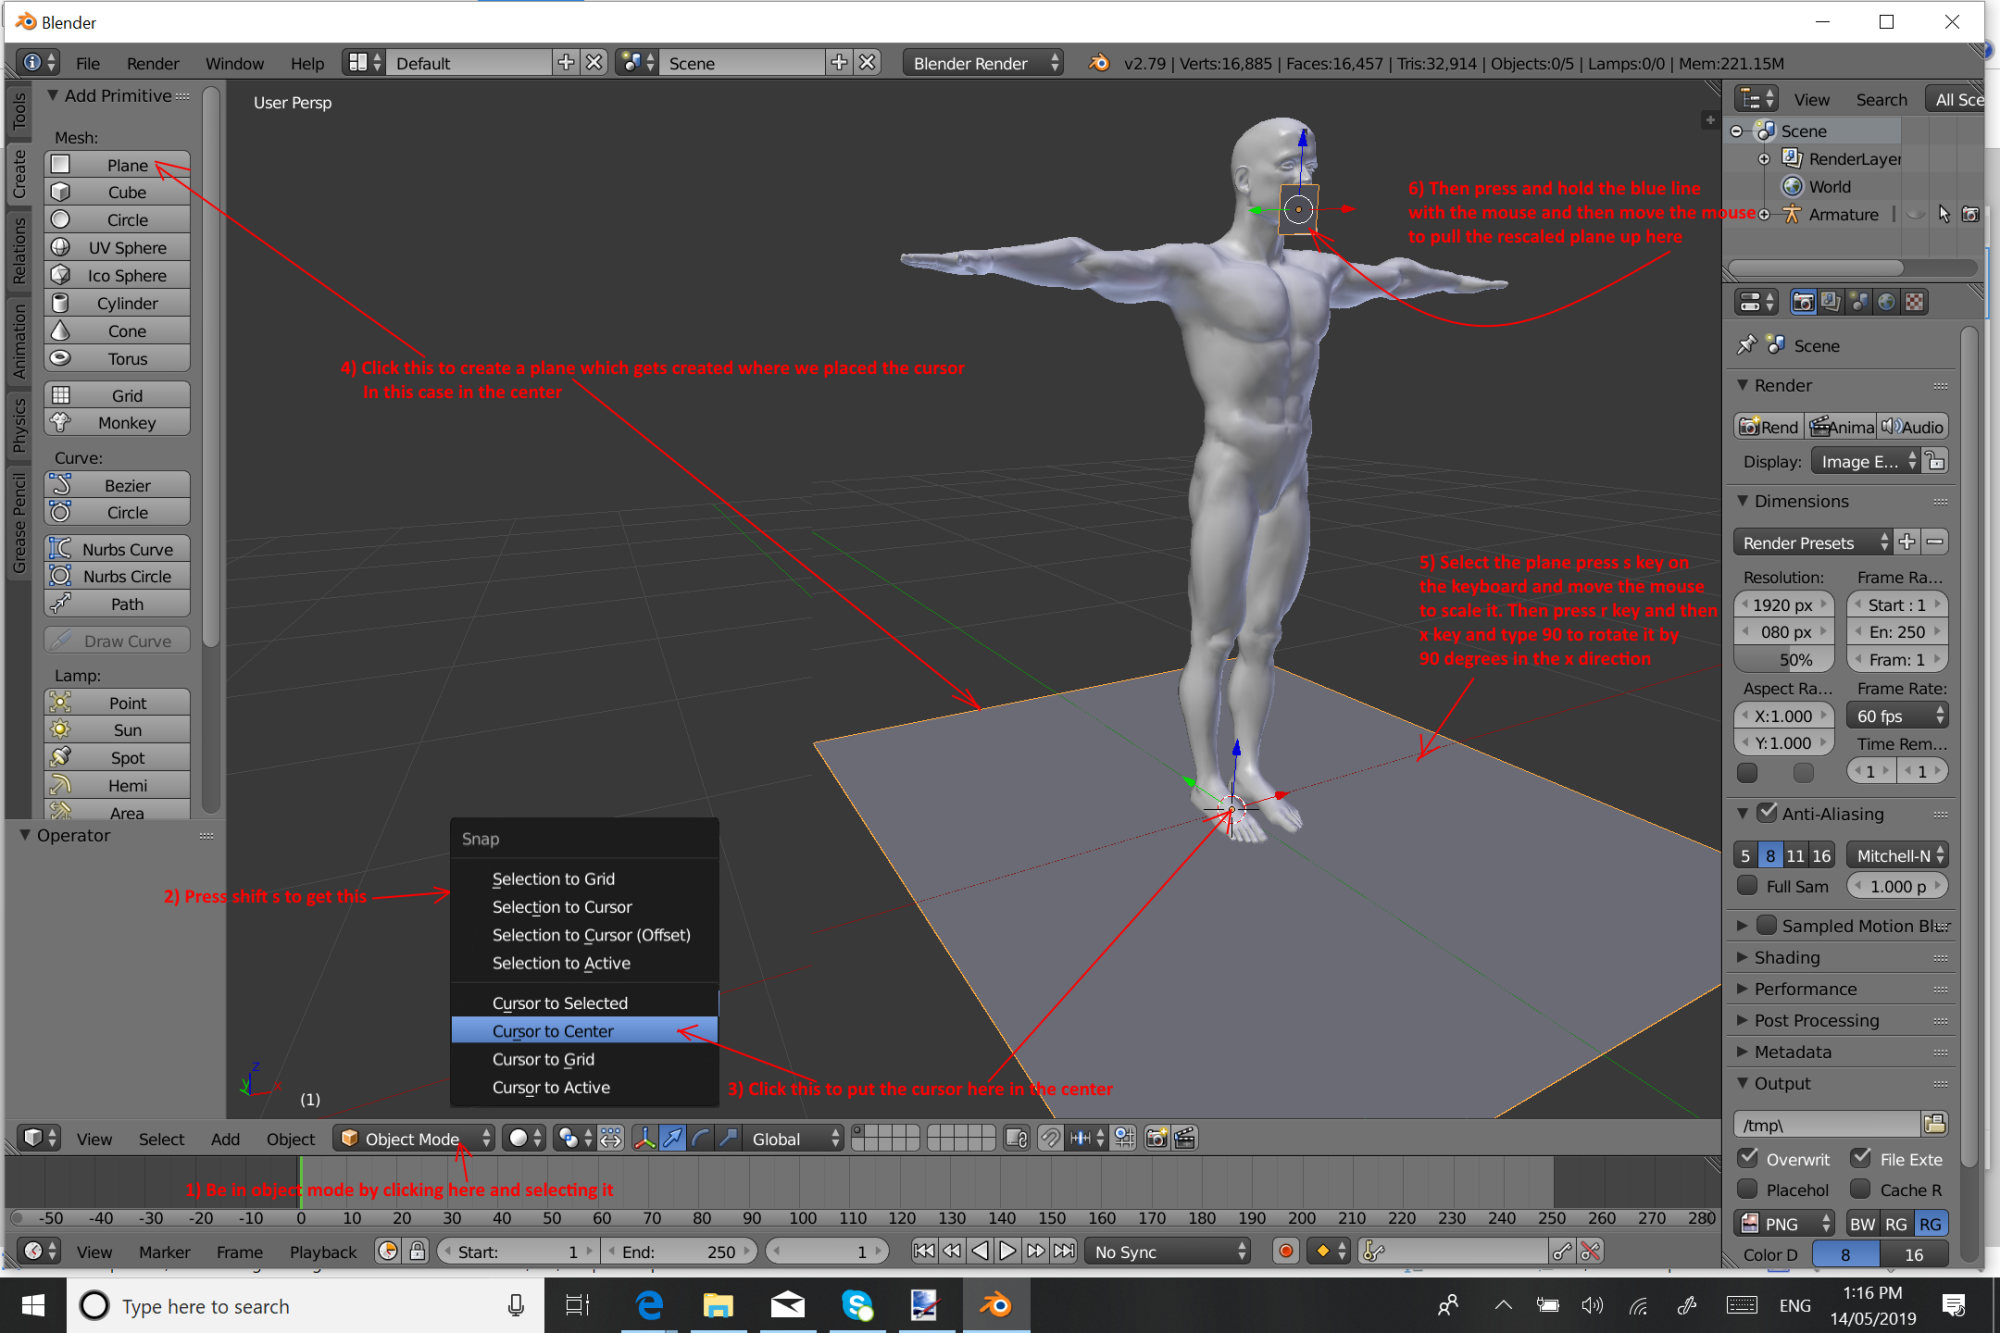
 START MAKING THE BASIC SHAPE
I always keep the thing I am making as simple as possible at first. The less details I start with the less things I need to move around to get the shape correct. As it gets closer and closer to the shape I want I add a bit more edges so I can start improving its shape. Adding all the lines it needs at the start means a lot more moving work to get its shape right. So I always keep it simple and get its shape as close as I can get it before adding more edges.
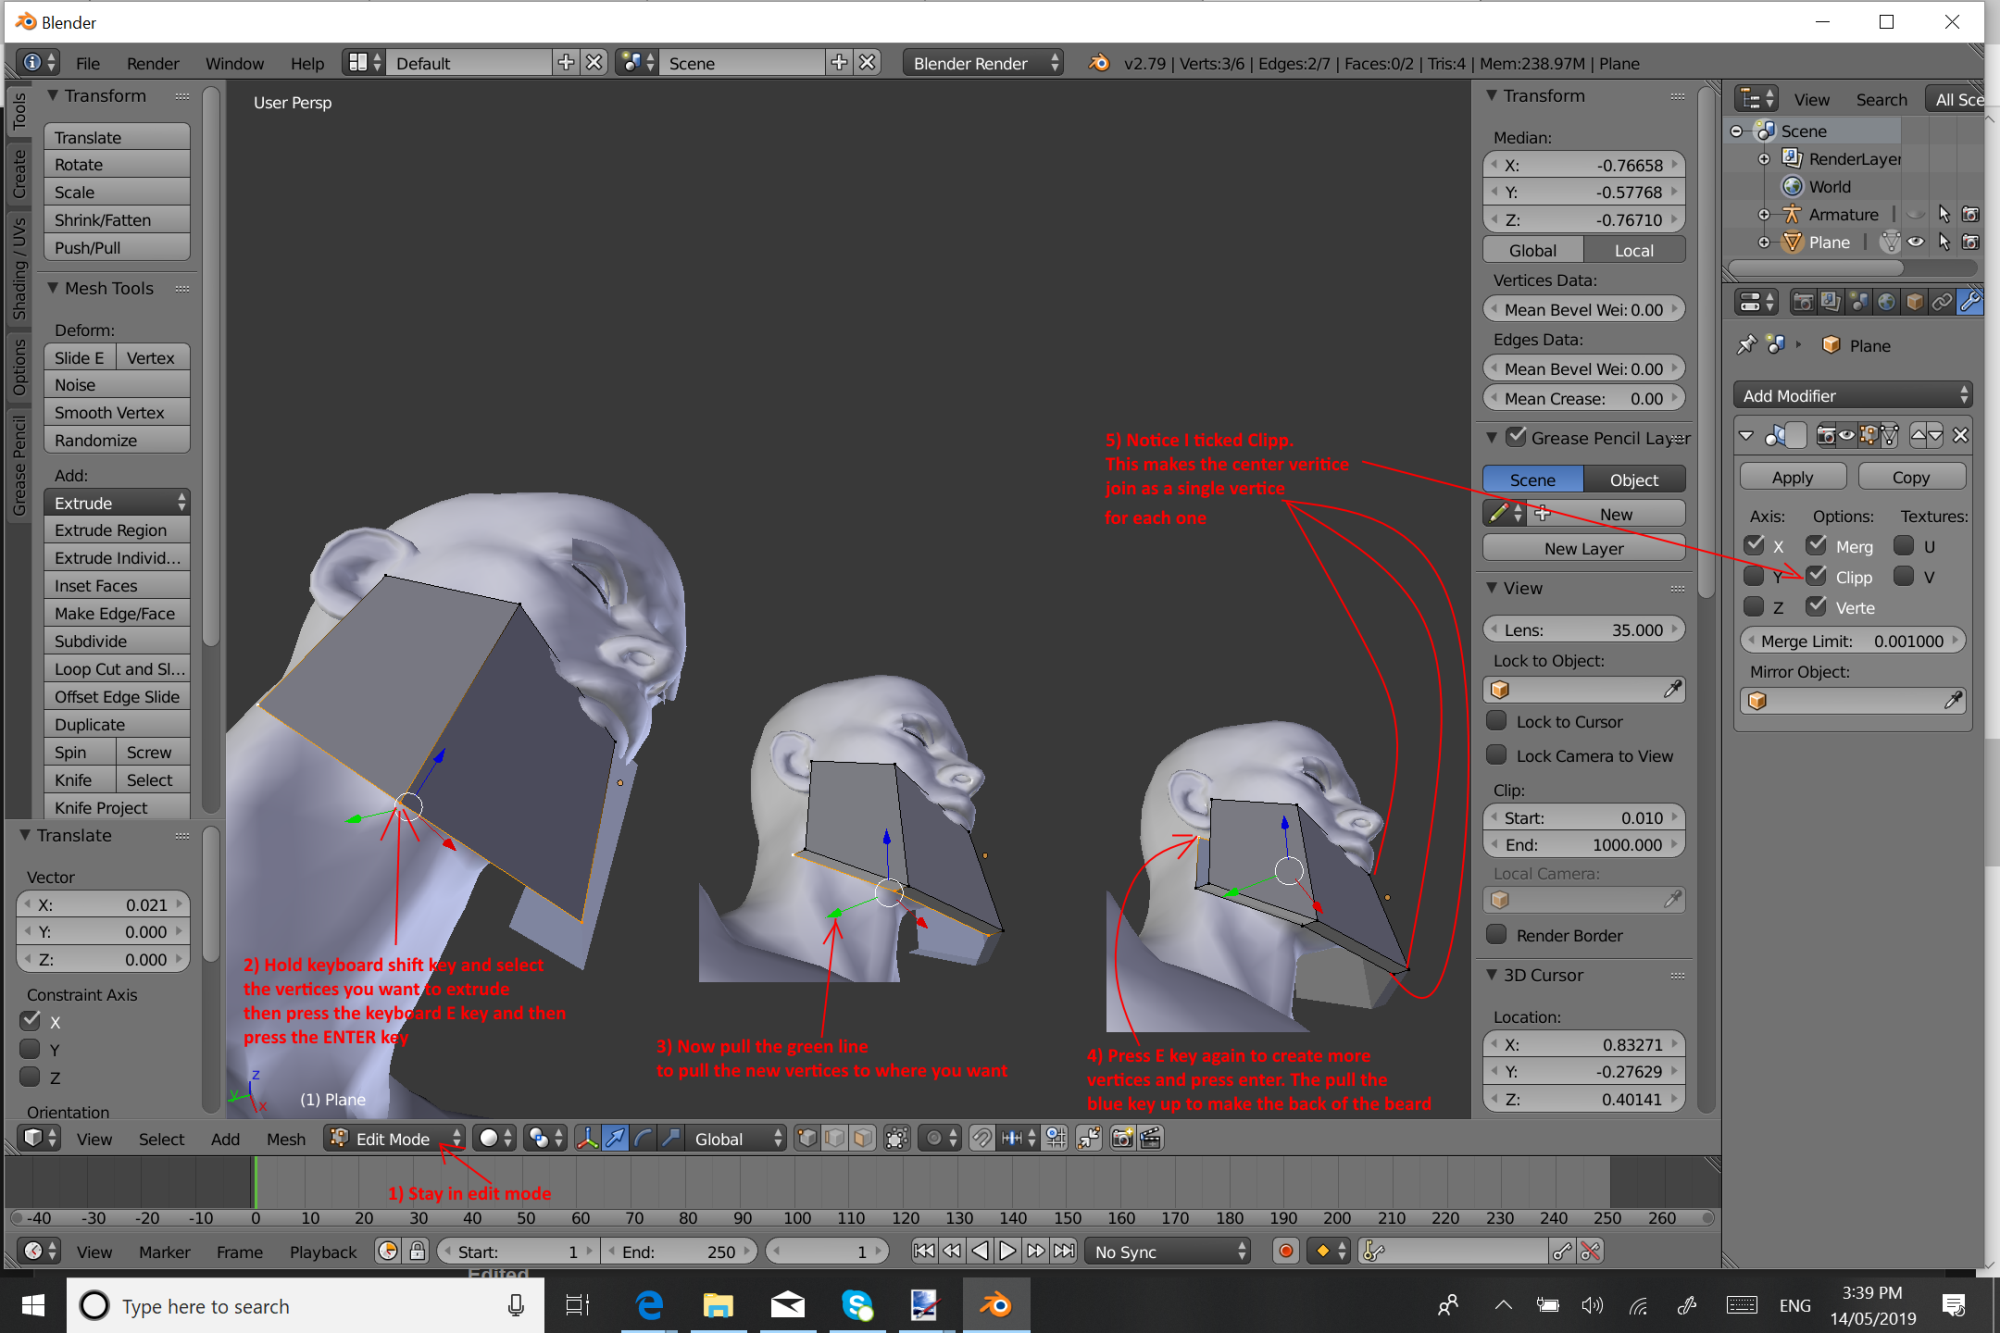
 HOW TO ADD NEW ITEMS TO WHAT ALREADY EXISTS
Here I am showing the easy way to start adding new parts to what is already started. I select the vertices where I need new things added and then press the E key on the Keyboard. Pressing that key Extends what has been selected by adding new items to what is selected. Press enter to complete it and then I move the new thing created by dragging one of the red green or blue lines. Need to do this before selecting something else that way its easy to find the new parts.
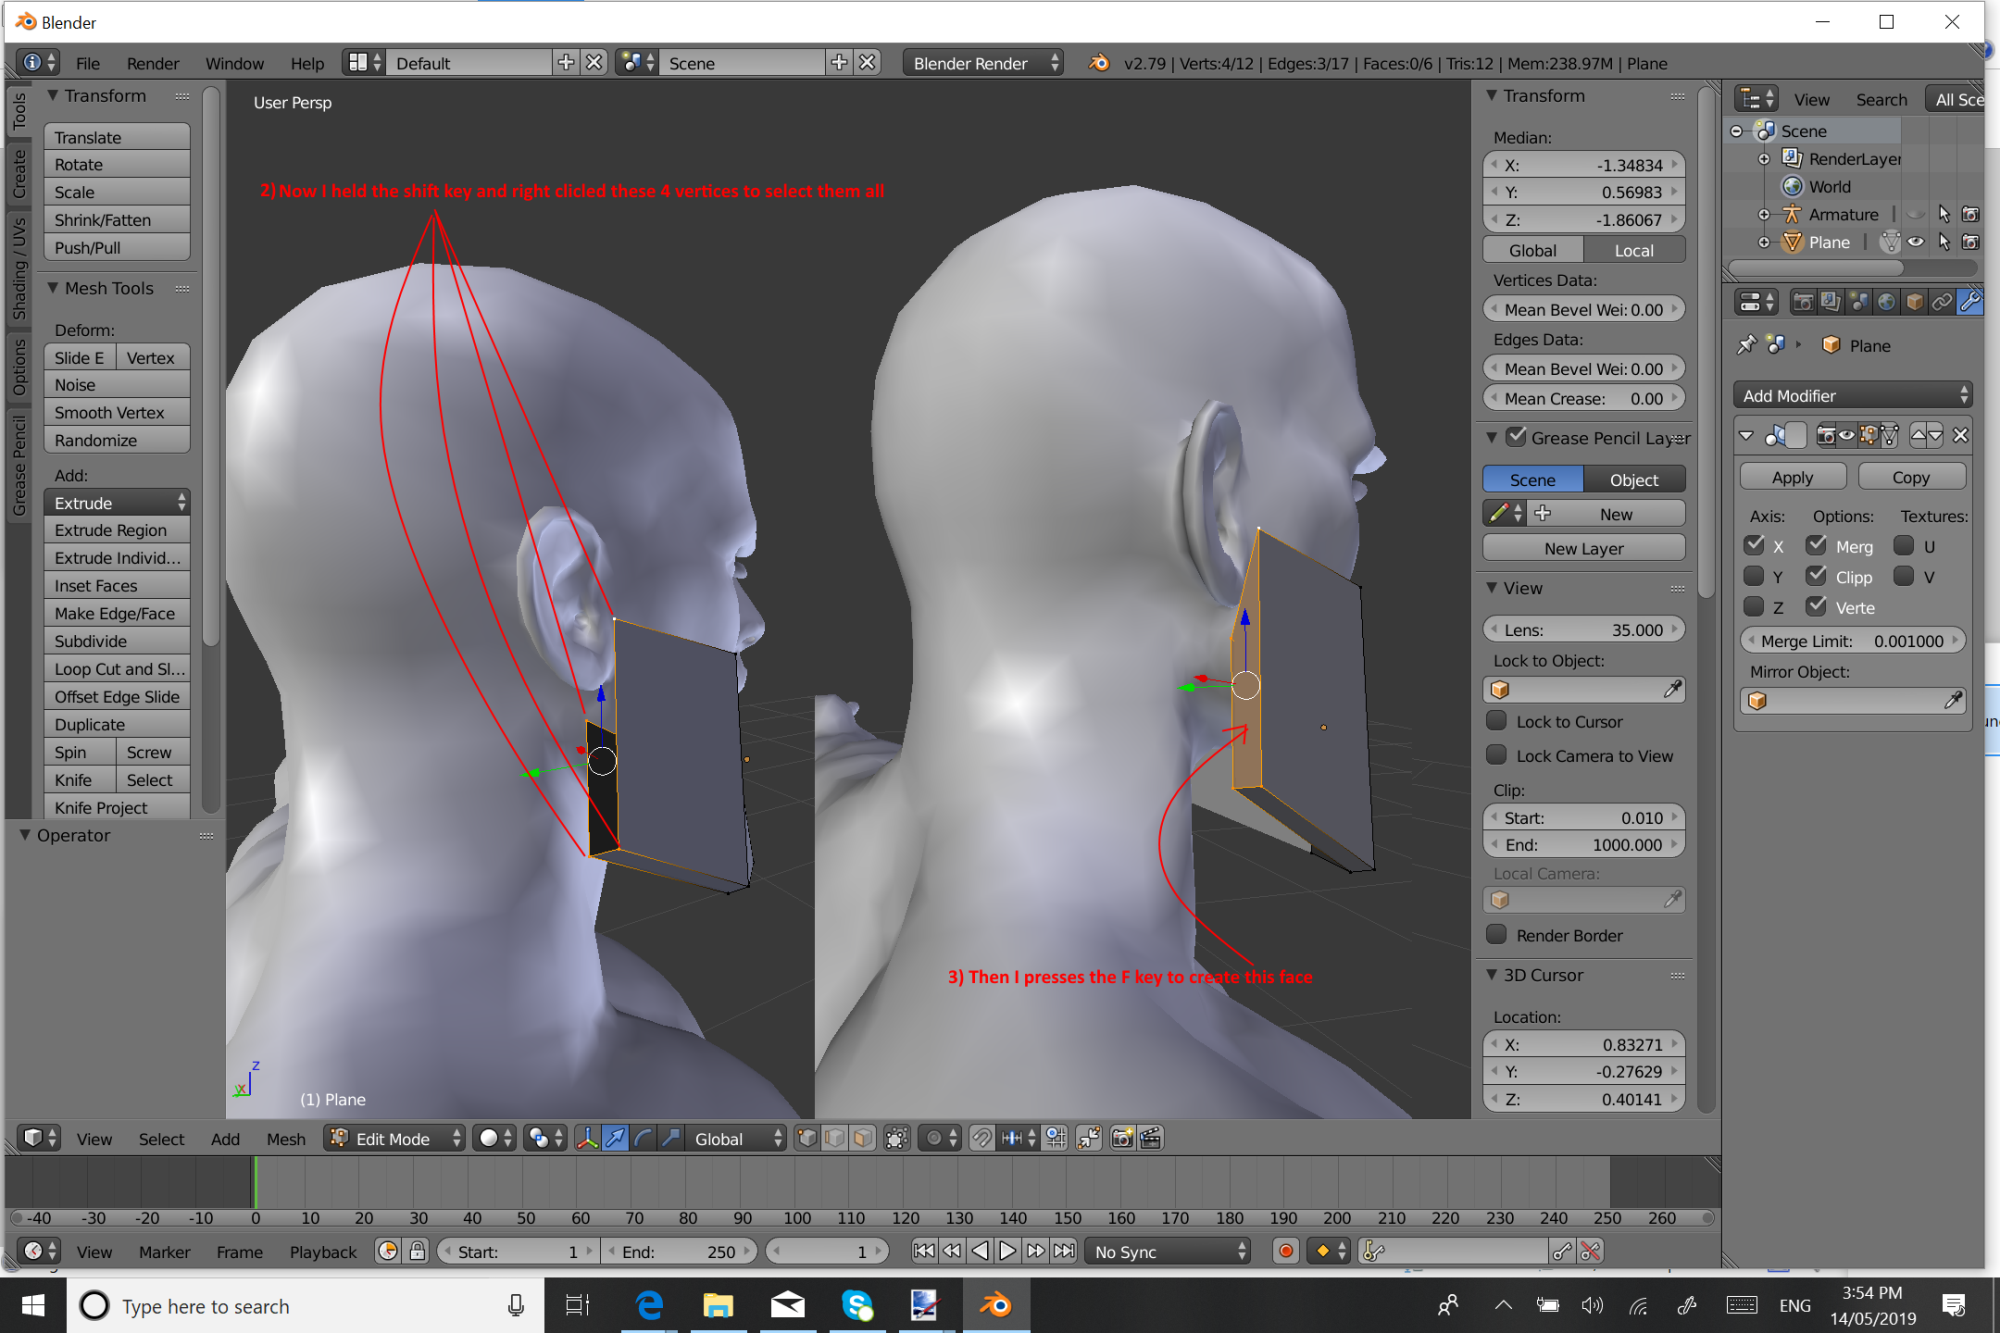
 HOW TO ADD FACES TO VERTICES THAT ARE EMPTY AND NEEDS A FACE ADDED
This is the only way I know how to do this and its certainly easy to remember. Press the F key to fill what has been selected with a face.
This is a pretty common thing to do in Blender when in edit mode and some also work in Object mode.
Pressing a key to do something. For example
F to fill what is selected with a face.
R to rotate what is selected when you move your mouse,
S to scale what is selected when you move your mouse.
E to extend what is selected and you can move what is extended by moving your mouse and pressing Enter key when its where you want it.
However I generally press E and then Enter key immediately because I find I can control where it moves to better by using the Red Green an Blue lines.
A to deselect what is already selected or if nothing is selected press A to select everything.
H to hide what is selected.
G to move what is selected by moving the mouse
Sometimes we can also press 2 keys for very specific actions. Example.
Press
S to go into scale mode and then press
Z so it only scales up and down
or X so it scales in the X direction
or Y so it scales in the Y direction
when you move your mouse.
Press
R to go into rotate mode and then press
X to rotate it in the X direction only
or Y to rotate it only in the Y direction
or Z to rotate it only in the Z direction.
Press
G and then press
G again. This works good with vertices. It will make the selected vertices move along one of the edges they are connected to.
Which one they move along depends on which way you move the mouse.
I mentioned these ones only because I use them very often. There are many others. Google search with
Blender keyboard shortcuts and you will find many many many and you might find you like some I don't and therefore didn't mention.
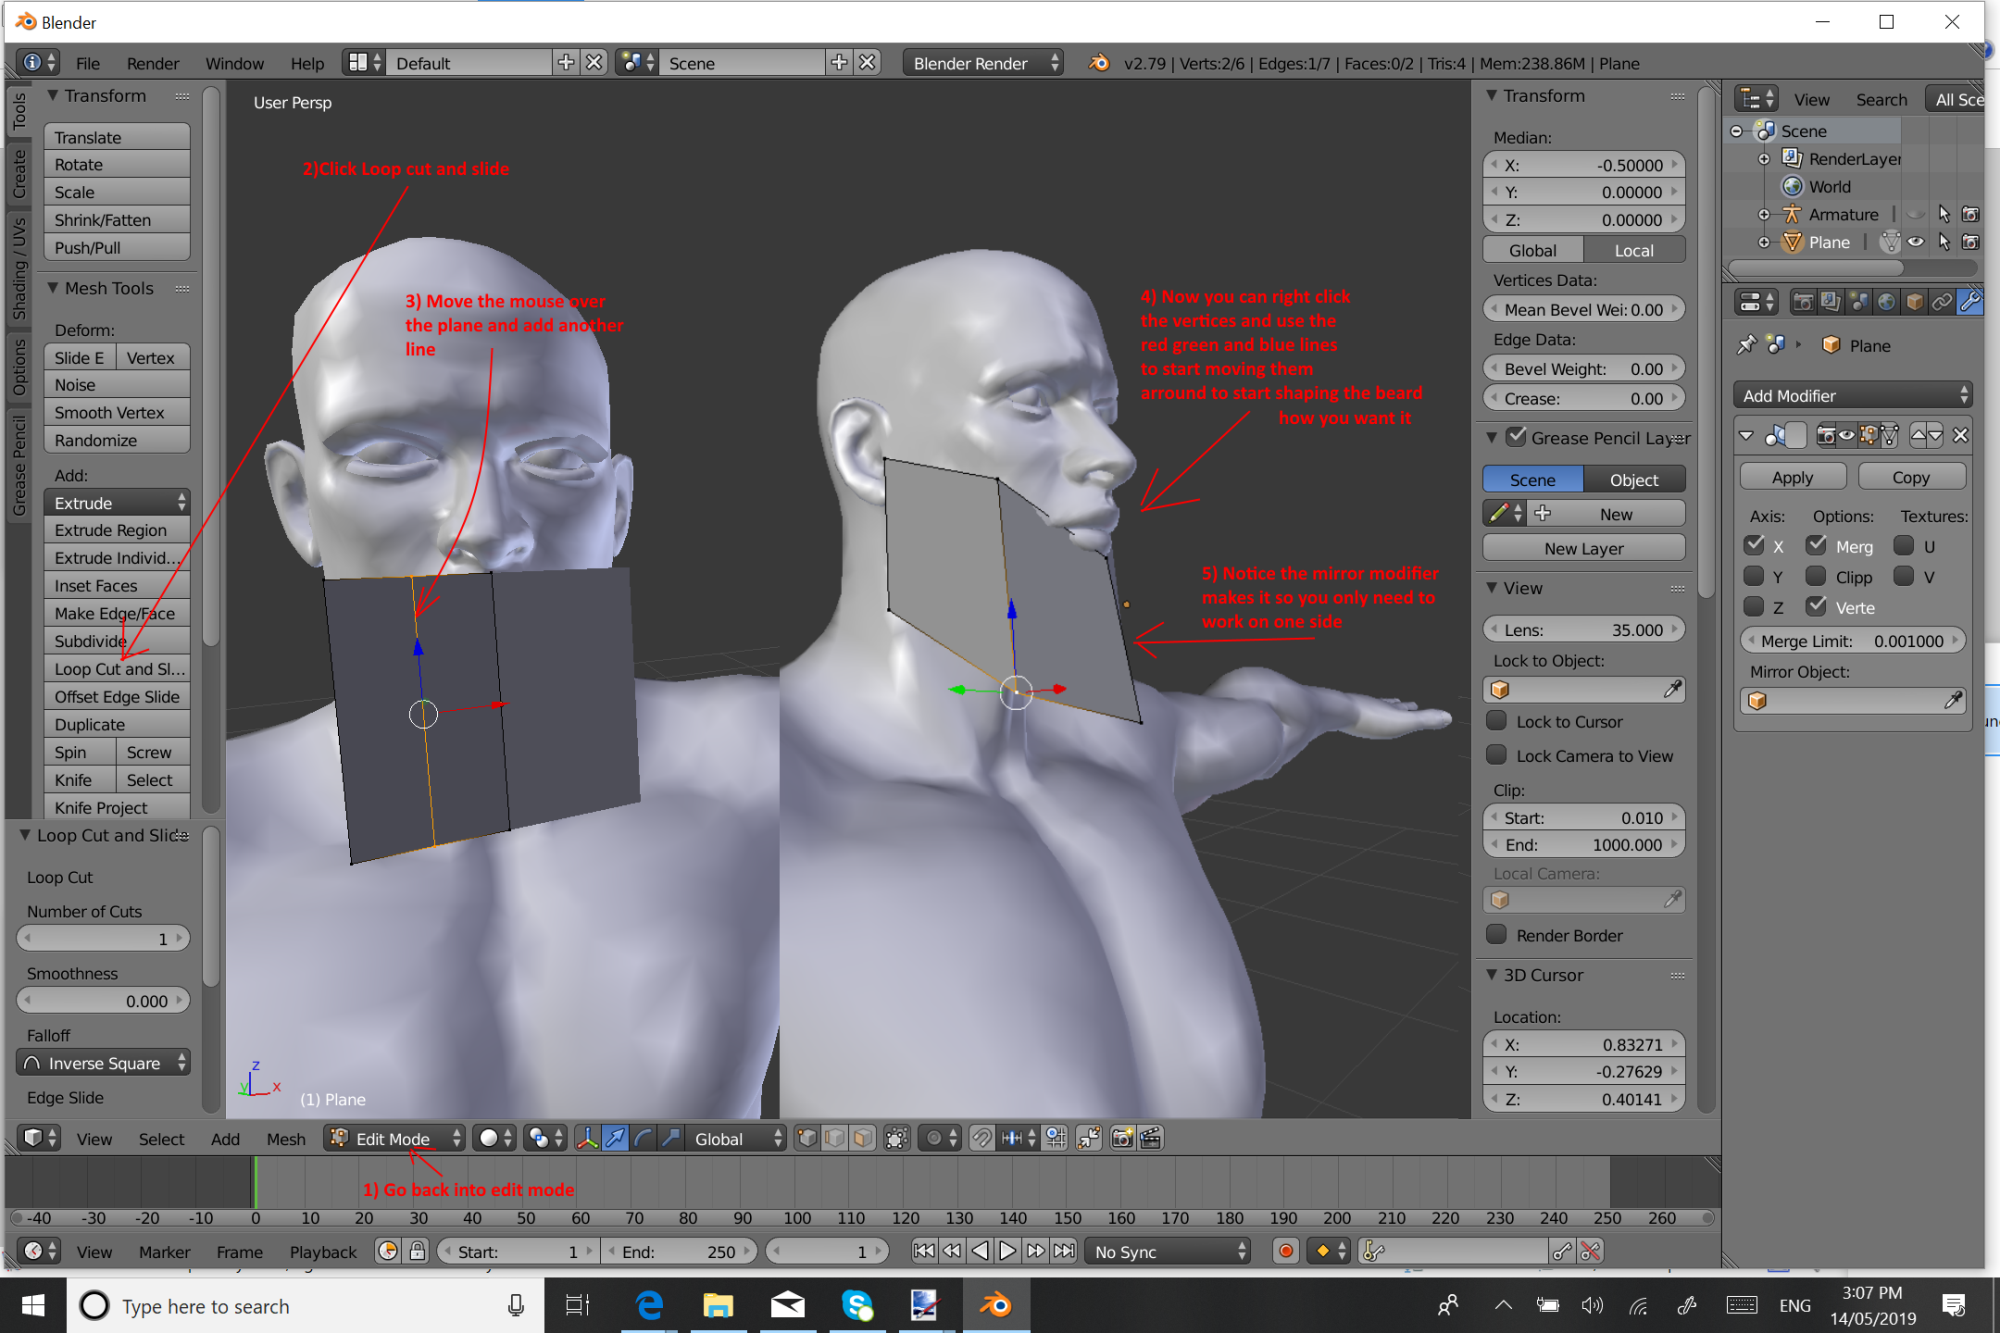
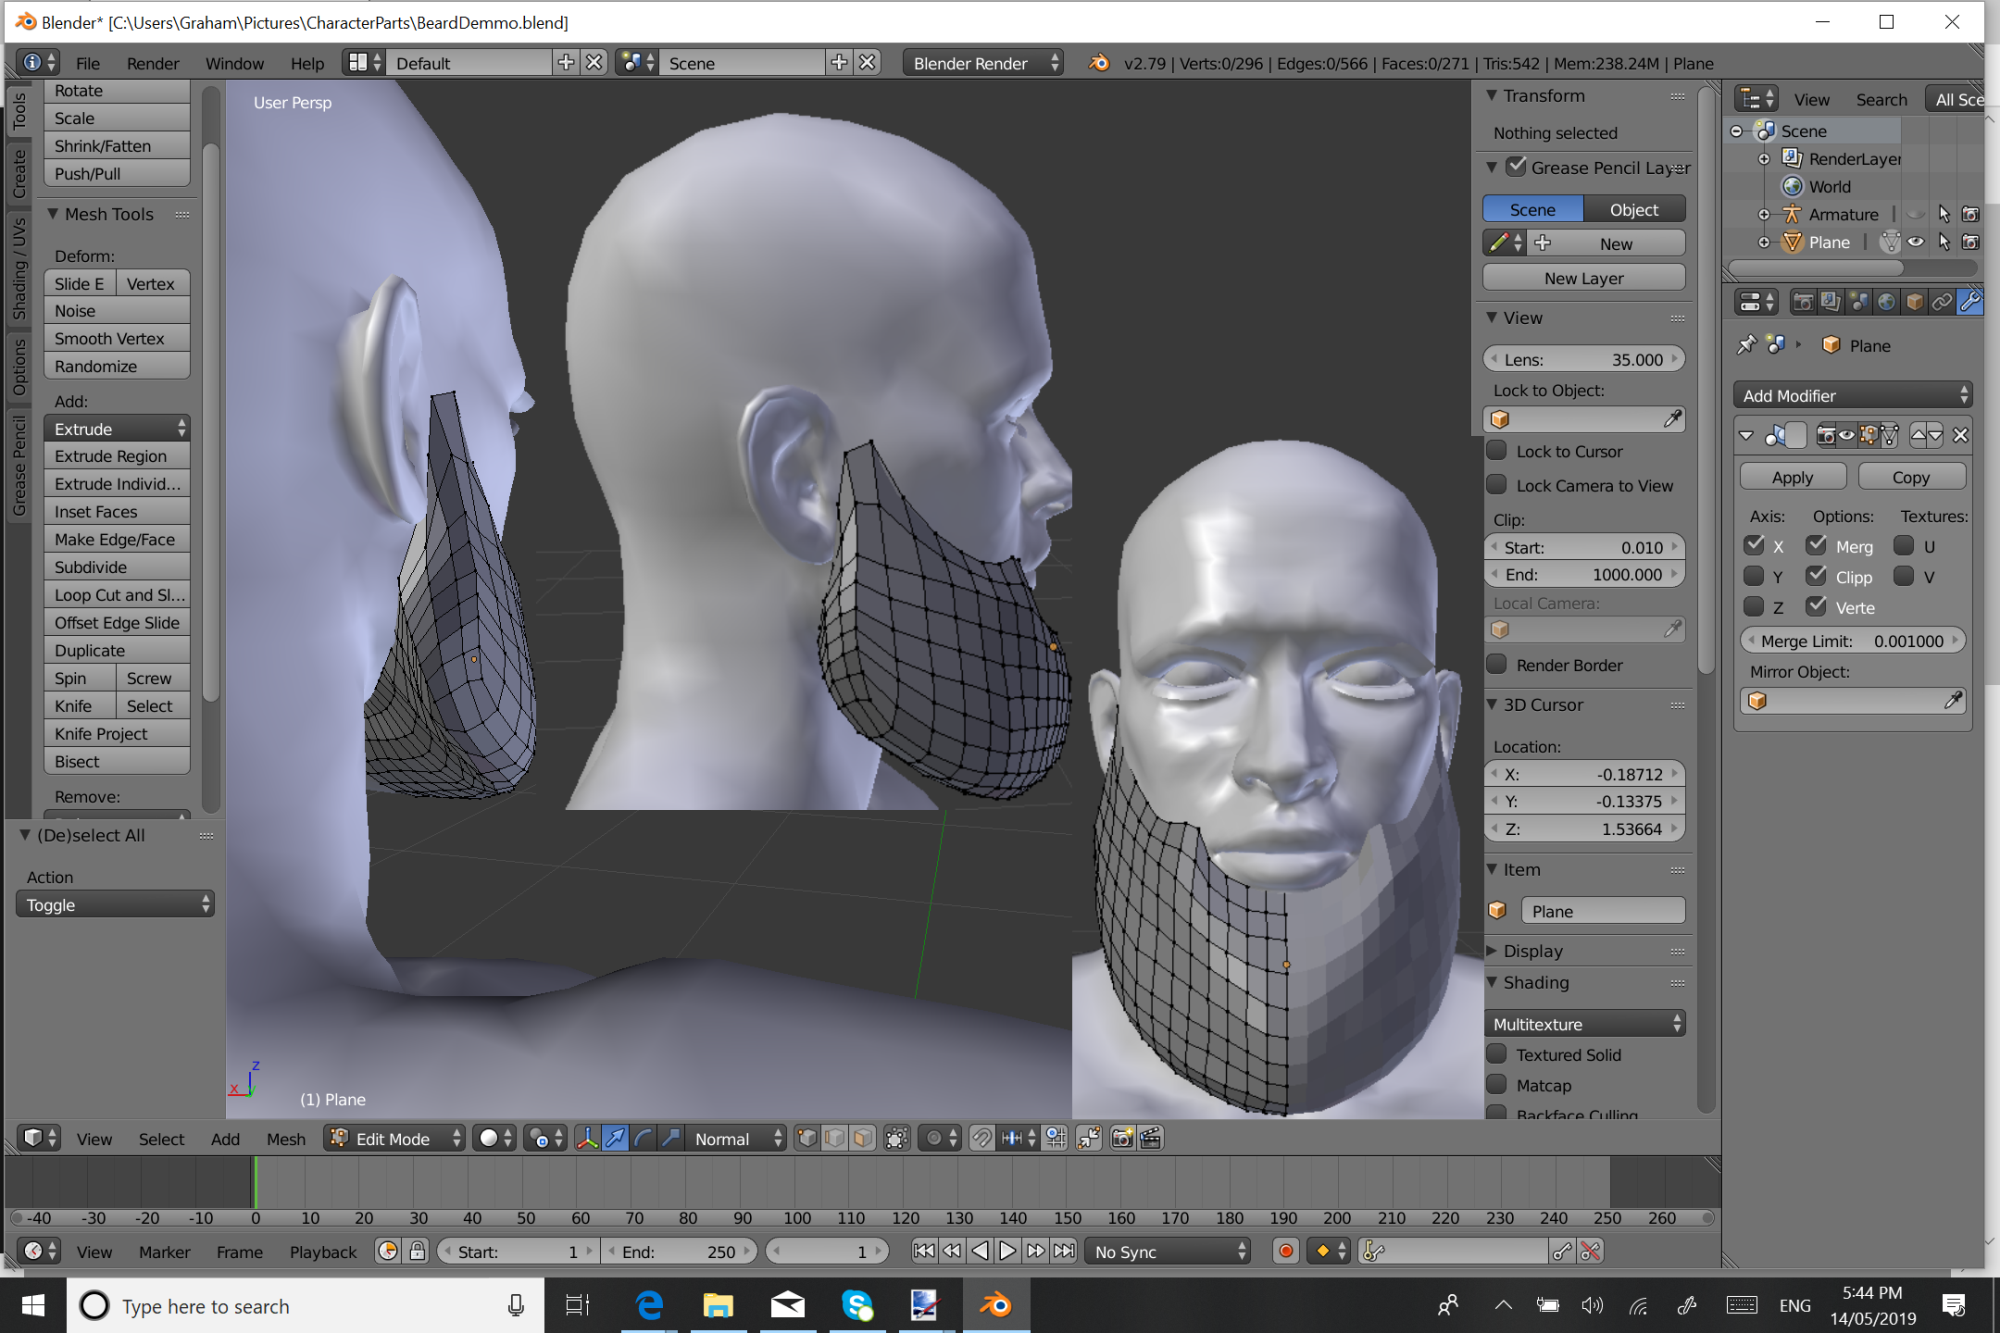
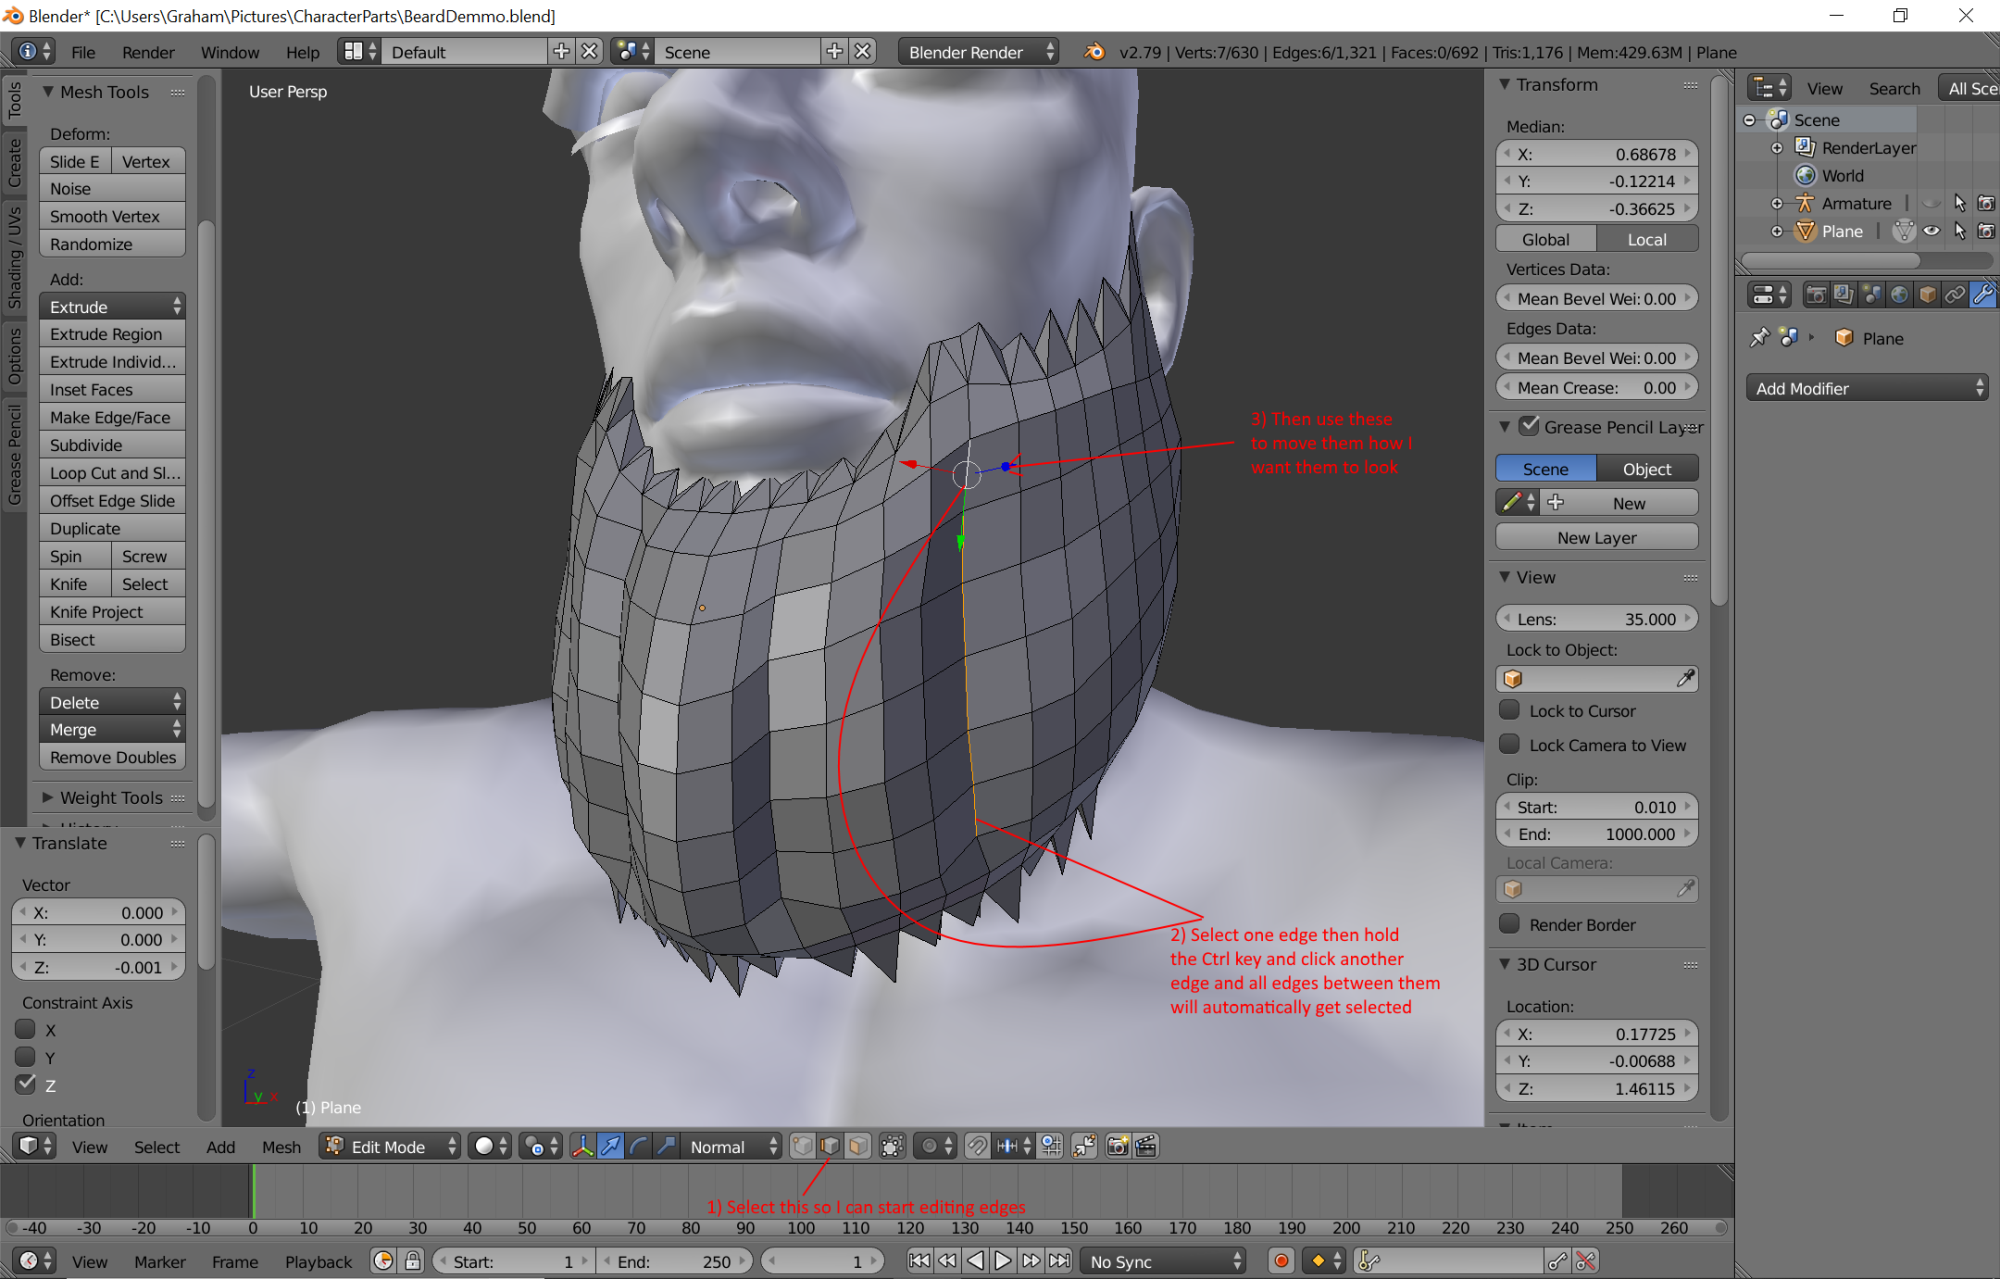
 SHAPING THE BEARD
Now I add a few extra lines to the beard by using the
Loop Cut And Slide tool. Then I select vertices and move them to get the basic shape of the beard roughly how I want it to look. Then I add some more lines and move vertices again to get the shape more smooth although I don't try to make it totally smooth. Still working on the beard. The image below just shows some basics. More work to do it yet but once finished I will be applying the mirror modifier to get rid of it and keep the beard how it is when finished making the basic shape. Then I will be showing how I add extra things to it to give it the shape of hairs. You will get what I am saying when I do that but
this hair in my store shows what I mean
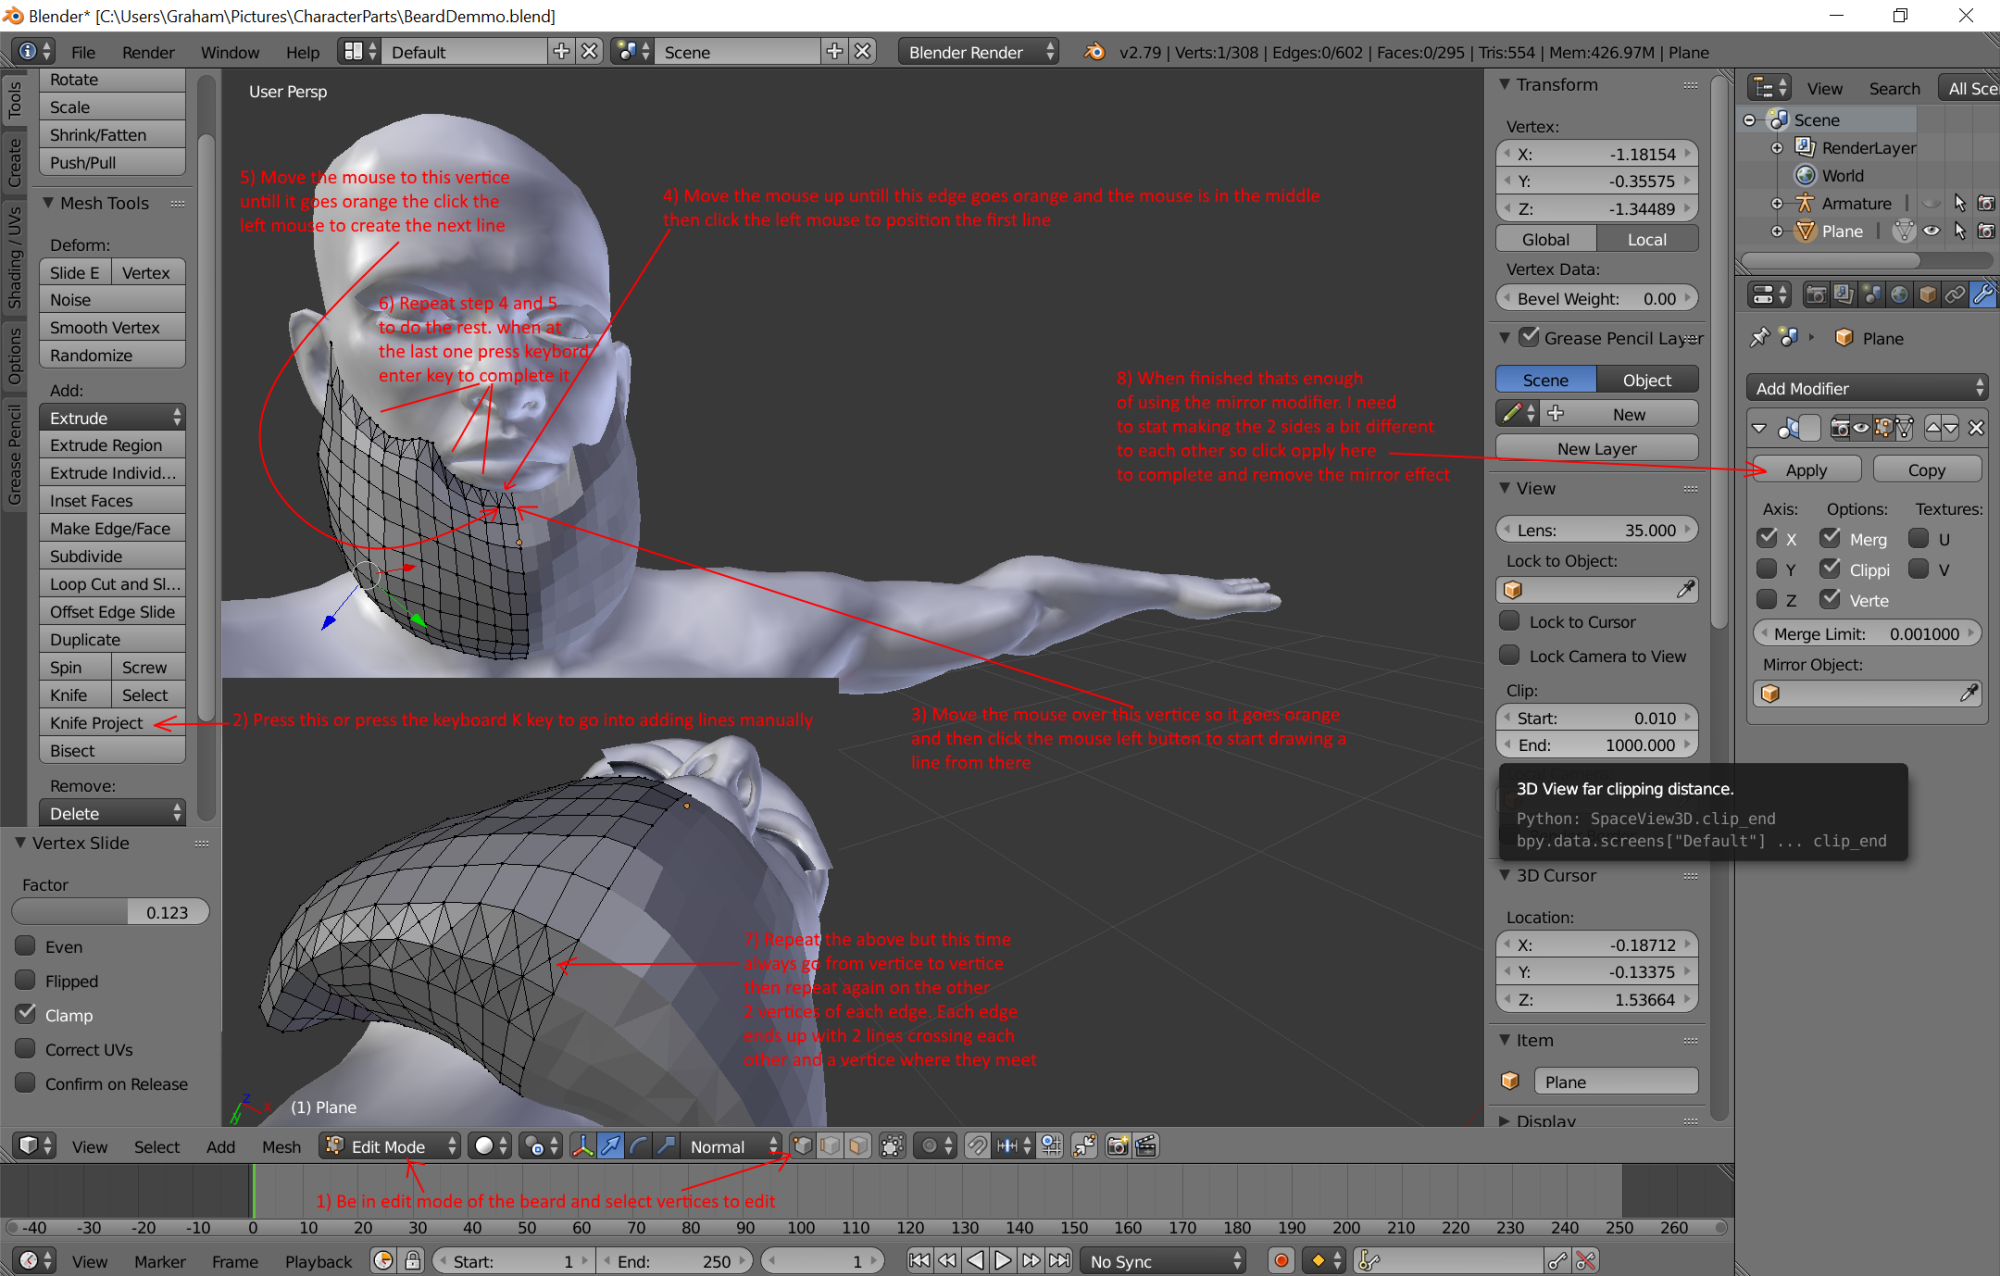
START MAKING BETTER SHAPES FOR HAIRTo do this I manually add lines to the parts I want to do this too and then complete the mirror modifier to remove it so I can make each side slightly different to each other from now on
Then I start moving vertices around to start making the bear look more hairy. I don't try to make it perfect looking because it can make the model use up too much of my computers resources. I highly rely highly on the texturing and bump mapping to make it look more like hair but adding some of this to the model helps make the texturing work better and easier to do. I haven't done it with this because I am just showing methods to use rather than making a good model but I also use a real photo of the hair I am wanting to make as a guide on what to do and where to do it.
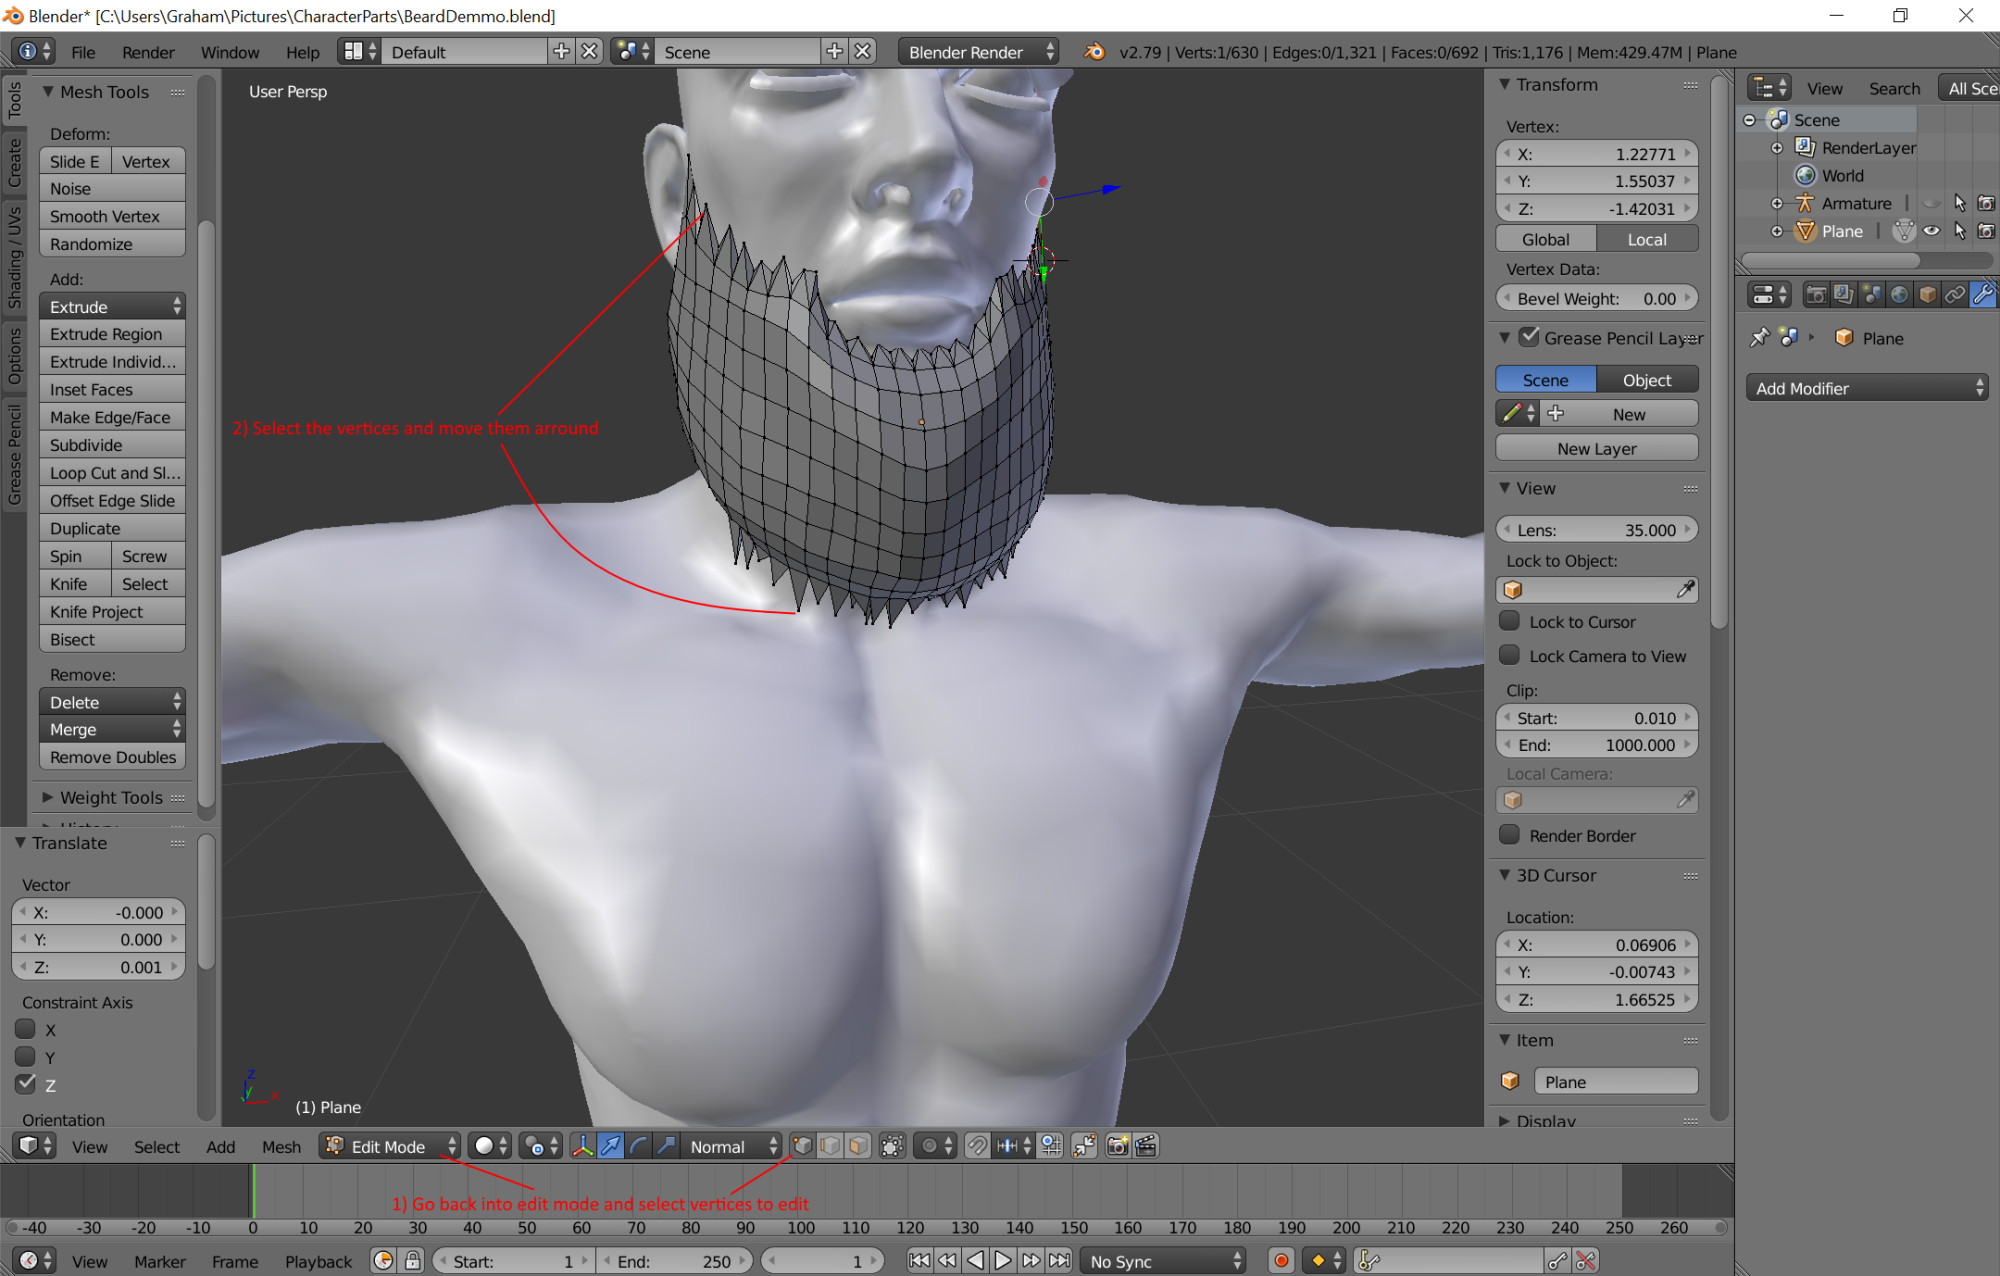
The final part of my modelling the beard is to start moving edges in and out to help it look more hairy. Again I rely highly on the texturing and bump mapping but doing this is helpful on making the texturing work better
OK its not too bad but really needs more work that I'm not going to do here because I am just trying to show the methods I use rather that show you a good model So I am now going to start working on the next post to show how to attach the model to the head in Blender so it follows the character when we send it to iClone and animate it. I will also be showing how to create a UV map so it can also be textured. Besides, once you start getting used to using Blender to make things like this and you have gone through making a couple you will start finding your own way to do things because Blender is starting to make sence to you. Providing that it is something that interests you of course. I think that is the most important thing for anything we do.
i7-3770 3.4GHz CPU 16 GB Ram
GeForce GTX1080 TI 11GB
Windows 10 Pro 64bit
Edited
5 Years Ago by
Delerna