Honestly, I have not used skin weight transfer in CC3 much.
But I would not trust ANY automated skin weight tools (regardless of the app), specially for the hair and specially for the long hair.
One thing is for sure: you should NOT use Transfer Skin Weight in CC3 for the hair.
Hair mesh has to have the majority of the influence coming from the head bone as Mike pointed.
Bottom line is, you want to have the least number of bones influencing hair.
So in the end it is fine tuning between 3: bone influence, hair physics and collision shapes.
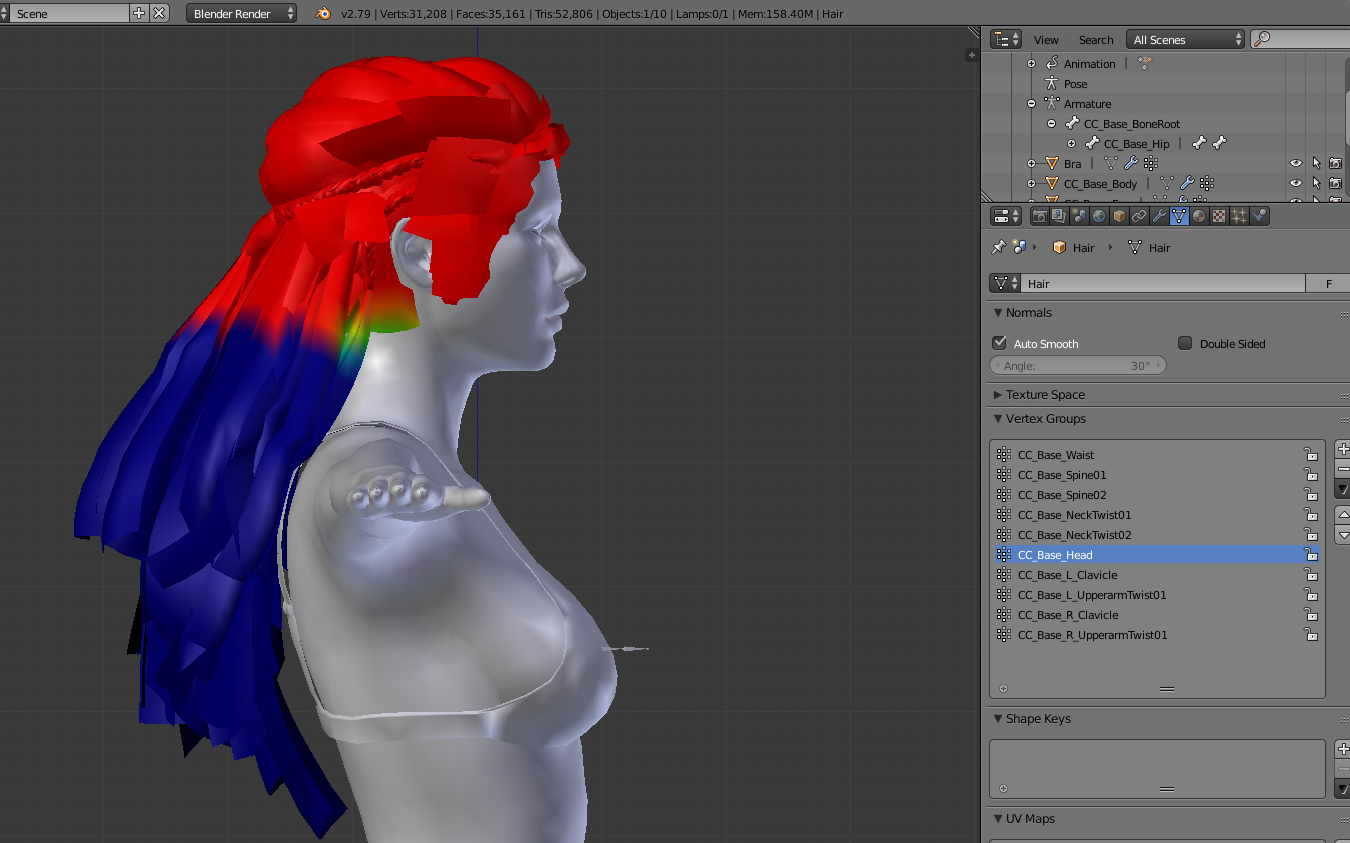
Out of curiosity, I have exported RL professionally made hair (I own an export version) and looked at it in Blender.
As you may see, only 2 bones are influencing the hair:

I then applied a Transfer Skin Weight in CC3 to the same hair and again exported:
Now, there are number of other bones influencing a hair mesh. which they should not IMO.
I'd suggest a third party tool such as Blender for the weight paint jobs.
It is probably possible to tweak weights in CC... but I just tried it for the hair and CC crashed to the desktop... So there you go...

But then again, I am speculating here, as I do not see what exact problem you are having

BTW: I cannot really test that second hair in iClone (it is rendering), but I am pretty sure the result would be terrible.
That sharp transition between red/blue for the head bone (full bone influence/no influence) would result in hair stretching and deforming with any head movements.
The physics weight map in the transition area is probably some shade of gray and would not be enough to smooth things down.
So that would require some custom weight paint work to make it look like the hair in the first image.
Edited
5 Years Ago by
4u2ges