New Features and Enhancements part 2
The "Mesh Editor" feature in CC1.5 gives users and developers the freedom to refine the surface look, also be able to use "Hide Mesh" function to remove selected meshes. In CC1.52, we move forward to support "Auto Hide Mesh", which automatically calculates the over-lapped mesh from multiple dress layers, and quickly hide the unwanted faced in one-click!
The Benefits of "Hide Mesh"1. To solve the surface penetration issues caused by the protruding shapes of the meshes of inner clothes.
Especially when users mix and match outfits from different cloth design sources, they might not follow the same "hide mesh" rules.
2. To keep the shapes of clothes.
Using the conforming cloth method might affect the shapes of clothes, while "Auto Hide Mesh" feature solves the surface penetration issue without losing the best looks of outfits.
3. To decrease the file size by reducing the polygon counts when exporting the character in OBJ or FBX format, which largely increases the performance in real-time animation or 3D game engine.
"Auto Hide Mesh" Features1. Hide overlapped mesh
2. Keep the inner mesh when there are transparent materials on the upper layer
3. Auto resume mesh beneath when deleting the outer clothes
*This is the project-level changes, the hide mesh settings won't be saved back to the individual outfit assets
How does it work?
1. Wrist, head, neck, lower neck, and shoulder areas are always shown, thus are ignored in the algorithm.
2. Vertex weighting are individually evaluated for the bind bone.
3. A ray is sent from the bind bone to the vertex hiding the geometries that lay between it and the outermost mesh.

 User Interface
- Auto Hide Mesh: click to calculate the whole dress and hide unnecessary mesh from the on-screen character
- Restore Content Settings: restore to the default content design settings
*Reallusion use in-house Hide Mesh settings when designing dress content to ensure the best result when there are multiple layer of dressings on the character. We also use this mechanism to make different outfit packs has the best Hide Mesh compatibility.
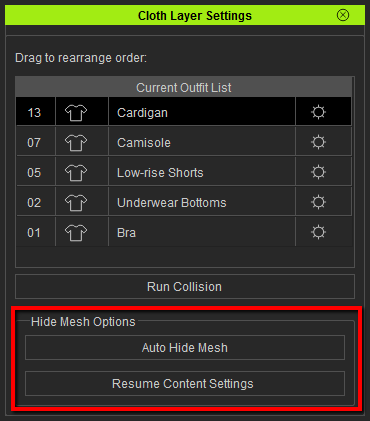
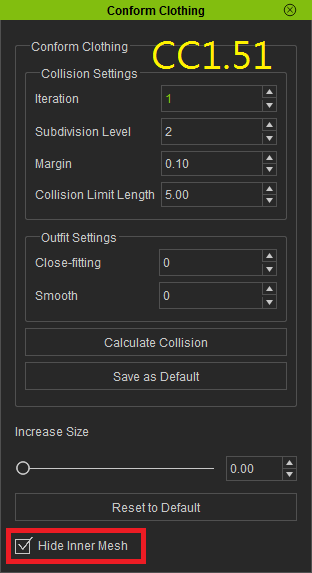
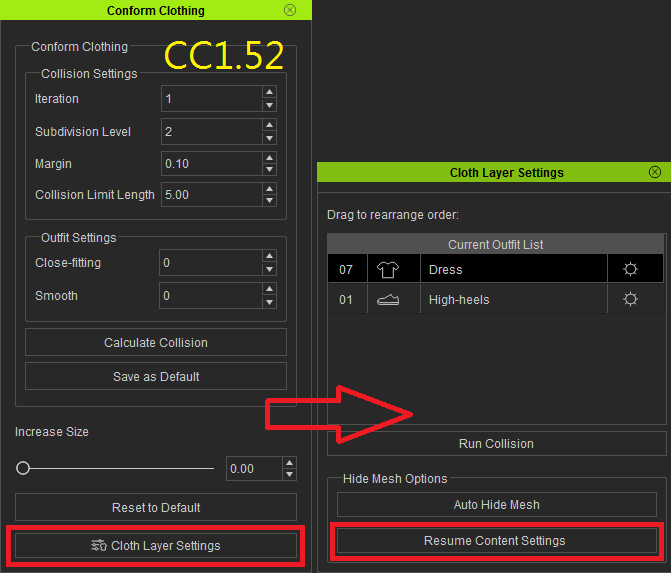
*In CC1.52, we made some UI change to give users more convenience in operating. That is, the "Hide Inner Mesh" function used to be set up in the "Conform Clothing" panel. Now all the related functions are back to the "Cloth Layer Settings" panel.
Demonstration
Case 1:Single layer of dress1. Open the "Conform Clothing" panel, and click Cloth Layer Settings
2. View the jeans in the X-Ray mode
3. Click the "Auto Hide Mesh" button and check by the X-Ray mode. You will find that the skin mesh under pants are well-hided, however, the skin beneath the holes on pants are kept.
4. If you want to cancel the result of auto hide mesh, click "Restore Content Settings' to back the default content settings.
 Case 2:Multiple layer of dress
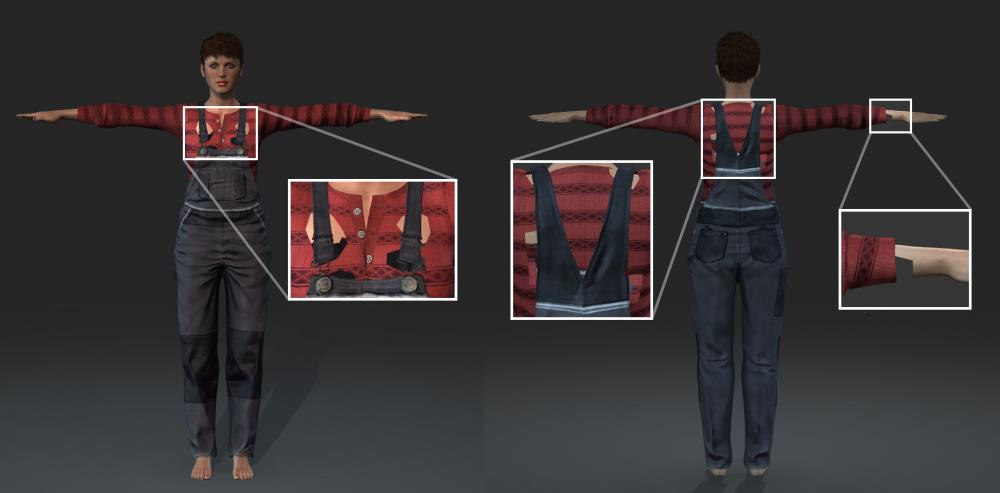
1. Get the character with multiple dresses including overalls, apron, underwear, boots, and click the "Auto Hide Mesh" button

2. Manually fix the parts not hided correctly, which usually to be the intersections of two layers of meshes
3. View the character in X-Ray mode, and you may find that the meshes of overalls, underwear, skin under the apron are well-hided.

4. If you remove the content from the character, the hided mesh under this content will be resumed automatically.
 "Auto Hide Mesh" vs Conforming Cloth by "Run Collision"
Using the conforming cloth method might affect the shapes of clothes, while "Auto Hide Mesh" feature solves the surface penetration issue without losing the best looks of outfits.
Note: some parts of meshes required further mesh editing after running "Auto Hide Mesh"1. Skirt: due to the mechanism of "Auto Hide Mesh" function, the mesh of legs will be hided. If the view angle is from the bottom to the top, you will find there is no legs under the skirt, which is terrifying.
You can easily use Mesh Edit to resume wanted leg parts
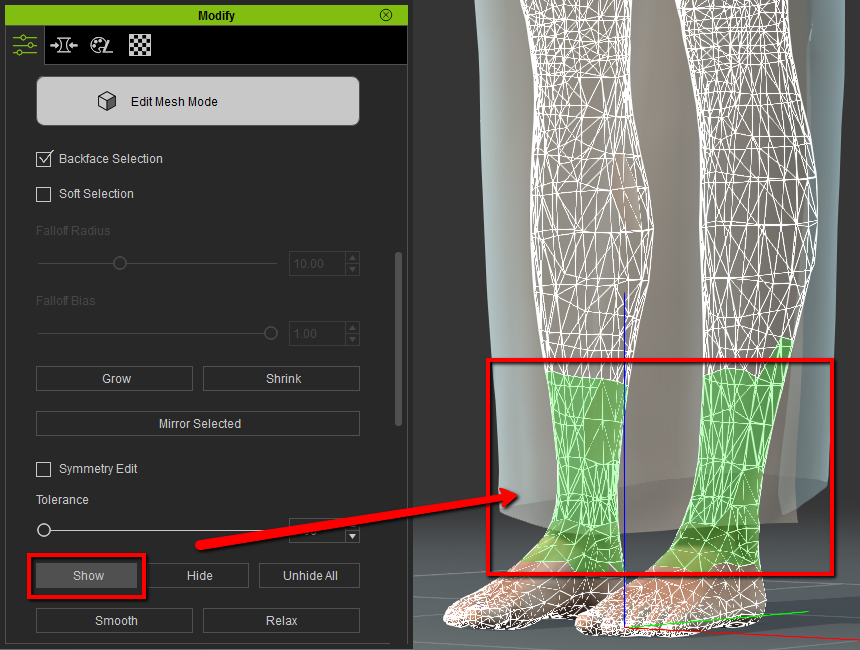
2. Intersections of two layers of meshes:
You can use the same "Mesh Edit" feature to fix this minor issue.
Edited
8 Years Ago by
Miranda (RL)