Getting Started – Axis NeuronCongrats, you are now set up with your very own live motion capture system. So how do we start the creation process? Well, with iClone 6 you can choose to immediately start capturing your motions by using a default character, or creating a new one from scratch. But first, we must launch our Neuron Axis software.
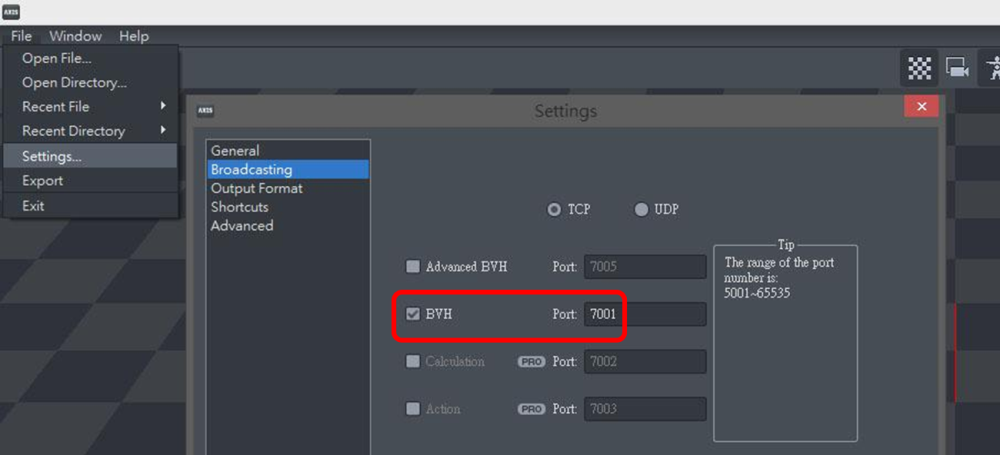
Axis Neuron: Launch your Axis Neuron application (make sure that you have the latest version). Go to File/Settings/Broadcasting. Inside use TCP, and enable BVH broadcasting on port
7001.
 Getting Started – Default Character
Once your Axis Neuron application is running, then launch iClone 6 PRO. You can use an iClone default character in order to immediately start motion capturing.
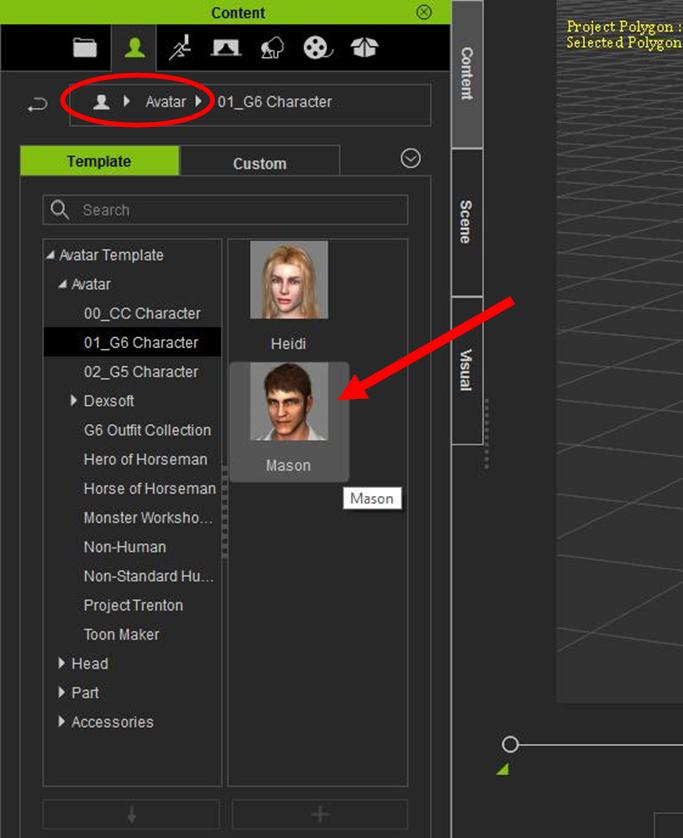
Use a Default Character:
- Go to the Content Manager on the left side. Click on Actor Tab/Avatar Folder. Double-click on a character. Choose actor from the folder options.
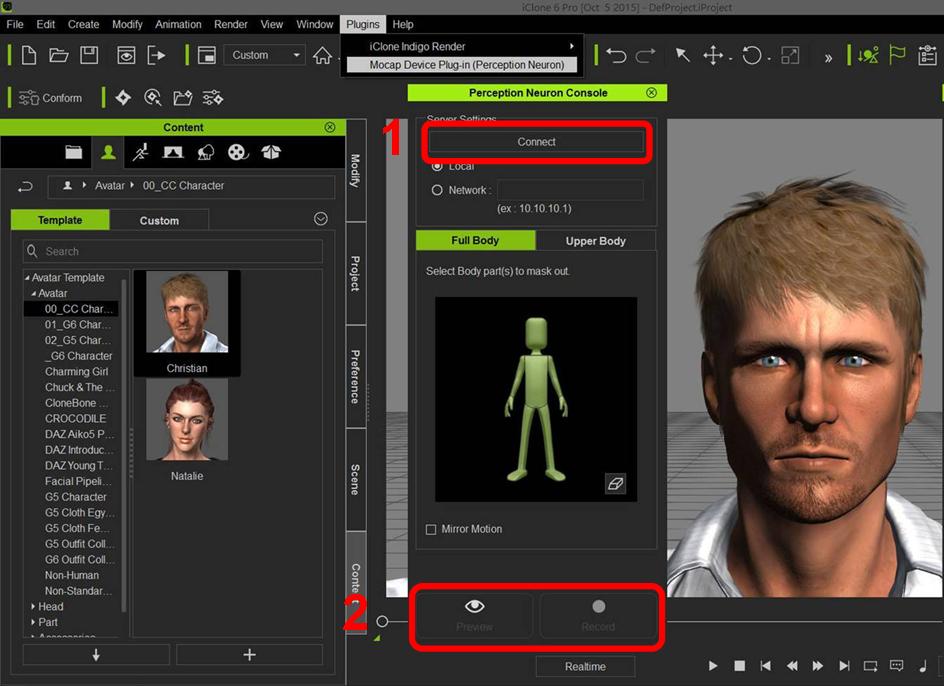
- Select character in the main window. Go to the top menu Plugins, then scroll down to Neuron Mocap Plugin
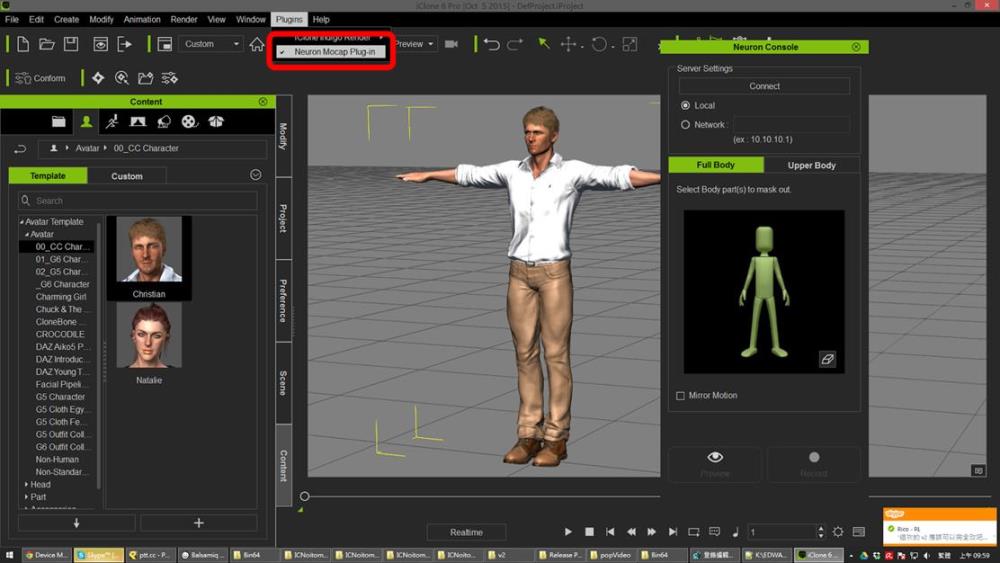
- Once the Neuron Console is open, click on CONNECT and then PREVIEW to test your motions. Once you are ready, simply click on RECORD to start capturing your body and finger motions.
Getting Started – Custom Character
Once your Axis Neuron application is running, then launch iClone 6 PRO. To puppet your own custom design character, you can first use the
Character Creator (CC) tool to generate your own character. (note: a copy of iClone 6 PRO must be purchased and installed on your PC in order to use iClone Character Creator)
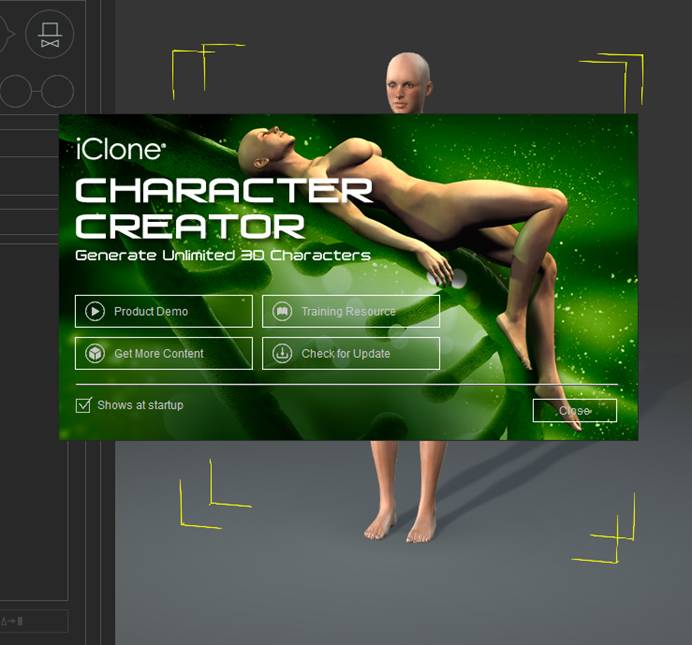
- Launch the Character Creator application, and start creating your custom character.
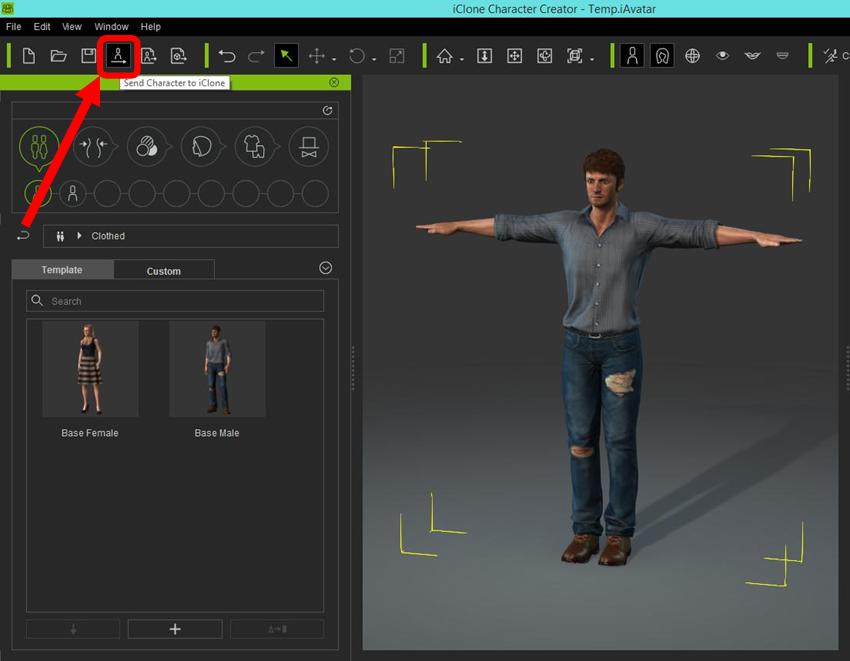
Getting Started – Export CC CharacterOnce you have finished customizing your new character, then you need to export it to iClone.
Export CC character to iClone:
- Inside the Character Creator tool, select your character
- Go to the top toolbar
- Click on Send Character to iClone
- Go to iClone, follow the Connect to Axis Neuron instructions found at the beginning of this thread.