|
Author
|
Message
|
|
theschemer
|
theschemer
Posted 10 Years Ago
|
|
Group: Forum Members
Last Active: Last Year
Posts: 1.4K,
Visits: 2.9K
|
Just use the ZOOM tool to better place the markers when editing the features. Once you get to where I did you can tweak it all kinds of ways in the feature editor panel. If you don't make the outline of the eyes large enough the eyes don't end up looking very well...Just experiment and take your time and you will be surprised how good it really works. Maybe not on *every* head but pretty good on most.  theschemer
|
|
|
|
|
theschemer
|
theschemer
Posted 10 Years Ago
|
|
Group: Forum Members
Last Active: Last Year
Posts: 1.4K,
Visits: 2.9K
|
Evil, Here is what happens without having the side profile pic so it is always best to have a front and side view of the person. 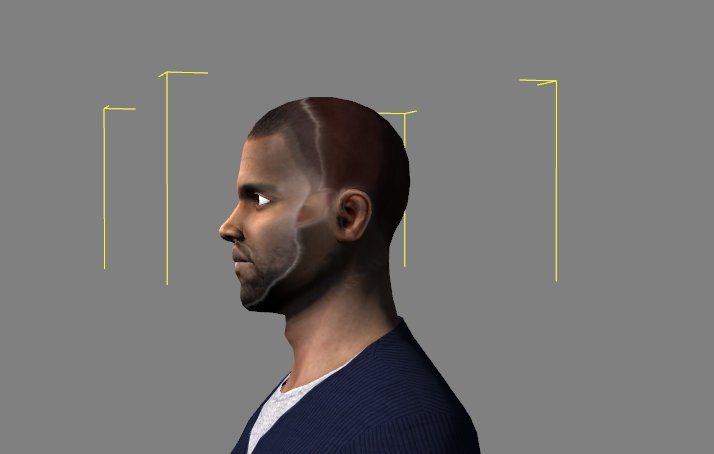 Hope that helps, theschemer
|
|
|
|
|
EvilGenius
|
EvilGenius
Posted 10 Years Ago
|
|
Group: Forum Members
Last Active: 14 minutes ago
Posts: 255,
Visits: 1.1K
|
Yeah the front and side pic were in the #2 post. Man, this is crazy. I wish it was easier. EDIT: Oops, nevermind they weren't. There goes that no sleep brainfart thing again.
======================================================
Edited
10 Years Ago by
EvilGenius
|
|
|
|
|
theschemer
|
theschemer
Posted 10 Years Ago
|
|
Group: Forum Members
Last Active: Last Year
Posts: 1.4K,
Visits: 2.9K
|
Making the large oval around the face smaller rather than larger, and then moving the blend lines forward instead of backwards makes a major difference. The blend lines are found when you are finished with the front view and it warns you you haven't done the side yet. Click the little radio button to choose the side view and continue there. Most of the outline usually matches, but moving the blend line forward seems to fix more issues and moving it back creates more issues. Hope that helps, theschemer p.s. I will work on this a little more later and post a pic...
Edited
10 Years Ago by
theschemer
|
|
|
|
|
theschemer
|
theschemer
Posted 10 Years Ago
|
|
Group: Forum Members
Last Active: Last Year
Posts: 1.4K,
Visits: 2.9K
|
Evil, Here are two simple generic Kenye pics made with FaceGen. They have the watermark but you should be able to open them and play some more. The first one is made with just a frontal image and the second with a front and a left side as that is all I had from you to work with. Let me know if this helps. theschemer
|
|
|
|
|
Emerald Animation...
|
Emerald Animation...
Posted 10 Years Ago
|
|
Group: Forum Members
Last Active: Last Year
Posts: 334,
Visits: 1.1K
|
As always, the better the source, the better the result. You need even lighting on the face with no significant shadows. As a hypothesis, I would also suggest that it would be better to keep your camera far from the subject and then zoom in until the face fills a good portion of the screen, to minimize lens distortion.
I for one would appreciate a bit of guidance on where all the little control points are supposed to map to on the subject face, especially the little quadrilateral for the end of the nose and the "eyebrow" arches. The manual doesn't go into nearly enough detail.
|
|
|
|
|
theschemer
|
theschemer
Posted 10 Years Ago
|
|
Group: Forum Members
Last Active: Last Year
Posts: 1.4K,
Visits: 2.9K
|
I agree, the source determines the outcome. Problem when you are grabbing images off the net and the colors and sizes for the front and profile differ and make it even tougher to get done right. But, getting the people's pics that you don't know and will never meet make the internet the only other option.  As far as the markers, I found that if you look real close at the example that is kind of small, it shows where they should be placed, along with the preview to fine tune a bit. Some noses however don't always follow those rules.  I think the eyebrows need a few more control points too. theschemer
|
|
|
|
|
justaviking
|
justaviking
Posted 10 Years Ago
|
|
Group: Forum Members
Last Active: 2 Weeks Ago
Posts: 8.2K,
Visits: 26.5K
|
Emerald Animation (formerly reelcheapfilms) (4/11/2014)
I for one would appreciate a bit of guidance on where all the little control points are supposed to map to on the subject face...
The manual doesn't go into nearly enough detail.+1 I only did this a couple of times, back when I first got iClone, but I remember having trouble around the eyes. I didn't know if I was better off putting the dots more on the eye or on the eyelid. It didn't turn out as well as I'd hoped. They eyes looked like they didn't fit right.
iClone 7... Character Creator... Substance Designer/Painter... Blender... Audacity...
Desktop (homebuilt) - Windows 10, Ryzen 9 3900x CPU, GTX 1080 GPU (8GB), 32GB RAM, Asus X570 Pro motherboard, 2TB SSD, terabytes of disk space, dual monitors.
Laptop - Windows 10, MSI GS63VR STEALTH-252, 16GB RAM, GTX 1060 (6GB), 256GB SSD and 1TB HDD
|
|
|
|
|
EvilGenius
|
EvilGenius
Posted 10 Years Ago
|
|
Group: Forum Members
Last Active: 14 minutes ago
Posts: 255,
Visits: 1.1K
|
Thank you theschemer for that.
What I want to know is, why is 3dxchange even a thing? Is it just me or should all the features in 3dxchange be integrated within iclone itself? This should also incluse a feature for rigging andf even a face modeler like facegen.
That would be amazing.
I am so frustrated, I really want a high quality low-poly character made out of celebrities but have no reliable way of doing it.
======================================================
|
|
|
|
|
animagic
|
animagic
Posted 10 Years Ago
|
|
Group: Forum Members
Last Active: 7 hours ago
Posts: 15.7K,
Visits: 30.5K
|
iClone existed before 3DXchange, so that is one reason. And for some the functionality of 3DXchange is of no use. And making iClone a full modeling application would make it far more expensive and come with its own can of worms. I for one couldn't care less about rigging and rather have better quality rendering. The only approach that would make sense IMO is have plugin architecture for iClone, so that people could add the functionality they want cafeteria-style. A FaceGen plugin as exists for DAZ would be useful.
|
|
|
|