|
Author
|
Message
|
|
Lamias
|
Lamias
Posted 7 Years Ago
|
|
Group: Forum Members
Last Active: Last Year
Posts: 646,
Visits: 2.9K
|
Does anyone know how to properly apply physics on Daz hair? In most of Daz hair, especially when it's long, each strand and each lock of hair extends from the top, all the way to the bottom of the hair, and there are many mixes and they crosses between them, so it's an absolute nightmare to apply the physics maps...  Thanks!!
___________________________________________________________________
My YouTube Channel
Phoenix 
Edited
7 Years Ago by
Lamias
|
|
|
|
|
vidi
|
|
|
Group: Forum Members
Last Active: Yesterday
Posts: 10.8K,
Visits: 40.2K
|
every hair is different made by developers , therfore not general Solution
-------------------------------------------------------------------
liebe Grüße vidi
|
|
|
|
|
Lamias
|
Lamias
Posted 7 Years Ago
|
|
Group: Forum Members
Last Active: Last Year
Posts: 646,
Visits: 2.9K
|
So no Daz hair inside Iclone? I am curious. Iclone has 2 or 3 long hair inside CC. So it's obvious that after (over)using those, we must look elsewhere for different hair. Doesn't anyone have the need to stop using all the time the 2 hair samples that came with CC? Am I alone?
___________________________________________________________________
My YouTube Channel
Phoenix
Edited
7 Years Ago by
Lamias
|
|
|
|
|
will2power71
|
will2power71
Posted 7 Years Ago
|
|
Group: Forum Members
Last Active: 3 days ago
Posts: 385,
Visits: 2.7K
|
Lamias (6/17/2017)
Does anyone know how to properly apply physics on Daz hair? In most of Daz hair, especially when it's long, each strand and each lock of hair extends from the top, all the way to the bottom of the hair, and there are many mixes and they crosses between them, so it's an absolute nightmare to apply the physics maps... Thanks!! The key thing you have to do to achieve what you want is to develop a weight map for the hair you're importing. Physics in this way works off a weight map that tells iClone how to apply physics. It's a greyscale map --darker means less physics and lighter means more physics. Most DAZ hair is going to have an image map for the hair strands that you can use to develop the soft cloth physics weight map. This is something that is unique to each imported hair option you're using so you will have to make it yourself. There is a video that can help shed some light on what I'm talking about.
|
|
|
|
|
animagic
|
animagic
Posted 7 Years Ago
|
|
Group: Forum Members
Last Active: 5 hours ago
Posts: 15.7K,
Visits: 30.5K
|
Lamias (6/17/2017)
So no Daz hair inside Iclone? I am curious. Iclone has 2 or 3 long hair inside CC. So it's obvious that after (over)using those, we must look elsewhere for different hair. Doesn't anyone have the need to stop using all the time the 2 hair samples that came with CC? Am I alone? Well, you are not alone, and a hair tool has been asked for over the years, something like "hair cloth". In fact, someone (I forget who) was recently working on a tool to create hair for CC/iClone. I have the Party Fun pack which has a few more options, and I also use hair from earlier IC versions sometimes. EDIT: To add to this, DAZ hair, though pretty, has a high poly-count so something as good-looking but with fewer polys would be good.
Edited
7 Years Ago by
animagic
|
|
|
|
|
will2power71
|
will2power71
Posted 7 Years Ago
|
|
Group: Forum Members
Last Active: 3 days ago
Posts: 385,
Visits: 2.7K
|
animagic (6/17/2017)
EDIT: To add to this, DAZ hair, though pretty, has a high poly-count so something as good-looking but with fewer polys would be good.
They do make some lower poly count hair if that's what you're after. you might want to check out a vendor on Renderosity called Ali. In comparison to others, his hair is a lower poly count than most and easier to work with. You also might look at some older hair from someone like Lady Littlefox over on DAZ's website. Her older stuff has lower poly counts which may suit your needs.
|
|
|
|
|
Lamias
|
Lamias
Posted 7 Years Ago
|
|
Group: Forum Members
Last Active: Last Year
Posts: 646,
Visits: 2.9K
|
will2power71 (6/17/2017)
The key thing you have to do to achieve what you want is to develop a weight map for the hair you're importing. Physics in this way works off a weight map that tells iClone how to apply physics. It's a greyscale map --darker means less physics and lighter means more physics. Most DAZ hair is going to have an image map for the hair strands that you can use to develop the soft cloth physics weight map. This is something that is unique to each imported hair option you're using so you will have to make it yourself. There is a video that can help shed some light on what I'm talking about.
Thanks for the link Will2power71!! I have already seen videos like that and I understand the standard principles of Iclone physics. The problem I am facing can be expressed in the following picture: 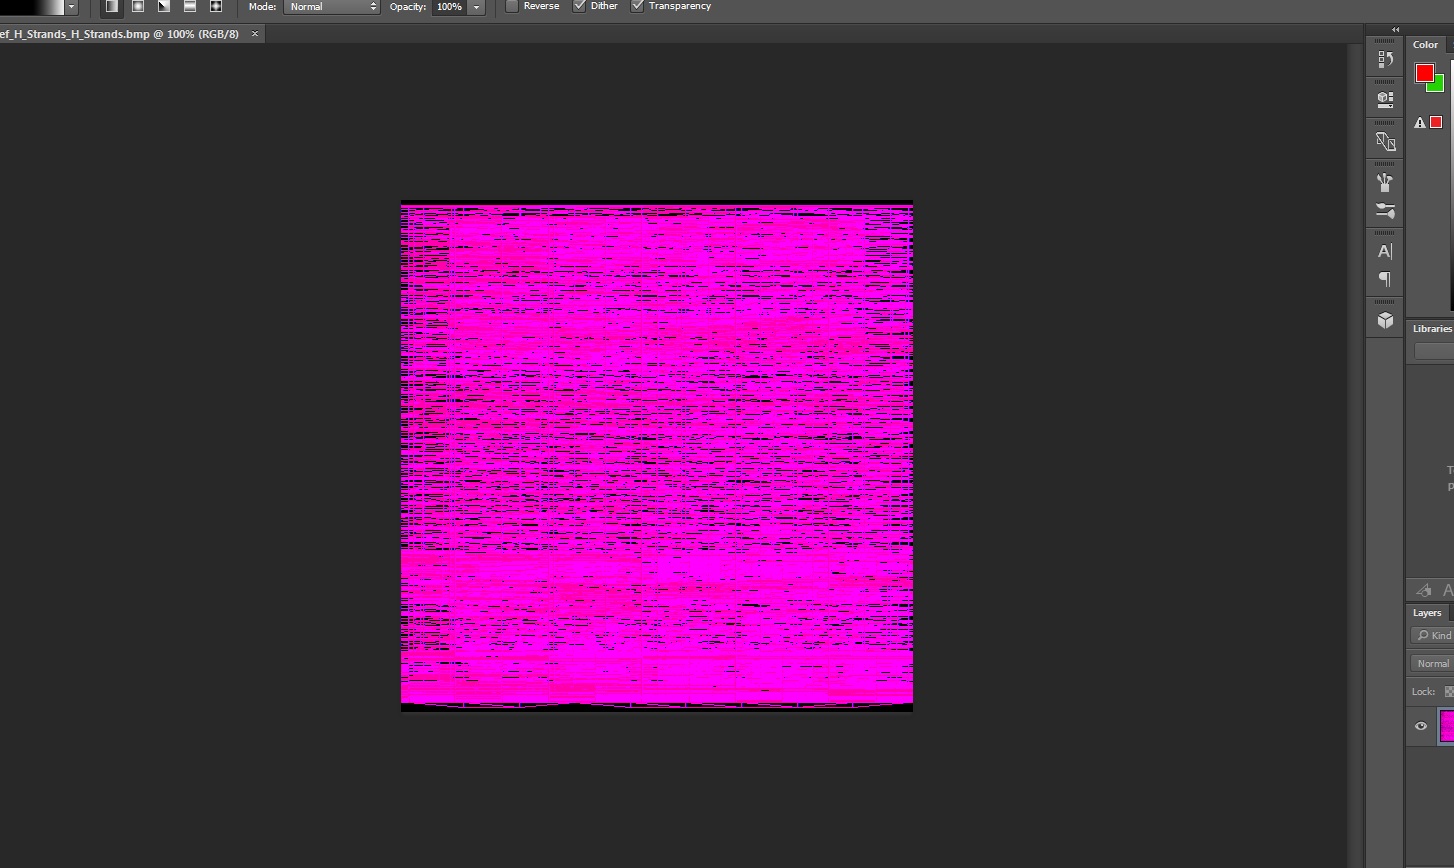 See this? This is the UV map of a random DAZ long hair that I imported in Iclone (forgive me, I don't remember the name). Most of the long hairs have UV maps like that. So, how on earth am I going to see which strand needs a black map to stay in it's place, and where I should make it gray or white? Isn't there a way to re-arrange the UV maps inside a 3D editor? Mos of the UVs are ridiculous. This is the texture map. It's not much of a help either: 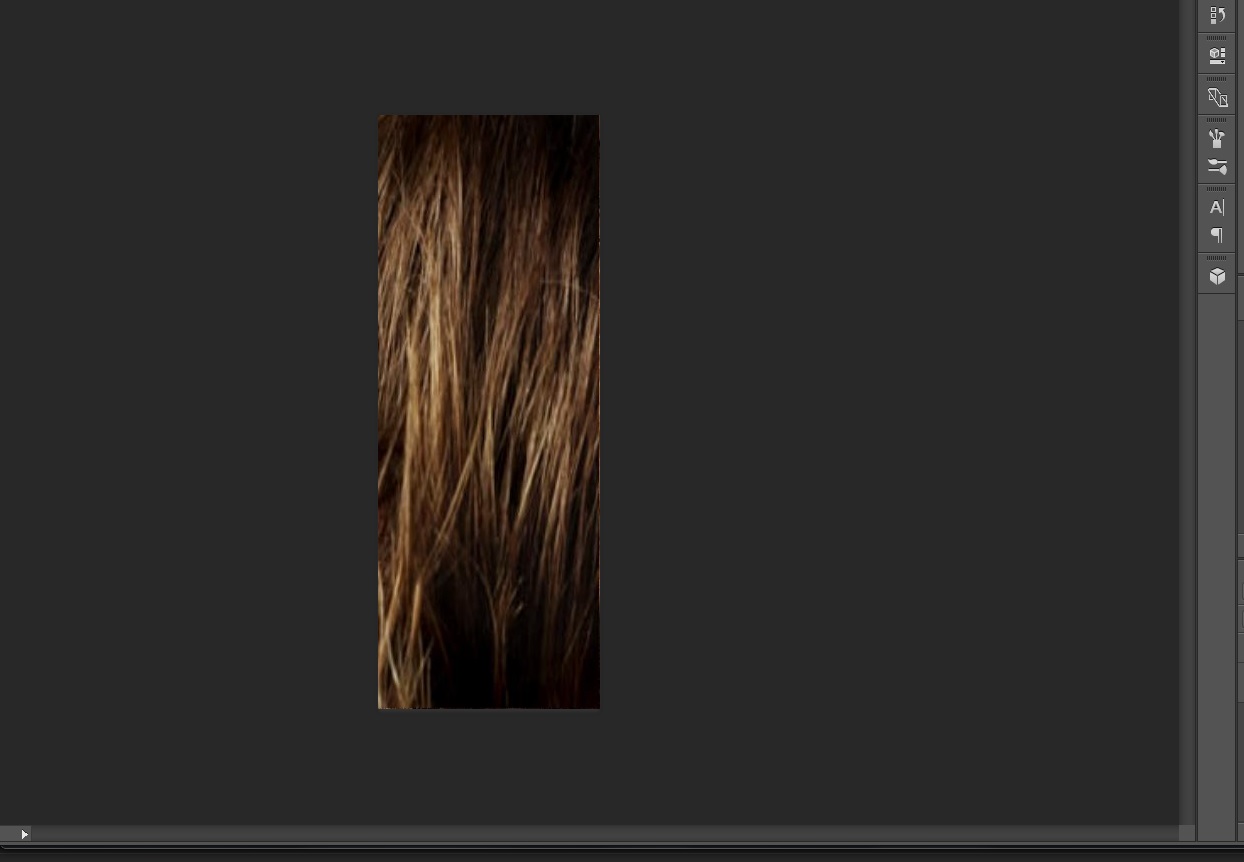 Thanks!!
___________________________________________________________________
My YouTube Channel
Phoenix
Edited
7 Years Ago by
Lamias
|
|
|
|
|
animagic
|
animagic
Posted 7 Years Ago
|
|
Group: Forum Members
Last Active: 5 hours ago
Posts: 15.7K,
Visits: 30.5K
|
What I have done in such cases is replacing the texture temporarily with a numbered grid (10x10 or 20x20). This allows you to see where things are and if it is even feasible. For example, if the texture is tiled for example I don't believe it would even be possible to apply a weight map.
|
|
|
|
|
will2power71
|
will2power71
Posted 7 Years Ago
|
|
Group: Forum Members
Last Active: 3 days ago
Posts: 385,
Visits: 2.7K
|
Lamias (6/19/2017)
Thanks for the link Will2power71!! I have already seen videos like that and I understand the standard principles of Iclone physics. The problem I am facing can be expressed in the following picture: See this? This is the UV map of a random DAZ long hair that I imported in Iclone (forgive me, I don't remember the name). Most of the long hairs have UV maps like that. So, how on earth am I going to see which strand needs a black map to stay in it's place, and where I should make it gray or white? Isn't there a way to re-arrange the UV maps inside a 3D editor? Mos of the UVs are ridiculous. This is the texture map. It's not much of a help either: Sometimes, when an artist creates a UV map, the individual materials are created in the same UV space. Think about it as laying out a stack of papers and then looking down on it. If you had X-ray vision, you would see a similar jumble of information. In this case, the thing to do is separate each material in the modeler of your choice and look at it's UV space by material. There's a tutorial on how to do that in UV Mapper Pro somewhere on the net if you google it. Or you can export each material separately by hiding the other materials in DAZ studio. So let's say you have a hairpiece with the materials Scalp, Strands, Bangs and Fringe. You would hide all the materials save the one and export an OBJ with that material. Make sure you select the option to not export hidden geometry. Take a look here: 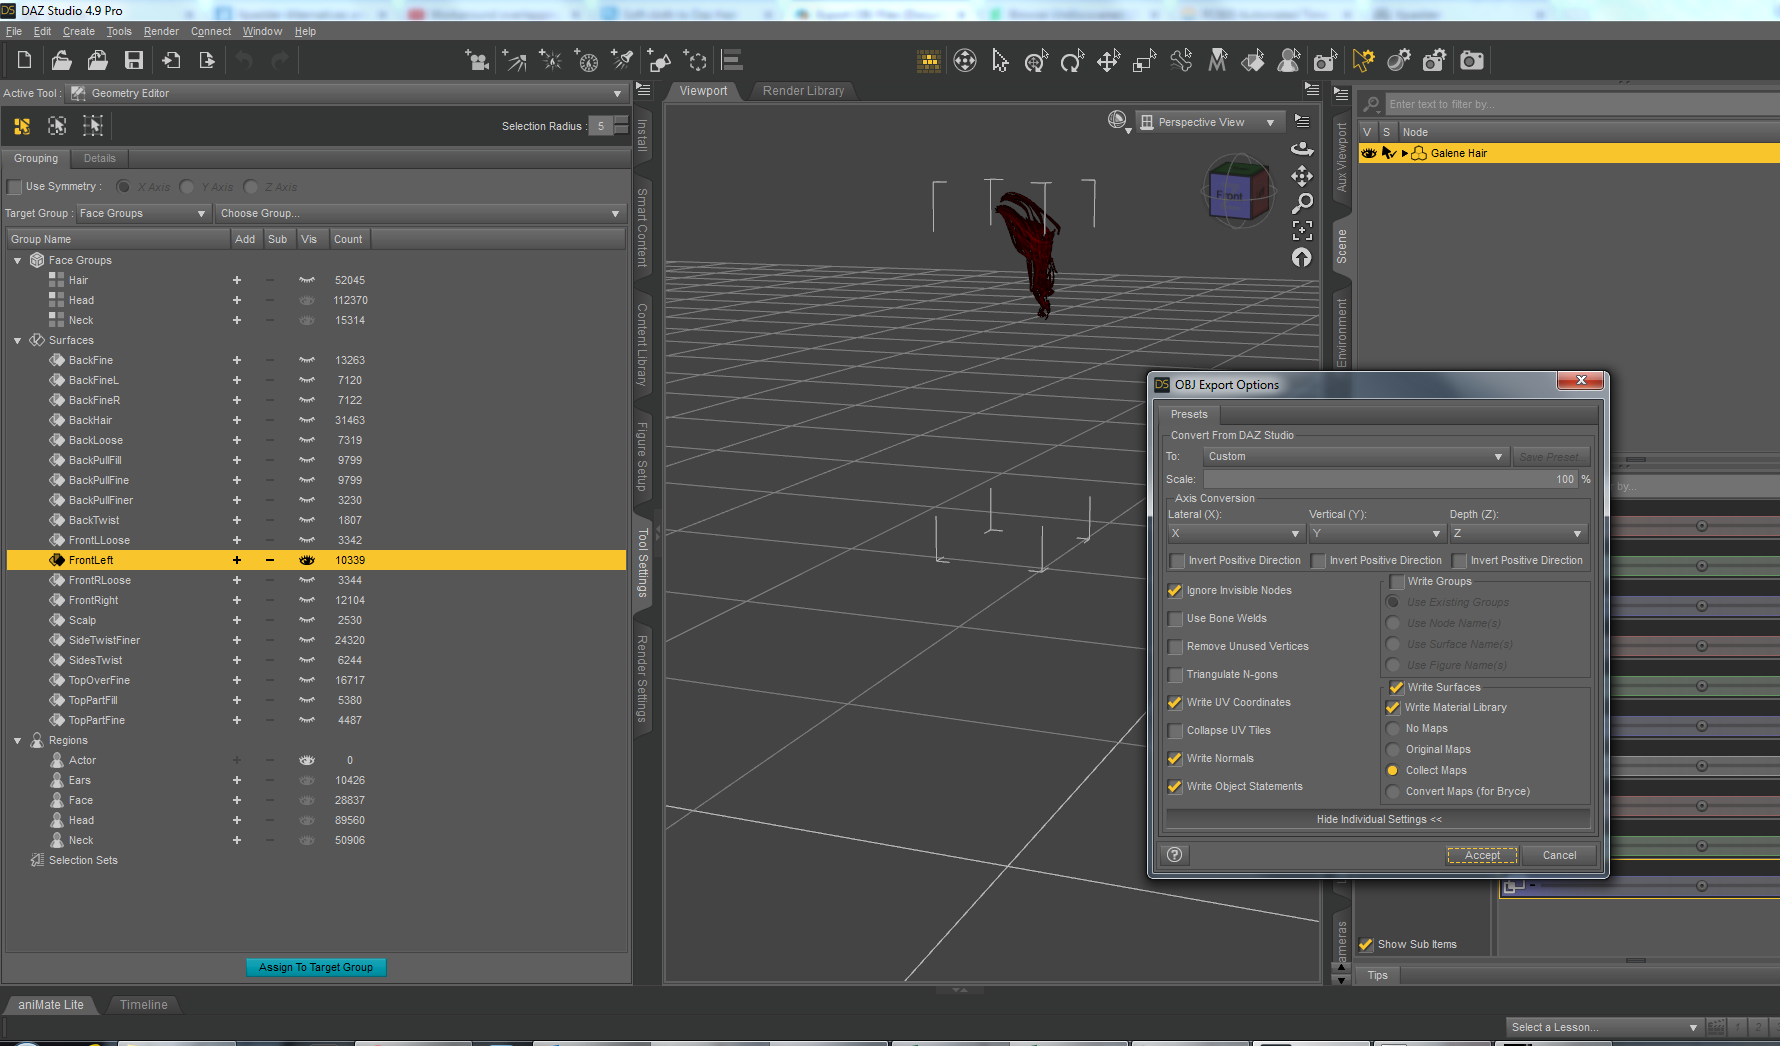 You use the Geometry selection tool and make sure you have the Tool Settings tab someplace visible. You then turn off all the sections but the one and export it. Make sure you select to ignore invisible nodes. 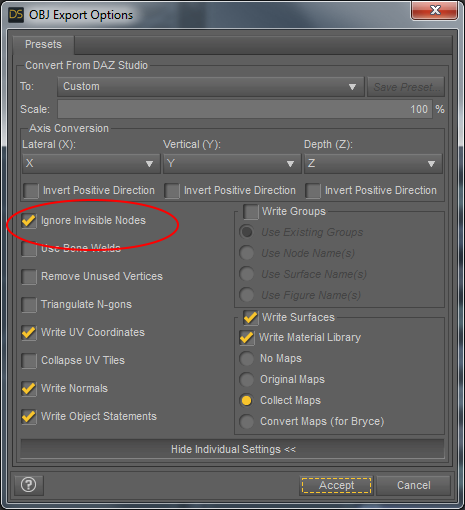 Once it's done, then you have an uncomplicated UV that you can set up to weight map. 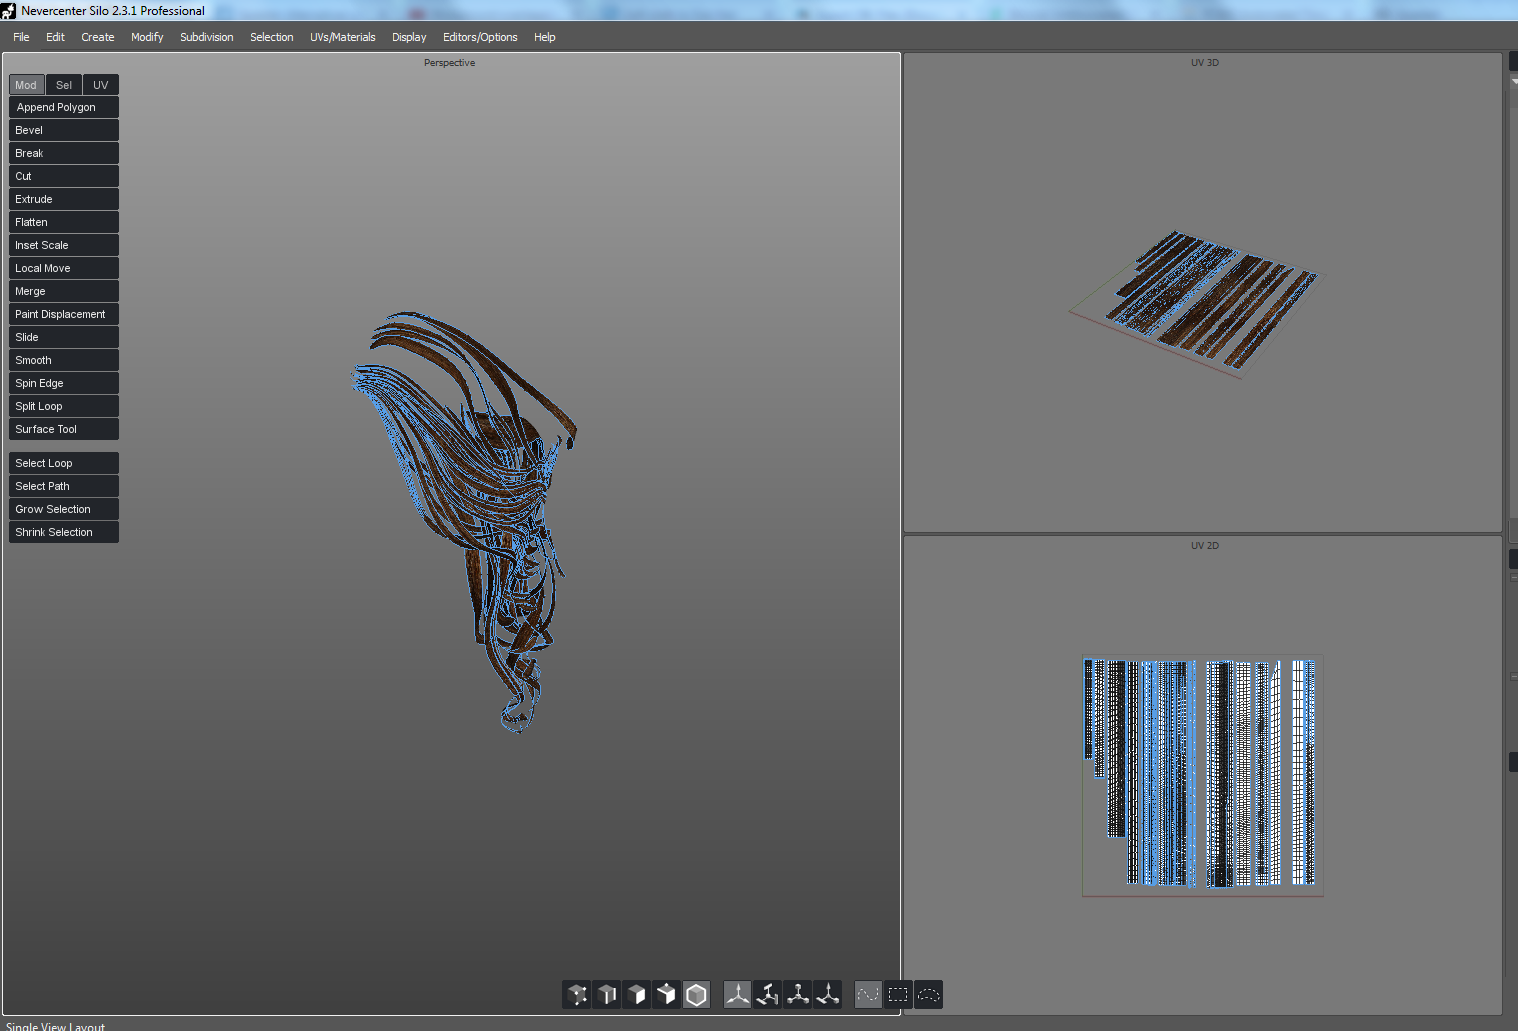 Unfortunately, for complex hair this is has to be done material by material and if you have a complex hair style you're going to end up with a lot of work to produce the weight map for each one but there's no other way to do it that's going to give you a proper result. It's not a quick way, but it's probably the best way to do it for a hair piece with complex geometry like DAZ Hair. Now as to how it performs in iClone I can't say. I don't use complex hair like that for that reason, but it can be done. Just remember to store those weight maps somewhere where you can find them to easily re-use them going forward.
|
|
|
|
|
Lamias
|
Lamias
Posted 7 Years Ago
|
|
Group: Forum Members
Last Active: Last Year
Posts: 646,
Visits: 2.9K
|
Well I hope I had seen your reply earlier. I don't know if it works and I am too tired to try it now, because I have been tampering with it for about 2 hours. The solution/workaround I figured is the following: 1) Inside your 3D editor, a long hair model will probably be 10-15 different meshes (the fewer the better, but I usually see 10-20 so let's keep it at that). You have to MERGE all the meshes together, so it won't be 20 different meshes, but ONE mesh. Each 3D editor does it differently so I cannot offer advice on this. 2) After they are ONE mesh, I enter hypershade (maya) and I delete all the materials this hair has. 3) I then select the entire hair (which we merged it earlier as one mesh) and I assign it a new material. Now our single mesh has ONE material. 4) Now we skin bind the hair to the head as we would normally do, and export it to CC. Then it's a matter of applying the right physics map, starting from the top as black all the way to the bottom as white, and gray in the middle. After a few trial and errors, we see where we want the map to be dark and where to begin whitening. A standard physics map, black to the top and whitening as it goes down will probably work, as the entire hair now is ONE material and ONE mesh. My results are below. <iframe src=" https://giphy.com/embed/laFI8FfiC8mqY" width="480" height="360" frameBorder="0" class="giphy-embed" allowFullScreen></iframe><p><a href=" https://giphy.com/gifs/laFI8FfiC8mqY">via GIPHY</a></p> Will2power 71, when I find time I will try the method you suggested. Might be easier. For now I leave this here for future reference.  Thanks for helping me once more guys!!
___________________________________________________________________
My YouTube Channel
Phoenix
Edited
7 Years Ago by
Lamias
|
|
|
|